TechRadar Verdict
Although Nero Video covers the basics of editing, including effects, titles and transitions, its interface feels pretty old for a modern application, and its lack of direct upload to social media sites might put some off.
Pros
- +
Easy to use
- +
Good import features
- +
Nice Picture-in-Picture and Themes options
- +
Music automatically scales to fit your project’s duration
Cons
- -
Feels really antiquated
- -
No effect preview
- -
Really basic tools
- -
No native export to social media
Why you can trust TechRadar
Update: This review is for an older version.
For the latest release, see our Nero Video 2022 review.
-------
Nero Video is a low-cost PC-only video editor application.
Some of the best video editing software for beginners, its aim is clearly set to make the whole process as easy and effortless as possible for the novice editor.
But how does it compare to the best video editing software (and even the best free video editing software) we've tested? Let’s take a look at what it offers and if it succeeds.
Importing media
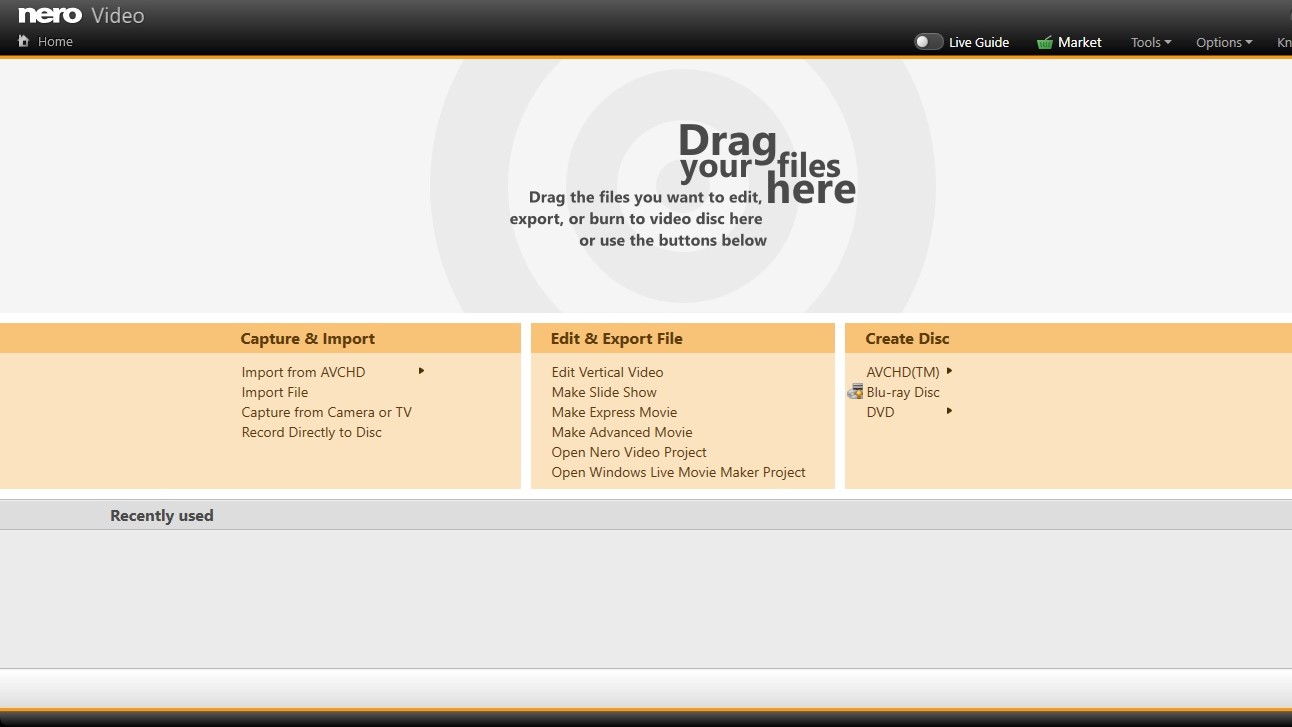
We were very pleased with Nero’s capturing options. You can grab footage from any AVCHD-compatible camera, or a AVCHD file stored on your hard drive. Other options include a multitude of files (videos, photos, audio, and even Powerpoint files).
Your media is stored by type, with Videos, Pictures, and Audio all segregated into their own separate tabs in the My Media section.
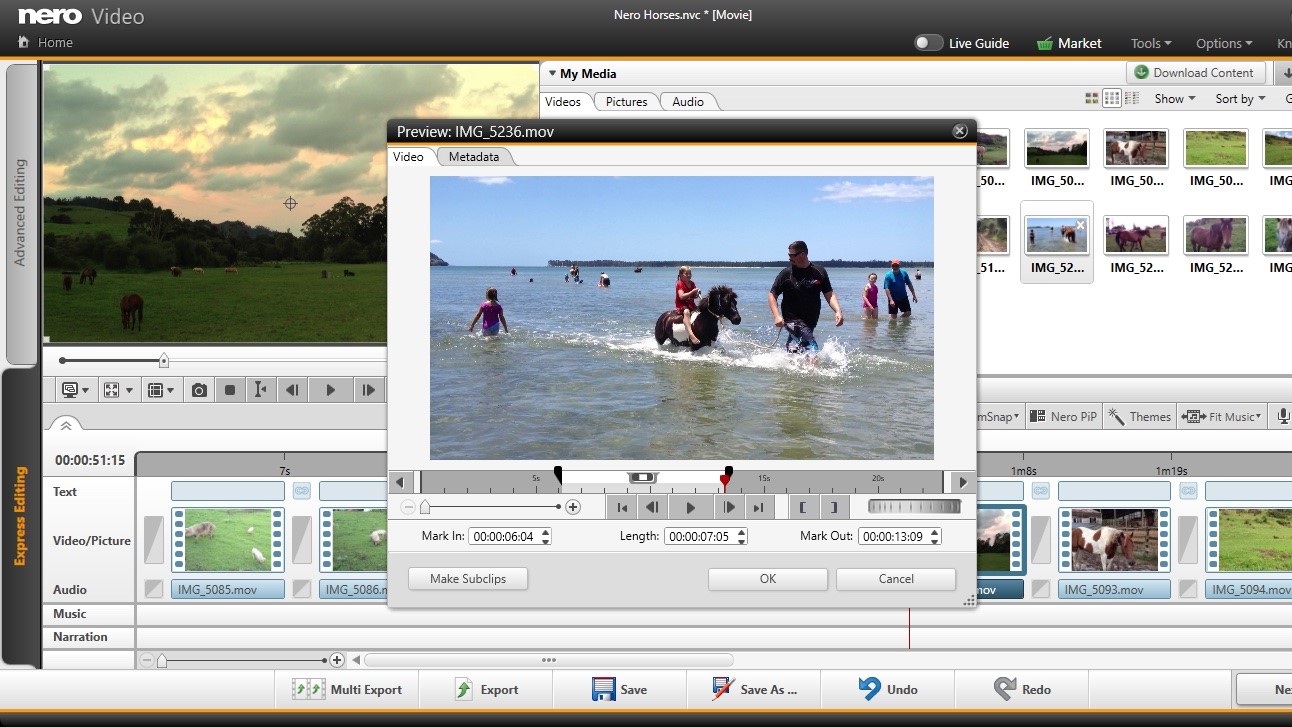
From there you can preview any clip by double-clicking on it - this opens up a new window from which you can also set in and out points to focus on the section you’re interested in. To add a clip to your project, just drag it from My Media to the Timeline.
Sign up to the TechRadar Pro newsletter to get all the top news, opinion, features and guidance your business needs to succeed!
Editing
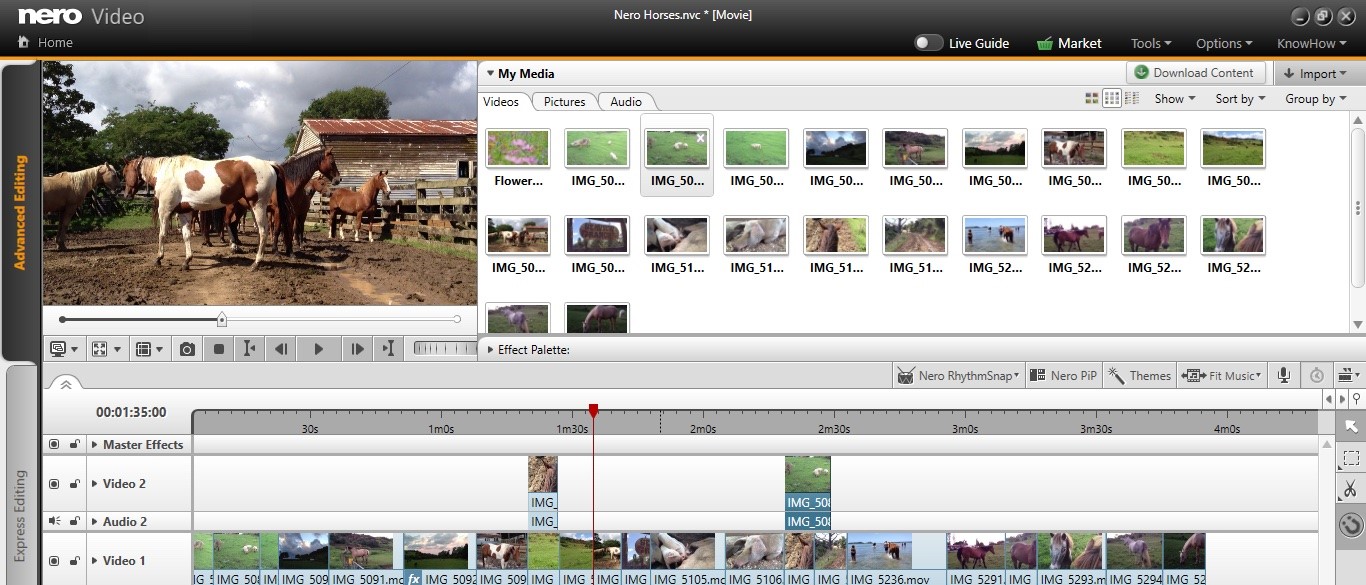
Nero Video offers you two different editing options: ‘Express Editing’ and ‘Advanced Editing’.
Express is really editing simplified as much as possible. You only have a single track, all clips are represented by a single square thumbnail, with obvious sections for adding transitions. You can trim a clip, reorder your footage and even delete some parts you don’t need, and that’s pretty much it, as far as editing goes. It’s great for complete novices.
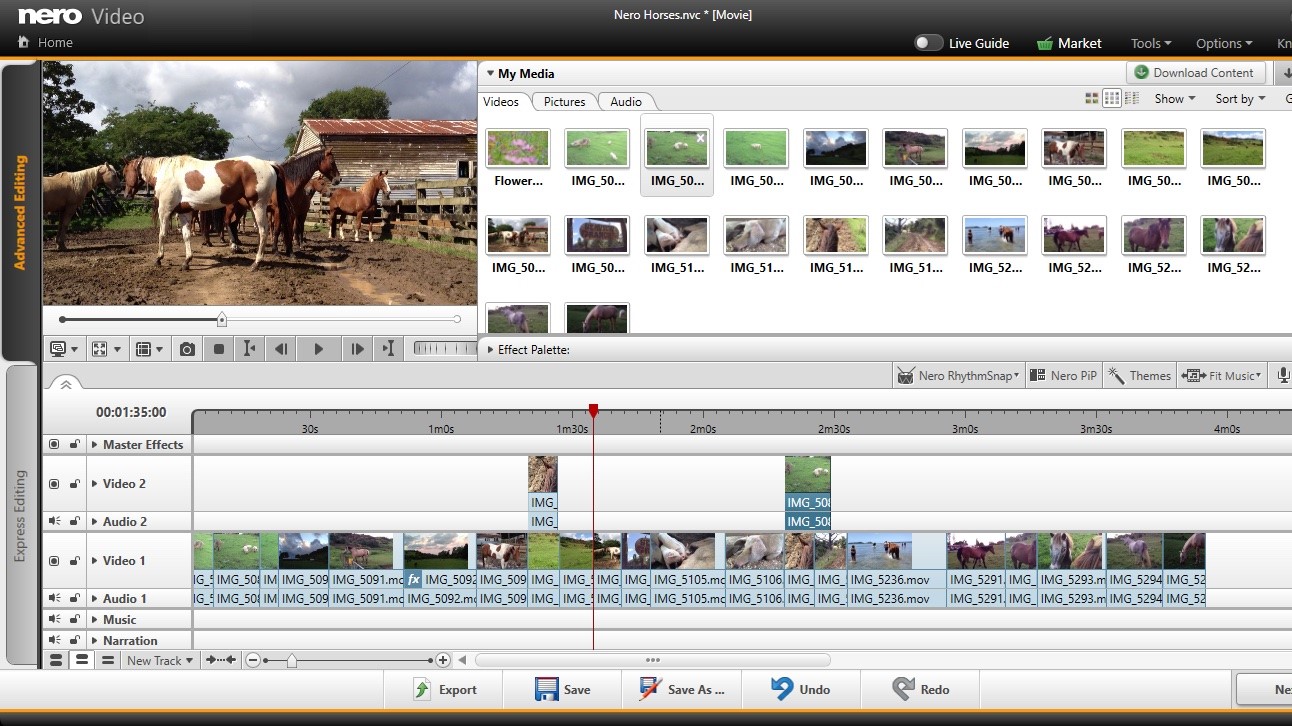
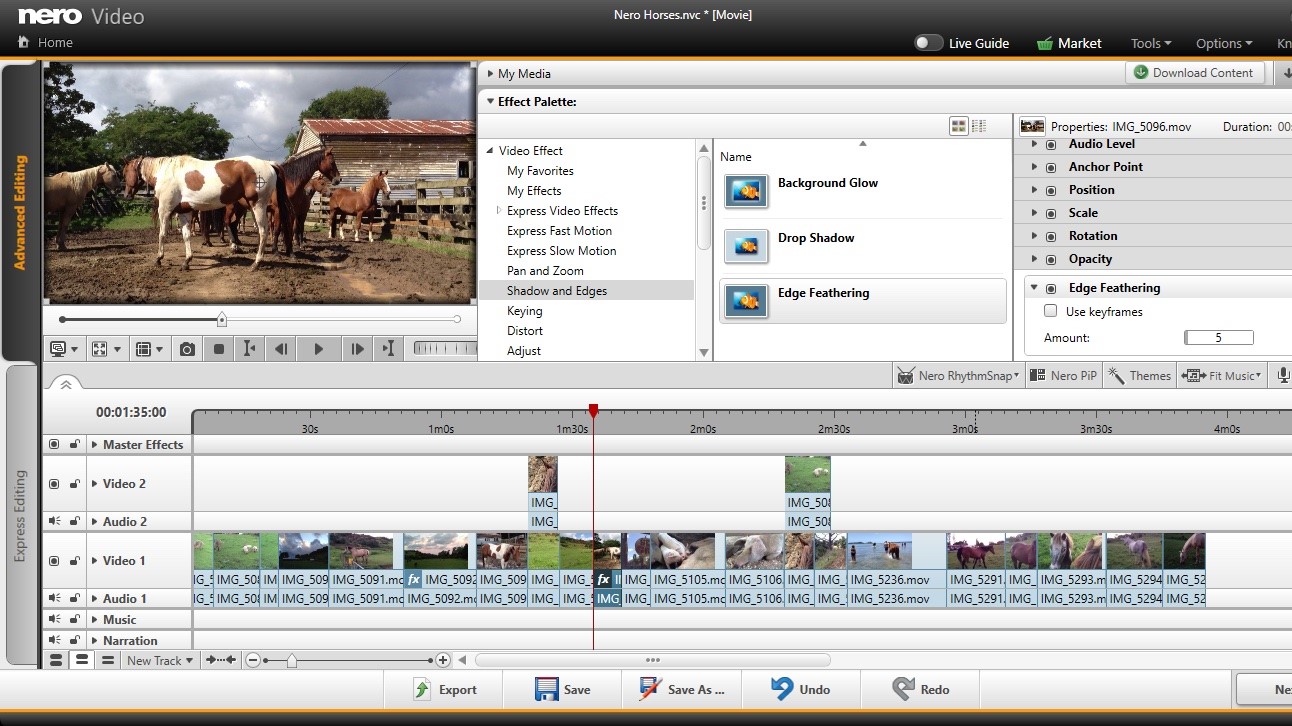
Advanced is more what traditional editing looks like. Each clip is represented by a rectangle whose length depends on the clip’s duration. You can work on multiple tracks, so clips can overlay one another. Trimming clips is as simple as dragging their edges inwards. You have a few tools to the right to select multiple clips, split a clip, and the magnet tool lets you snap your clips to edit points, which makes it easy to place footage in the right place as you move it around the Timeline or add new ones from My Media.
You can switch between the two modes but if you’ve made alterations to your project while in ‘Advanced Editing’, those changes won’t be reflected once you go back to ‘Express Editing’. More frustrating still, if you then try to go back to ‘Advanced Editing’ you’ll be asked if you’d like to start a new advanced project or open the existing one. If you choose the former, all your previous work in ‘Advanced’ will be lost, but if you choose the later, all the work you’ve done since switching back to ‘Express’ will be lost. It’s pretty much a lose-lose situation, and is best to stick to one mode while working on a project, or if you need to switch, do so only once.
Both editing options have dedicated tracks where you can add music or a narration to your project, but whichever interface you choose, your choices do feel quite limited. The fact the whole look of the software reminds us of early consumer editors from the late 90s doesn’t help the sensation that what’s on offer hasn’t taken advantage of more modern improvements in the field.
There are exceptions of course, like the ability to edit vertical video (for all you TikTok lovers out there), with an easy way to reframe a clip should it have been taken in landscape. So there’s that!
Effects and transitions
Sadly, the Effect Palette doesn’t appear to have been updated. This is where all your effects are stored, be they video effects, audio effects, text, transitions, clip art or background. It’s all bundled in this menu. These effects have no preview options, just a title which acts as a description and a thumbnail which just uses a clownfish as an example of what to expect. The only way to see exactly what one does is to add it to one of your clips.
On the plus side there’s a good number of interesting looking transitions.
As you’d expect, you can alter your clips’ properties, like their scale, rotation and position. You can even animate those values over time with the use of keyframes.
Of greater interest are the buttons top right of the Timeline. These offer clever ways to make your edit more interesting.
One of them analyses any music you’ve added to your project and determines its beats. There’s even the option to create more or fewer of those beat markers. Then, you can use this tool to retrim your footage to match those markers. If you haven’t got any music handy, Nero Video comes bundled with a useful selection.
Even better, the software will automatically resample the song to make it fit your project exactly. As is often the case while you work, you may lengthen or shorten your project even after having added your musical score. Should you wish to retime your song to match your project’s new duration, just click on ‘Fit Music’ and Nero Video will take care of it for you.
‘Nero PiP’ is a clever way of creating an animated picture in picture effect with you having to do practically nothing at all; just choose the effect you like best from a list. This time, you get a handy animated preview of what your chosen template will do before you add it to your project. Once you’ve clicked on OK, that template will be included in the Timeline wherever the playhead was, and any clips to its right will be overwritten by default, so make sure you place that playhead in the right location. If you’d rather insert your chosen template and move everything to the right along the timeline, make sure you choose ‘Shift’ from that effect’s Settings menu.
Once in your Timeline simply drag your clips over the placeholders and you’re done. It could hardly be simpler.
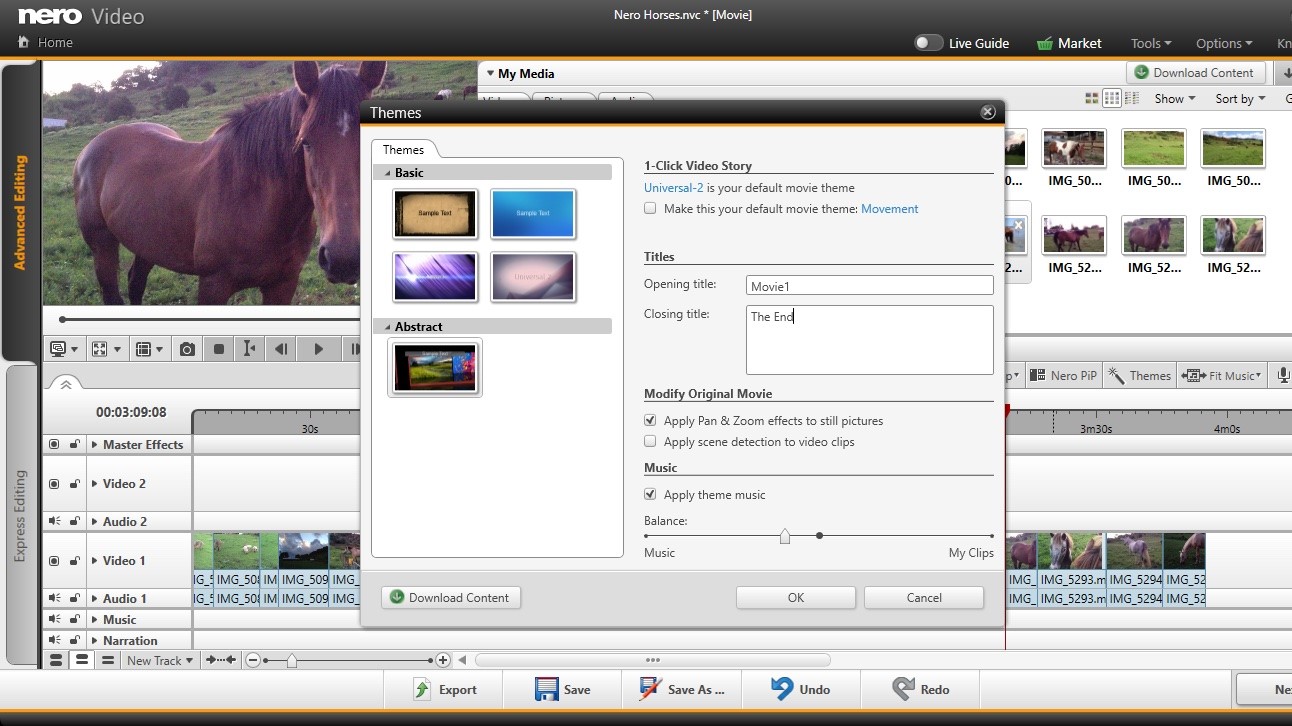
‘Themes’ is a fun way to automatically adds an intro and outro to your project based on a chosen style. Transitions will also be inserted for you, including a specific score based on your chosen theme. Sadly unlike ‘Nero PiP’ there isn’t a preview to let you see what you’re selecting and, again, as with the Effects Palette, the little thumbnails aren’t much to go on.
But the few we tested did make for interesting additions to our projects.
Exporting
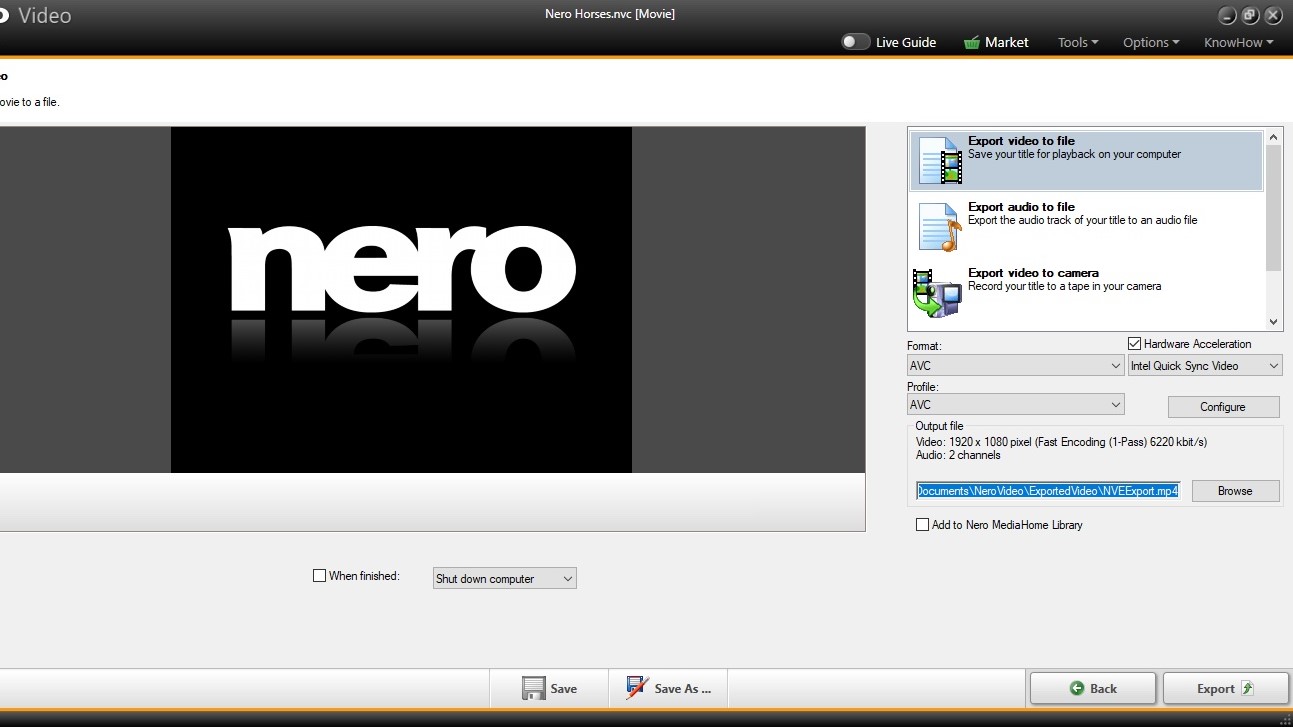
The options available to you to Export your work appear unchanged since we last explored this application. You can save the file to your computer in a variety of formats, like AVCHD, MPEG4, and WMV, but also Flash Video, which feels pretty antiquated considering Adobe is making flash EOL (end of life) in about three months.
You have options to export solely the audio, save the video back to your camera, or add it as an attachment to an email. How very 90s.
And although you can choose in the profile formats to save your work for ‘YouTube Standard HD’ and ‘YouTube Best HD’, we would’ve welcomed the ability to export directly to social media websites such as YouTube, Facebook or Vimeo since this is likely what most users would be doing anyway.
Instead, you must export your file to your drive first, and then manually upload it later. Such a feature should really be a basic requirement these days.
Final verdict
As it is, Nero Video covers the basics, and does include some good ideas. But we feel it’s hampered by an antiquated interface, a lack of preview for many tools, and not really enough changes from the last time we looked at this software.
For more content creation tools, we reviewed the best video editing apps.
Steve has been writing about technology since 2003. Starting with Digital Creative Arts, he's since added his tech expertise at titles such as iCreate, MacFormat, MacWorld, MacLife, and TechRadar. His focus is on the creative arts, like website builders, image manipulation, and filmmaking software, but he hasn’t shied away from more business-oriented software either. He uses many of the apps he writes about in his personal and professional life. Steve loves how computers have enabled everyone to delve into creative possibilities, and is always delighted to share his knowledge, expertise, and experience with readers.
