How to use your MacBook safely in public
Keep it secret, keep it safe

If you regularly connect to free Wi-fi hotspots of the kind found in hotels and cafes, your data may be at risk from snoopers and hackers.
Sometimes this is no more harmless that people trying to read emails over your shoulder. In more extreme cases, hackers will sometimes deliberately set up free Wi-Fi networks themselves to harvest your credentials.
The best solution to this problem is to use a connection only you control like home broadband or a 3G/4G hotspot on your iPhone. If this isn’t possible, follow the steps in this guide to keep your data as safe as possible.
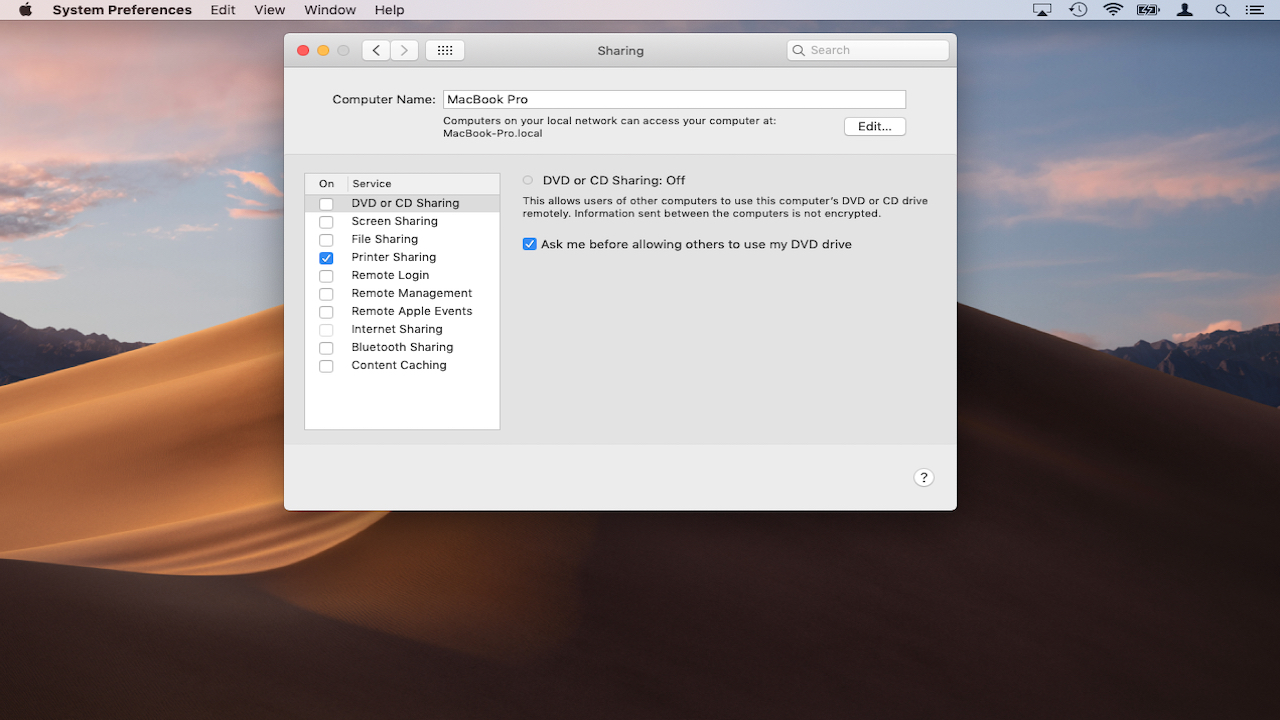
1. Disable sharing options
Apple allows you to share folders and files with other users on your network. This may be something you want to use when you are on your home network, however you do not want external users to have access to your information when you are connected to public Wi-Fi.
By default, File Sharing is disabled on your Mac but you can double check this by going to ‘System Preferences > Sharing’. Confirm ‘File Sharing’ is unchecked.
Make sure to work through the other sharing options such as ‘Remote Login’ and ‘Screen Sharing’ to check these are disabled too. You can always reactivate them later.
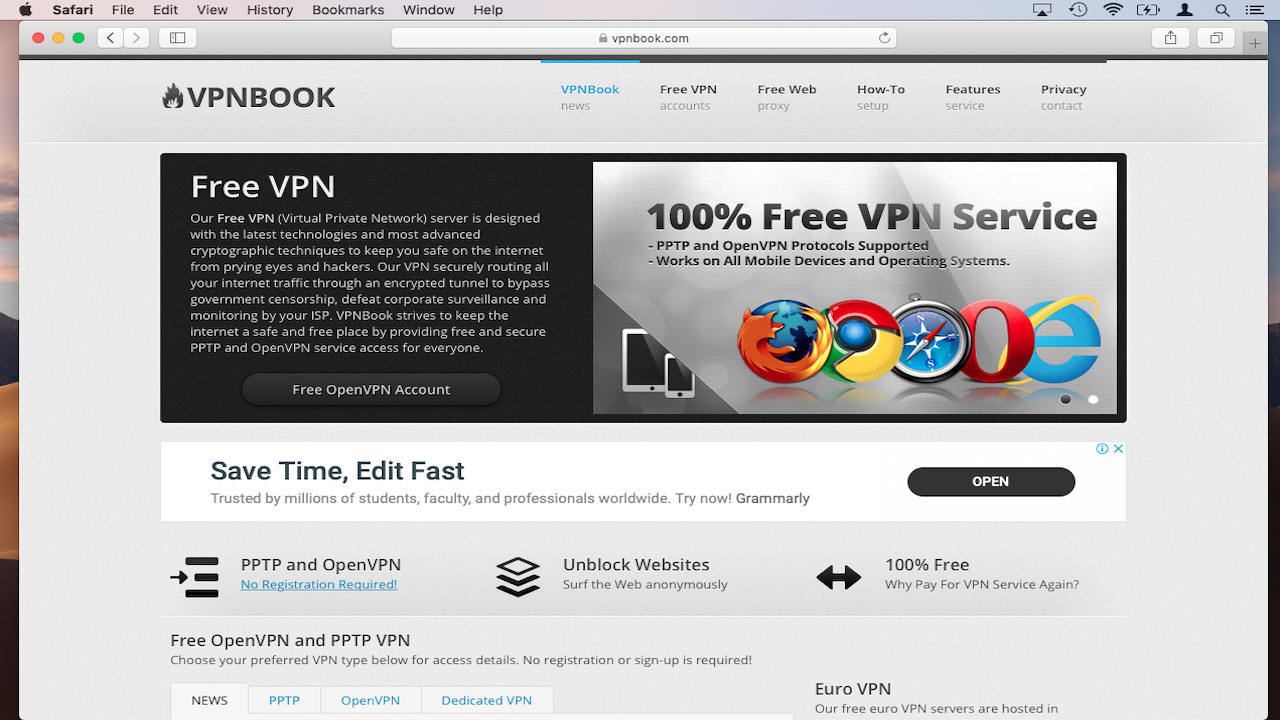
2. Use a VPN
If you’re using an unsecured Wi-Fi network – and by that we mean no password is required to log in – then it’s fairly simple for hackers to monitor data passing between your device and the Internet.
Sign up to the TechRadar Pro newsletter to get all the top news, opinion, features and guidance your business needs to succeed!
You can make life much harder for the them by using a VPN, which establishes an encrypted connection to your providers servers. Information such as passwords, emails and social media photos is sent via this encrypted connection, so hackers will have a great deal more difficulty harvesting your data and working out which sites you’ve visited.
If you don’t need super-fast speeds there are a number of VPN providers such as VPNBook. Ideally choose a provider which supports the ‘OpenVPN’ protocol, it keeps ‘no logs’ of customer activity and uses ‘DNS Forwarding’.
We've also got a roundup of the best VPN services.
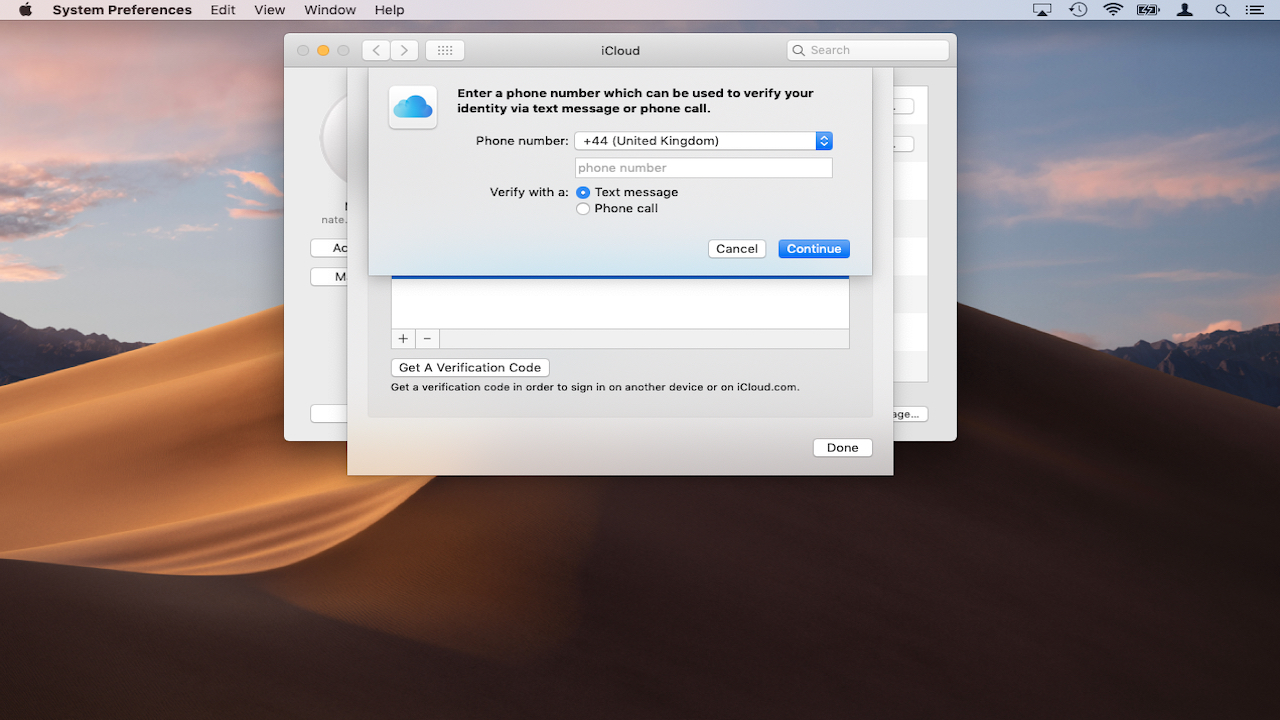
3. Use 2FA
2FA (Two Factor Authentication) is a simple but very powerful way to protect your online credentials. It works by requesting a six-digit code to a mobile device such as an iPhone whenever you log in form a new location.
This code has to be entered along with your password, which means that if someone wants to break into your account they’d need to know your password and have access to your mobile. This is ideal for situations where hackers may be trying to steal your password on public Wi-Fi.
To get started you’ll need to install a dedicated 2FA app on your devices such as Google Authenticator or Free OTP. Many online services such as Facebook and Twitter now offer 2FA and the specific steps for setting it up will vary from platform to platform, so you should contact them for help with setup.

4. Use safer browser extensions
Simply by choosing to use an Apple Mac, you’ve already protected yourself from the vast majority of malware on the internet, which is designed to run only on Windows machines.
However, some free Wi-Fi providers insist that you connect to their network via a landing page with 3rd party ads, which can sometimes link to harmful content. You can block 99% of these using the browser extensions AdBlock Plus.
This extension is available for all major browsers and will present ads from loading, so you’re less likely to click the wrong link. Consider also installing the Electronic Frontier Foundation’s extensions ‘HTTPS Everywhere’. This forces your browser to use the ‘secure’ version of websites where available, encrypting the connection between you and the site.
Some organizations may ask you to install a 3rd party app on your Mac before you can use their free Wi-Fi. If this happens, you should always refuse as there’s no way to make sure the program’s safe.

5. Lock it down
One of the easiest ways for identity thieves to steal your password info is either by looking over your shoulder or stealing your Mac altogether.
Each time you enter a public place, try to seat yourself with your back to a wall or corner. Invest in a cable lock for your MacBook and attach it to something sturdy like a radiator if possible.
If you’re using a MacBook made in the past few years, FileVault encryption should be enabled on your device by default. This means that even if your Mac is stolen, thieves won’t be able to access your data without the correct password.
You can check if FileVault’s enabled by going to ‘System Preferences’>’Security & Privacy’. Click on ‘FileVault’. If FileVault hasn’t been set up, follow the steps on Apple Support.
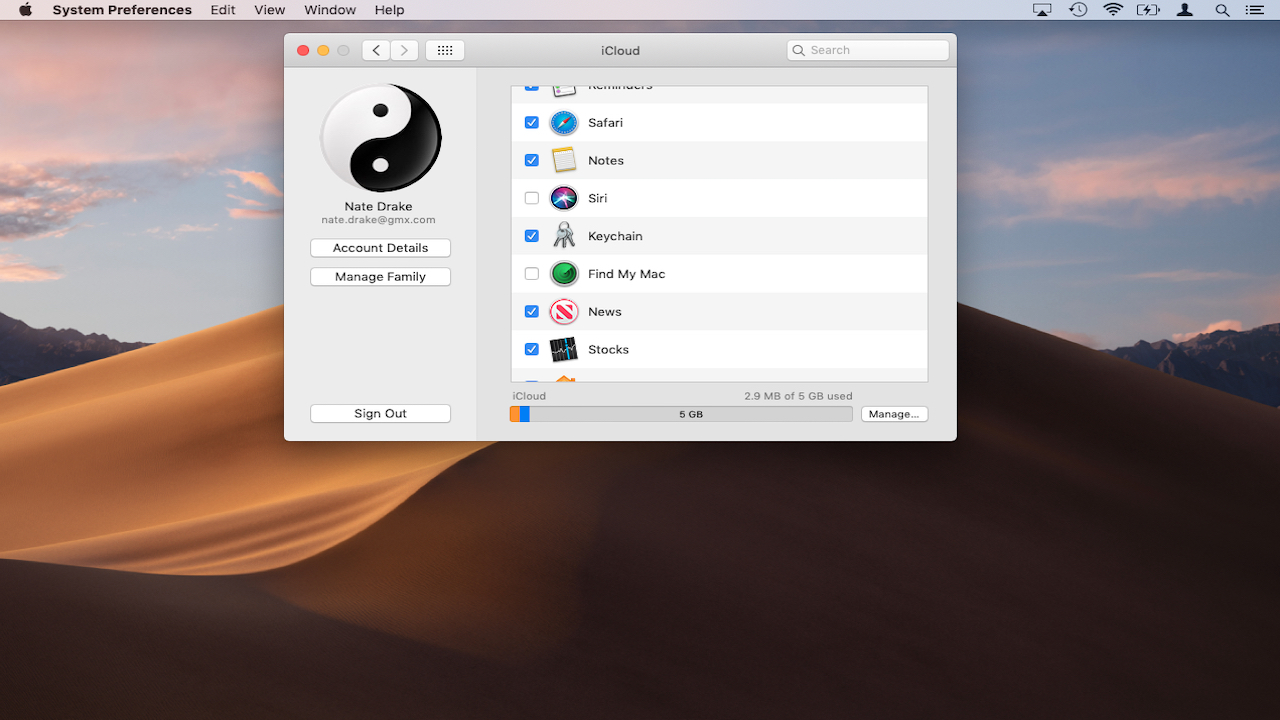
6. Track missing devices
Apple’s ‘Find my Mac’ service can be used to track missing MacBook’s if the worst happens. First to to ‘System Preferences > iCloud’ and check that you’re currently signed in to the MackBook with your own Apple ID.
Make sure the box next to ‘Find my Mac’ is checked. If your device goes missing, go to the iCloud website using another machine, then sign in with your Apple ID.
Choose ‘Find my Mac’ to display your Mac’s last known location. You can also remotely lock your MacBook the next time it connects to the Internet.
Anyone using the machine will need to enter a special code to use it, even if the hard drive has been wiped. You can also choose to remotely wipe the device next time it goes online.
Make sure to register your MacBook and serial number with an online service like Immobilize, so that the Police will be able to return your MacBook to you if it’s recovered. Registration is free but for a small fee you can buy special security tags, which can be attached to your MacBook to make it easier to recover.
7. Disable Guest users
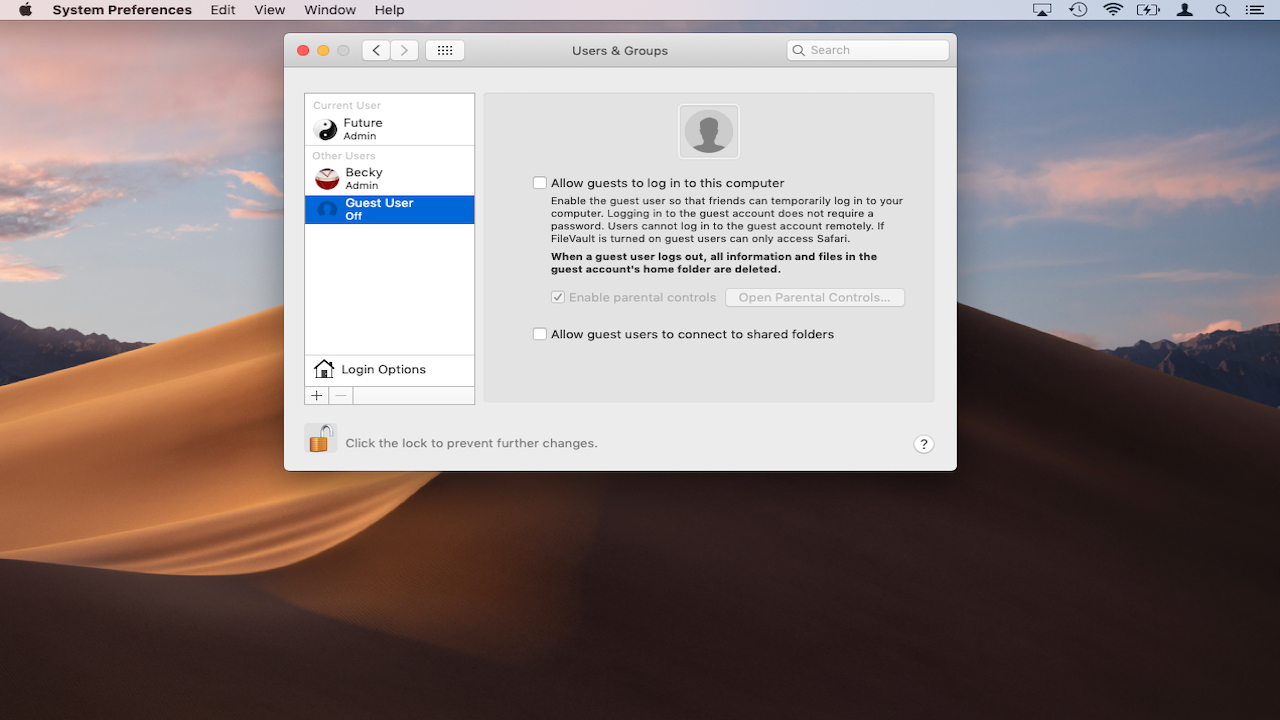
The Mac operating system contains a ‘Guest’ account for friends and acquaintances. In theory, guests can log in, browse the web and use programs without accessing your files or other sensitive information.
In practice this is a major security flaw as strangers could potentially use it to access unsafe websites. To disable the Guest Account, go to System Preferences > Users & Groups. Highlight the guest account on the left-hand side and uncheck ‘Allow guests to log in to this computer’.
8. Use the on-screen keyboard
Certain types of malware known as ‘key loggers’ can record the letters you press on the keyboard to capture a password, for example, and send them to hackers. Very skilled digital spies can also use a microphone to perform ‘acoustic cryptoanalysis’ allowing them to monitor key presses.
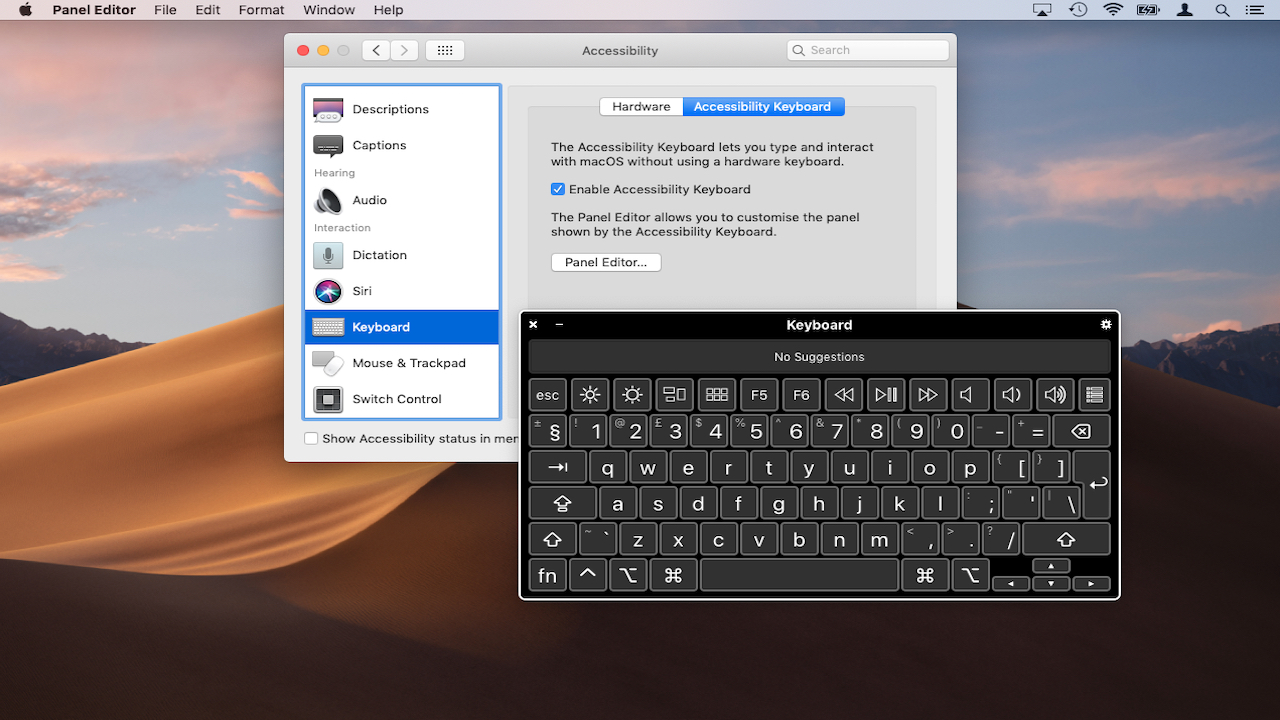
These types of attack are rare but if you are on your Mac in public, they’re easier to carry out. You can make life much harder for hackers by using the macOS onscreen keyboard – this befuddles most key loggers and as you’re using the mouse, there are no sounds from the keyboard for intrusive microphones to detect.
Next time you need to enter sensitive information like a password, go to System Preferences > Accessibility. Scroll to ‘Keyboard’ and click on ‘Accessibility Keyboard’. From here you enable the keyboard and customize it to suit your needs.
- macOS 10.15 Catalina release date, news and features
Nate Drake is a tech journalist specializing in cybersecurity and retro tech. He broke out from his cubicle at Apple 6 years ago and now spends his days sipping Earl Grey tea & writing elegant copy.