
 Become a TechRadar Insider


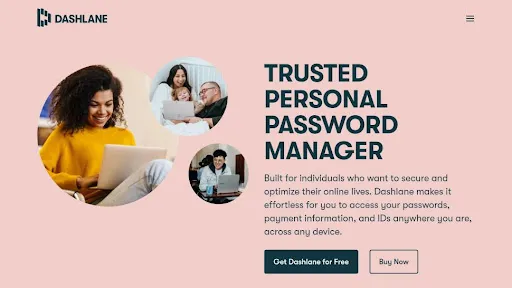
Today’s users have to have unique passwords for each account they use, and often, there are a lot of them. While keeping them in your head is the safest option possible, from a security standpoint, doing so is simply impossible for the majority of us as there are dozens and more accounts we need to log in to. To circumvent this, users sometimes fall back to using one password for all their accounts, which is a very risky gamble. Enter password managers, tools that should help us keep all of our passwords in one secure, encrypted place, protected by a single master password.
Despite this promise and the fact that most password managers are safe, there are instances of hacking and data breaches inside these companies. Take LastPass, for example, and the security breach that occurred in 2023, which is a reason you may be considering switching password managers. If you’re still using LastPass and wonder whether you will have to manually transfer all of your passwords, worry not.
So, if you wish to upgrade your password manager from LastPass to Dashlane and move your passwords safely from the former to the latter, here’s a step-by-step guide.
")
Export your passwords from LastPass
Before starting with the first steps, you’ll want to make sure of a few things first. For the sake of your online safety, don’t use anything else than a secure personal computer. After all, you’ll be exporting/importing your sensitive data via CSV file, and doing it via an unsafe device could leave all your data susceptible to cyberattacks.
To be extra safe, if you’re currently using any backup software, switch it off during the exporting process - you wouldn’t want your unencrypted export file to get backed up.
Another thing you’ll want to do before you get cracking is to install Dashlane and make sure you have your LastPass app at hand.
You can export your passwords from LastPass via its browser extension or its official website. While the process is pretty similar, we recommend using the official site as it's more straightforward.
Now, let’s start with the first step.

1. Log into your LastPass account
To log into your LastPass account, you’ll be asked to enter your email address and your master password. So, do that and then hit the “Log in” button - well, just like you did many times before.
At the same time, if you wish to do this via the LastPass browser extension, go to your browser and click on the “Extensions” button at the top right, the one that looks like a puzzle piece. It will trigger a dropdown menu to appear, so select LastPass on it.
Also, if you’ve enabled multi-factor authentication (MFA) on your account, you’ll have to verify your identity first.

2. Click on “Advanced Options” on the sidebar, then select “Export”
Once you arrive at your LastPass dashboard, you’ll want to look at the left sidebar and select “Advanced Options” on it. Then, click on the “Export” button on the right and wait for another page to pop up.

3. Enter your master password and download a new CSV file to your computer
As soon as you arrive, you’ll be asked to enter your master password, so do it. After this, click on the “Continue” button and stick around for a couple of seconds.
A new CSV file titled “lastpass_export.csv” will be automatically saved to your computer - still, double-check if the CSV extension is included. This file should contain all of your vault data, including all your passwords, secure notes, credit card details, and such.
Once the download is complete, check the CSV file’s location - you’ll have to use it soon enough. And that’s it, you’ve successfully exported your passwords and other data from LastPass.
Import your passwords to Dashlane
Now that your precious passwords have been exported from LastPass, it's time to transfer them to your new password manager, Dashlane.

1. Sign in / log into your Dashlane account
For starters, if you aren’t logged into your Dashlane account, do it straight away. As with other password managers, you’ll be asked to supply your email address and your master password. Then, tap on the “Log in” button.
While Dashlane users can choose to stay logged in for 14 days straight, don’t do this if you’re not using a secure computer.

2. Open your Dashlane application and click on “Logins”
Once you make it to Dashlane’s dashboard, click on “Logins” on the left sidebar menu and then on “Import data” in the center of the dashboard. This is the simplest, swiftest, and most secure way to start adding logins to your Dashlane vault.

3. Go to “Select source” and pick out LastPass from the list
After this, you’ll be prompted to select the source you’ll be importing your passwords and other data from. You’ll see LastPass among other platforms on the list, so go ahead and select it. To proceed to the next step, click on the “Get started” button.

4. Select the CSV file you wish to import, first click on “Next” and then on “Import items”
Now you’ll want to upload the CSV file you exported a couple of steps ago. Once this is done, click on the “Next” button and preview the items before importing them.
Here, you can choose to import specific items as logins, as secure notes, or to skip importing them altogether. Once every item is organized, press the “Import items” button below. Dashlane displays the number of passwords set for transfer, giving you an opportunity to review and modify your selection. This is the moment to deselect any passwords if you change your mind. Ensure that all the passwords you intend to transfer are selected. To initiate the transfer, simply click on the green “Import” button.

If the importing process was successful (and it should be if you’ve completed all the steps above), you’ll get this message. And that’s it, you’ve exported your LastPass passwords to your new password manager.

Out with the old, in with the new: It’s time to ditch your LastPass account
Keeping in line with good security practices, once you have migrated to Dashlane, you need to securely delete the unencrypted CSV file on your computer.
Now, wave goodbye to your old LastPass account, and don’t look back. To do it, go back to your LastPass dashboard and click on “Account Settings” - it’s above “Advanced Options” you’ve visited before. Once a new window pops up, select “My Account” and then select the “Delete or Reset Account” option.
After this, confirm your choice by clicking on yet another “Delete Account” button. Finally, enter your master password and watch as your LastPass account gets cast into oblivion.
Also, don’t forget to ditch any LastPass apps you have installed, whether a desktop app or a web browser extension.
- Check out our list for the best password managers