How to create your own database on Linux
Nick Peers reveals how to create your own simple databases in minutes with no coding or server experience required. It’s open source magic!
Sign up for breaking news, reviews, opinion, top tech deals, and more.
You are now subscribed
Your newsletter sign-up was successful
Set up your first database
Step 1: Create a new database
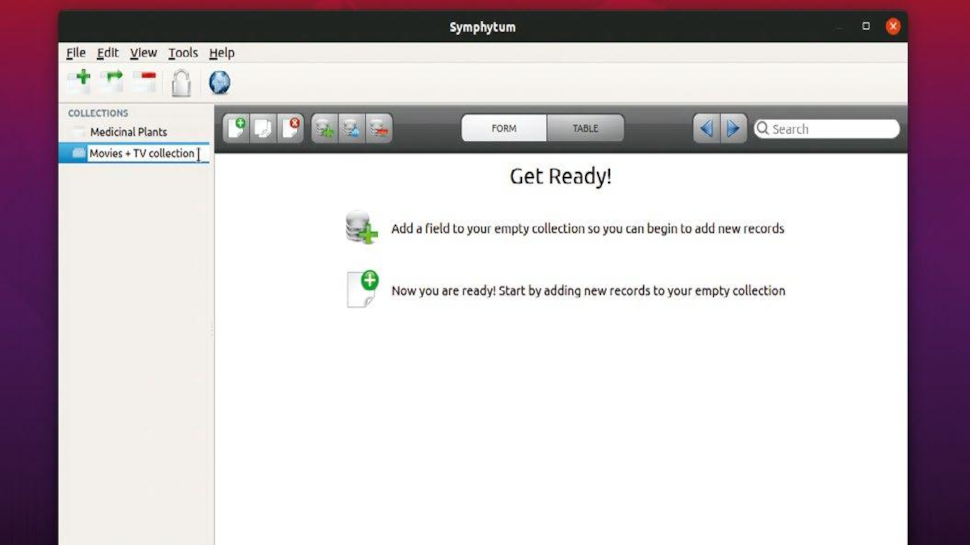
To create a new database from scratch, simply click the Create a new collection button beneath the File menu. The new database appears in the left-hand sidebar, so start by giving it a suitable name. You’ll start in Form view, with a couple of handy shortcuts highlighted. Start by clicking the New Field button to define the first field of your database.
Step 2: Set up your first field
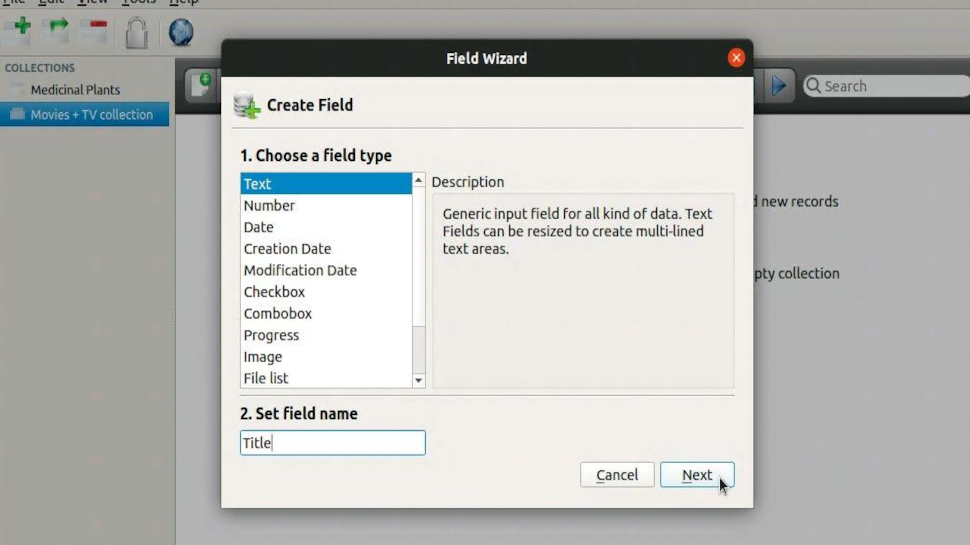
When you press the New Field button, the Field Wizard pops up. First, define what type of field you wish to create from a choice of 12 (see the main text) – select one for a description of what it does. Once you’ve set your field type, give it a name such as Title and click Next. If the field must always be filled in, tick Required field before clicking Finish.
Step 3: Create subsequent fields
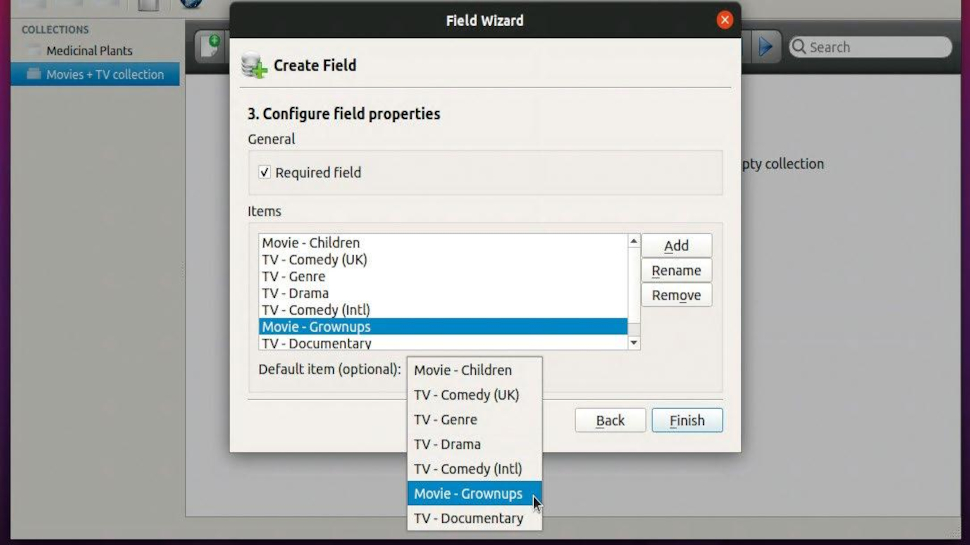
Repeat the process to create all the fields you think your database needs (it’s worth sketching these on paper before you begin). Certain field types will trigger more context-sensitive options within the wizard – for example, choose Combobox and you’ll be prompted to enter each choice you wish to appear in the drop-down menu.
Step 4: Redesign your form
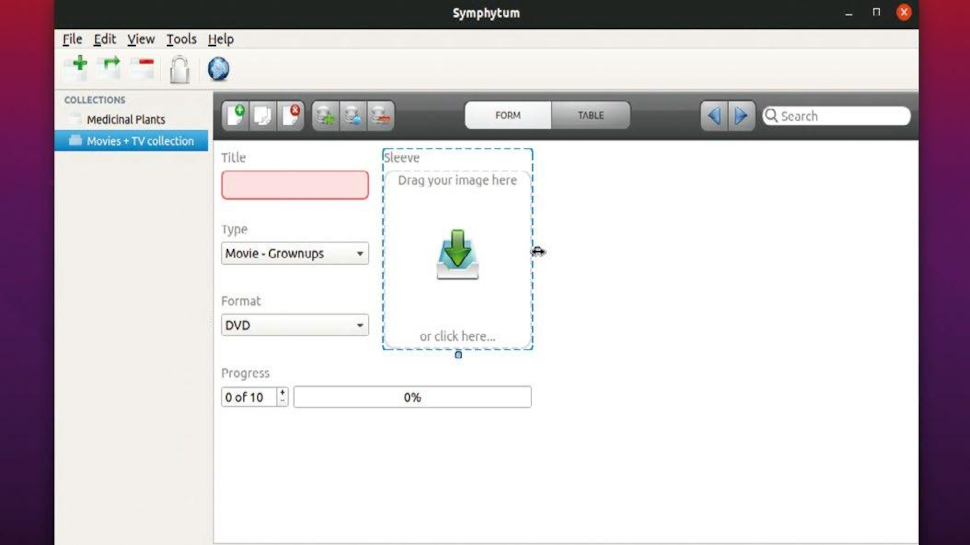
Once your fields are in place, click the New Record button or press Ctrl+N. The Form will switch to show all the fields in your database, dynamically positioned on-screen. To rearrange their order, just click a field’s title to reveal its borders. You can click and drag to move it, or use the drag handles on the right and bottom to resize the field as required.
Step 5: Modify or remove fields
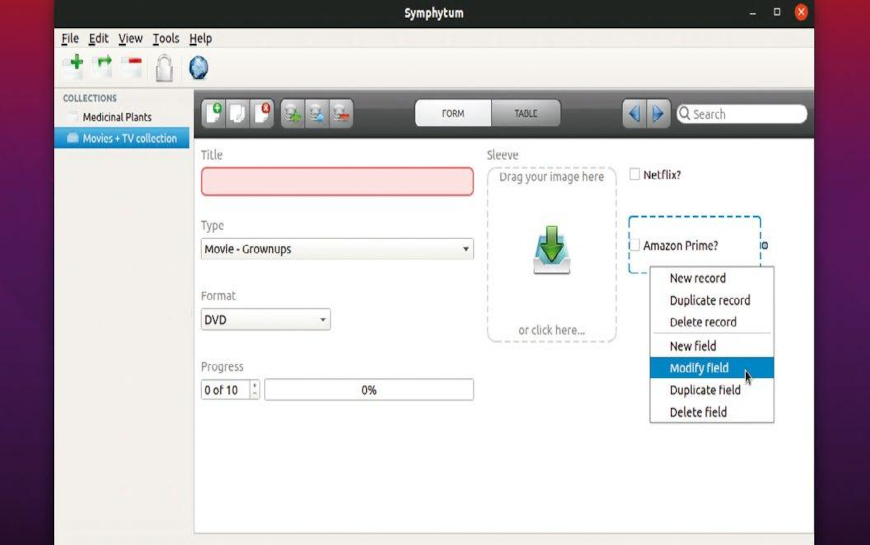
You can also modify and remove fields when in Form view proper. Right-click the field to modify it by changing its name and associated options with the selected field type (but note that you can’t change the field type). Other options include deleting the field or creating a duplicate based on it (you’ll be prompted to change the field name).
Step 6: Edit in table view
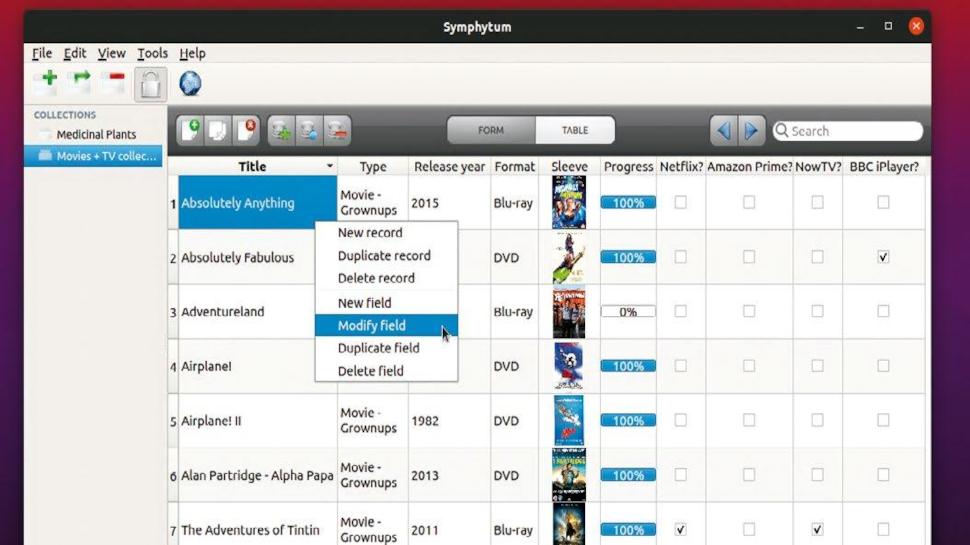
You can also add, modify, and remove fields in Table View. Just use the New Field button to create a new field from scratch in the usual way, or right-click an existing field column to access options for modifying, duplicating or deleting it. Once created, switch back to Form view to arrange the new field’s position as required on-screen.
Protect your databases
There are two ways to protect your Symphytum databases: through manual backups stored elsewhere on your computer (or over the network), or via the Cloud synchronization button. Choose File>Backups to make (and later restore) a manual backup – just follow the wizard. Your databases and any file or image attachments will be bundled up into a single file with a .syb extension.
Sign up to the TechRadar Pro newsletter to get all the top news, opinion, features and guidance your business needs to succeed!
If you want either a real-time backup or the ability to work on your database across multiple machines or collaborate with others (Symphytum supports Windows and macOS as well as Linux), then a better option is to use your cloud provider to keep files in sync. Rather than move your database folder to a folder you’re already syncing to the cloud, click Symphytum’s Cloud synchronization button.
For now, Symphytum offers three options: there’s direct support for Dropbox and MEGA (choose the appropriate option then follow the prompts to connect your account), plus a handy ‘Generic provider (folder based)’ option. This latter option enables you to save your database in a folder being synced to the cloud using a native Ubuntu tool, such as Nextcloud or Google Drive.
If you do the link through cloud synchronization, then when you open the database on your PC, it’s made ‘read-only’ for other users who try to open the synced database on their own computers. They can view the file, but can’t make changes to prevent sync conflicts.