 Become a TechRadar Insider


WARNING! Don't try anything you read here outside of your local network. Scanning and exploring distant ports or other people's networks is legally questionable, and could land you in very hot water. DON'T DO IT.
In part one of Network scanning secrets revealed we showed how attackers scan and snoop on your network.

USER CREATION: Before starting the attack you will need to create an account
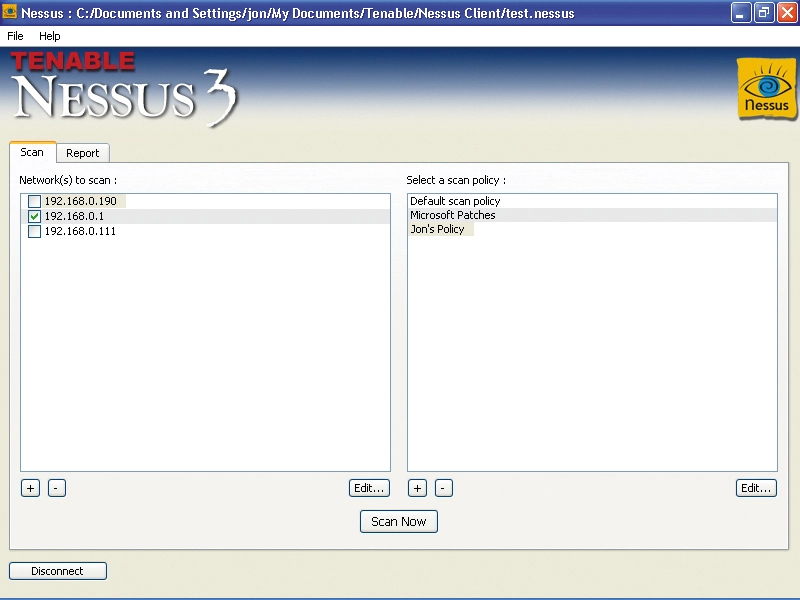
Now, start the Nessus client. Under the list of networks to scan, press the plus ('+') button. In the subsequent dialogue box, leave the scan type on single host and enter the IP address of the machine on the local network that you want to scan (192.169.0.190, for example). Click on 'Save' and the host will appear in the list.
Now press 'Connect' and a list of Nessus servers will appear. This will usually only list the server on the local host, so select it and press 'Edit'. In the resulting window, enter the username and password you created and press 'Save'.
Now press 'Connect' and you should connect to the server. After a moment or two, the scan policies in the right-hand pane of the main interface will become active. To mount your first attack, make sure that the host's tickbox is selected, select 'Default scan policy' in the right-hand pane and hit 'Scan now'. The Nessus client will now send its orders to its server, and after a few moments, network traffic will begin to flow as the attack begins.

SCANNING: After choosing your scan policy, click Scan Now to launch Nessus proper
The Report tab allows you to see its progress. Expand the tree under the IP address of the target machine and click on the subsections to follow Nessus as it walks through its battery of tests. Tests that have found medium security threats turn their part of the tree orange, while those that reveal high priority threats are coloured red.