How to render in your favorite video editing software
Learn how to render in Premiere Pro, Final Cut Pro, and more

Sign up for breaking news, reviews, opinion, top tech deals, and more.
You are now subscribed
Your newsletter sign-up was successful
Renders are so useful when working on a video editing project, especially if you’re having to deal with limited resources (low RAM, underpowered CPU, that sort of thing), or are applying complex effects or transitions to your clips.
Usually, the best video editing software (and even the best free video editing software) will attempt to play back your edit in real time, doing it all in software. For simple edits and VFX, that should be no problem, but the more you demand of your program, the more it will struggle, to the point where you end up with a playback of one or two frames per second - if you’re lucky. So we render.
We’ll be showing you how you can access and control your render files in various popular video editing applications, and finish off with general tips and advice to help make sure your computer runs as efficiently as possible.
How to render in Adobe Premiere Pro
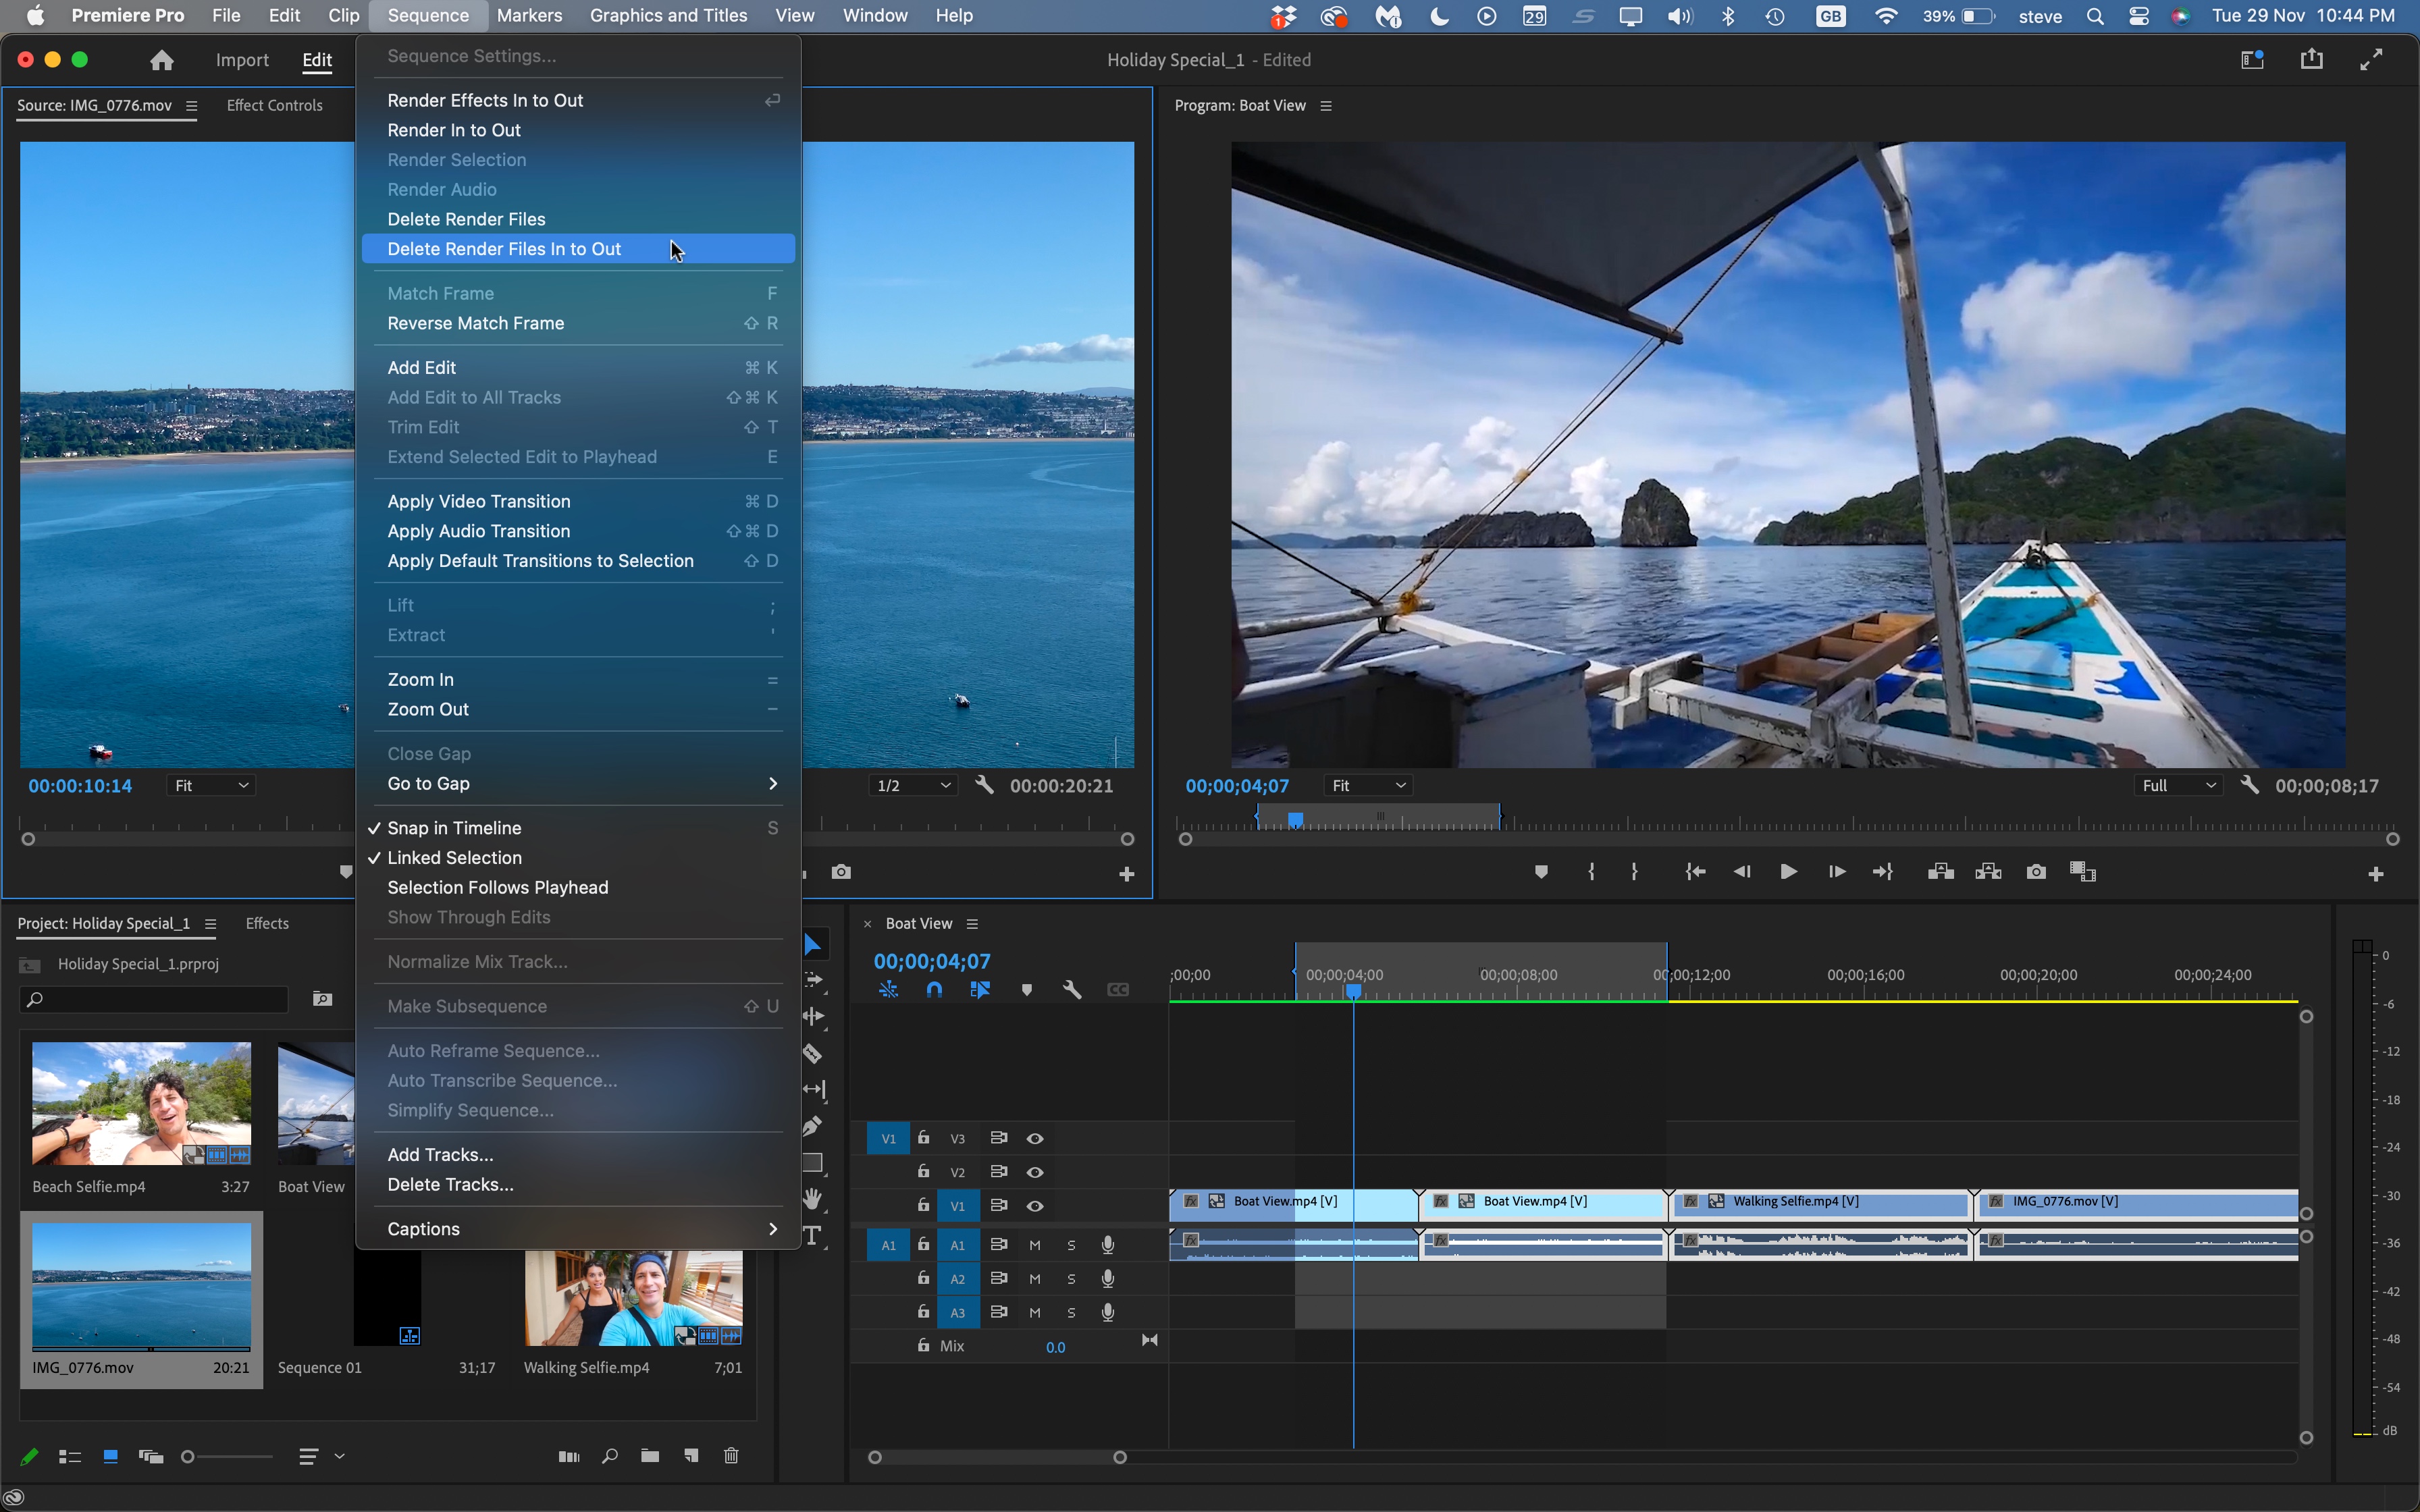
Adobe Premiere Pro, and it’s hardly a surprise, being one of the biggest non-linear desktop video editors out there, giving users practically total control over their projects.
As with other tools, you can select one or more clips and choose to render them to speed up playback should the effects you’re applied be complex enough to slow your computer down when Premiere tries to play them on the fly.
What’s useful is your ability to render between In and Out points, meaning your request can start and stop partway through a clip if you like. Even better, you can do the same action to delete rendered files, which means it’s not an all or nothing affair as it is with the apps we’ve looked at previously - you can simply pinpoint a render you do not need, while keeping the rest intact.
How to render in Cyberlink PowerDirector
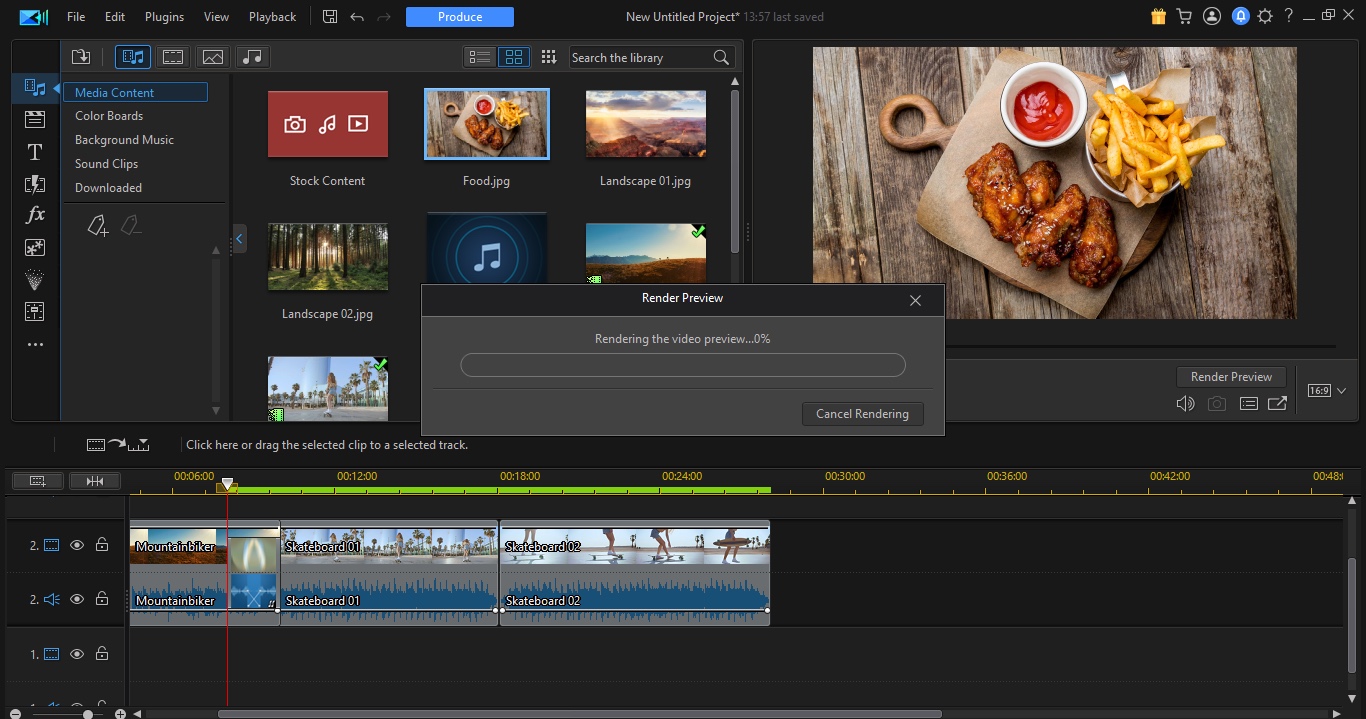
In order to get CyberLink PowerDirector to render your project, you’ll find a handy ‘Render Preview’ button, to the right of the interface. This will write down all effects to disc, freeing up your RAM, and give you smoother playback.
Sign up to the TechRadar Pro newsletter to get all the top news, opinion, features and guidance your business needs to succeed!
In fact, PowerDirector will do this automatically for you when your system is running low on memory. What you can do manually though is select a range which the software will only render and ignore the rest.
Should you need more control over this action, you’ll find a few options in the Settings window. One of these is the option to render files in Ultra HD quality.
If you need to delete those files (say they didn’t turn out as you expected upon playback, or you just need to free up space), this can be done from there as well. Click on ‘Manually Delete’, then select all the files you wish to get rid of from the next window.
How to render in Apple Final Cut Pro
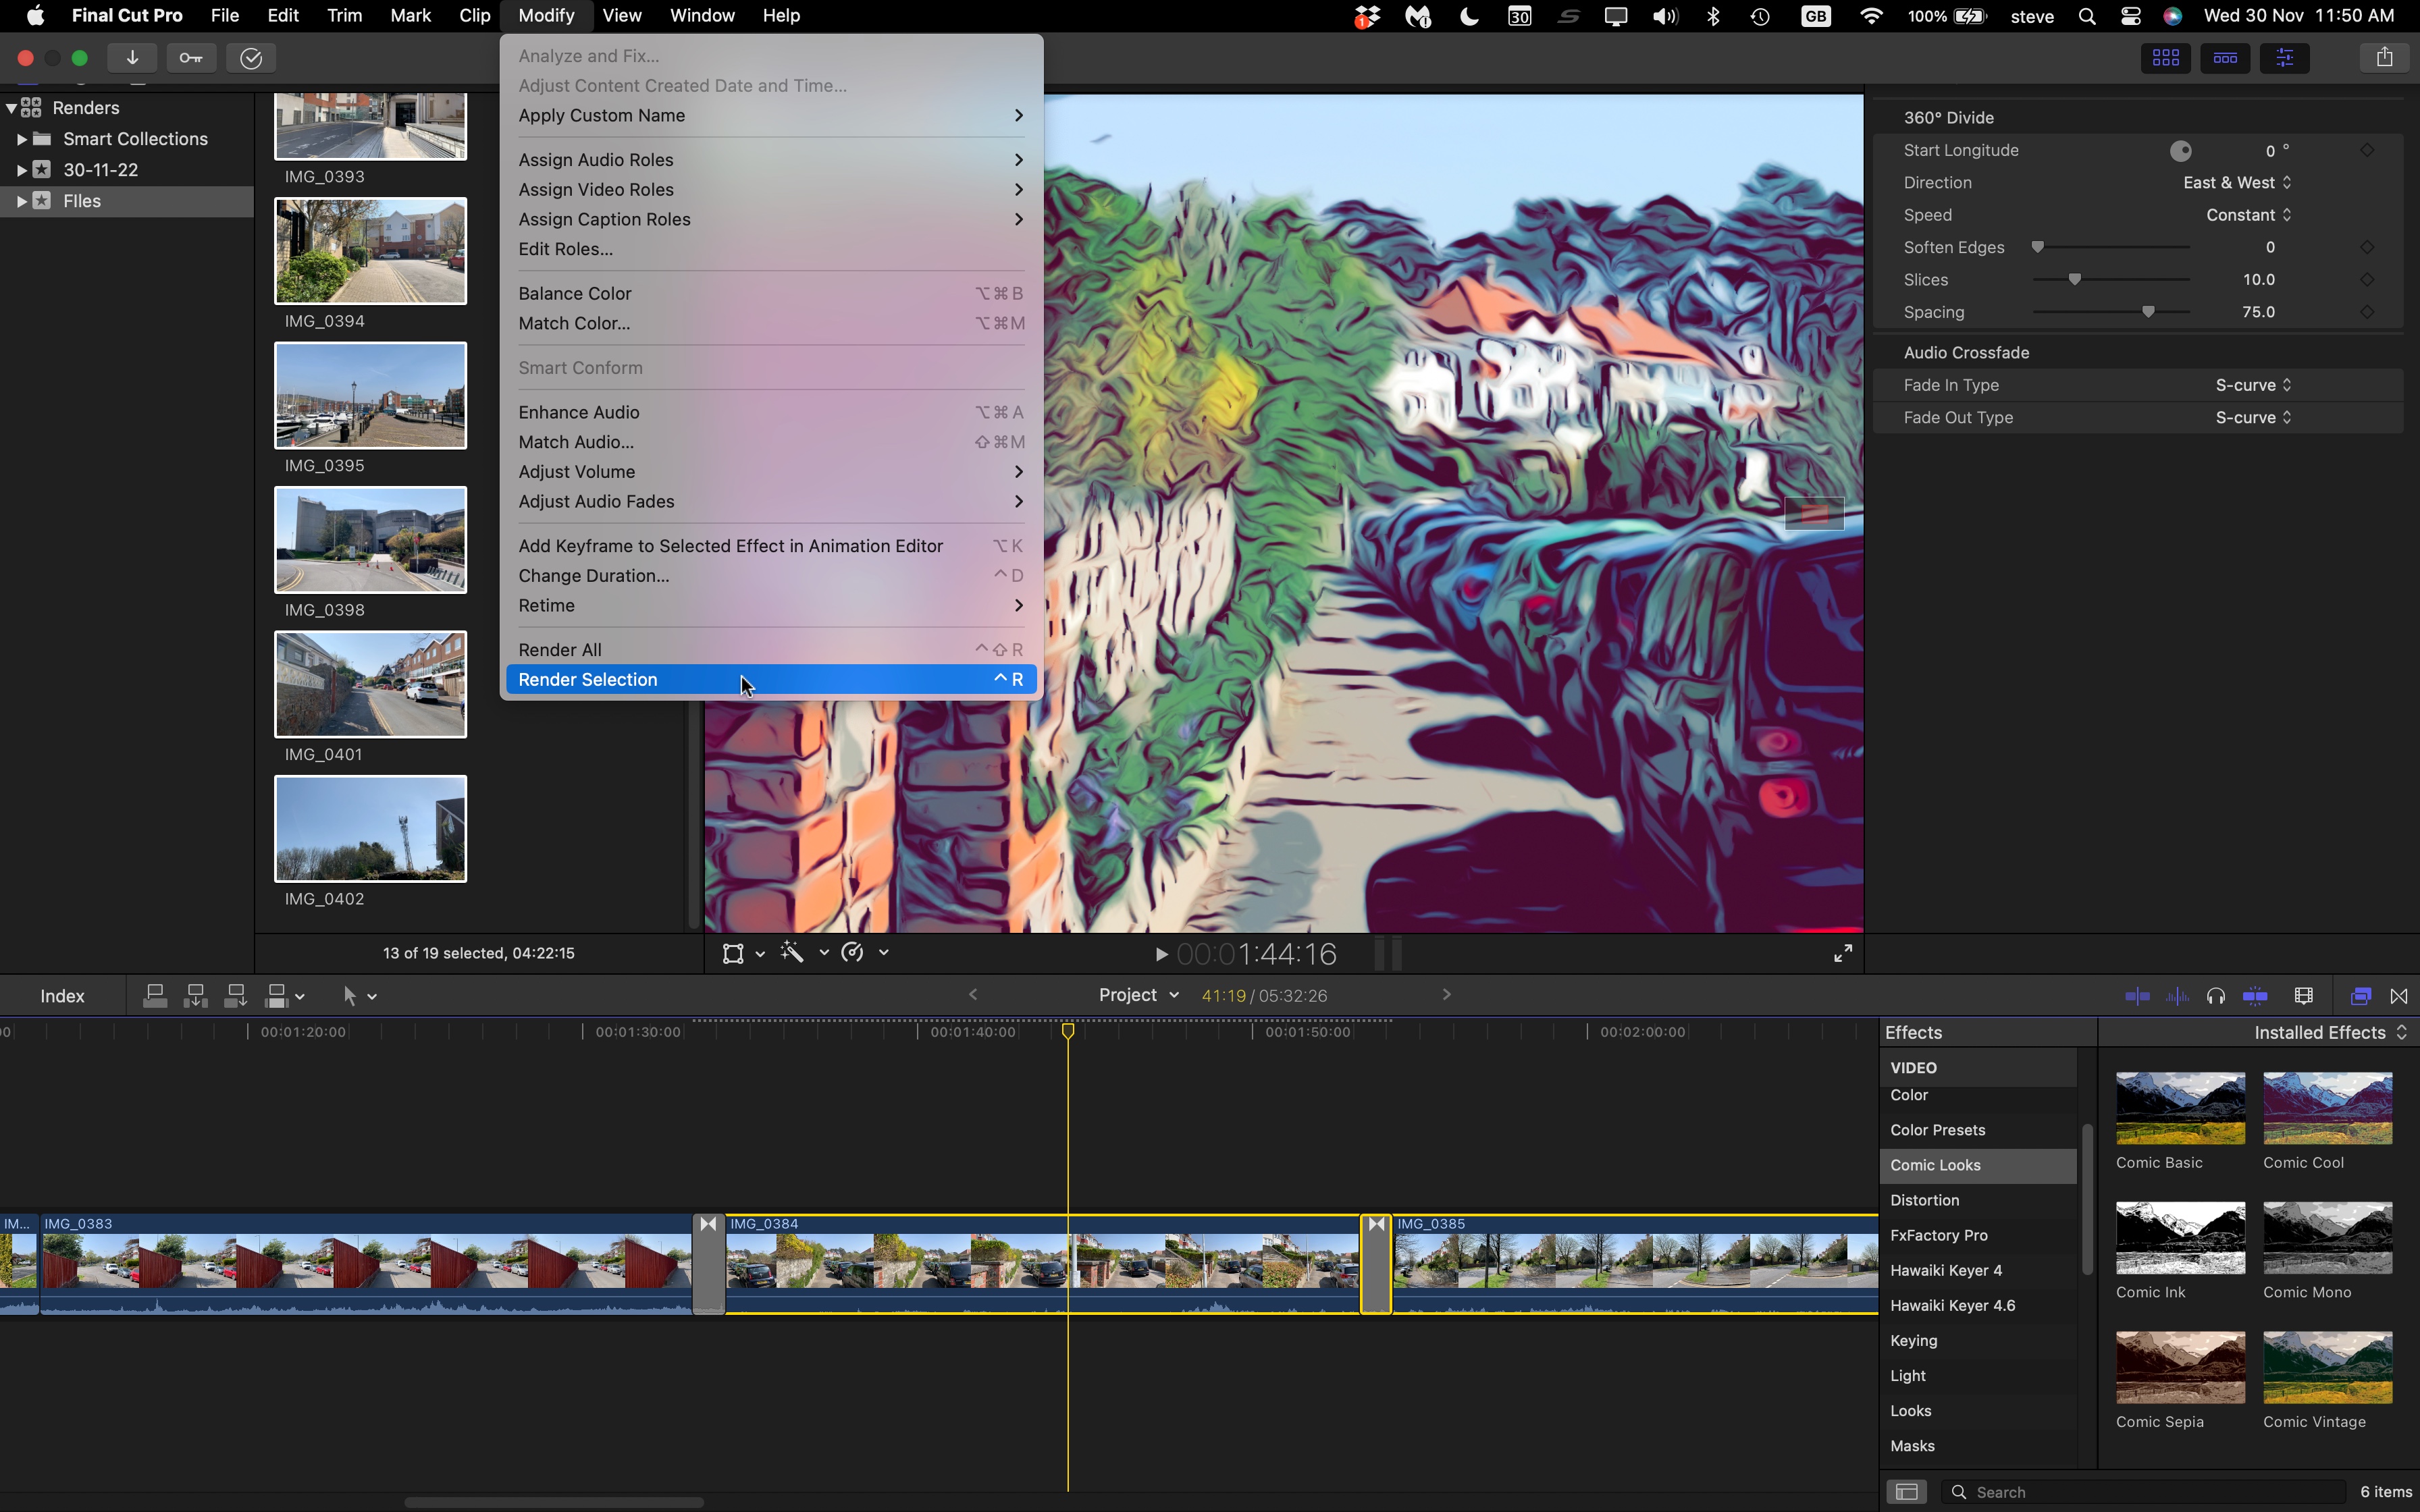
Apple Final Cut Pro has a good amount of flexibility when it comes to render files. By default, it’s set to auto-render whenever you’re not doing anything on your computer. We find the default limit to be much too short: like Filmora, it’s set to 5 seconds, but you can change it in the Preferences’ Playback section. Set the delay by as much, or as little as you want, or disable the feature altogether.
You have the option of rendering the entire project, or just the highlighted section, giving you some flexibility, but if you feel that something went wrong and the render doesn’t look as it should, click on your Library in the sidebar, take a trip to File > Delete Generated Library Files, and tick ‘Delete Render Files’. Unlike Premiere, you can’t select a specific section, but you do have the option of deleting any unused files, or the whole lot.
How to render videos in HitFilm
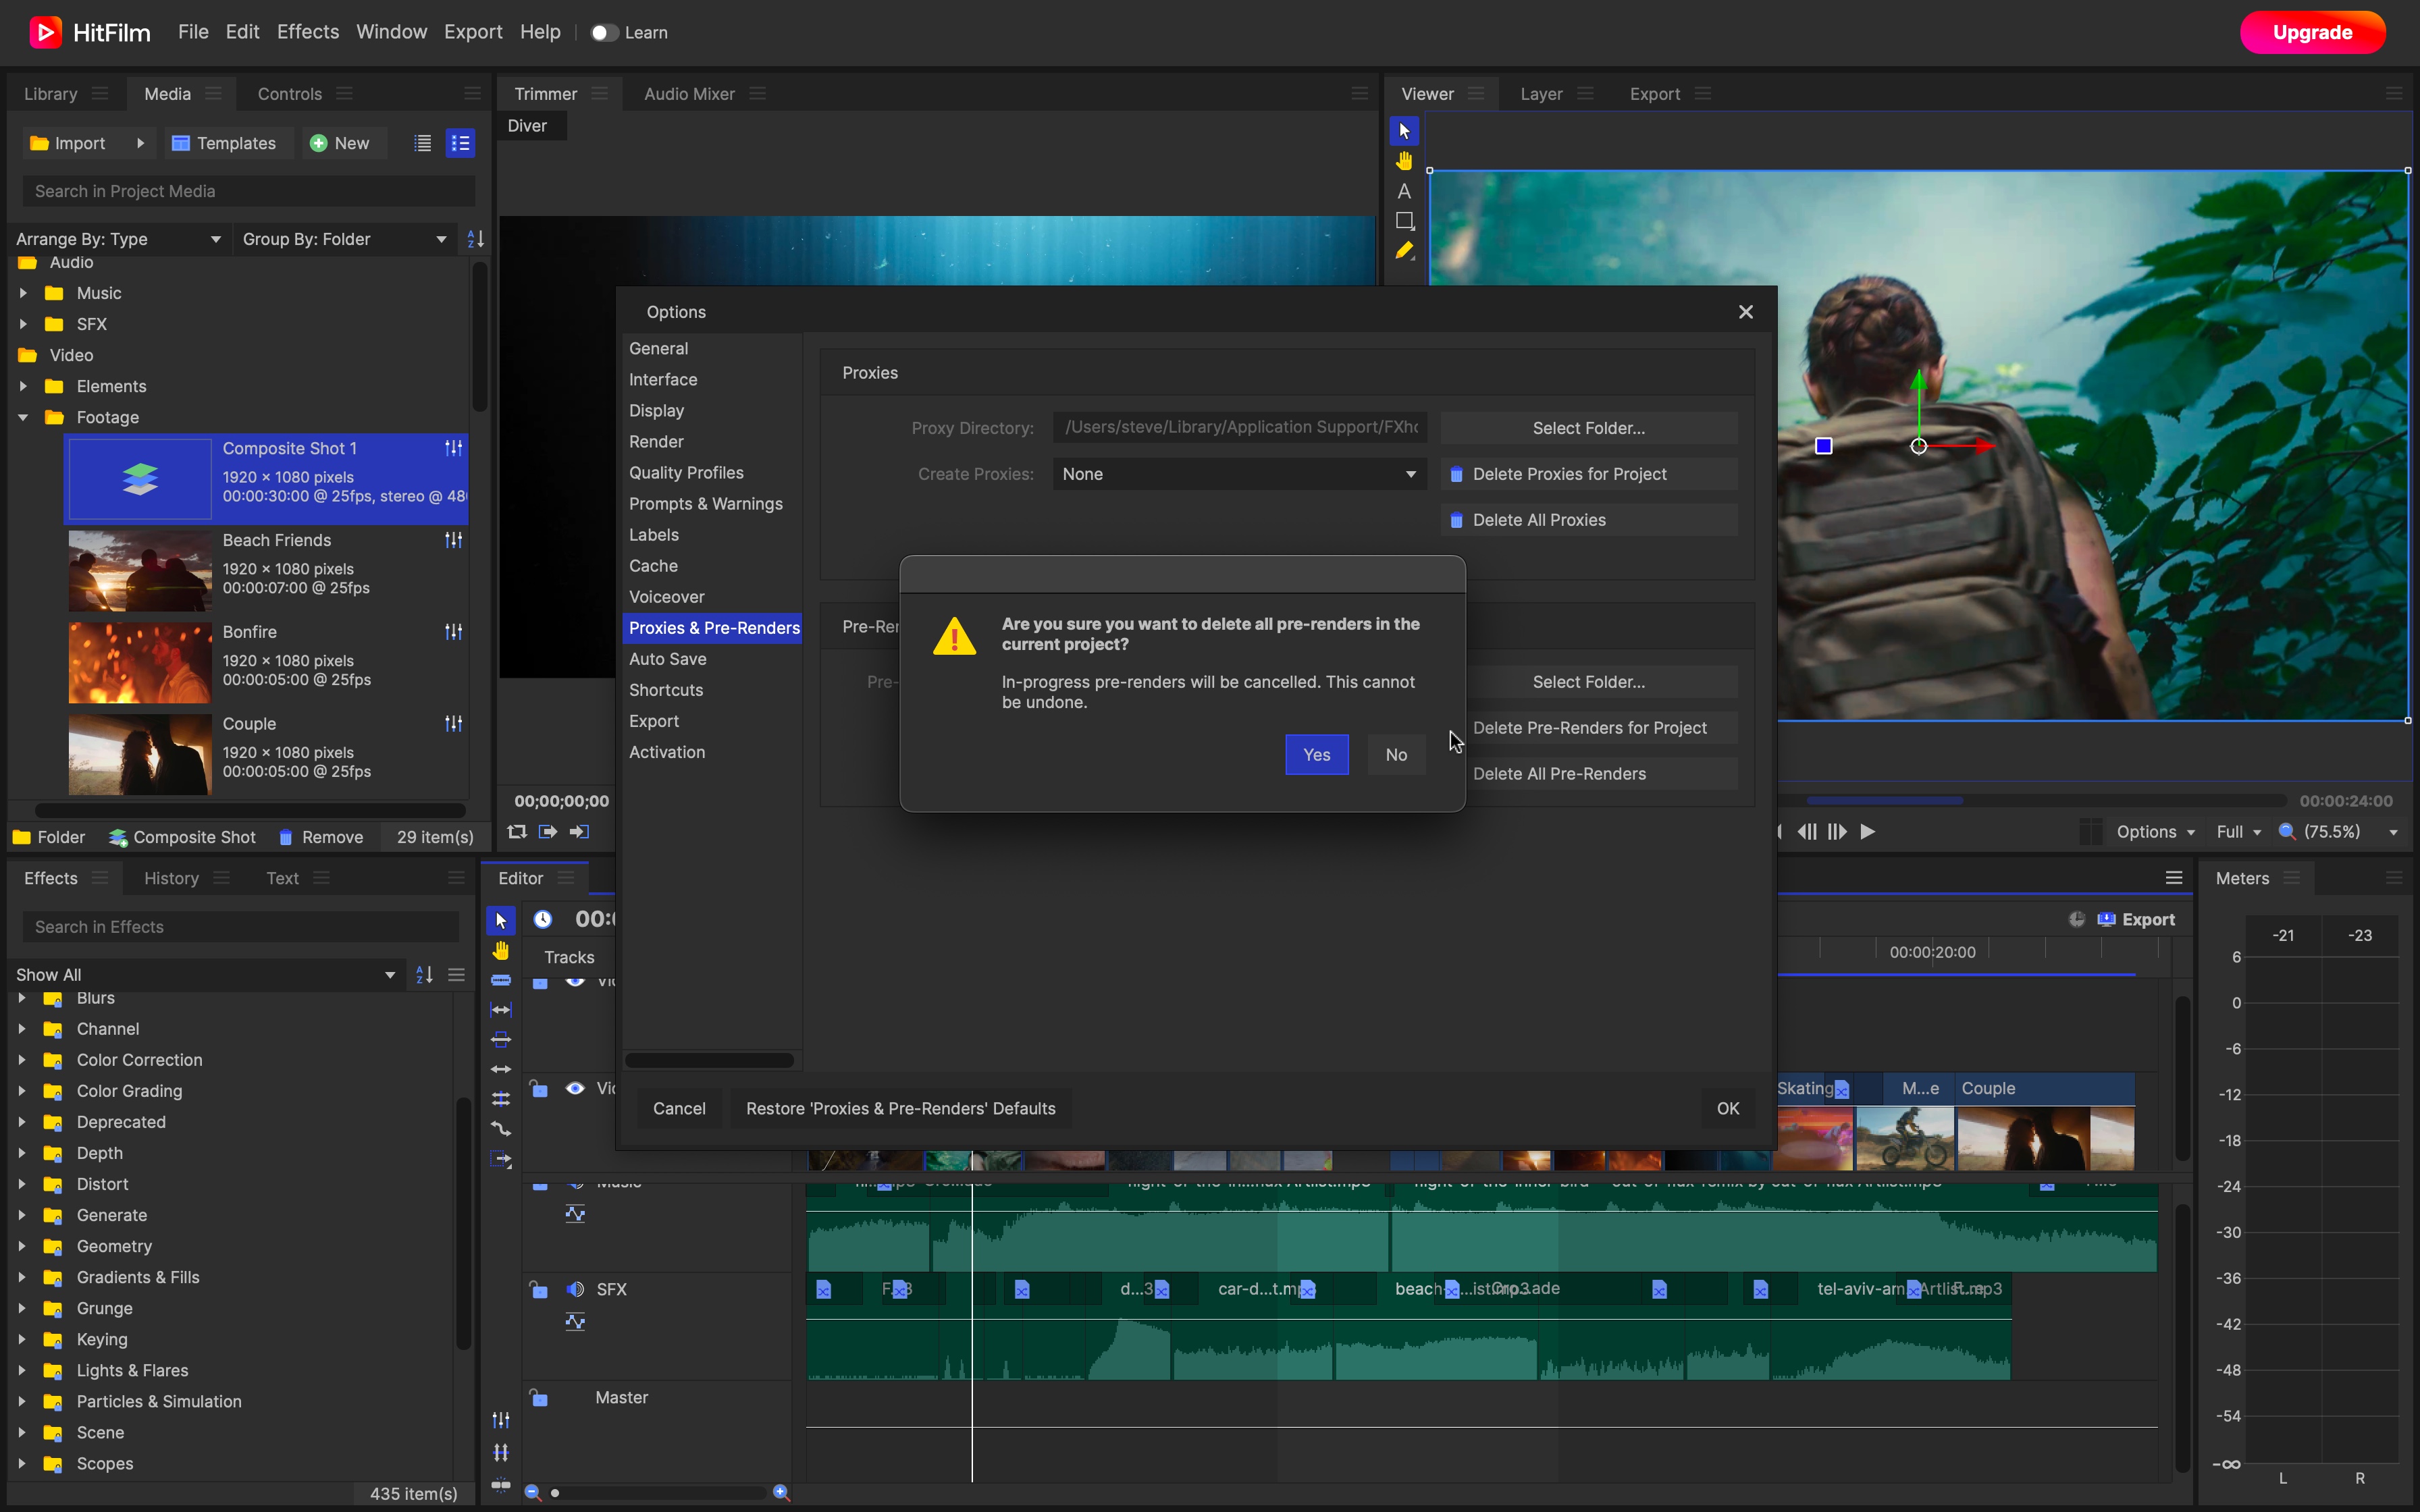
Rendering in HitFilm, from FXHome, is done automatically, but you can manually trigger this action by right-clicking on a clip in your timeline, and selecting the ‘Pre-Render’ menu. It’s also from this menu that you can remove any render applied to a selected clip.
Deleting pre-renders, as with the other apps on this list, can be done to force the software to create a fresh new copy of the clip with its applied effects (should something have gone wrong with the original rendering for instance), but it can also be useful when archiving a project where space saving in an issue.
In this case, take a trip to the Options panel, and visit the Proxies & Pre-Renders menu. This is where you’ll find two features: ‘Delete Pre-Renders for Project’ does exactly that: any rendered files will be deleted. The other option, ‘Delete All Pre-Renders’ would remove any such files from any project on that computer.
How to render videos in Wondershare Filmora
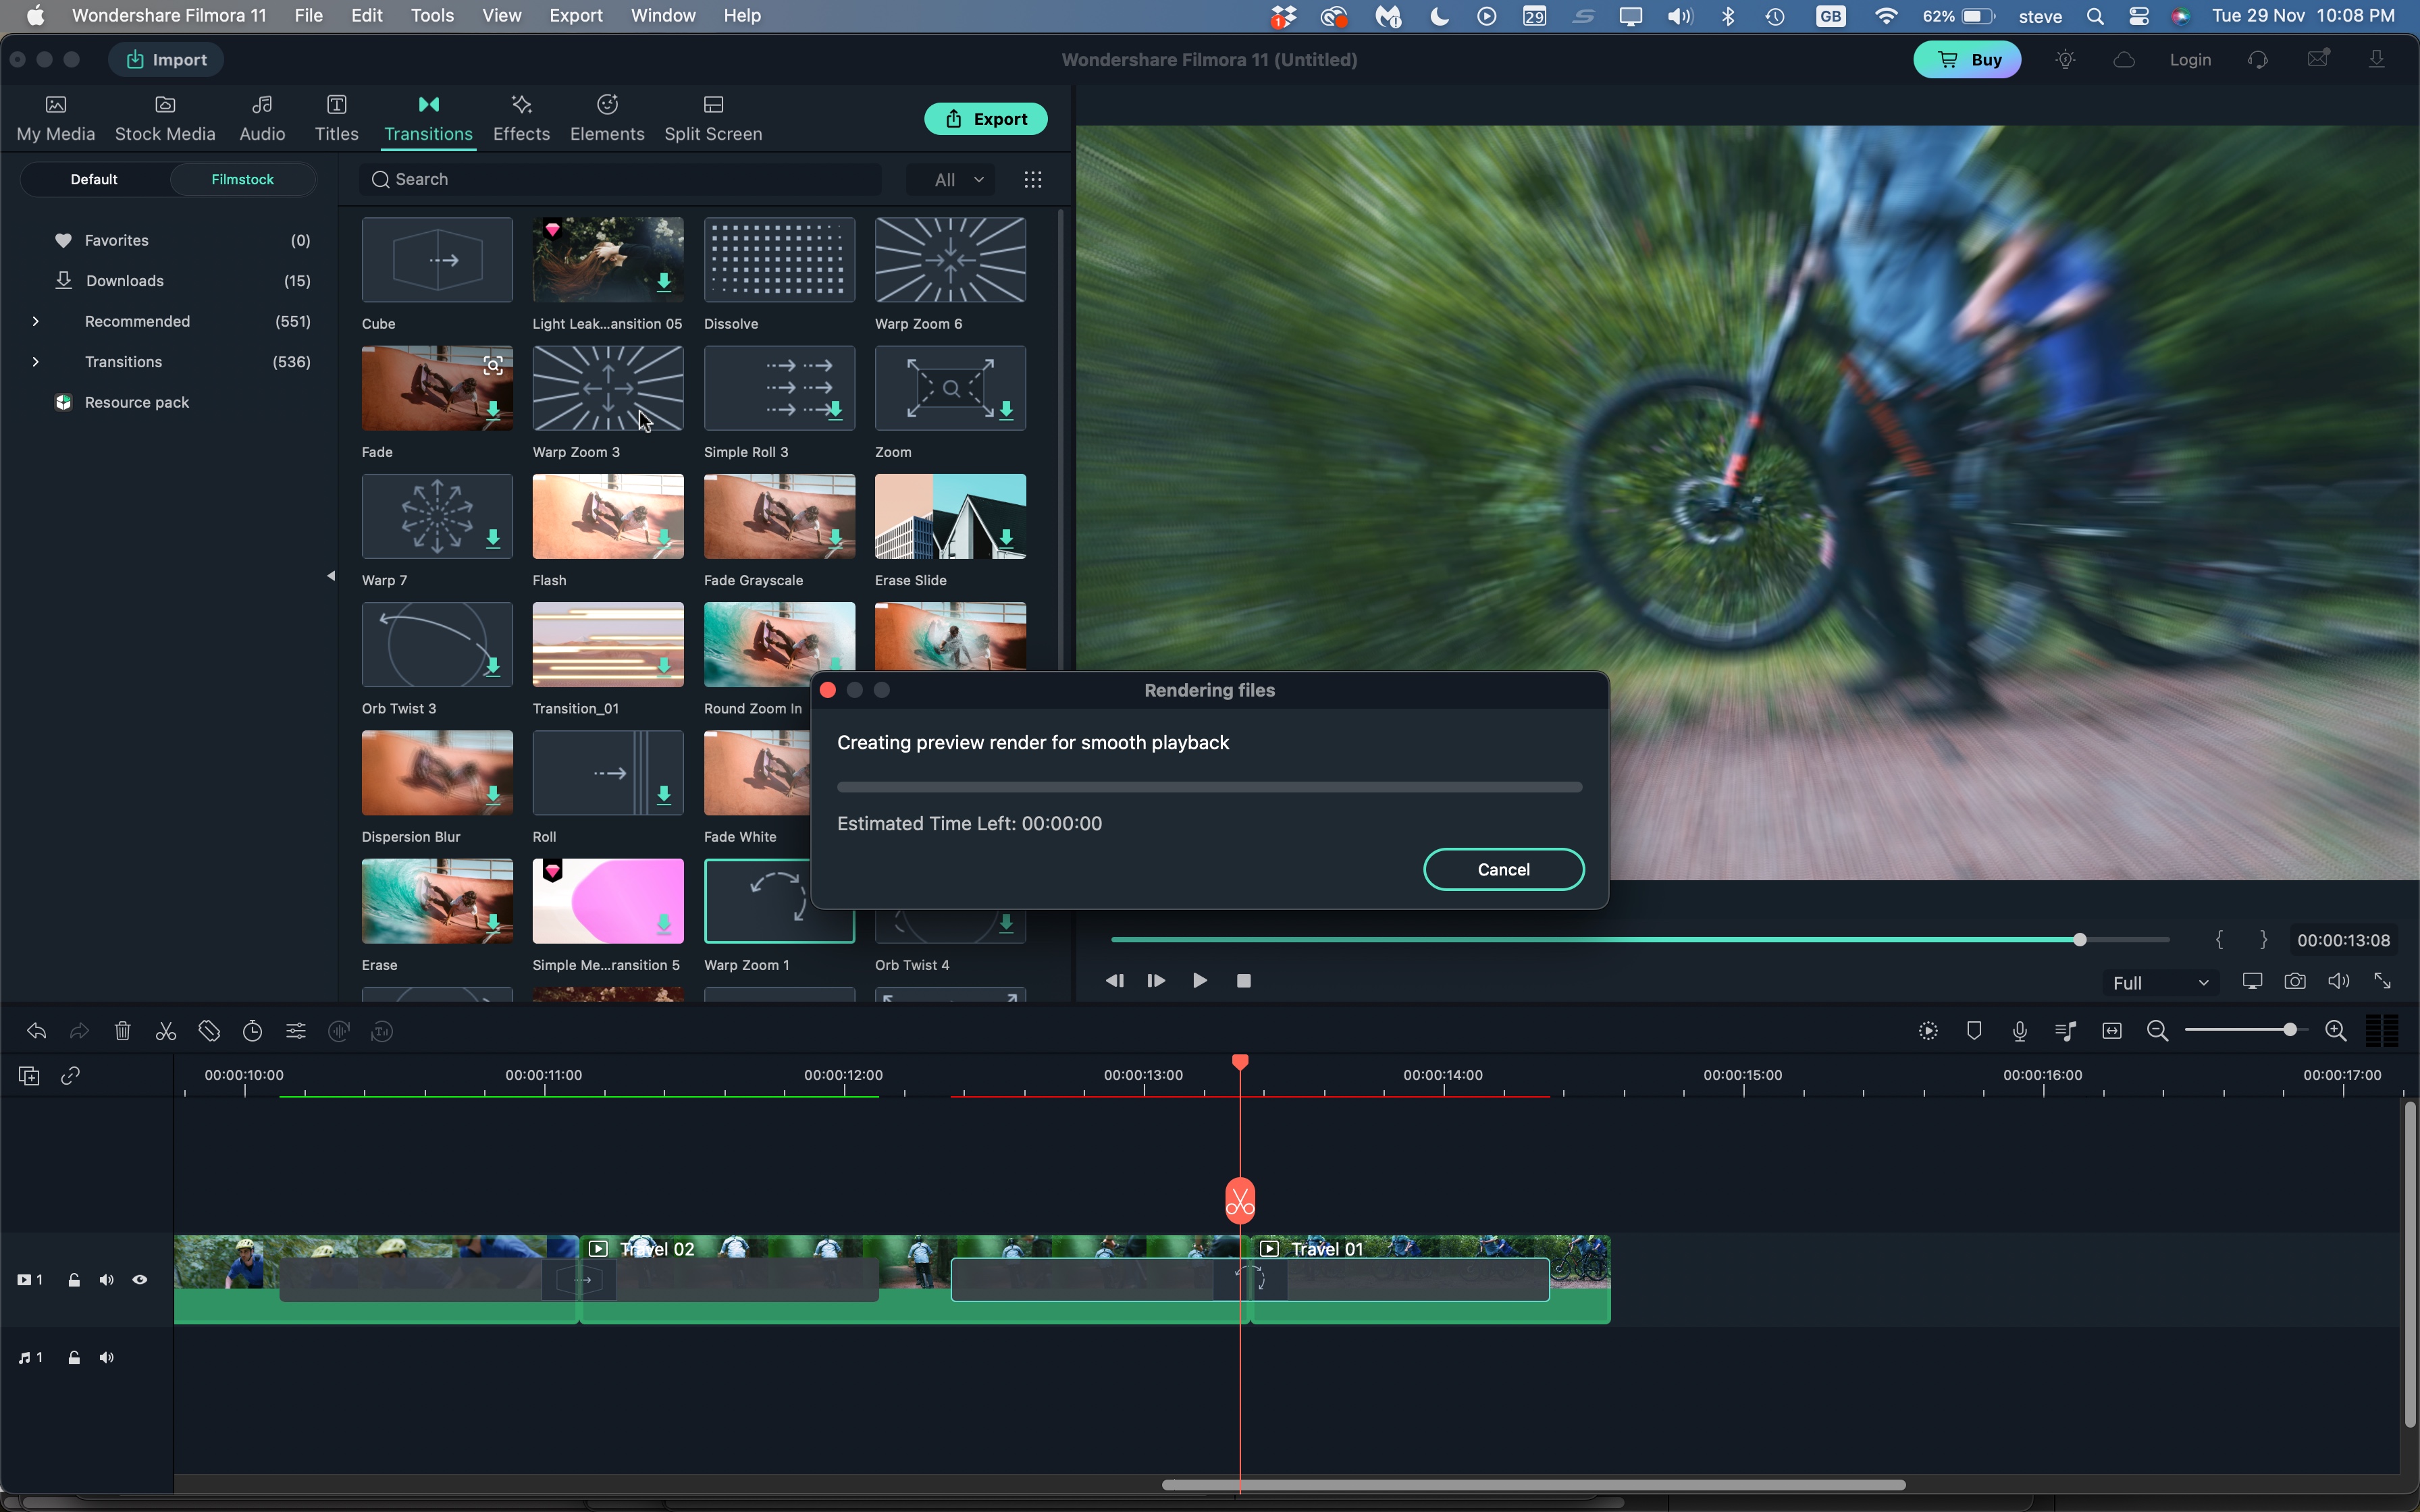
Wonderrshare Filmora makes it easy to see which sections of your project need to be rendered: any red line on your timeline will inform you those might experience dropped frames or be shown in lower quality when played back (it really depends on your computer’s CPU and RAM).
To manually trigger a rendering action, go to File > Render Preview. You can’t do anything else to your project while Filmora writes those effects to disc. Deleting preview files is just as easy: File > Delete Render Preview Files.
If you work with a lot of effects, you may find repeating this action somewhat tedious, so you might appreciate automating the process. This is done in the app’s Preferences. Just make sure Background Render is ticked, tell it how long to wait before this action is triggered (by default it’s 5 seconds of inactivity, which is a very short amount of time), and Filmora will take care of your rendering needs for you.
You can also delete all your project’s renders from here too, by clicking on ‘Clean’ next to the ‘Preview Render Files’ menu. You can’t however pick and choose which renders to remove: it’s all or nothing.
Rendering videos: General troubleshooting
You might find that sometimes - albeit rarely - rendering doesn’t work as it should, even when running the software on the best video editing computers and best video editing laptops. We’ve shown you how various video editors allow you to delete these files and start again, but what happens if the results are the same?
This is sadly a case of eliminating potential variables, like switching off some filters and see this that helps. But it might be best to start with the basics: make sure your software is as up to date as possible.
Sometimes, you might find uninstalling it from your computer and reinstalling it could help. Making sure your operating system is the latest one available can also resolve issues, and packing your machine with as much RAM as you can afford has been known to fix lingering issues. And it may have been turned into a meme thanks to shows like The IT Crowd, but switching your computer off and restarting it, has indeed solved many mysterious glitches.
There’s regretfully no easy answer if your video editor doesn’t behave as it should but making your way through this checklist might resolve your particular problem.
- New to editing? Try the best video editing software for beginners
Steve has been writing about technology since 2003. Starting with Digital Creative Arts, he's since added his tech expertise at titles such as iCreate, MacFormat, MacWorld, MacLife, and TechRadar. His focus is on the creative arts, like website builders, image manipulation, and filmmaking software, but he hasn’t shied away from more business-oriented software either. He uses many of the apps he writes about in his personal and professional life. Steve loves how computers have enabled everyone to delve into creative possibilities, and is always delighted to share his knowledge, expertise, and experience with readers.
