How to password-protect a Mac folder
Never worry again whether your important files are protected.

Sign up for breaking news, reviews, opinion, top tech deals, and more.
You are now subscribed
Your newsletter sign-up was successful
You almost certainly already know the importance of regularly backing up your computer in case of hardware failure or other issues. What’s less emphasized are tools you can use to protect your most important files in real-time through passwords and other means.
Whether it’s from the annoying co-worker with too much time on their hands or the would-be criminal who could steal your computer, there are ways to protect your files better. These include built-in solutions to ones from third parties.
Each focuses on providing better ways to protect folders rather than individual files. The reason? Once you have a folder protected, adding and removing files is far easier. Among our favorite solutions are those that follow.
- You should also consider how to encrypt files and folders on your Mac.
Steps for better protecting your Mac files
- The macOS Disk Utility makes it possible to password-protect folders on your computer. Although the setup process for Disk Utility is somewhat tedious, it gets the job done.
- Third-party solutions bring additional features to the table. Many are free (or freemium), while others require a one-time purchase or subscription.
Tools and Requirements
- To better protect your Mac files, all you need is your computer with an internet connection.
Step by step guide to using the macOS Disk Utility
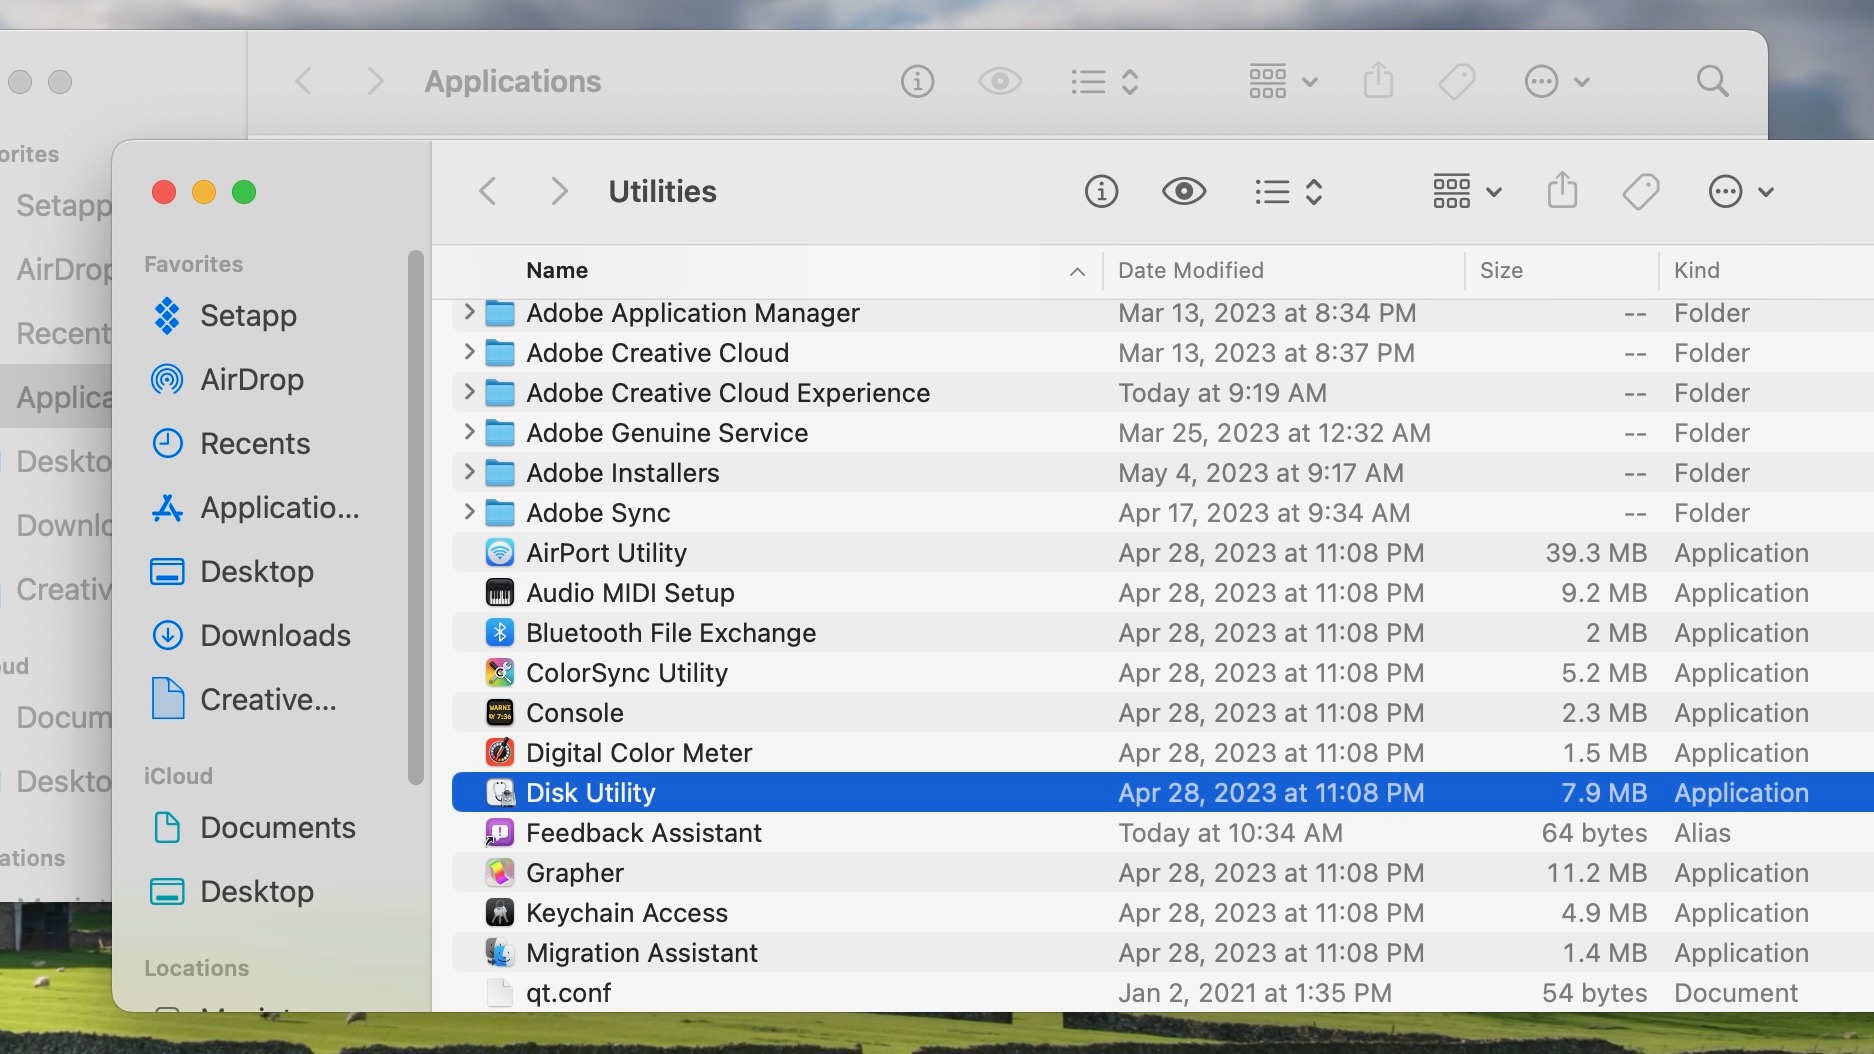
1. Go into the Disk Utility

To get started, choose the Applications folder on your Mac. Next, click on the Utilities folder. From the list, select Disk Utility.
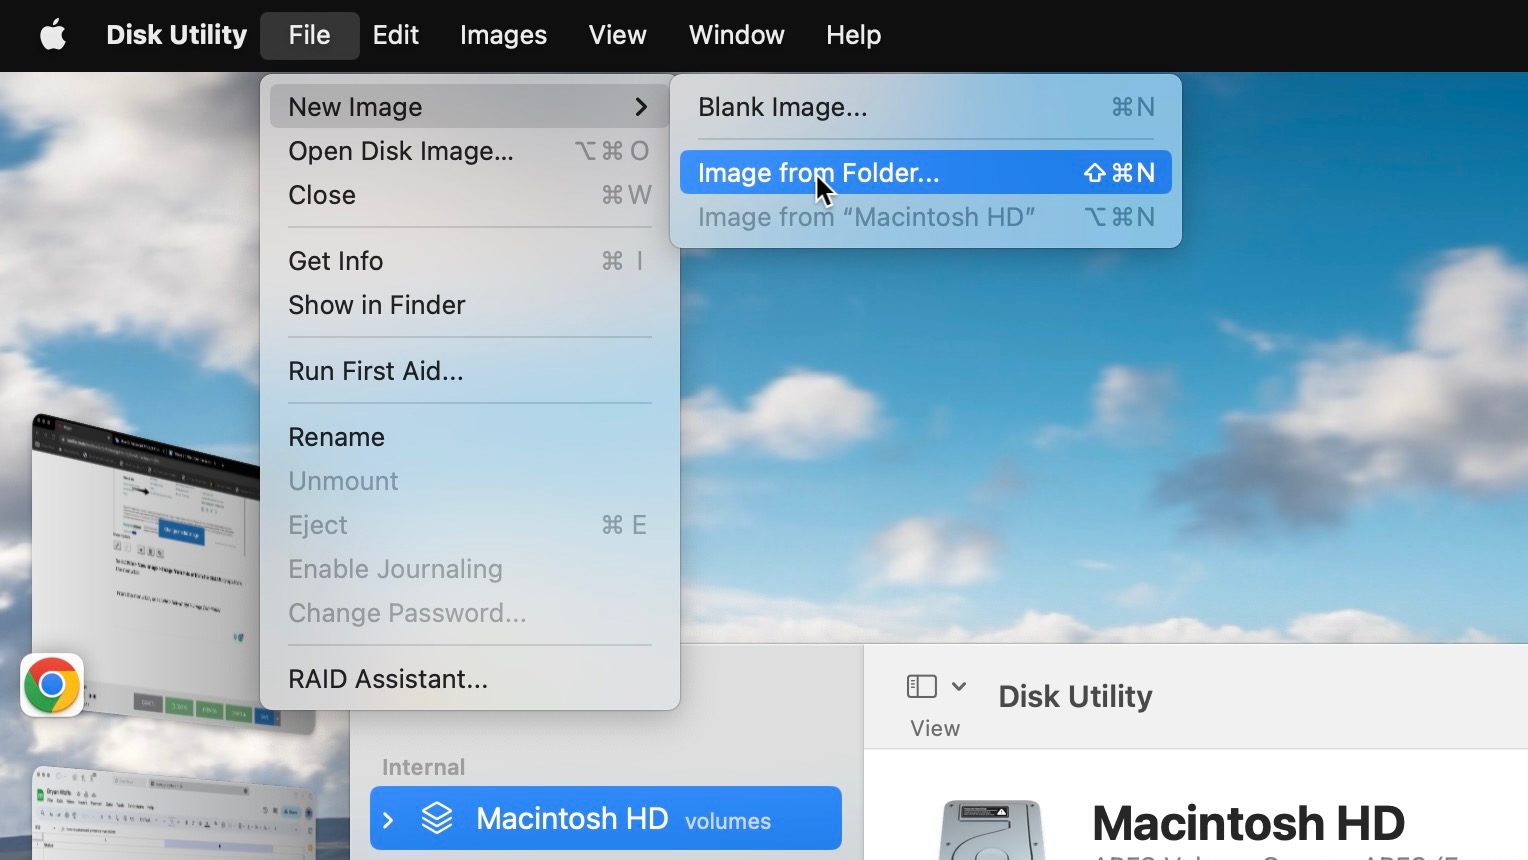
2. Make an image

Select File > New Image > Image from Folder from the Disk Utility app from the menu bar.
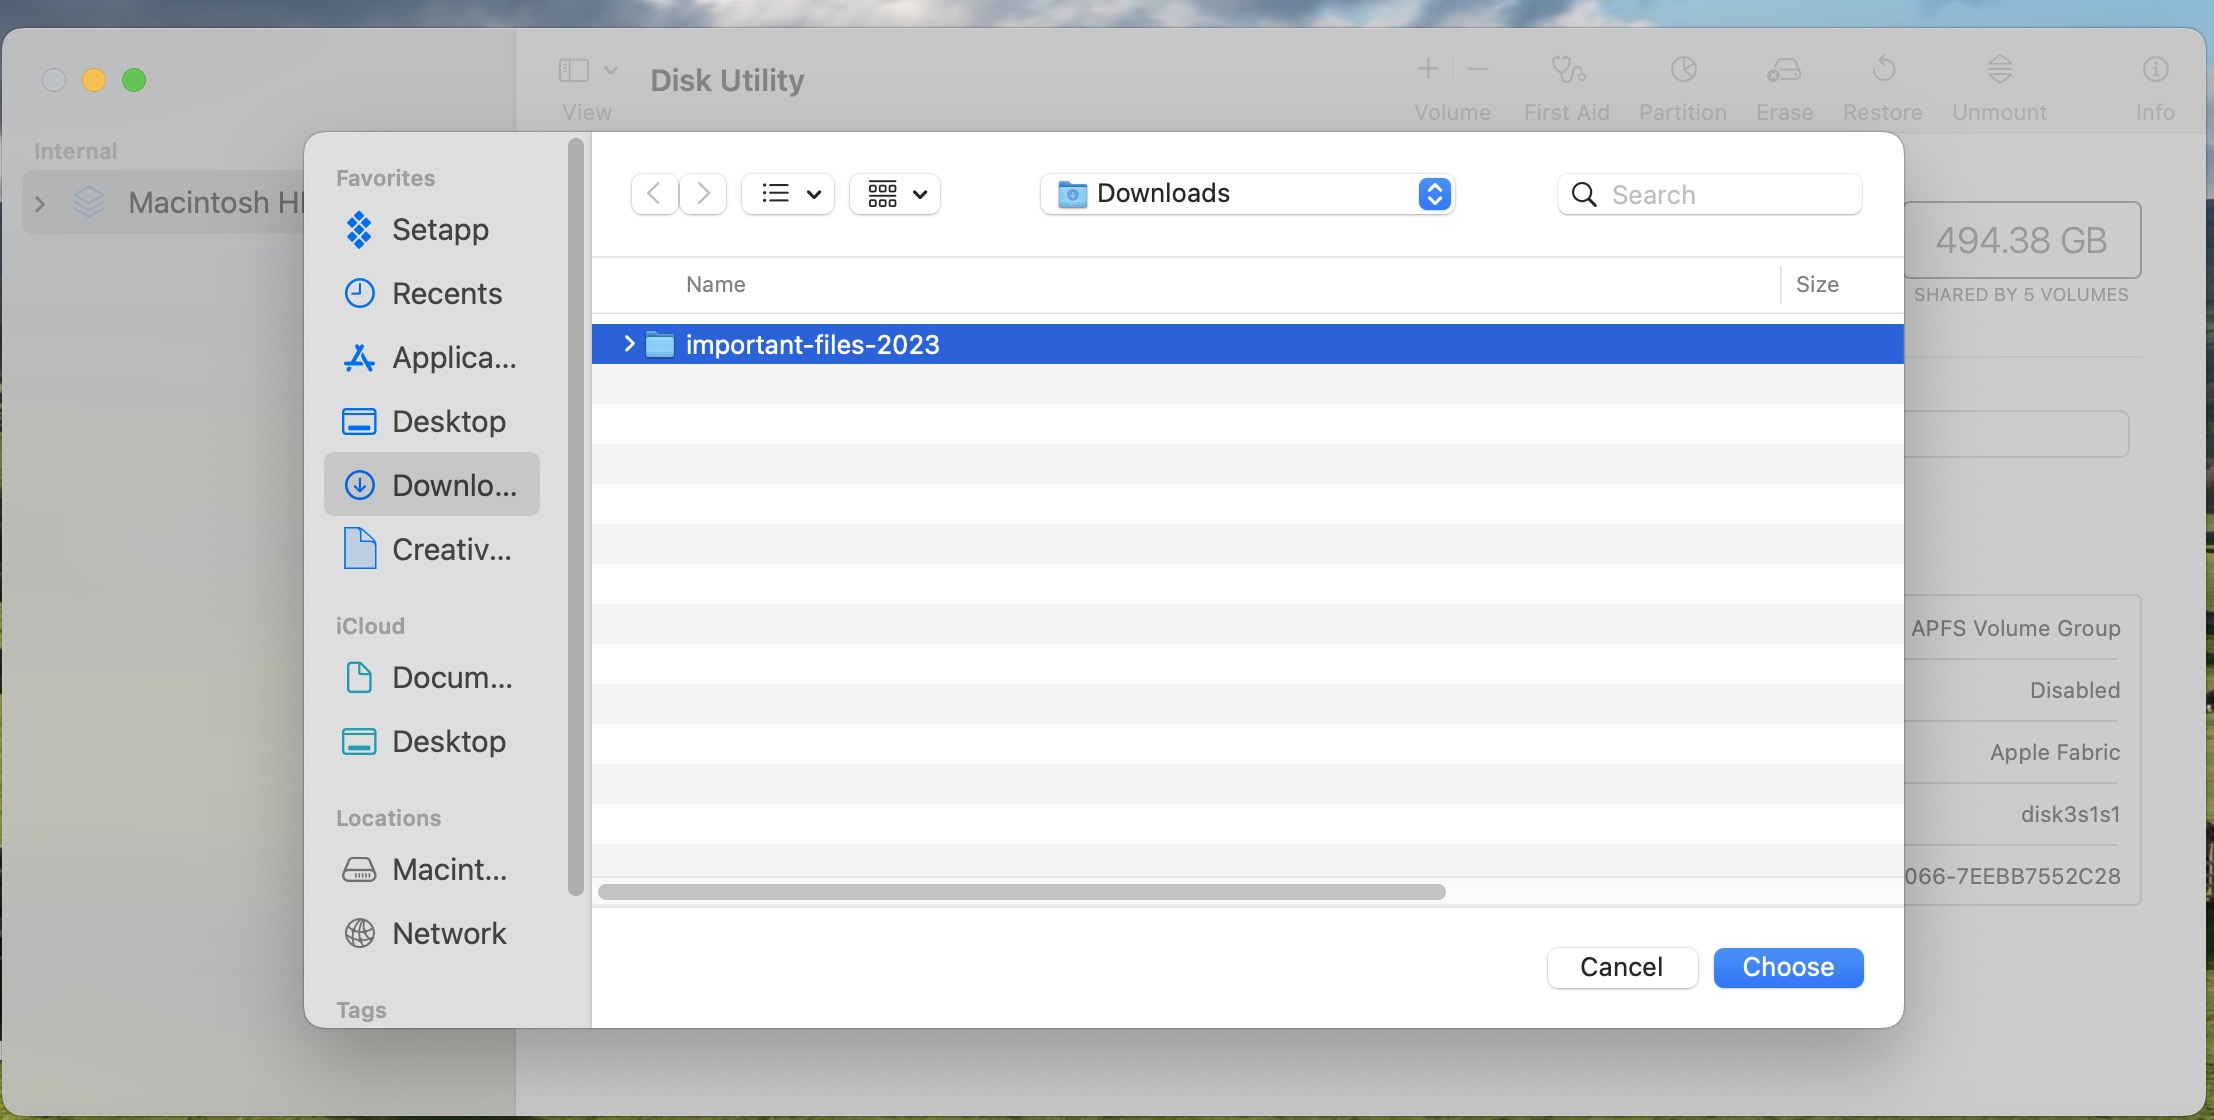
3. Choose your folder

Find and choose the folder already on your Mac that you wish to password-protect. Once you do, select Choose.
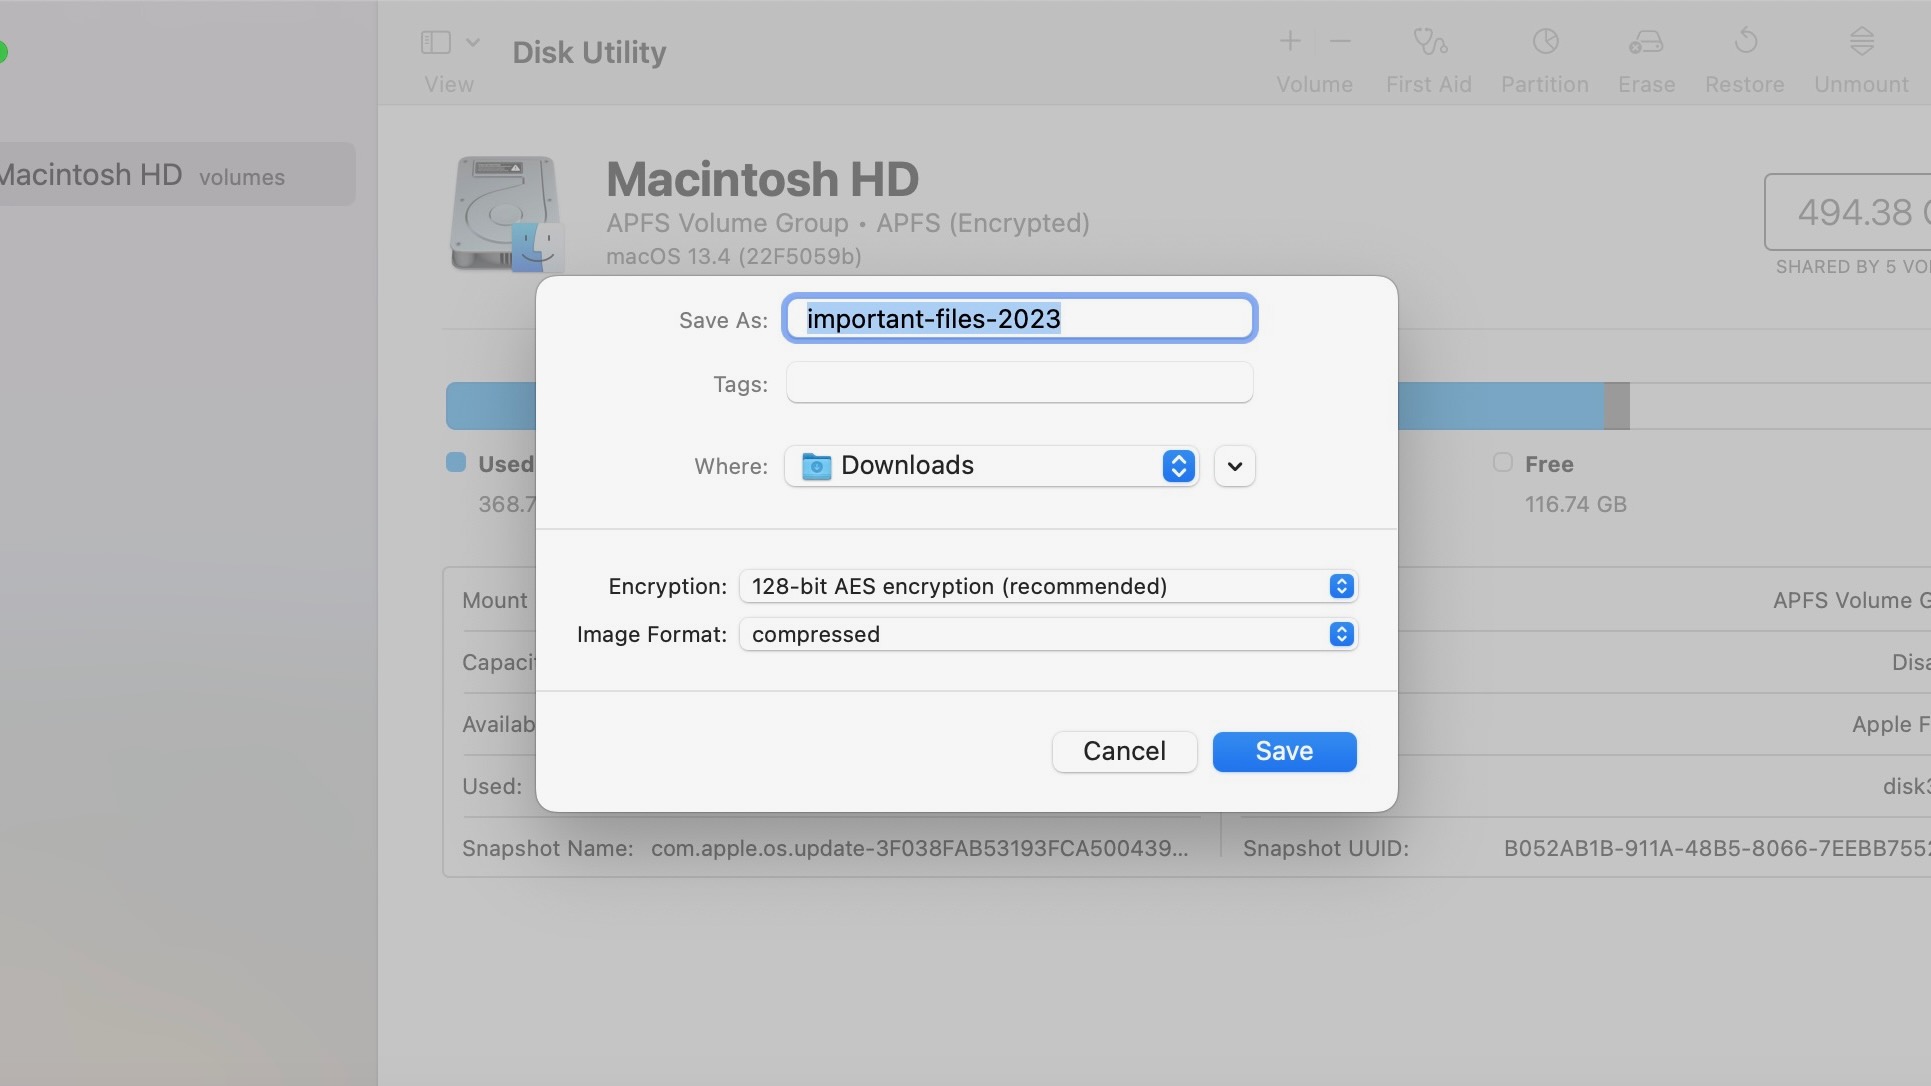
4. Save password protected folder

Type the name of the protected folder in the provided box. You can also choose the folder's location on your Mac as needed. Then, select between 128-bit and 256-bit AES encryption from the Encryption dropdown menu. For most 128-bit encryption is fine.
Enter, then re-enter a password for your folder. Select Choose. You can also click on the key icon and have your Mac create a strong password. After that, select Choose.
Using the Image Format dropdown menu, select read/write. Click Save. From the main Disk Utility screen, click Done to finish the process.
Double-click the .dmg file to open the locked folder, then enter your password. Once this password is added, you can remove files and folders from the protected disk image.
FAQs
Are there other password-protecting solutions in macOS?
Beyond Disk Utility, there are other native password-protect solutions on macOS. These tools are only available for native macOS apps and only involve protecting individual files, not folders.
First is password protection in the Apple Pages, Numbers, and Keynote apps. To get started, open the file you wish to protect. Next, select File > Set Password, then follow the on-screen directions.
You can also password-protect messages in the native Notes app on macOS. To do so, right-click on the note on the left side of the screen. Select Lock Note. Enter a password, and select Set Password.
How do I password-protect Mac folders using third-party tools?
There are a handful of third-party apps that you can use to protect your Mac folders better. Two of these, Encrypto and VeraCrypt, are free, while others, such as Concealer, Data Guardian, and AppCrypt, require a purchase. The freemium Folder Lock is another option.
Each solution above offers at least bare-bones password protection for your Mac folders. However, the premium choices offer bonus features such as multiple encryption options, password generators, backups, and more.
For example, the well-reviewed VeraCrypt is available for Windows, macOS, and Linux. You can use it to create a virtual encrypted disk, encrypt an entire partition, or the operating system itself.
How do I create a secret folder on my Mac?
You should also consider hiding an important folder on your Mac. Under this scenario, no one will see the folder (and its many files) in the first place. To get started, you'll want to open Terminal on your Mac, then type "chflags hidden." Drop the folder you wish to hide onto Terminal, then press the Return key. To unhide the folder, replace the command " chflags nohidden" above.
What about encryption?
Apple offers several different macOS, letting you encrypt your entire Mac or individual files or folders, and we'll show you how in this guide.
Encryption involves scrambling your data, rendering it unreadable without the secret key, password, or portable RFID chip for access.
Final thoughts
Protecting your Mac files isn't just about keeping a backup copy nearby. It also means adding a layer of protection so wandering eyes can't see your files. Apple's Disk Utility is a free option for password-protecting folders on your Mac. Once you use the tool, you can add and remove files and folders from this location anytime. Of course, for an outsider to get inside, they must enter the password.
Third-party solutions are also available. At a minimum, these also make it possible to password-protect folders. Some, however, also offer extra features — at a cost. Among these are automatic backups and additional ways to add authentication.
Whatever path you take, it's important to remember how you protected your file and kept this information offline. For example, if you don't know how to unlock a protected folder, you'll be out of luck; Apple and third-party providers do not have this information.
See also the best free password managers and best internet security suites.
Sign up to the TechRadar Pro newsletter to get all the top news, opinion, features and guidance your business needs to succeed!
Bryan M. Wolfe is a staff writer at TechRadar, iMore, and wherever Future can use him. Though his passion is Apple-based products, he doesn't have a problem using Windows and Android. Bryan's a single father of a 15-year-old daughter and a puppy, Isabelle. Thanks for reading!
