TechRadar Verdict
The Mate SE gives a bit of a mixed message, with its marketing material highlighting that it's an 80 Gbps hub. However, unless you're using this with a Thunderbolt 5-equipped Mac, you're more likely to see 40 Gbps. Internally with two M.2 SSDs installed, the drives are impressive, and the Mate SE look particularly neat when purchased alongside the SER9 Pro.
Pros
- +
Massive storage expansion
- +
Fast data transfer
- +
Compact docking system
Cons
- -
Designed for use with SER8 and above
- -
More expensive than other docks
- -
80 Gbps marketing is confusing
Why you can trust TechRadar
Beelink Mate SE: 30-second review
The Beelink Mate SE has been designed for use with the Beelink SER8, SER9 and SER9 Pro, the latter of which I've been using to test the Mate SE. It can also equally be used with any USB Type-C-enabled device, and if you want to see the maximum speeds that it's capable of delivering, you can even use it with one of the latest Thunderbolt 5-equipped Macs.
The design is neat, and getting started is exceptionally easy. The first step is to install the SSDs into this barebones hub. To do this, you simply pull away the two rubber feet on the base, undo four screws, remove the base, then unscrew the heatsink and fan, pop in two M.2 SSDs, then screw it all back together. The Mate SE and the SER9 Pro are then connected using the short cables provided.
Once the machine is booted up, the drive will then appear as another drive on your system with those two M.2 drives fully accessible. Meaning that if you've already maxed out your SER8 or 9 machine and you want more storage, you can add another 16 TB of ultra-fast storage.
The other thing that the dock does is add a few additional ports, including LAN, USB-A, and a very handy SD card reader slot.
There are a couple of things that are slightly confusing about the Mate SE. When you look over the box, everything seems straightforward, as soon as you check online, you see highlighted everywhere that this is an 80 Gbps device, which is far in excess (that's double) the PCIe 4.0 M.2 SSDs that you can install, and of the USB 4 port on the SER9 or SER8.
However, unlike many of the best docking stations I've reviewed, the Mate SE is equipped with the ability to reach those speeds with machines equipped with Thunderbolt 5, such as the latest range of Macs.
So, saying the 80 Gbps is just a little bit of marketing spin, considering most people will be looking to purchase this alongside their SER9 or SER9 Pro, and when it comes to it, actually, what you do have is a very proficient and very neat dock for the SER series of mini PCs.
Sign up to the TechRadar Pro newsletter to get all the top news, opinion, features and guidance your business needs to succeed!
Once the two SSDs were installed and using the neat U-shaped cable connected to the mini PC, the rest was all straightforward. The drive essentially appears within your PC interface, and as you connect further drives or monitors to the dock, they're instantly recognised.
When it comes to outright performance, it might not meet the 80 Gbps when used with the SER9 Pro, but actually, what that connection does enable is ultra-fast transfer rates from those two internal SSDs. They only need to be PCIe 4.0, not the newer and more expensive PCIe 5.0. You still maintain ultra-fast transfer rates, which makes it an ideal option if you're using the machine for content creation.
As a neat docking solution, the Beelink Mate SE is impressive. I like the fact that you can boost the internal storage of the whole system from the 1 TB the SER9 Pro arrived with, to a colossal 16 TB, and then with the Mate SE, another 16TB, giving you 32GB of ultra-fast storage potential.
So, despite the slightly mixed marketing messaging, this is an exceptionally good docking option, and while it's designed for the SER machines, it works equally well with all PCs. Considering the price when you buy the SER9 Pro along with the dock together, it makes an exceptionally good value as well.
Beelink Mate SE: Price and availability
- How much does it cost? $139
- When is it out? Now
- Where can you get it? Widely available
The Beelink Mate SE is available as a barebone system, so essentially you get the dock empty with the option to install your own M.2 SSD to whatever capacity you want. The price of the barebone system is $139 (roughly £139) and can be purchased directly through the Beelink website as well as from many larger online retailers.
If you just want to use this as a dock, then it is an expensive option, but everything you need to get up and running is included in the box, essentially the linkage cable. If, however, you do want to install your own M.2 PCIe 4.0 modules, then you'll need to factor these into the cost as well.
- Value: 4 / 5
Beelink Mate SE: Specs
Storage: 2 × M.2 2280 PCIe 3.0/4.0/5.0, up to 16 TB total
Ports: USB‑C 80 Gbps host input, USB‑C PD in, USB‑A 3.0 ×2, SD 4.0 reader, 2.5 GbE LAN
Connectivity: USB‑C 80 Gbps, USB‑C PD, USB‑A 3.0, SD 4.0, 2.5 GbE
Size: 135 × 135 × 18 mm
Accessories: Includes two 80 Gbps USB‑C cables, a user manual
Beelink Mate SE: Design
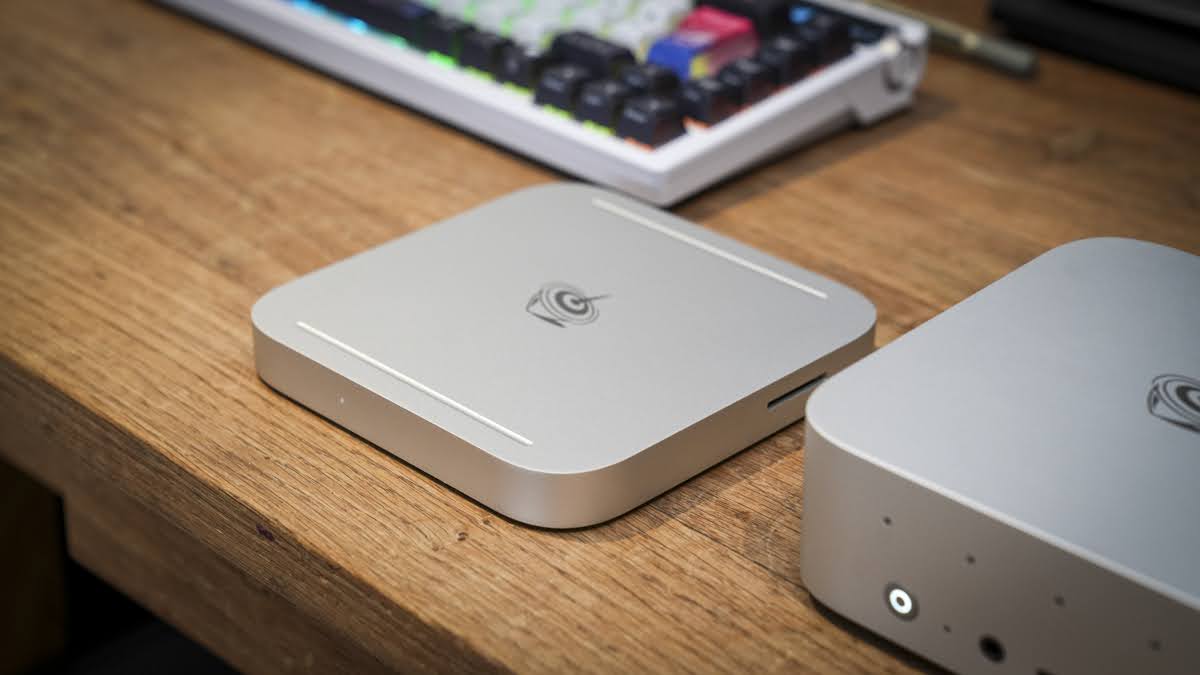
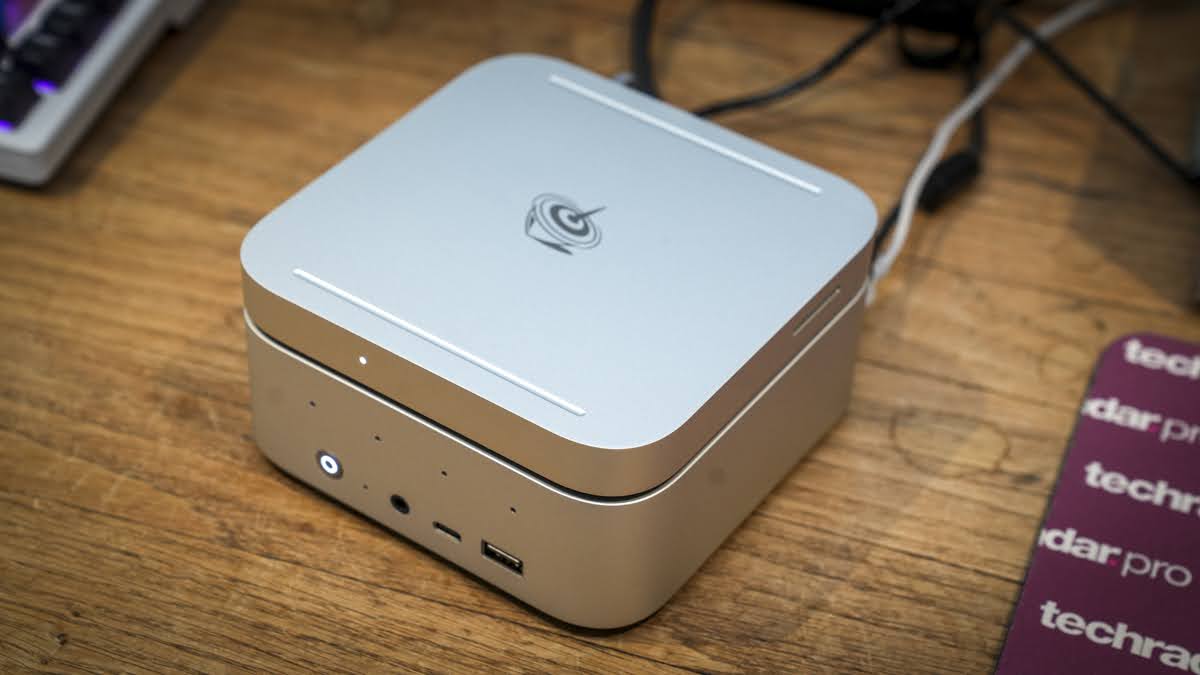
As a docking station that has been designed to blend seamlessly with the SER8 and SER9 mini PCs, the size, shape, and colour match perfectly with those mini PCs. As such, the Beelink Mate SE is a slimline square unit made from solid aluminium, which gives a good feel. Yet it's minimalistic and extremely stylish, reflecting the mini PCs it's designed to be used with.
When it comes to dimensions, it measures in at 135 × 135 × 18 mm, so it really is very slimline and discreet. As with the size, the weight before you install any drives into the system is light at 284 g.
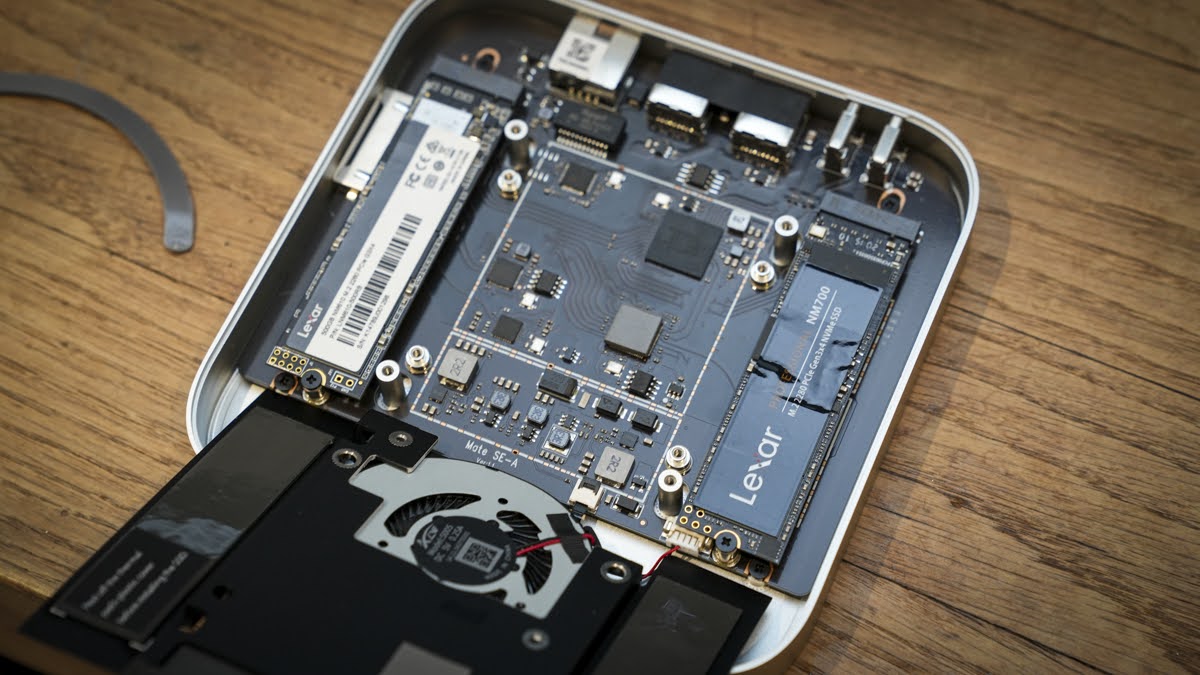
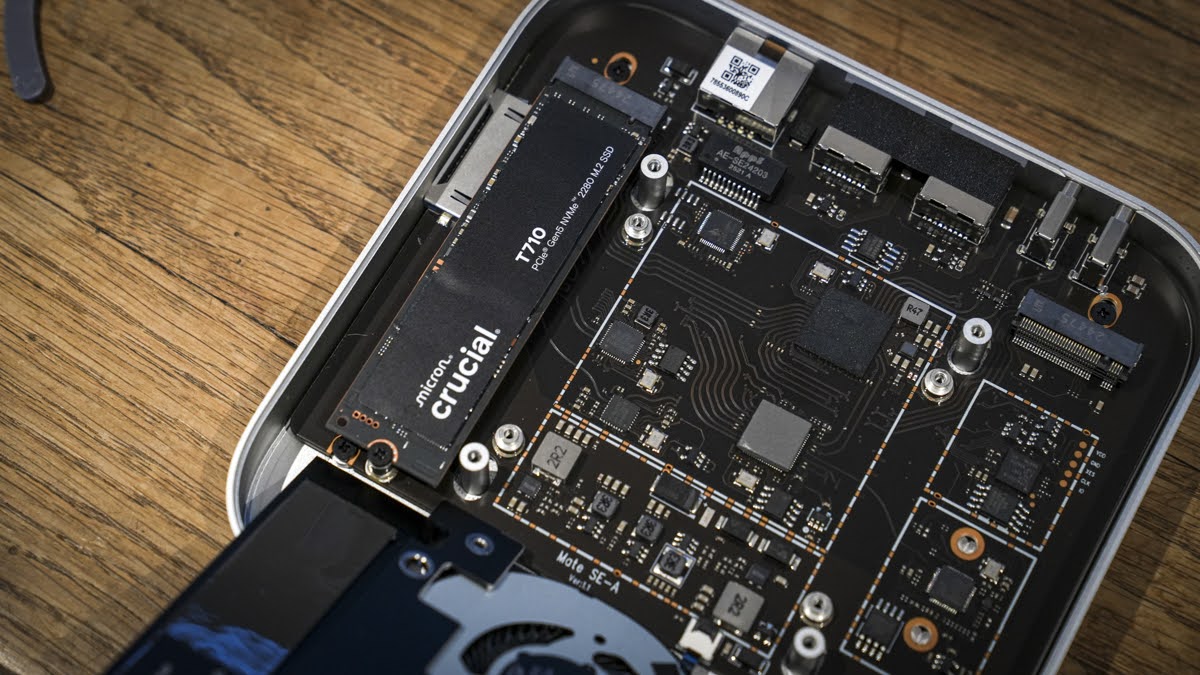
Inside the electronic layout is well-thought-out, with heatsink and fan covering the installed M.2 SSDs once installed. This process of installation is straightforward. To access the two slots, you need to pull away the two rubber feet on the base, remove the four screws, and then the whole base plate can be lifted up and away, being careful not to disturb the single connector to reveal the heatsink.
The heatsink and fan unit are again held in place with four screws. Once this is lifted away, the 2 M.2 slots are revealed, and you can quickly place in your choice of M.2 2280 SSDs, then screw everything back together.
Essentially, just think of this as an SSD enclosure at this point, so once everything is together, you use one of the short cables to link the SE in with the SER9 Pro, and power everything on. The two drives, once installed, will be ready for formatting with whichever system you wish.
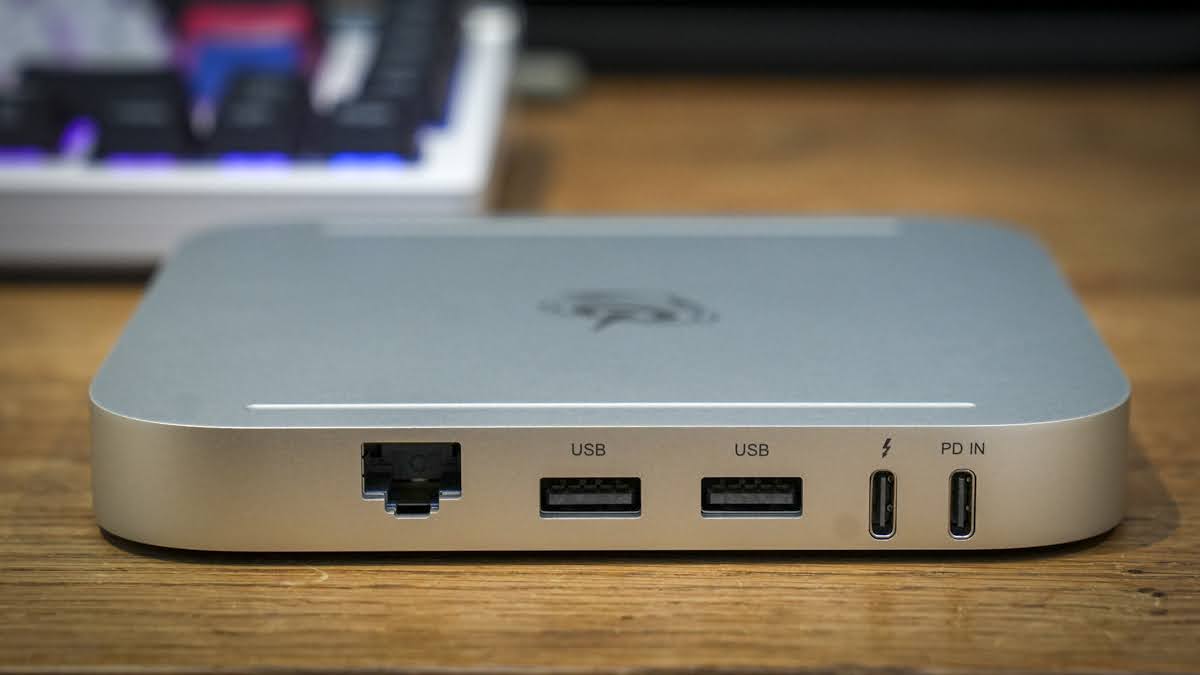
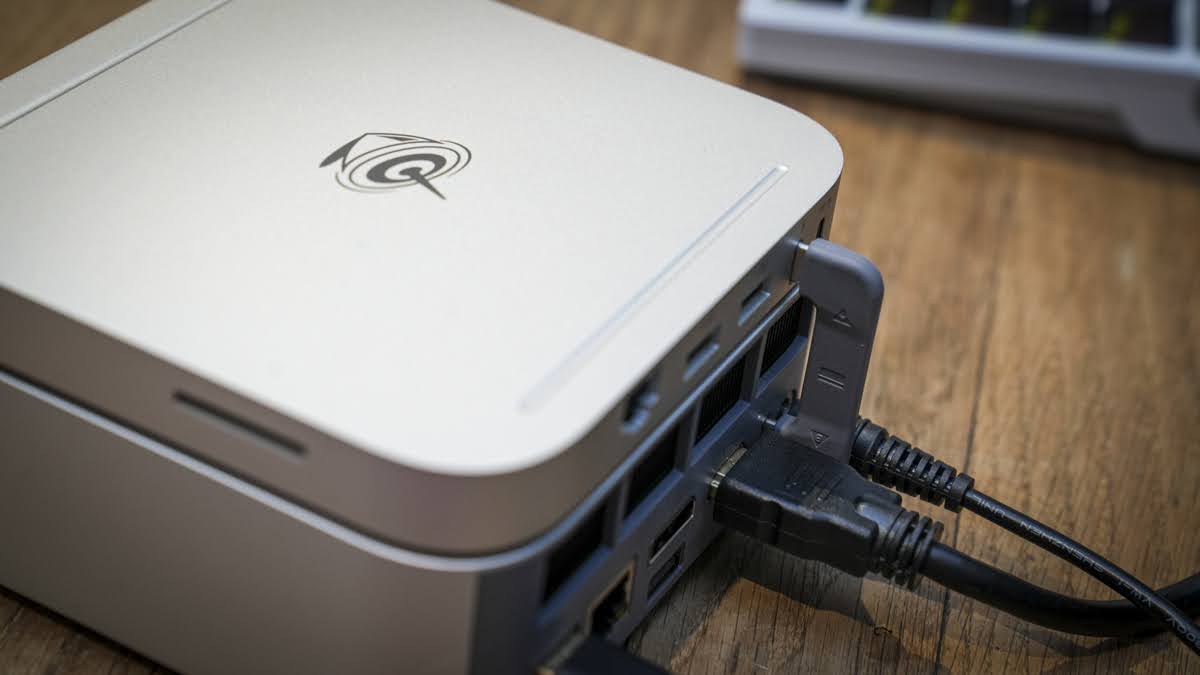
On the back of the dock are two USB ports. One is the ultra-fast connector, positioned so the short USB cable provided can link perfectly into the USB port on both systems. What's interesting here is that there are two cable options, one if you want to mount the unit on top of the mini PC, and another if you decide to mount it below. Each of the cables provided is a perfect length for whichever choice you make.
One other point about the ports on the back is the secondary USB-C port that enables PD power. So, if you do find that some of your accessories are drawing too much power from the system, then you can plug in a secondary cable into a power supply just to give the system a boost.
Once the hard drives are formatted and installed, they simply appear in your OS as any other internal drive would. Likewise, all the ports around the machine act as if they were integral parts of the computer.
Otherwise, taking a look around the body, on the back, there's a 2.5 Gbps Ethernet port, a USB-A 3.0 port, and a USB-C 80 Gbps port (used for the PC connection). Next to this is a power input port. This is for the power supply only and isn't a data port. On the front of the machine is a single white LED that shows the status of the dock, just so you know the power is being provided. Finally, on one of the sides is an SD 4.0 card slot, which is very handy.
- Design: 4.5 / 5
Beelink Mate SE: Features
The design and style of the Beelink Mate SE are simplistic, yet the concept behind it and the technology are impressive. It makes a superb companion if you do have one of the SER8/9 machines, although it is fully compatible with all PCs and Macs as well.
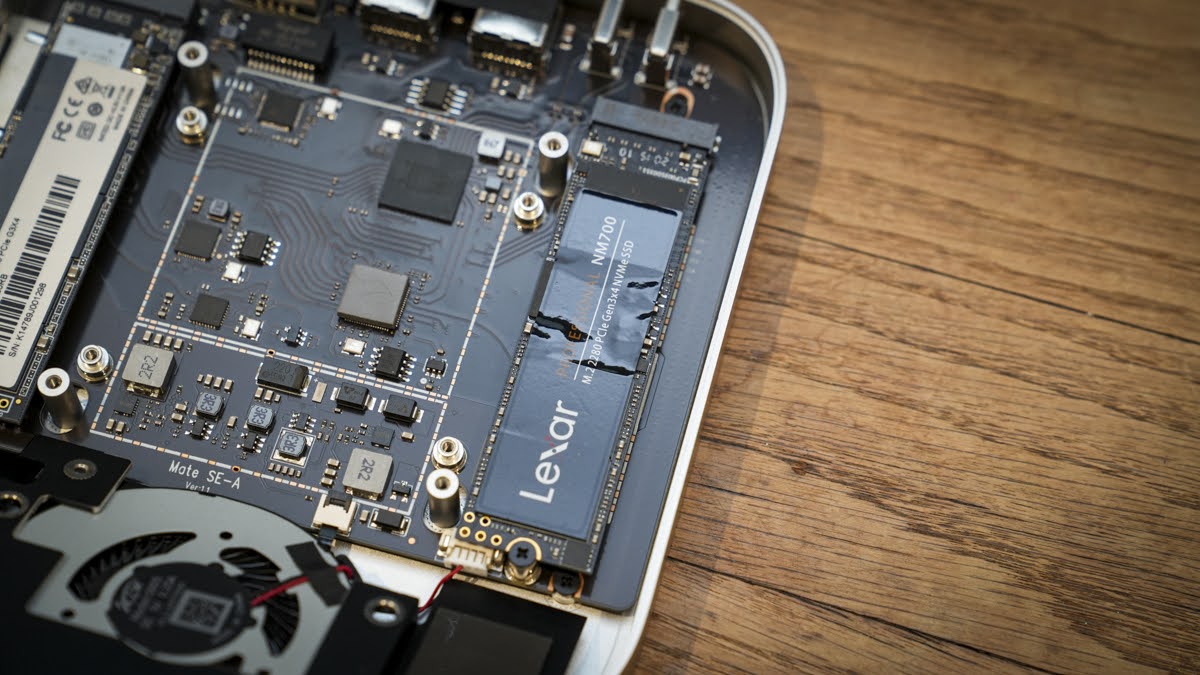
Essentially, it's a PC hub designed to sit neatly above or below one of those mini PCs. Alongside a decent set of additional ports, it also features 2 × M.2 2280 PCIe 4.0 ×4 SSD slots, which support up to 16 TB of additional storage capacity.
On the back, there are several ports, including a USB-C port that connects to the machine. Through the test, I wasn't able to get 80Gbps transfer rates as I don't have one of the newer Macs, and while my PC does have Thunderbolt 5, the speeds still seemed limited.
One other surprise is the secondary USB-C, and this is for power input only. So, if you have other accessories plugged into the dock and it starts to struggle with the power input provided through the USB-C connector to the machine, then you can give the whole unit a power boost through a secondary cable.
One of the features that is quite handy if you work in a studio or office is the additional LAN 2.5G port. For all SER8 machines, this will give you a boost in that network connection, and with the newer SER9 and 9 Pros, you'll get that additional LAN port for connectivity, so you'll be able to bridge networks or plug directly into a NAS system.
If you do work in the creative sector and use any modern camera, then it'll probably utilise the SD card format. In that case, it's really nice to have an SD card 4.0 slot on the front so you can quickly offload your images onto that huge potential internal storage.
On the back, there are also two additional USB-A ports, although these are only USB 3.0, so they offer limited transfer rates. Still, they're good for attaching slightly older accessories and are useful for additional control desks or even webcams.
Impressively, on the inside, because you can have two potentially 8 TB SSDs, Beelink has included plenty of cooling. The heatsink and fan cover both SSDs, along with most of the electronics in the system. Even during testing, when I was really pushing the internal SSDs with video editing, there didn't appear to be any sustained thermal throttling, showing that there's enough cooling within the system, despite there being no fans, to keep those SSDs cool under substantial load.
- Features: 4 / 5
Beelink Mate SE: Performance
CrystalDiskMark Read: 3368.86 MB/s
CrystalDiskMark Write: 3102.16 MB/s
AS SSD Read: 2876.07 MB/s
AS SSD Write: 2520.34 MB/s
ATTO Read: 3150 MB/s
ATTO Write: 2890 MB/s
AJA System Disk Test Read: 2866 MB/s
AJA System Disk Test Write: 2677 MB/s
Getting started with the Beelink Mate SE was relatively quick and straightforward, peeling away the rubber feet, installing the SSD under the heatsink, then bolting everything back together. Once done, I had to follow the usual OS prompts to format the new SSD before it was ready for use.
One aspect of the setup that I liked was the inclusion of the two USB cables, each with the perfect length and right-angle connectors to link into the machine when you place the Mate SE under the SER9 Pro or above.
Once connected, power is also supplied by that single USB cable; however, as a fail-safe, if you have an accessory that draws a little more power than expected, then there is the option to connect a secondary USB cable to supply direct power to the unit. However, in this test, I couldn't see why this was needed, as the only other major USB ports were USB 3.0, and I didn't have any accessories that seemed to draw enough power to cause any issues.
Once everything was assembled, the setup looked very neat, and one of the things I liked was the fact that there's an SD card reader on the side. So, you can quickly pop in your card from your digital camera, and then it appears as a drive, so you can copy all your files over to one of the two internal SSD drives. This essentially expands the system storage and creates a mini PC with a very neat and large storage solution.
Through this test, I used several applications, including Adobe Photoshop and Premiere Pro, to edit images and video. I started off by copying video content shot on the Sony A7 Mark IV over to the internal SSDs directly from the SD card inserted into the Mate SE. For the images, this was absolutely fine, but for the video, I had used a CFexpress Type A card, so an external reader was required.
This is the first oddity about the system: there is only one USB-C port, and this is used to connect the Beelink SER9 Pro with the Mate SE. That only leaves the slower USB 3.2 Gen 2 Type-C port on the front of the machine, which is faster (10 Gbps), but nothing like as fast as USB4. So it seems a bit of a shame, you have all of the storage and speed, but for the likes of the faster CFexpress Type A (and for that matter, Type B) cards, those transfer speeds will be limited.
That said, the transfer rates were still impressive, and with the huge amount of storage internally provided by the Mate SE, there was plenty of room for both images and 4K S-Log3 footage I had shot.
Getting started with Adobe Photoshop and opening up a few images in Adobe Bridge demonstrated just how fast that connection between the Mate SE and the SER9 Pro was, with the images rendering their thumbnails quickly, and opening, saving, and closing files was nice and quick, just as if you were doing exactly the same process using the SSDs inside the SER9 Pro itself.
Switching over to Premiere Pro and again, whilst those video files were stored on the Mate SE rather than the internal storage of the SER9 Pro, there was absolutely no difference in the speed at which timelines rendered and the smoothness of video playback.
The Mate SE also features a 2.5 GbE LAN connection, which, when using the SER9 Pro, initially seemed a little redundant. However, if you have the experience and, of course, knowledge, you can use this to bridge networks or create a dedicated line for a NAS or VM. In this test, I connected it up to my Ugreen NAS system, and it all seemed to work perfectly well.
The reason for wanting the Beelink Mate SE is the ability to expand the storage of the SER9 Pro, especially if you work with videography, photography, or any creative industry. Checking out the transfer rates between the Mate SE and the main machine just highlighted how fast that connection is, with the CrystalDiskMark score showing read speeds of 3368.86 MB/s and write speeds of 3102.16 MB/s, more than enough for most 4K and image editing requirements.
By the end of the test, I was impressed by the aesthetics, ease of setup, and the ability to install up to 16 TB of internal SSD. When it comes to a clean, neat solution for the SER8, SER9, and SER9 Pro, the Beelink Mate SE seems like a very easy and straightforward way to add more storage and a few additional ports, although the choice of port type is a little disappointing.
- Performance: 4 / 5
Beelink Mate SE: Final verdict
There are many things to like about the Beelink Mate SE, primarily the ability to expand the storage of your Beelink SER9 Pro. For example, you can boost the system's memory up to 32 TB, 16 TB in the machine and another 16 TB in the Mate SE.
Setup and use are extremely easy, with just a single connector needed to connect the two machines. The position above or below enhances the aesthetics and ease of use. So on the surface, at least, if you own a Beelink SER8, 9, or 9 Pro, this seems like a very good barebone solution with the ability to install whatever SSDs you require.
However, there are a few things about the Beelink Mate SE that I found a little puzzling. The first is that the marketing material focuses on 80 Gbps, yet all the technology is USB4 when connected to the Beelink SER9 Pro, which maxes out at 40 Gbps. It's only when you connect to a compatible Mac that you'll see the full potential.
Then there's the array of ports available. It's nice to have the addition of the SD card reader and the fact that you get two rather old USB 3.0 Type-A ports and an additional 2.5 GbE LAN port. Then there's the USB-C port, which is taken up with the connection between the Mate SE and the SER9 Pro.
However, there is an additional USB Type-C port. Initially, you think this is great, another ultra-fast port for you to utilise to connect additional storage or other accessories. However, this port is only for power delivery and not data, so for the most part, it will just sit empty.
Though it is more niche as an external SSD docking caddy, it does work exceptionally well. And if you have one of the Beelink mini PCs that this is compatible with, then it makes absolute sense. For anyone else, however, there are cheaper solutions out there. Or, if you're after a dedicated dock, there are options that will supply you with the latest ultra-fast connections.
Should I buy a Beelink Mate SE?
Value | A little expensive for a dedicated dock, but a very neat solution with the right mini PC | 4 |
Design | Used with the compatible Beelink mini PCs, the SE looks fantastic | 4.5 |
Features | If you focus purely on the dual SSD compatibility and storage expansion, the features are well balanced | 4 |
Performance | Transfer rates are solid using the two internal SSDs, though port choices are limited | 4 |
Overalls | A great upgrade for the Beelink range of compatible mini PCs, though other options exist for other users | 4 |
Buy it if...
You work with video
You move large files, edit high‑res video or manage large game libraries and need super‑fast storage/transfer.
You own a SER8 or SER9
You have a SER8 or SER9 Mini PC and want to expand storage, upgrade networking, and add a card reader in one hub.
Don't buy it if...
You don't own a Beelink Mini PC.
The Mate SE is really designed for use with compatible Beelink mini PCs. For all other mini PCs, there are far cheaper options.
You expect 80 Gbps
The marketing of 80 Gbps is a little misleading; even using a fully compatible mini PC, you won't see 80 Gbps transfer rates.
For more essential computing, we've reviewed the best mini PCs.
Alastair is a photographer, filmmaker and tech writer who has been working in the publishing industry since the late 1990s. For more than 25 years he has covered photography, video and technology across Future's photography, technology and gaming brands. He runs a photography and video production company and lectures in TV and film. He can usually be found testing mini PCs or prototyping and prop building with the aid of 3D printing.
You must confirm your public display name before commenting
Please logout and then login again, you will then be prompted to enter your display name.
