How to purchase Bitcoins with Bitstamp
Join the cryptocurrency revolution today
In the past two years, the value of the Bitcoin cryptocurrency has shot up nearly 1600%. A single BTC (Bitcoin) is now worth almost four times the value of an ounce of gold.
One of the easiest ways to get your hands on your own BTC is to use a Bitcoin Exchange: these companies help you convert fiat currency (real money) to cryptocurrency (virtual money).
In this guide, we'll focus on Bitstamp, which is one of the most reputable Bitcoin Exchanges. In order to proceed, you'll need a scanned copy of a government issued ID (passport, national ID card, driver’s license) and some proof of address such as a utility bill (issued within the last three months). You'll also need a phone or other mobile device to protect your account via two-factor authentication.
- We show you how to buy bitcoins and how to mine Bitcoins
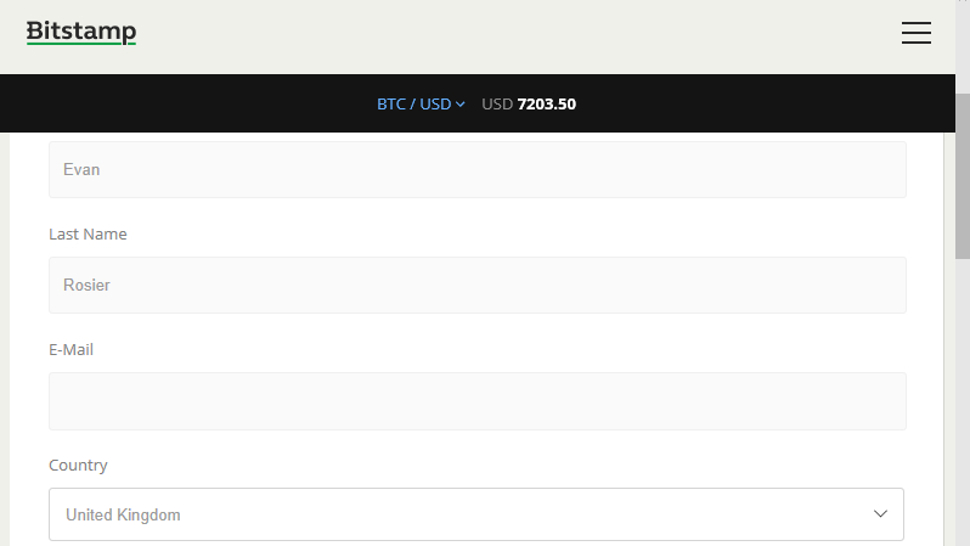
1. Create Bitstamp account
Open your web browser and visit https://www.bitstamp.net. Click ‘Create Account’. A screen will appear entitled ‘Open your Free account’. Fill in the form with your name and email address. Tick the box to agree to Bitstamp's terms and conditions, and click ‘Register’.
You'll see a notification telling you registration is complete and informing you that you'll receive your user ID and password via email. Go to your email and note both the client ID and password for your account. Visit https://www.bitstamp.net again, click the Options button at the top-right and choose ‘Log In’. Enter the relevant username and password details to log in.
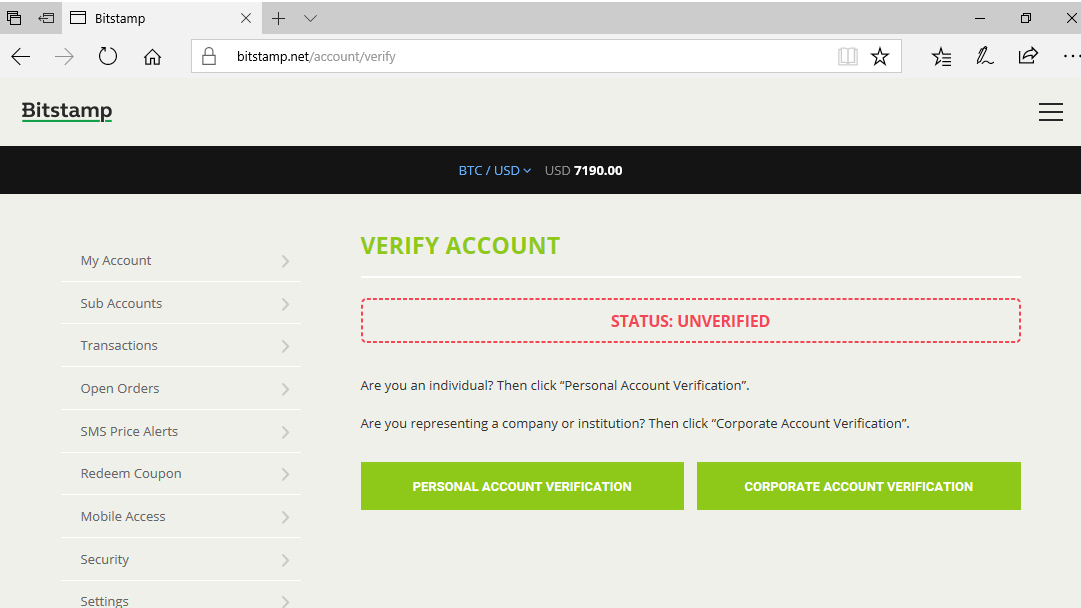
2. Secure password and begin verification
When you first log in to Bitstamp, you'll see a notification saying your password is out of date. Click the link to change your password. On the new screen which loads, enter your current password in the field at the top. Next, put your new password into the fields below. The new password must have at least one lower and upper case character and one digit (for example: ‘Kitchen809’). Click ‘Change Password’ to confirm.
Start the verification process by visiting https://www.bitstamp.net/account/verify. You'll first be asked to choose between a personal and corporate account. If you're a private individual click ‘Personal Account’.
Sign up to the TechRadar Pro newsletter to get all the top news, opinion, features and guidance your business needs to succeed!
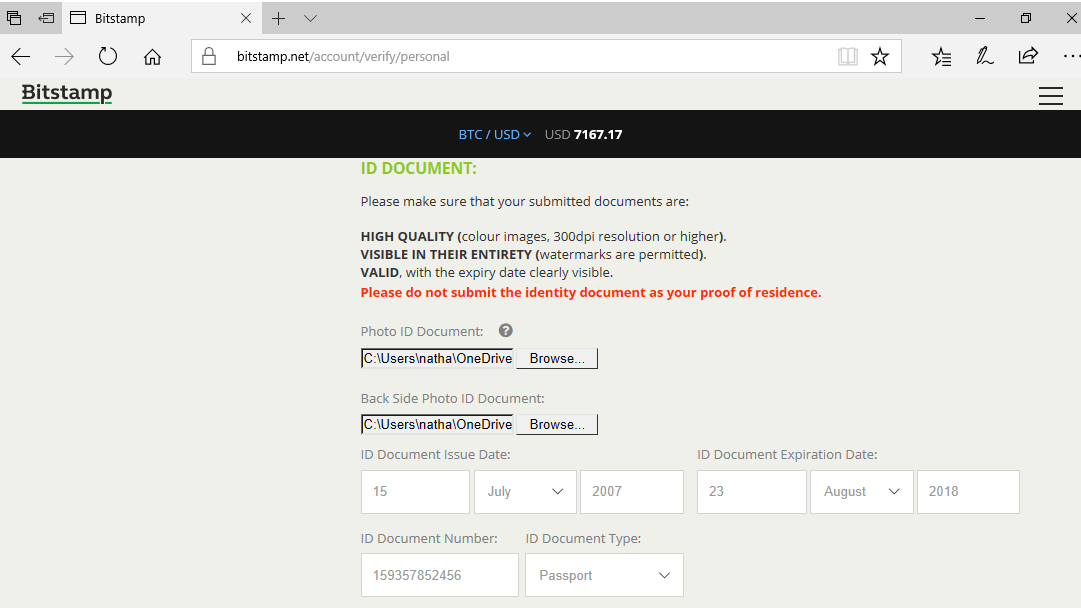
3. Upload your ID
The next verification screen will ask you to enter your name and residential address. Make sure that your name appears exactly as it's written on your ID. Scroll down the page and enter your date of birth as it appears on your ID. You must also declare whether you're a US Citizen or resident for tax purposes. Click no on the radio buttons here if that's not the case, obviously.
Scroll down and click the ‘Browse’ button to upload the image of your ID. Use the fields below to enter the date the ID was issued and when it will expire.
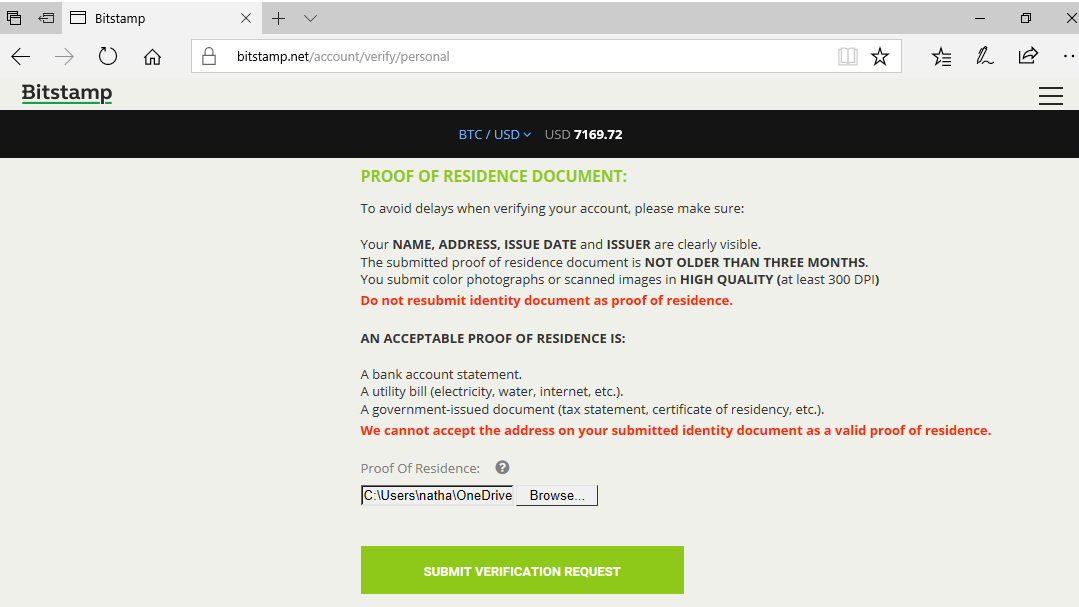
4. Submit verification request
Click the ‘Browse’ button to upload your proof of address. This must be either a bank statement, a utility bill such as a gas bill (not more than three months old), or documentation from your government such as a tax certificate. You cannot use your ID here, even if it shows your address.
Click ‘Submit Verification Request’ at the bottom of the screen. Bitstamp will review the information and documents you provided. If they are valid, your account will be verified in two to three working days. You must wait for this to happen before you can buy Bitcoins. Visit https://www.bitstamp.net/account/verify to check your verification status.
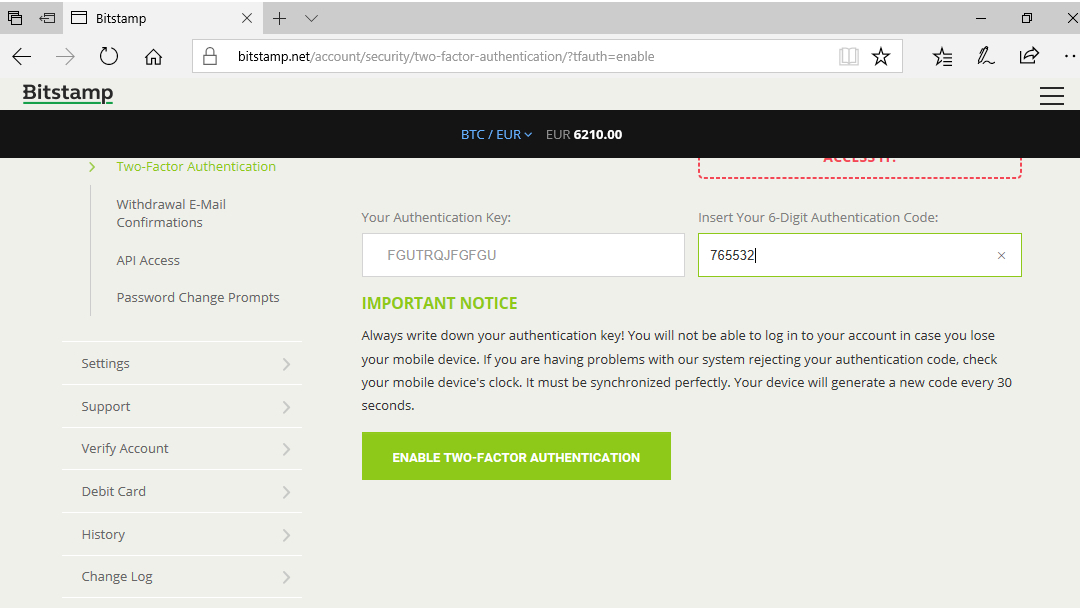
5. Enable two-factor authentication
Enabling two-factor authentication means Bitstamp will request a special code from your mobile device when signing in or processing transactions. To use it, you'll need a suitable app for your phone such as Google Authenticator or FreeOTP, which are free to download on the iTunes and Google Play stores (for iOS and Android respectively).
Visit https://www.bitstamp.net/account/security/two-factor-authentication and click ‘Enable 2 Factor Authentication’. You will see a QR code which you can scan in using your mobile app. Make a note of the security key. Enter the six digit code generated by your app next to the 'Auth key' field, then click ‘Enable Two Factor Authentication’ at the bottom of the screen.
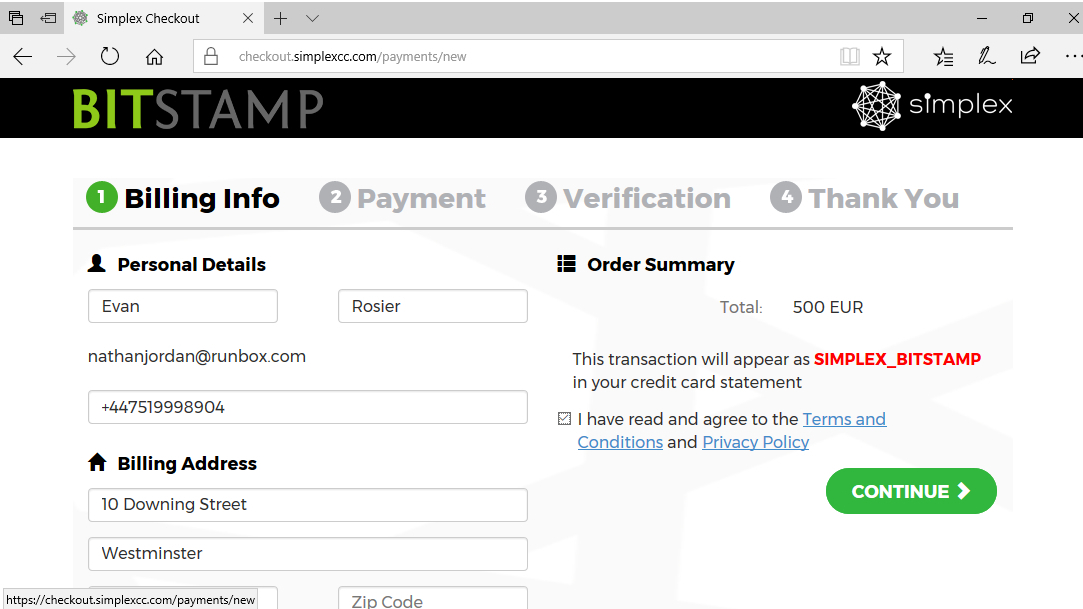
6. Buy Bitcoins with a credit card
If you have a Visa or Mastercard and live in an EU country or the UK, you can purchase Bitcoins instantly using your credit card. To get started visit https://www.bitstamp.net/account/deposit/credit-card in your browser and click ‘Buy’ underneath the amount of BTC you wish to purchase.
Click ‘Continue’ and you'll be redirected to Bitstamp's card processor. Enter your name, mobile phone number and email address here. The processor will send a link to your email address. Click this to continue. You'll also need to enter the four digit code you received via SMS. Click ‘Continue’ to enter your billing address and card details.

7. Deposit funds to your account
If you're unable to use a credit card to buy Bitcoins, you can deposit funds with Bitstamp via your bank account instead.
To get started, visit https://www.bitstamp.net/account/deposit. If you have a SEPA (Single Euro Payments Area) account click ‘EU Bank (SEPA)’ on the left. Otherwise choose ‘International Bank’.
On the next screen, check that your first and last name are correct. Under ‘Account Balance’ choose either EUR or USD. Under ‘Amount’ enter the value of the money you're depositing. Click the green ‘Deposit’ button when you're done. Bitstamp will display the necessary account details and transaction reference number. Make sure to include this when sending funds.
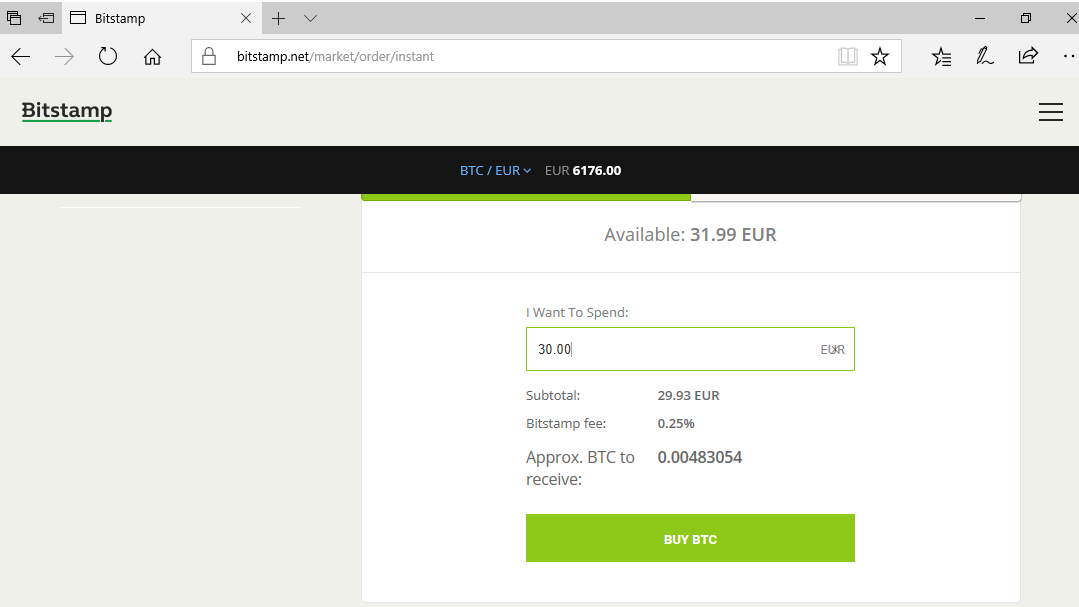
8. Place instant order for Bitcoins
Once your funds are confirmed, the simplest way to purchase Bitcoins is an instant order at the current bid/ask price. As the name suggests this usually results in your purchase going through right away.
To place an instant order, visit https://www.bitstamp.net/market/order/instant. Click ‘Buy BTC’, then in the ‘I want to spend’ box enter the total amount of funds you want to use for buying Bitcoins. This amount includes Bitstamp's fees.
Click on ‘Buy BTC’ underneath to place your order. Once your order is processed, the amount will be added to your BTC balance. Visit https://www.bitstamp.net/account/balance at any time to check this.
9. Place limit order
Bitstamp supports placing more advanced types of orders. These can be helpful if you want to get the best possible value for money.
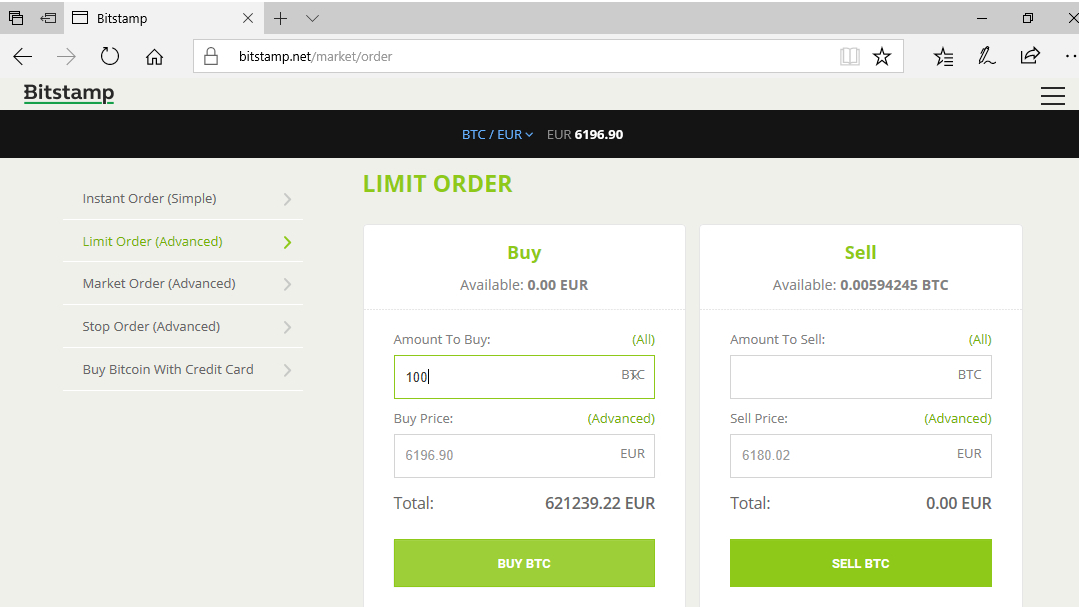
To get started, visit https://www.bitstamp.net/market/order. Click ‘Limit Order (Advanced)’ on the left to place a limit order. In the simplest terms, this involves you placing an order to only purchase when Bitcoin reaches a certain value. Enter the number of Bitcoins you want under ‘Amount to Buy’ and under ‘Buy Price’ enter the price you wish to pay per Bitcoin. By default BitStamp will show the current market rate. Click ‘Buy BTC’ to place your order.
10. Place stop order
Bitcoin is notoriously volatile in terms of its value. You can reduce the level of risk you may be exposing yourself to by placing a stop order which will execute automatically when certain conditions are met. In financial parlance, these kind of techniques are known as ‘hedging’.
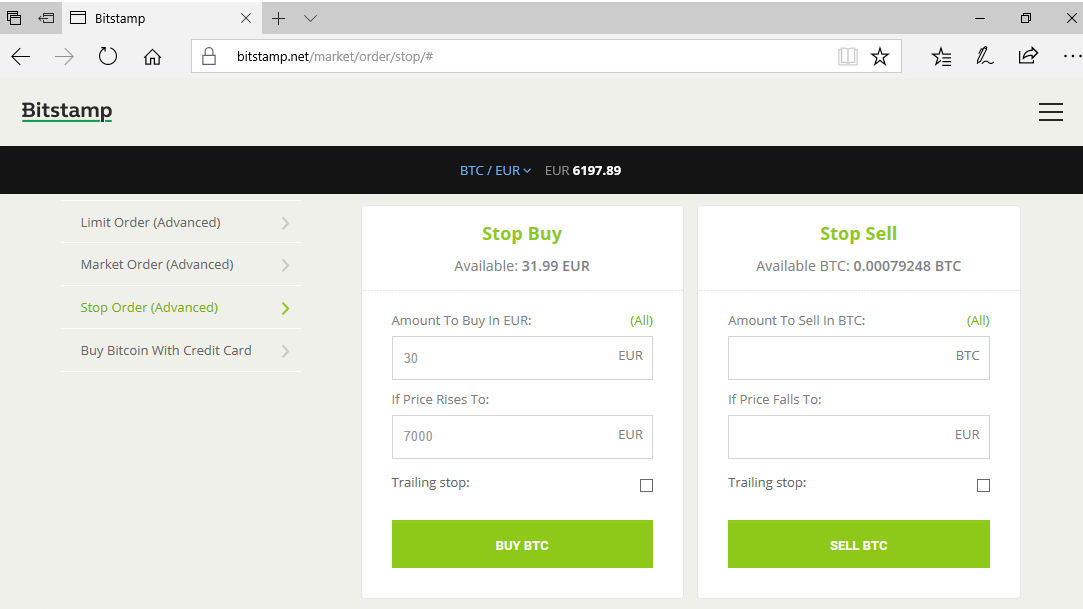
To begin, visit https://www.bitstamp.net/market/order and choose ‘Stop Order (Advanced)’ on the left. Place a ‘Stop Sell’ order by entering the amount to sell if the Bitcoin falls to a certain value. Set this value in ‘If Price falls to’. The ‘Trailing Stop’ option can be used to express this value as a percentage rather than a fixed amount. See here for more information.
You can also place a ‘Stop Buy’ order to purchase when the price rises to a certain level, again optionally with a Trailing Stop.
Nate Drake is a tech journalist specializing in cybersecurity and retro tech. He broke out from his cubicle at Apple 6 years ago and now spends his days sipping Earl Grey tea & writing elegant copy.