How to create a secure ‘cold storage’ Bitcoin wallet using Bitkey
Freeze out hackers and keep your virtual currency safe

In July 2017, one of the largest Bitcoin (BTC) exchanges, Bithumb, was targeted by hackers who stole millions of Won. The infamous BTC Exchange MtGox was also hacked in 2014. Thieves made away with nearly $500 million (around £370 million) worth of Bitcoin, forcing the exchange to shut down.
So there are certainly security concerns regarding the virtual currency. However, one very easy way to ensure that your Bitcoin wallet can't be targeted by hackers is to use Bitkey. Bitkey is a 'live' bootable version of the Debian Linux operating system.
In this guide you'll learn how to boot Bitkey to create a 'cold storage' offline Bitcoin wallet, which is never directly connected to the internet. This protects it both from online hackers and malware designed to exploit Microsoft’s Windows operating system.
You'll also learn how to set up an online 'watching' wallet which you can use to view your balance and previous transactions. Your watching wallet can also be used to send Bitcoins by generating a special 'transaction' file, which you can then sign using the cold offline wallet.
In order to get started, all you need are three empty USB sticks of at least 4GB capacity. You'll also need a way to clearly tell these apart: for example, you could purchase USB sticks which are different colors.
- You might also want to know how to mine Bitcoins
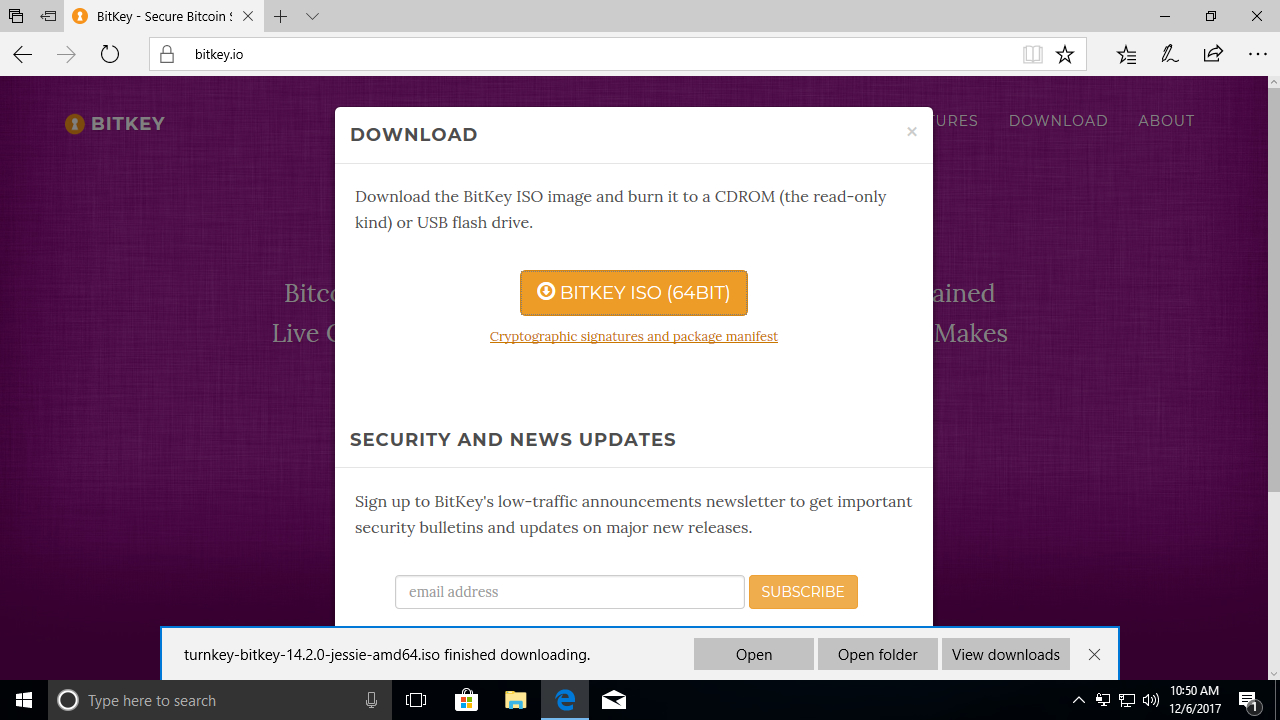
1. Create BitKey Installer
Open your web browser and navigate to https://bitkey.io/. Click the 'Download' button then click on 'Bitkey ISO' to download the CD image.
If you're running Windows 10 and your machine has a DVD burner, you can write this to a blank disc by inserting it, right clicking the file and choosing 'Burn Disc Image'.
Sign up to the TechRadar Pro newsletter to get all the top news, opinion, features and guidance your business needs to succeed!
If you have no DVD drive, you can create a bootable USB stick using the file you just downloaded. The easiest way to do this in Windows is to use the program Rufus. Follow the instructions on the website to do this.
Once you've created your boot medium, save any important files. Windows users can then restart to the 'Advanced Startup Options' screen and choose the DVD or USB stick from there. If you're using a Mac hold down the Alt key on startup to show the boot menu, then double click on the external disk.
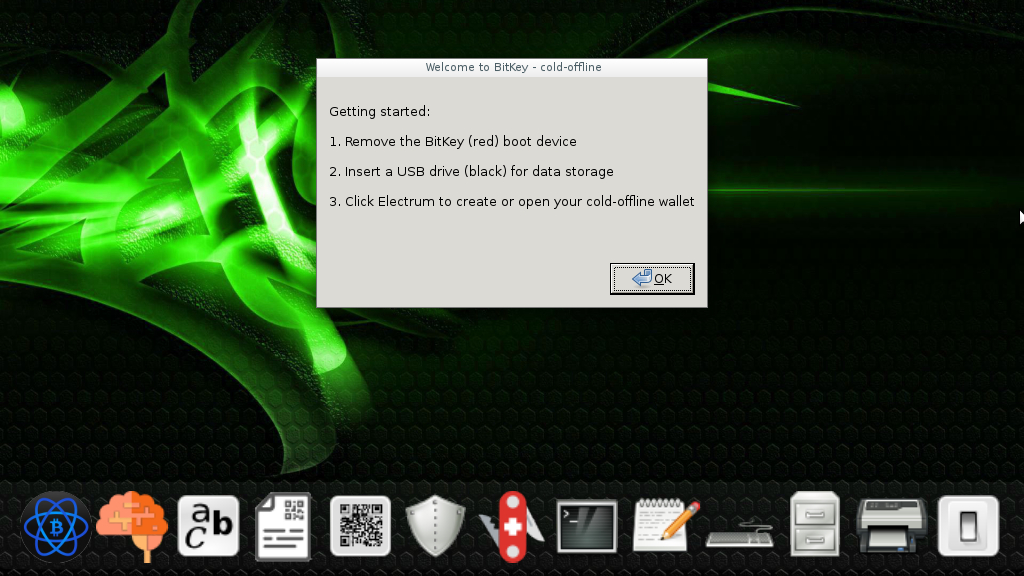
2. Remove and insert USB keys
Once the Bitkey boot menu shows, choose the first option: cold-offline (green). True to its name, once the desktop loads you'll see the background is green. This signifies that the cold-offline version of Bitkey is not connected to the internet so can't be hacked remotely.
If you're using a USB stick to boot Bitkey, remove this now and put it in a safe place. Next, insert a separate, blank and formatted USB stick into your machine. Ideally use a brand new USB drive for this.
Juggling USB sticks can be confusing. As we mentioned at the outset, Bitkey recommends color-coding your USB sticks. The one you just removed will be called 'Red' (feel free to mark it with some red tape or a pen accordingly). The new, blank stick you're inserting is will be known as 'Black'. You should only ever insert the 'Black' USB stick when booted into the cold-offline desktop.
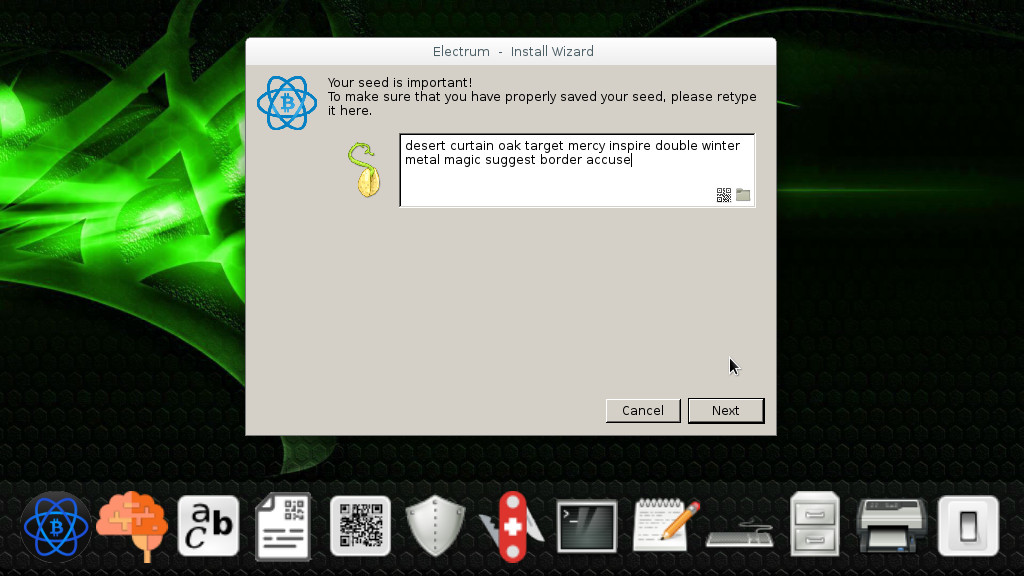
3. Set up your cold wallet
Click the blue Electrum icon at the very bottom left of the screen. You'll first be asked to set a passphrase to protect the wallet files you're about to create. Enter a suitably long passphrase and click 'OK'.
The Electrum install wizard will now launch. Leave the default options checked and click 'Next'. Electrum will now display a dozen random words. This is what’s known as your 'wallet generation seed'. Make sure to write this down and put it in a safe place. Click 'Next' and retype your seed to make sure you have it written down correctly. Click 'Next', set a password specific to this wallet, then choose 'Next' again. Electrum will now launch.
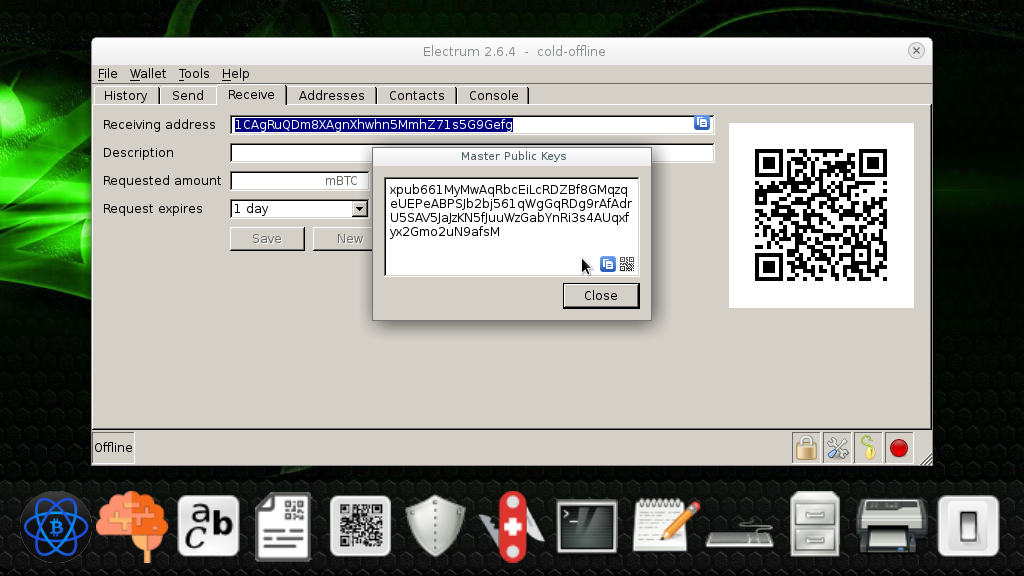
4. Export payment address and public key
As soon as your Electrum wallet opens, click on the 'Receive' tab. Make a note of your 'Receiving Address'. You'll need to provide this address to anyone who's sending you BTC. If you already have an existing Bitcoin wallet, scan the QR code to send your funds here. As the wallet is offline, don't worry if your balance doesn't display right away.
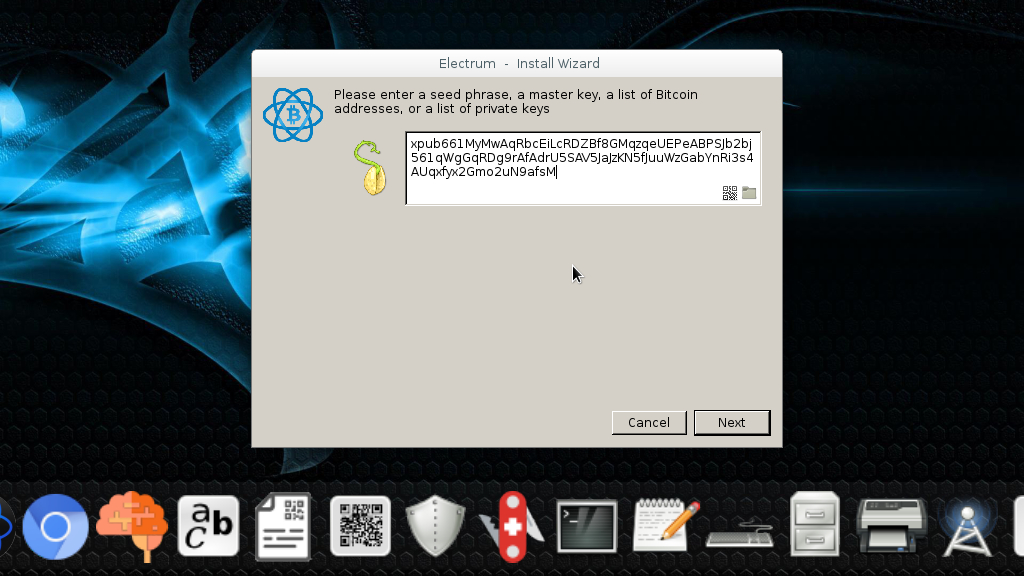
Next click the 'Wallet' menu and choose 'Master Public Keys'. You'll need this to create an online 'watching' wallet in the next step so you can view your balance.
Either write down the master key carefully or scan it using a QR code app on your phone.
5. Create watching wallet
Close down Electrum and use the icon at the bottom-right to shut down the machine. Ignore the warning about your session being 'non-persistent' as you've saved your wallet data to the USB stick. Be sure to remove the 'Black' USB drive and put it somewhere safe.
Reboot the machine and choose the second boot option: cold-online (blue). Now you need to insert another new USB drive, which we'll name 'Blue'. This will be used to store your watching wallet settings.
Once the desktop loads click the Electrum icon at the very bottom left of the screen once again. On the install wizard this time choose 'Restore a wallet or import keys' and click 'Next'. On the following screen enter the master public key you generated earlier. Click 'Next' and then 'Next' again to choose servers automatically.
6. Create a transaction
When you launch Electrum, you'll see a warning message reminding you that this is a 'watching wallet'. In other words, while you can see your balance and any transactions that have been made, it can't send money by itself.
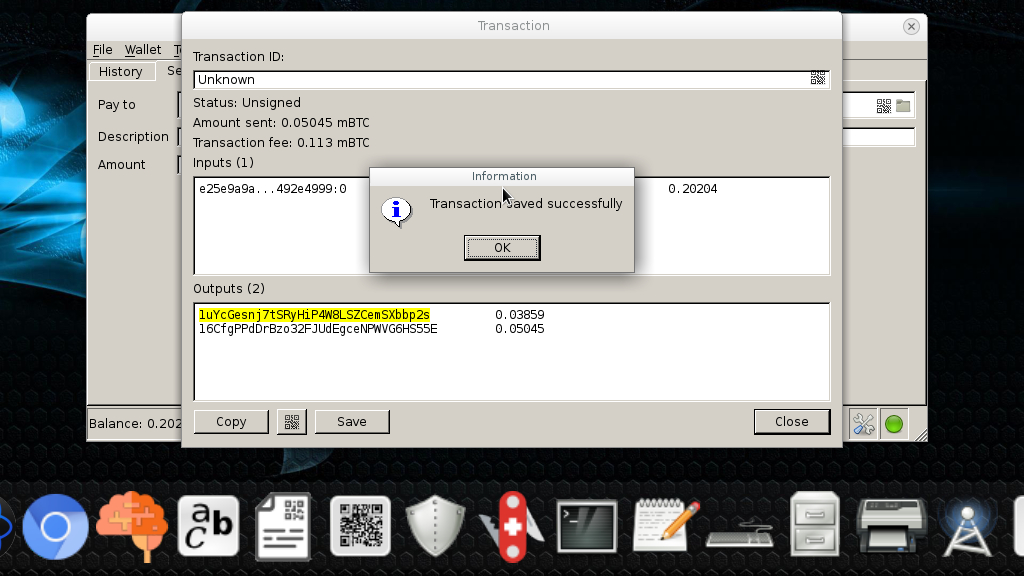
If you do want to make a payment, click the 'Send' tab and enter the recipient's payment address in the 'Pay To' field. Next fill in the 'Amount' field for the number of BTC you want to spend and click 'Send'.
Electrum will generate the transaction data for you. Click 'Save' to store the transaction (TXN) file to the 'Blue' USB drive.
Electrum will confirm the transaction has been saved.
7. Sign transaction
Shut down your machine. Make sure both the 'Black' and 'Blue' USB drives are connected, and then restart. Choose the first option: cold-offline (green) from Bitkey's boot menu.
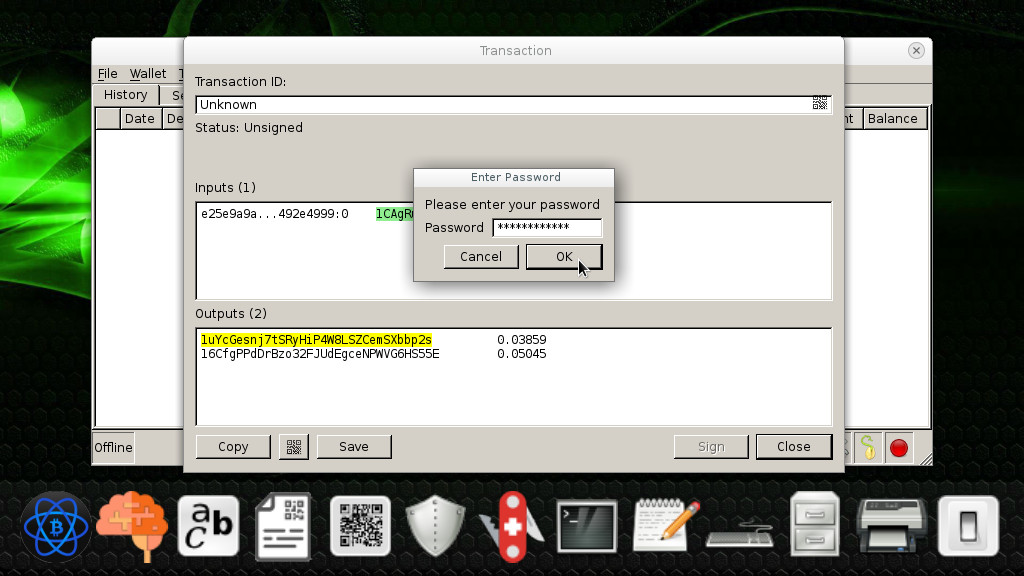
Once the desktop loads, click the Electrum icon once again and enter the passphrase you chose earlier.
On the 'Tools' menu choose 'Load Transaction' > 'From File'. Navigate to the TXN file you saved earlier to the 'Blue' USB stick. You'll most likely find this in either /media/usb0 or /media/usb1.
Choose 'Open', then at the new window click 'Sign'. Re-enter your wallet password. Next click 'Save'. Save the newly signed transaction file (e.g. signed_123*.txn) to the 'Blue' USB stick. Electrum will confirm that the transaction's been saved.
8. Broadcast transaction
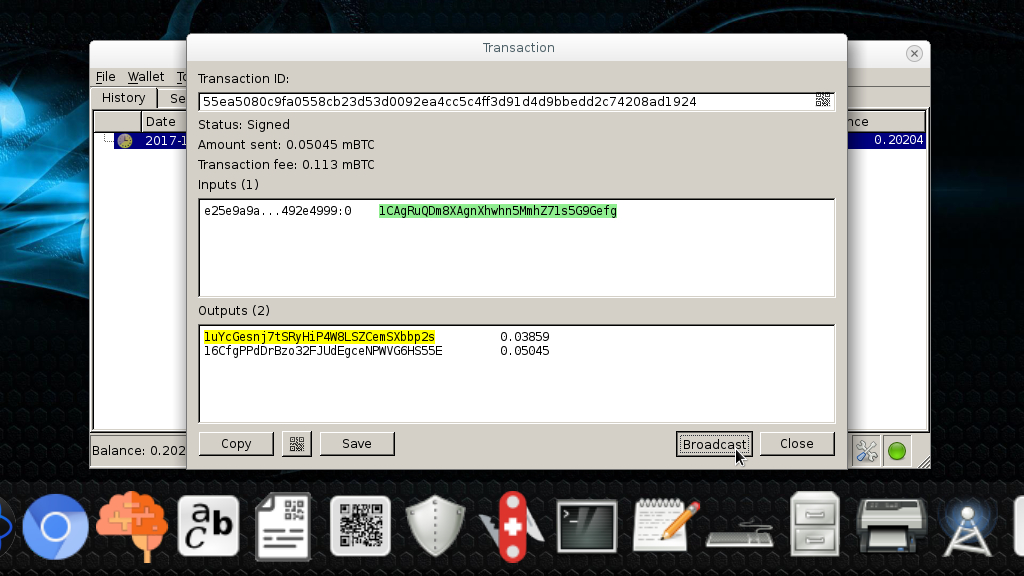
Shut down your machine and remove the 'Black' USB stick. Restart and choose the second option: cold-online (blue). Once the desktop loads, open Electrum once again and click the 'Tools' menu. Choose 'Load Transaction' > 'From File' and navigate to the signed transaction file on the 'Blue' USB stick, then click 'Open'.
Electrum will now display the transaction. Click 'Broadcast' to send the authorized transaction to the Bitcoin network. Finally click 'Close'. Your transaction will appear as 'Unconfirmed'. Depending on the transaction fee you paid it may take several hours to be fully validated.
9. Customize Electrum
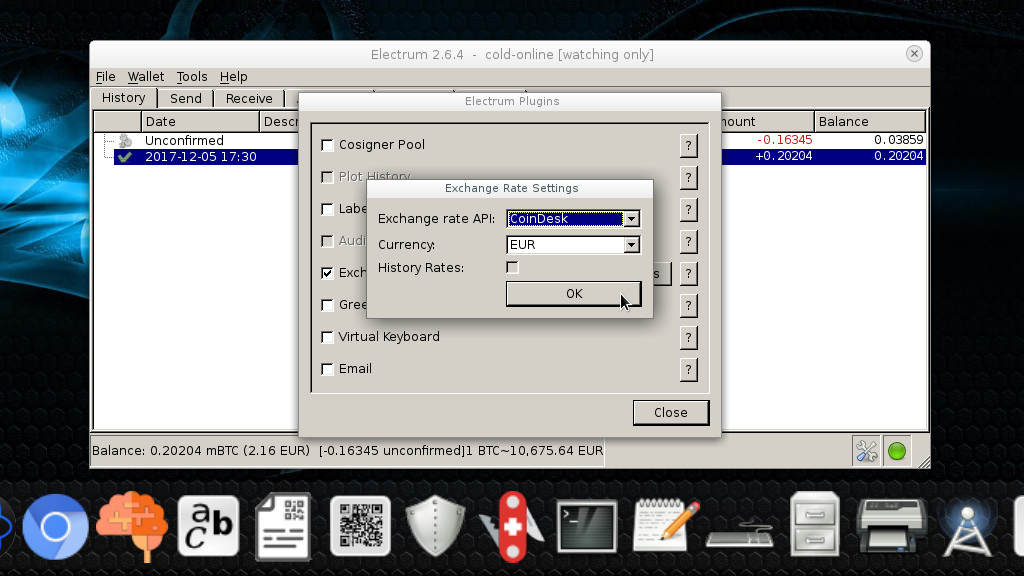
Bitkey uses an older version of the Electrum client which doesn’t have all of its newest features. You can get around this issue by going to the 'Tools' menu and choosing 'Plugins'.
The most useful option you can choose is 'Exchange Rates'. Mark the checkbox then click 'Settings' to choose both an exchange rate API such as 'CoinDesk' and your chosen fiat currency such as Euros.
By default Electrum expresses your Bitcoin balance in mBtc (millibitcoins). One MilliBit is equal to 0.001 Bitcoins. This makes working with smaller sums of money easier. If you want to change this setting, go to the 'Tools' menu. Click on 'Preferences' then the 'Appearance Tab'. You can then select a different 'Base Unit' from the drop-down menu.
10. Restore cold wallet
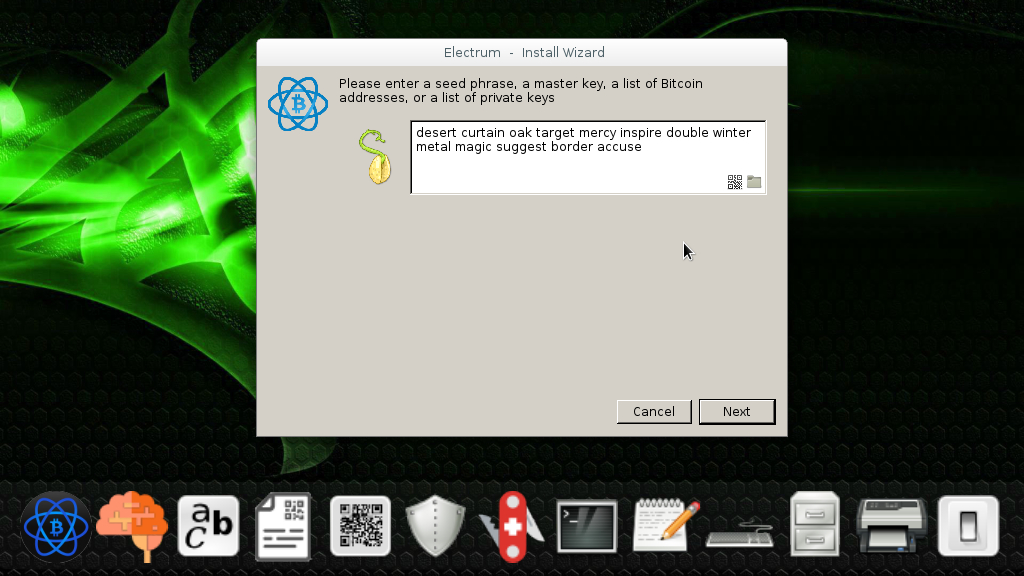
If anything happens to your 'Black' USB stick which contains your cold wallet, boot Bitkey once again and choose the first option: cold-offline (green). Once the desktop loads insert a new USB stick to replace the old 'Black' one, then launch Electrum.
BitKey will ask you to set a password to protect the new wallet files. Once the Electrum install wizard starts choose 'Restore a wallet or import keys' and choose 'Next'.
From here you can type the private 'seed' for your original cold wallet which you wrote down earlier. Click 'Next' and set a new wallet password. Electrum will warn you that as the wallet has been restored offline, not all your payment addresses are listed here. However, you can check them at any time using your watching wallet.
Top Image Credit: Ian Mackenzie (Wikimedia Commons)
Nate Drake is a tech journalist specializing in cybersecurity and retro tech. He broke out from his cubicle at Apple 6 years ago and now spends his days sipping Earl Grey tea & writing elegant copy.