TechRadar Verdict
A good service, marred somewhat by a limited design interface and some glitches, but filled with a vast library of items to make your rooms truly unique.
Pros
- +
Many editing options
- +
Large library of furniture
- +
Works with any browser
Cons
- -
Constraining top-down workspace
- -
Annoying glitches
Why you can trust TechRadar
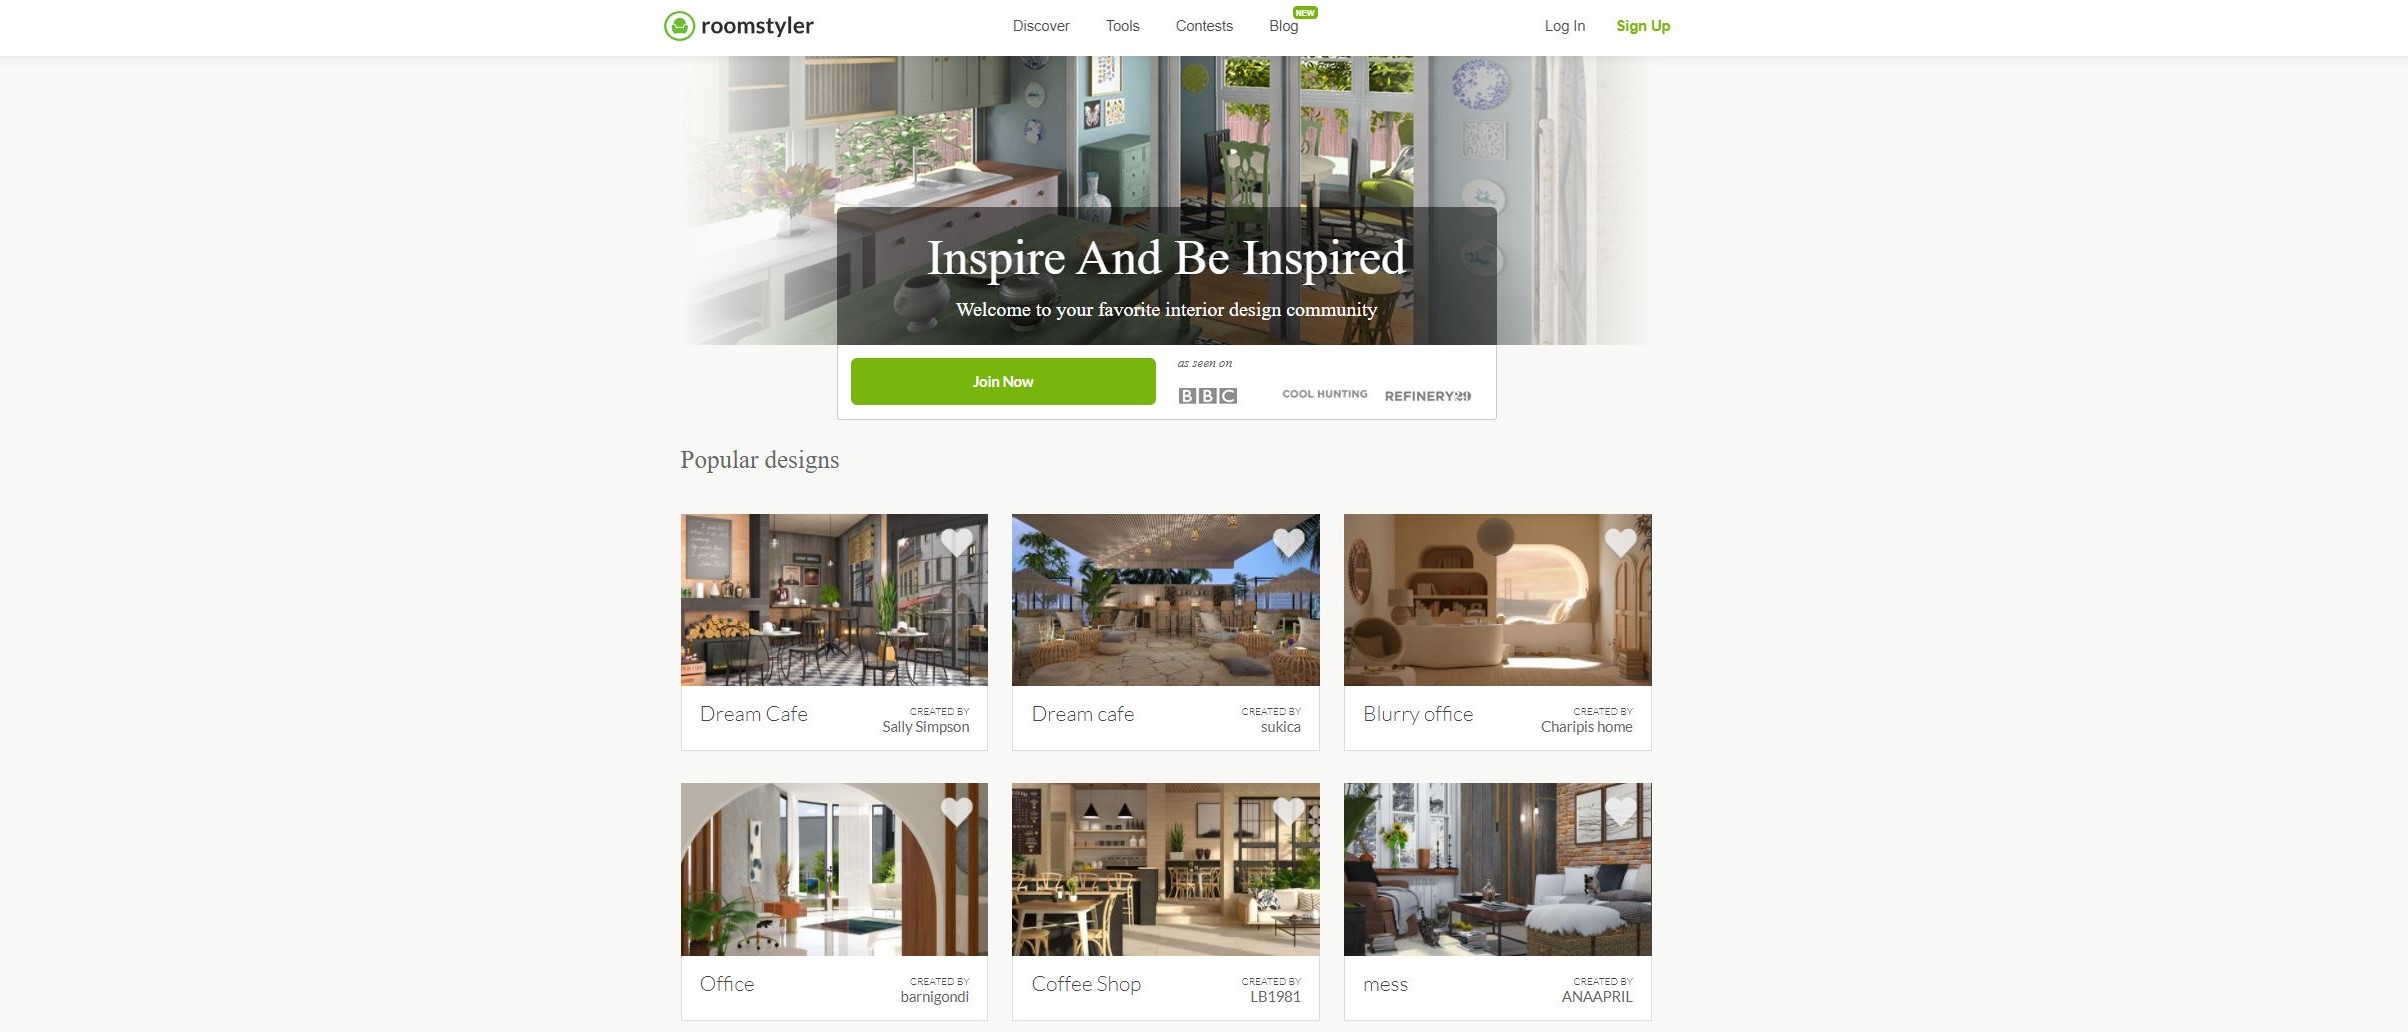
Roomstyler appears to be a place where you get inspired by a plethora of designs, created and posted my a myriad of designers. But you’re not only there to check what others have done, this is also a full featured 3D room design service which you can access and use straight from your favourite browser.
- Also check out our roundup of the best architecture software
Getting started
Once you’ve registered (either by using your Facebook account or your email address), you can click on the green ‘Create a 3D Interior’ button to start the process. If you’re new to 3D design, there’s a series of videos you can access from there. Otherwise, click on ‘Start from Scratch’.
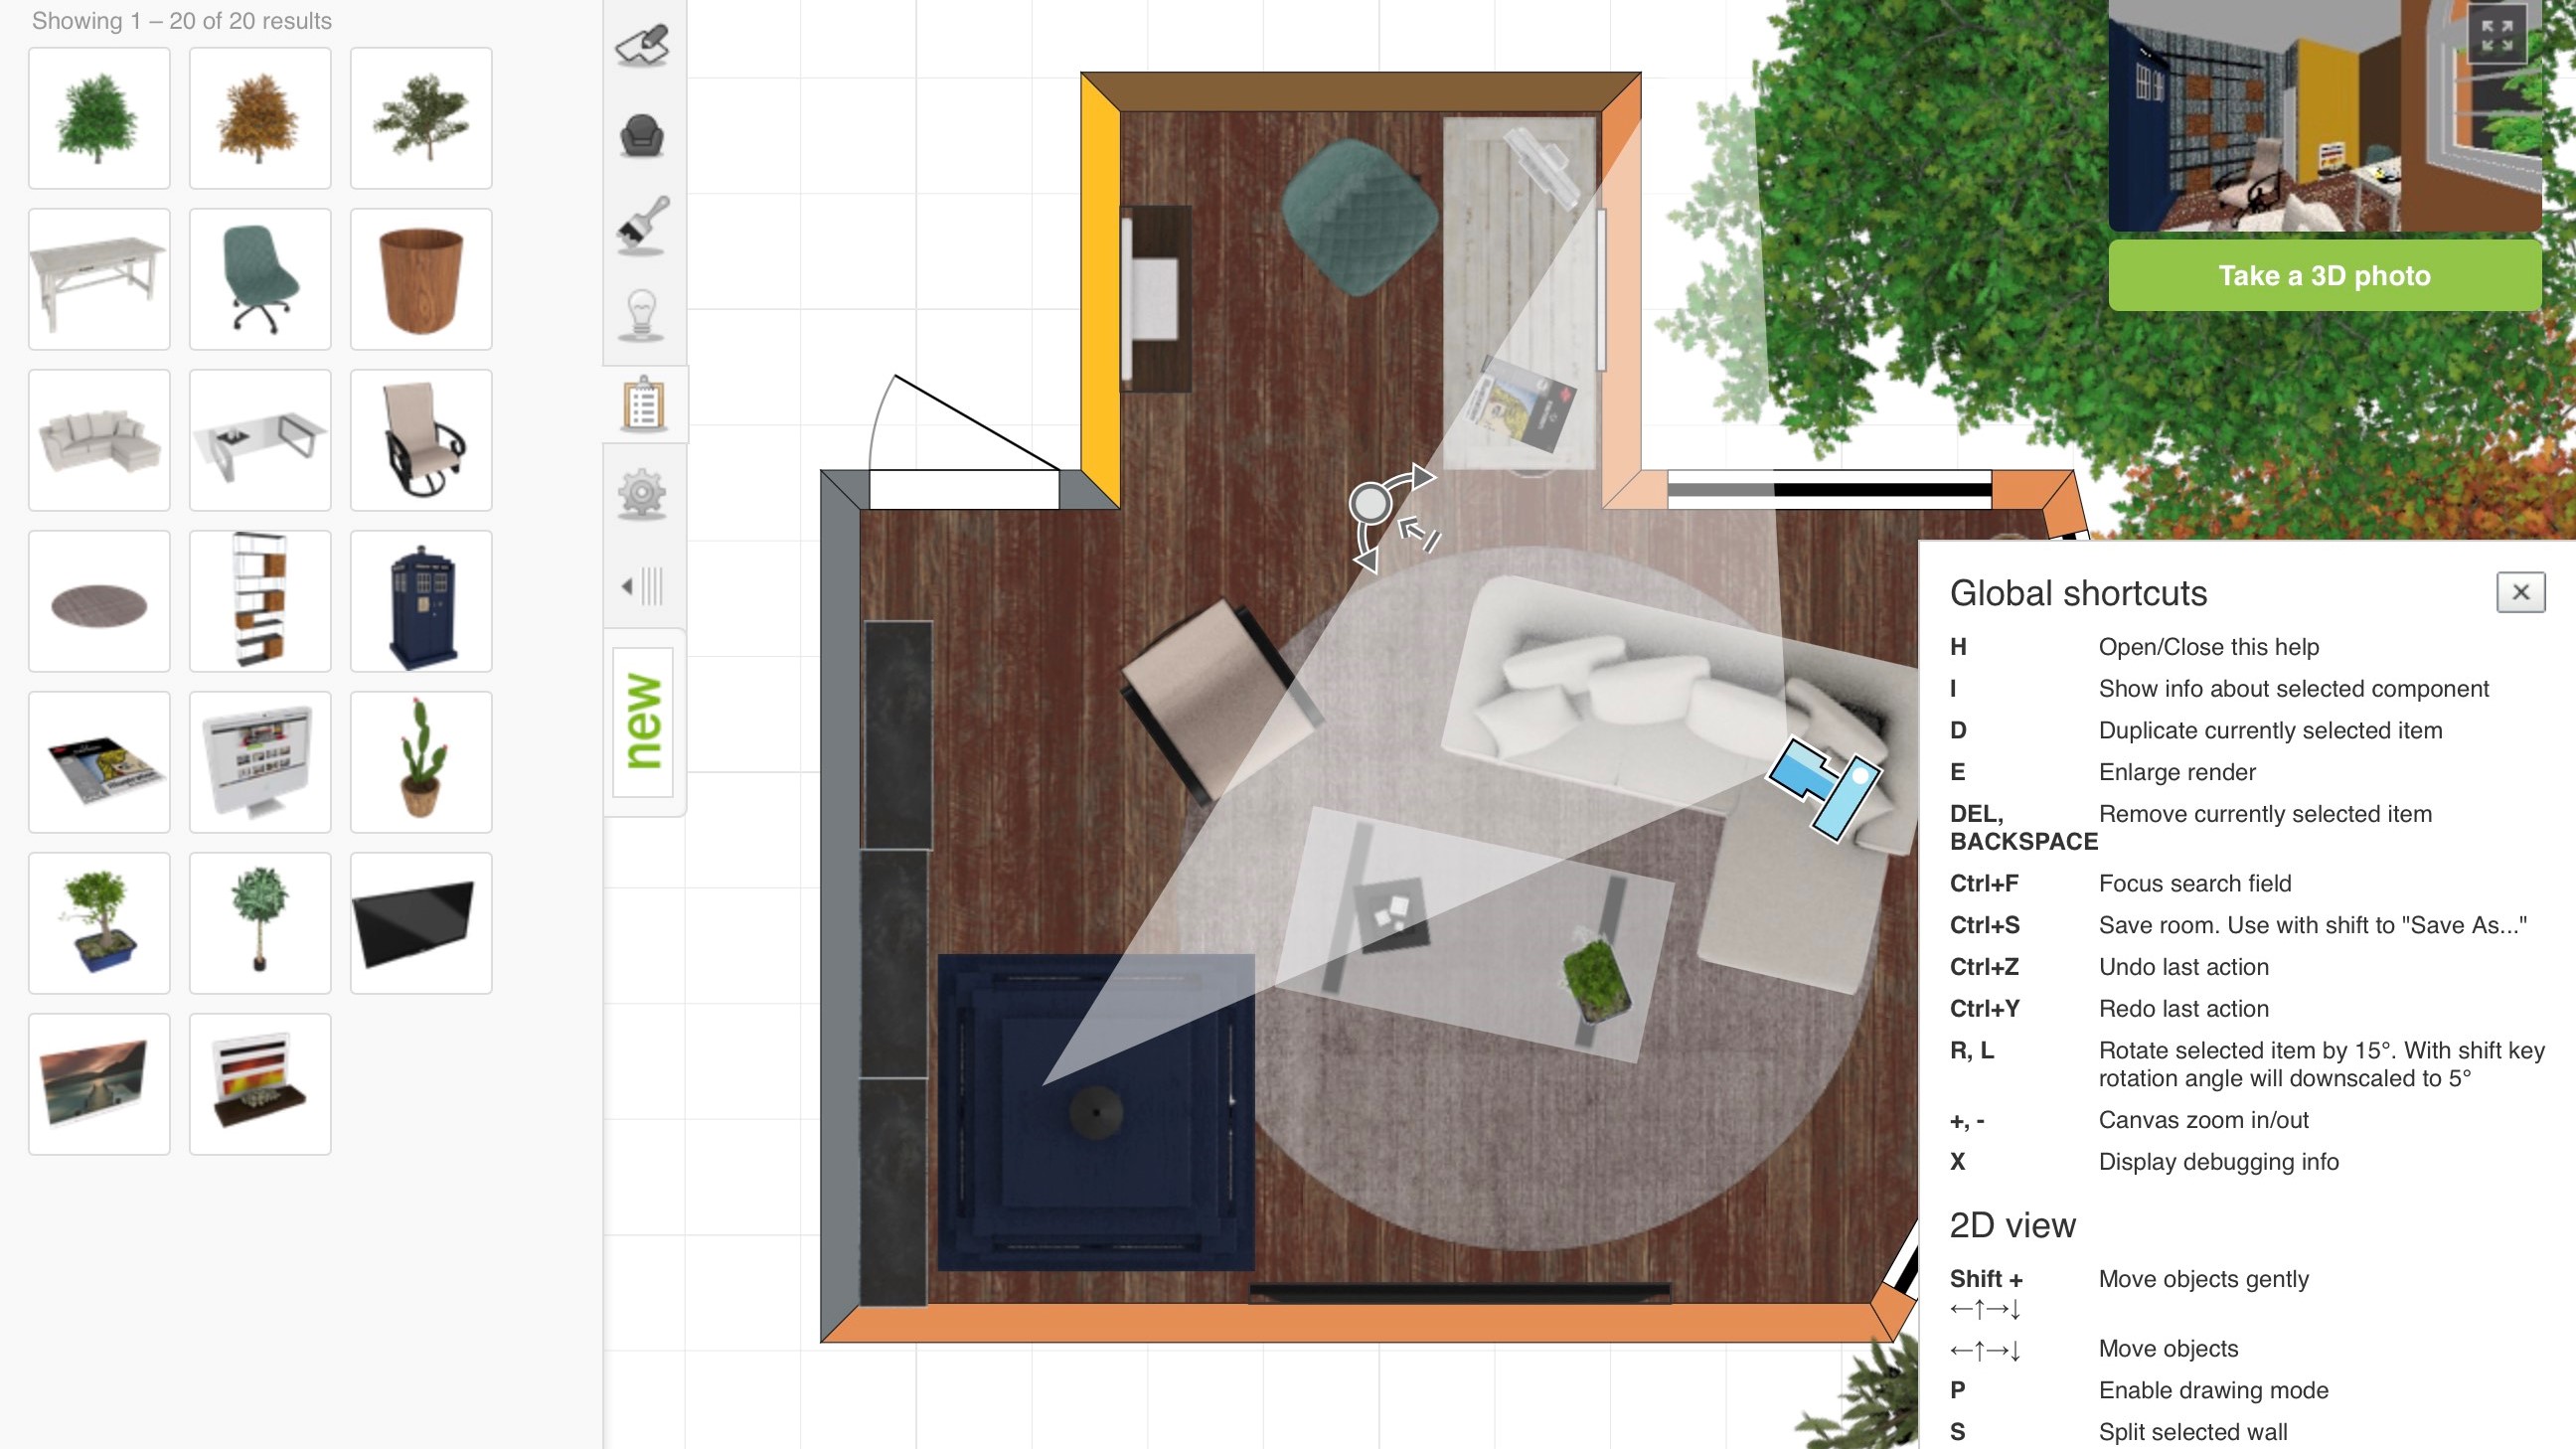
This takes you straight to the design area, with sample rooms on the left and a large empty canvas to the right, with a blue camera inside it. That camera is connected to the preview top right of the screen, which is currently dark (because your floorpan is bare).
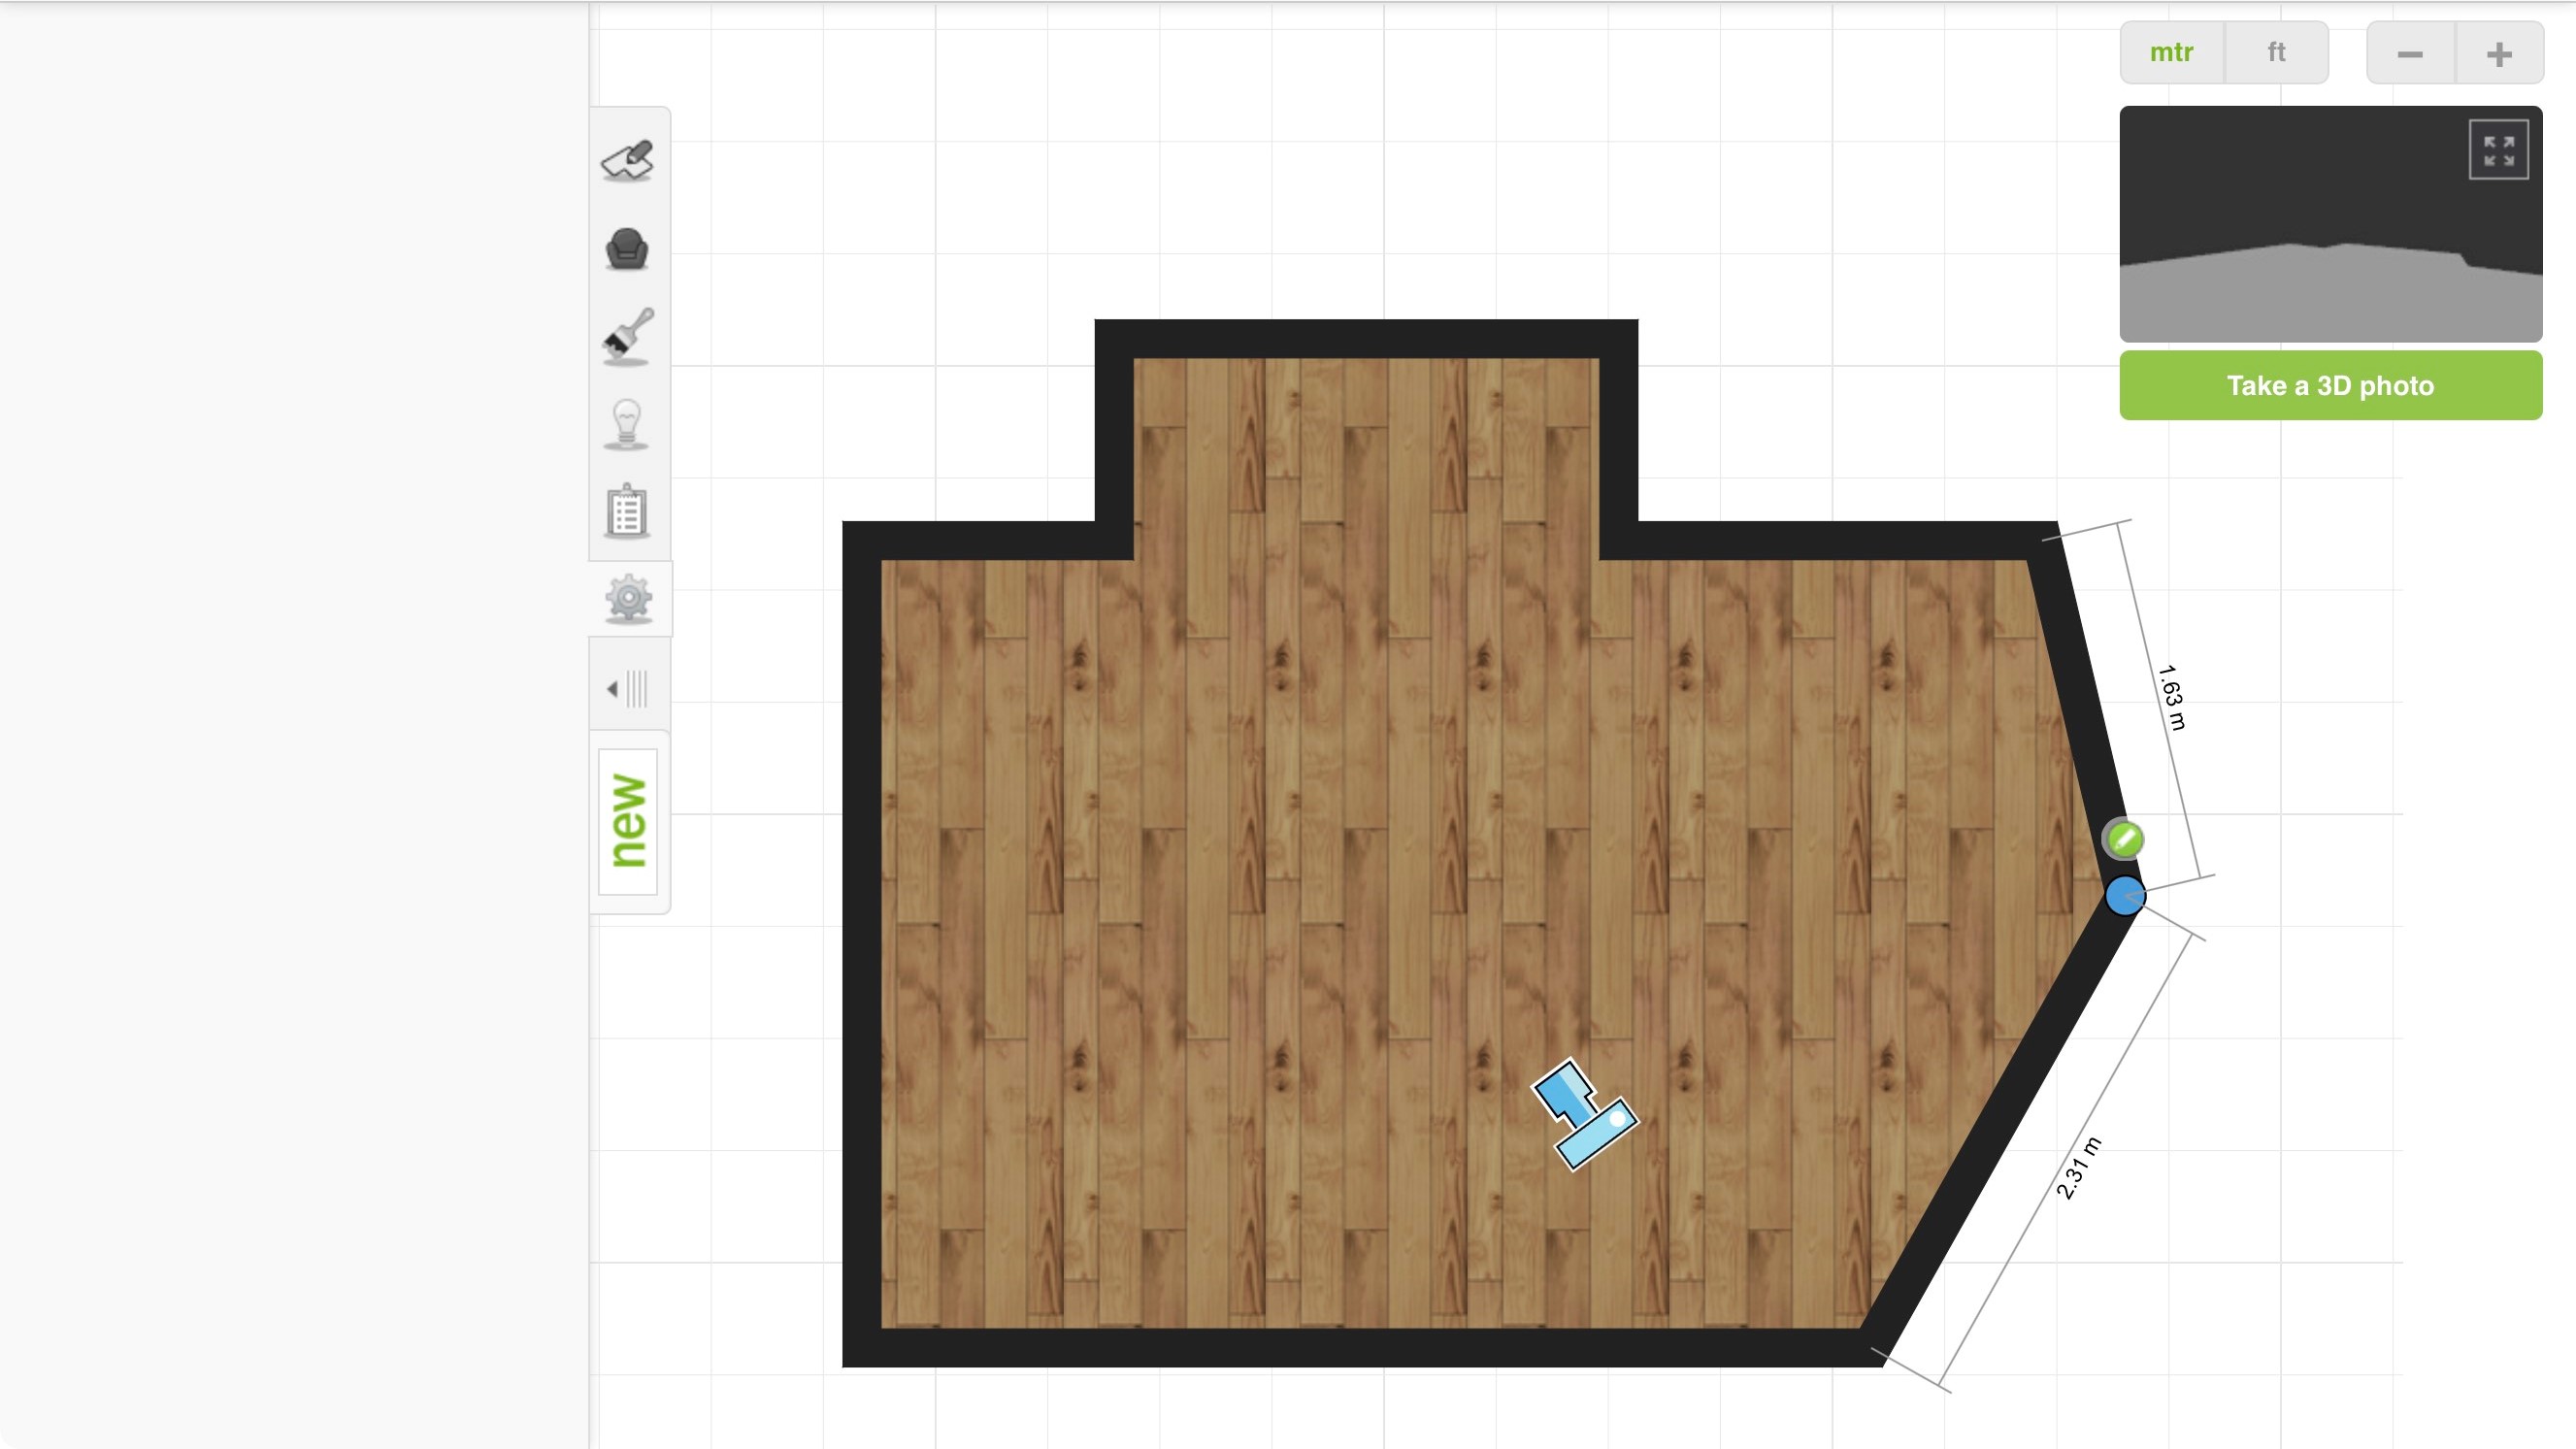
To add walls, just drag one of the sample templates from the left, or use the’ Draw Your Own Walls’ tool, top left. If you place it over the camera, you’ll notice the preview section will show you a 3D representation of what it can see after a few seconds.
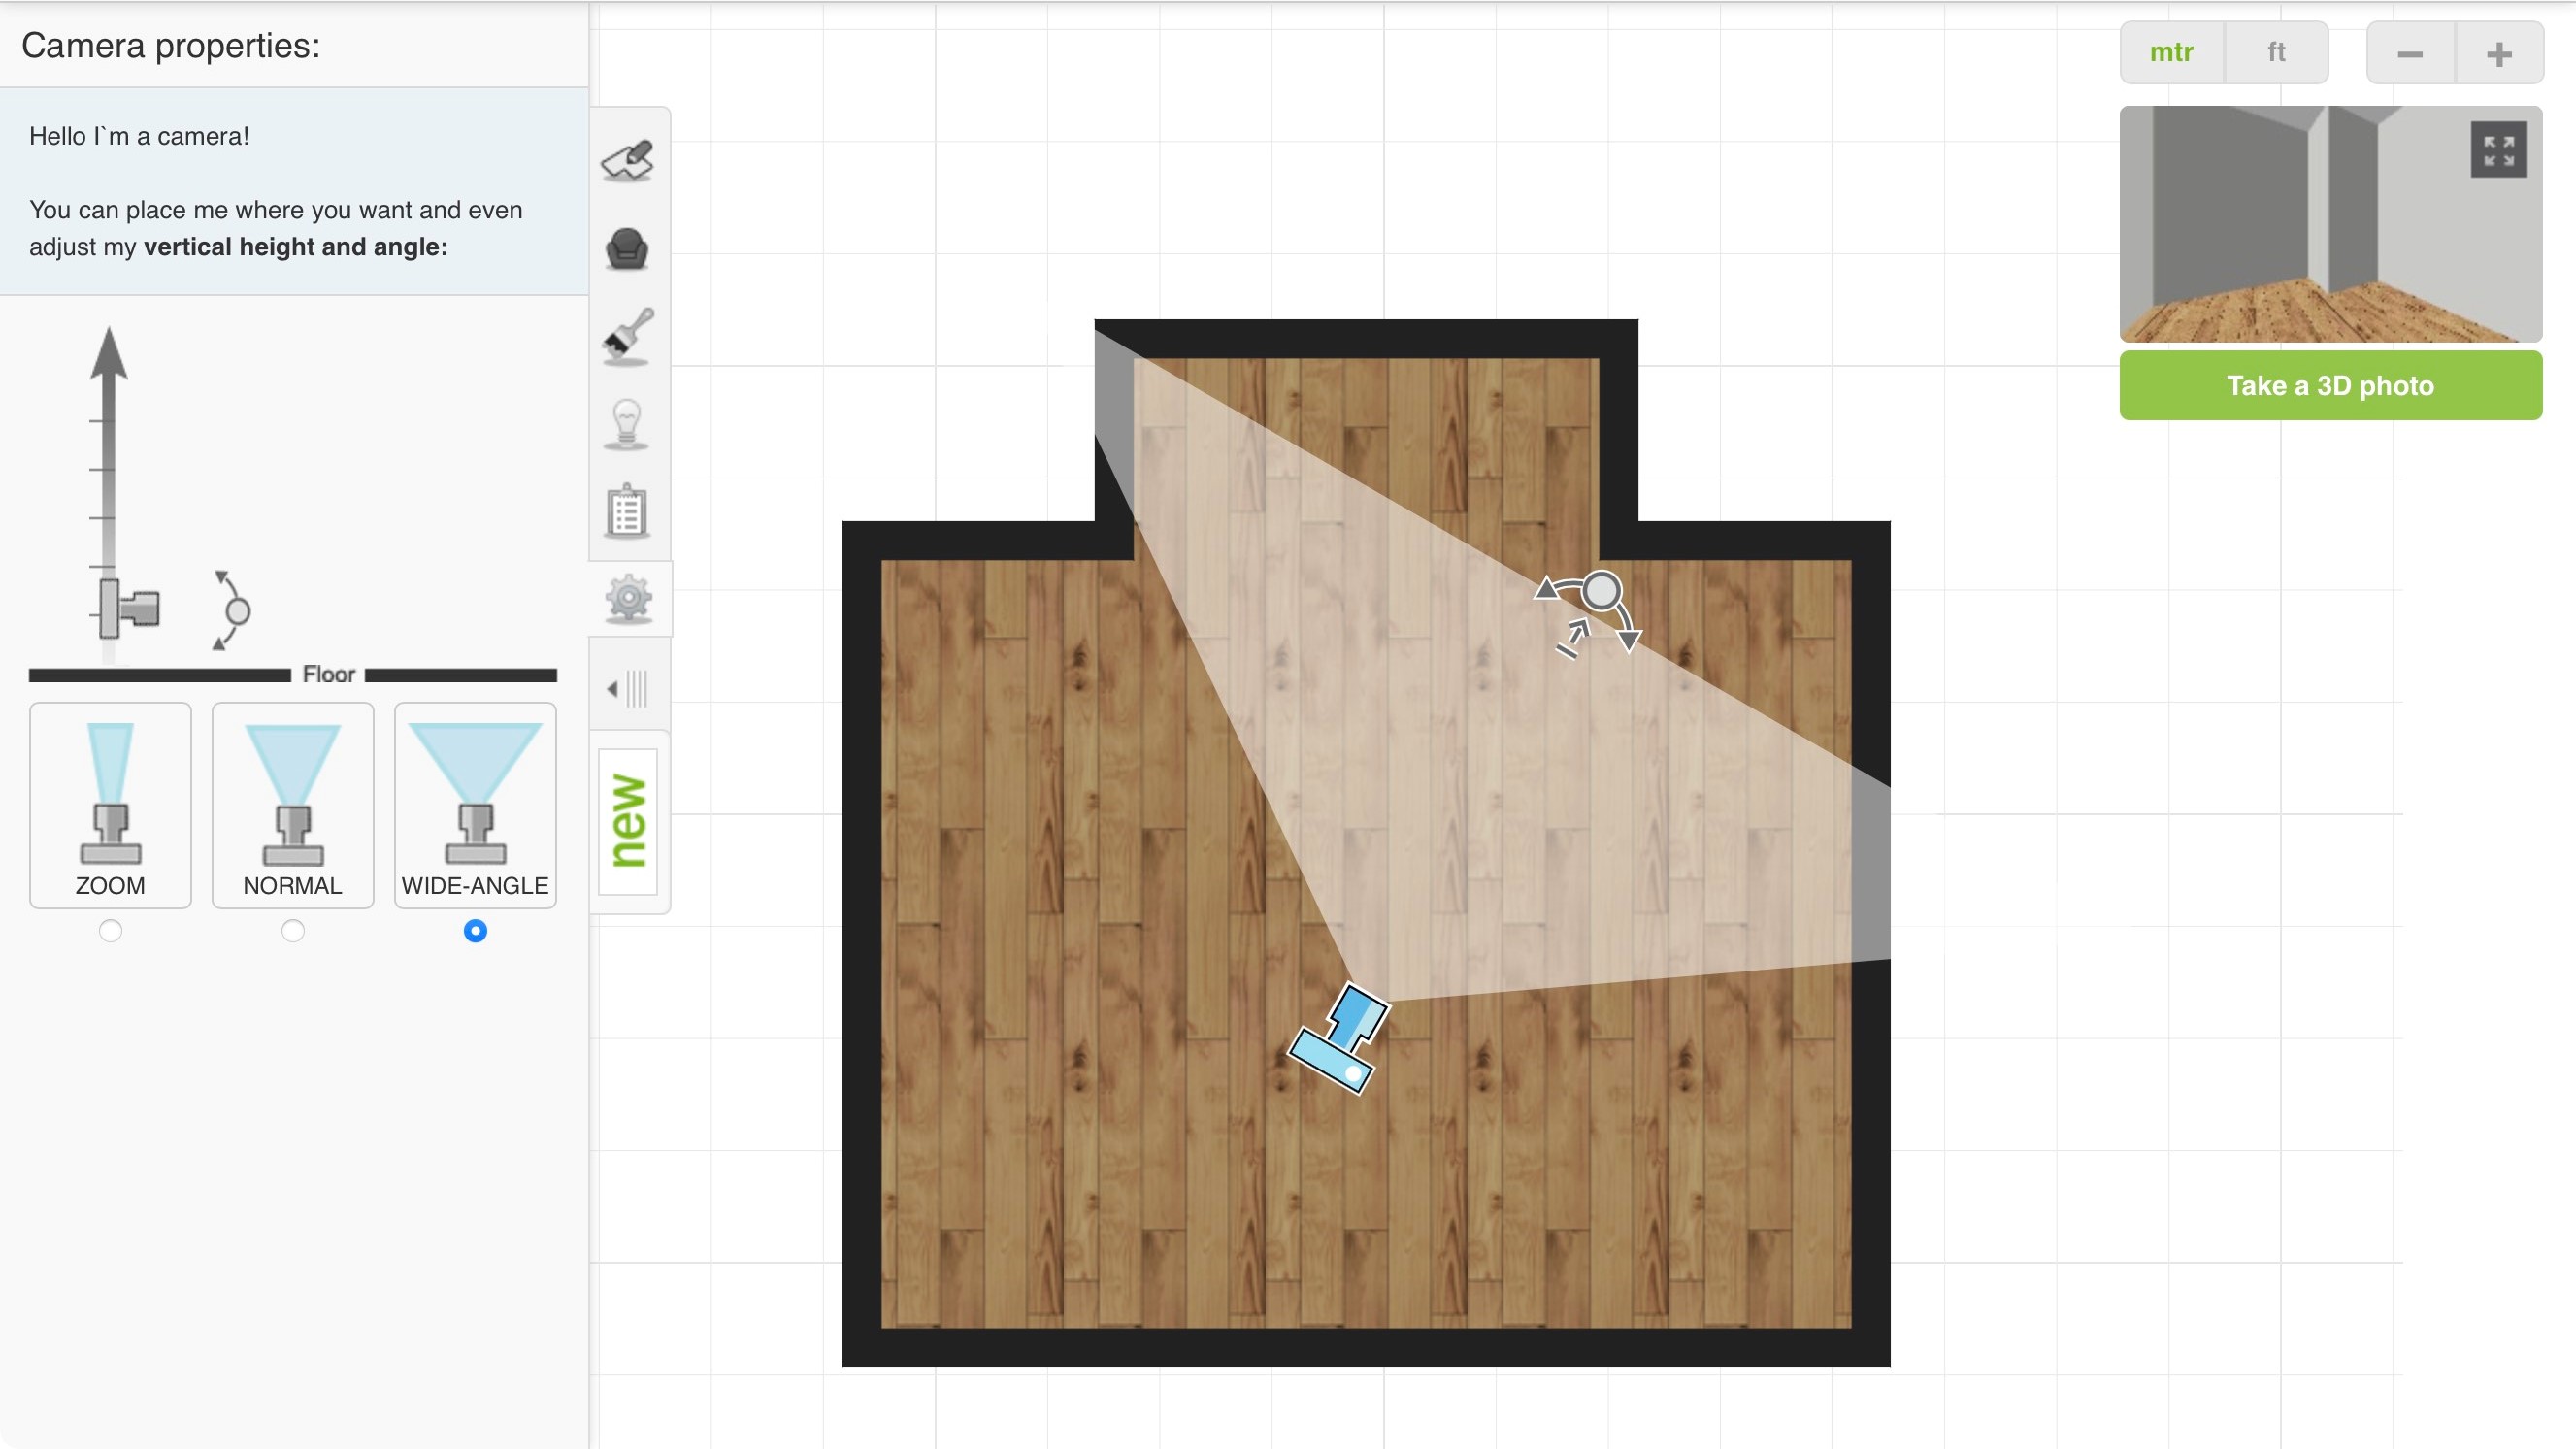
Speaking of the camera, with it selected, the left sidebar changes to display its properties. This is where its height and angle is changed, and there’s even a choice of lenses, from Zoom, to Normal, to Wide-Angle (the latter is selected by default). To change its position in the room, just drag it around, and use the rotate tool at the edge of the viewing angle to turn it around. It’s all very straightforward and easy to understand.
Customisation
Making changes is usually a simple matter of clicking on what you want to alter. Mouse over the various walls for instance and they’ll turn blue as the cursor goes over them. Click on one to select it. From there you’ll see its dimensions (you can easily switch better feet and meters thanks to a handy button top right of the window). You have options to remove the wall entirely or create a junction point to split it in two. The position of the split is altered by dragging it. Once it’s in the right place, the junction is ready to be dragged to change the dimensions of the room. The same applies for entire walls which can be brought it or extended with a simple drag and drop.
Want to add a window? Drag the one you want onto a wall, click on it, then alter its parameter (width, height and distance from the floor). The same applies to doors, and other architectural objects such as railings, stairs, or fireplaces (there’s even a Tardis lurking in there for those who want to add a little sci-fi to their design).
Sign up to the TechRadar Pro newsletter to get all the top news, opinion, features and guidance your business needs to succeed!
Furniture
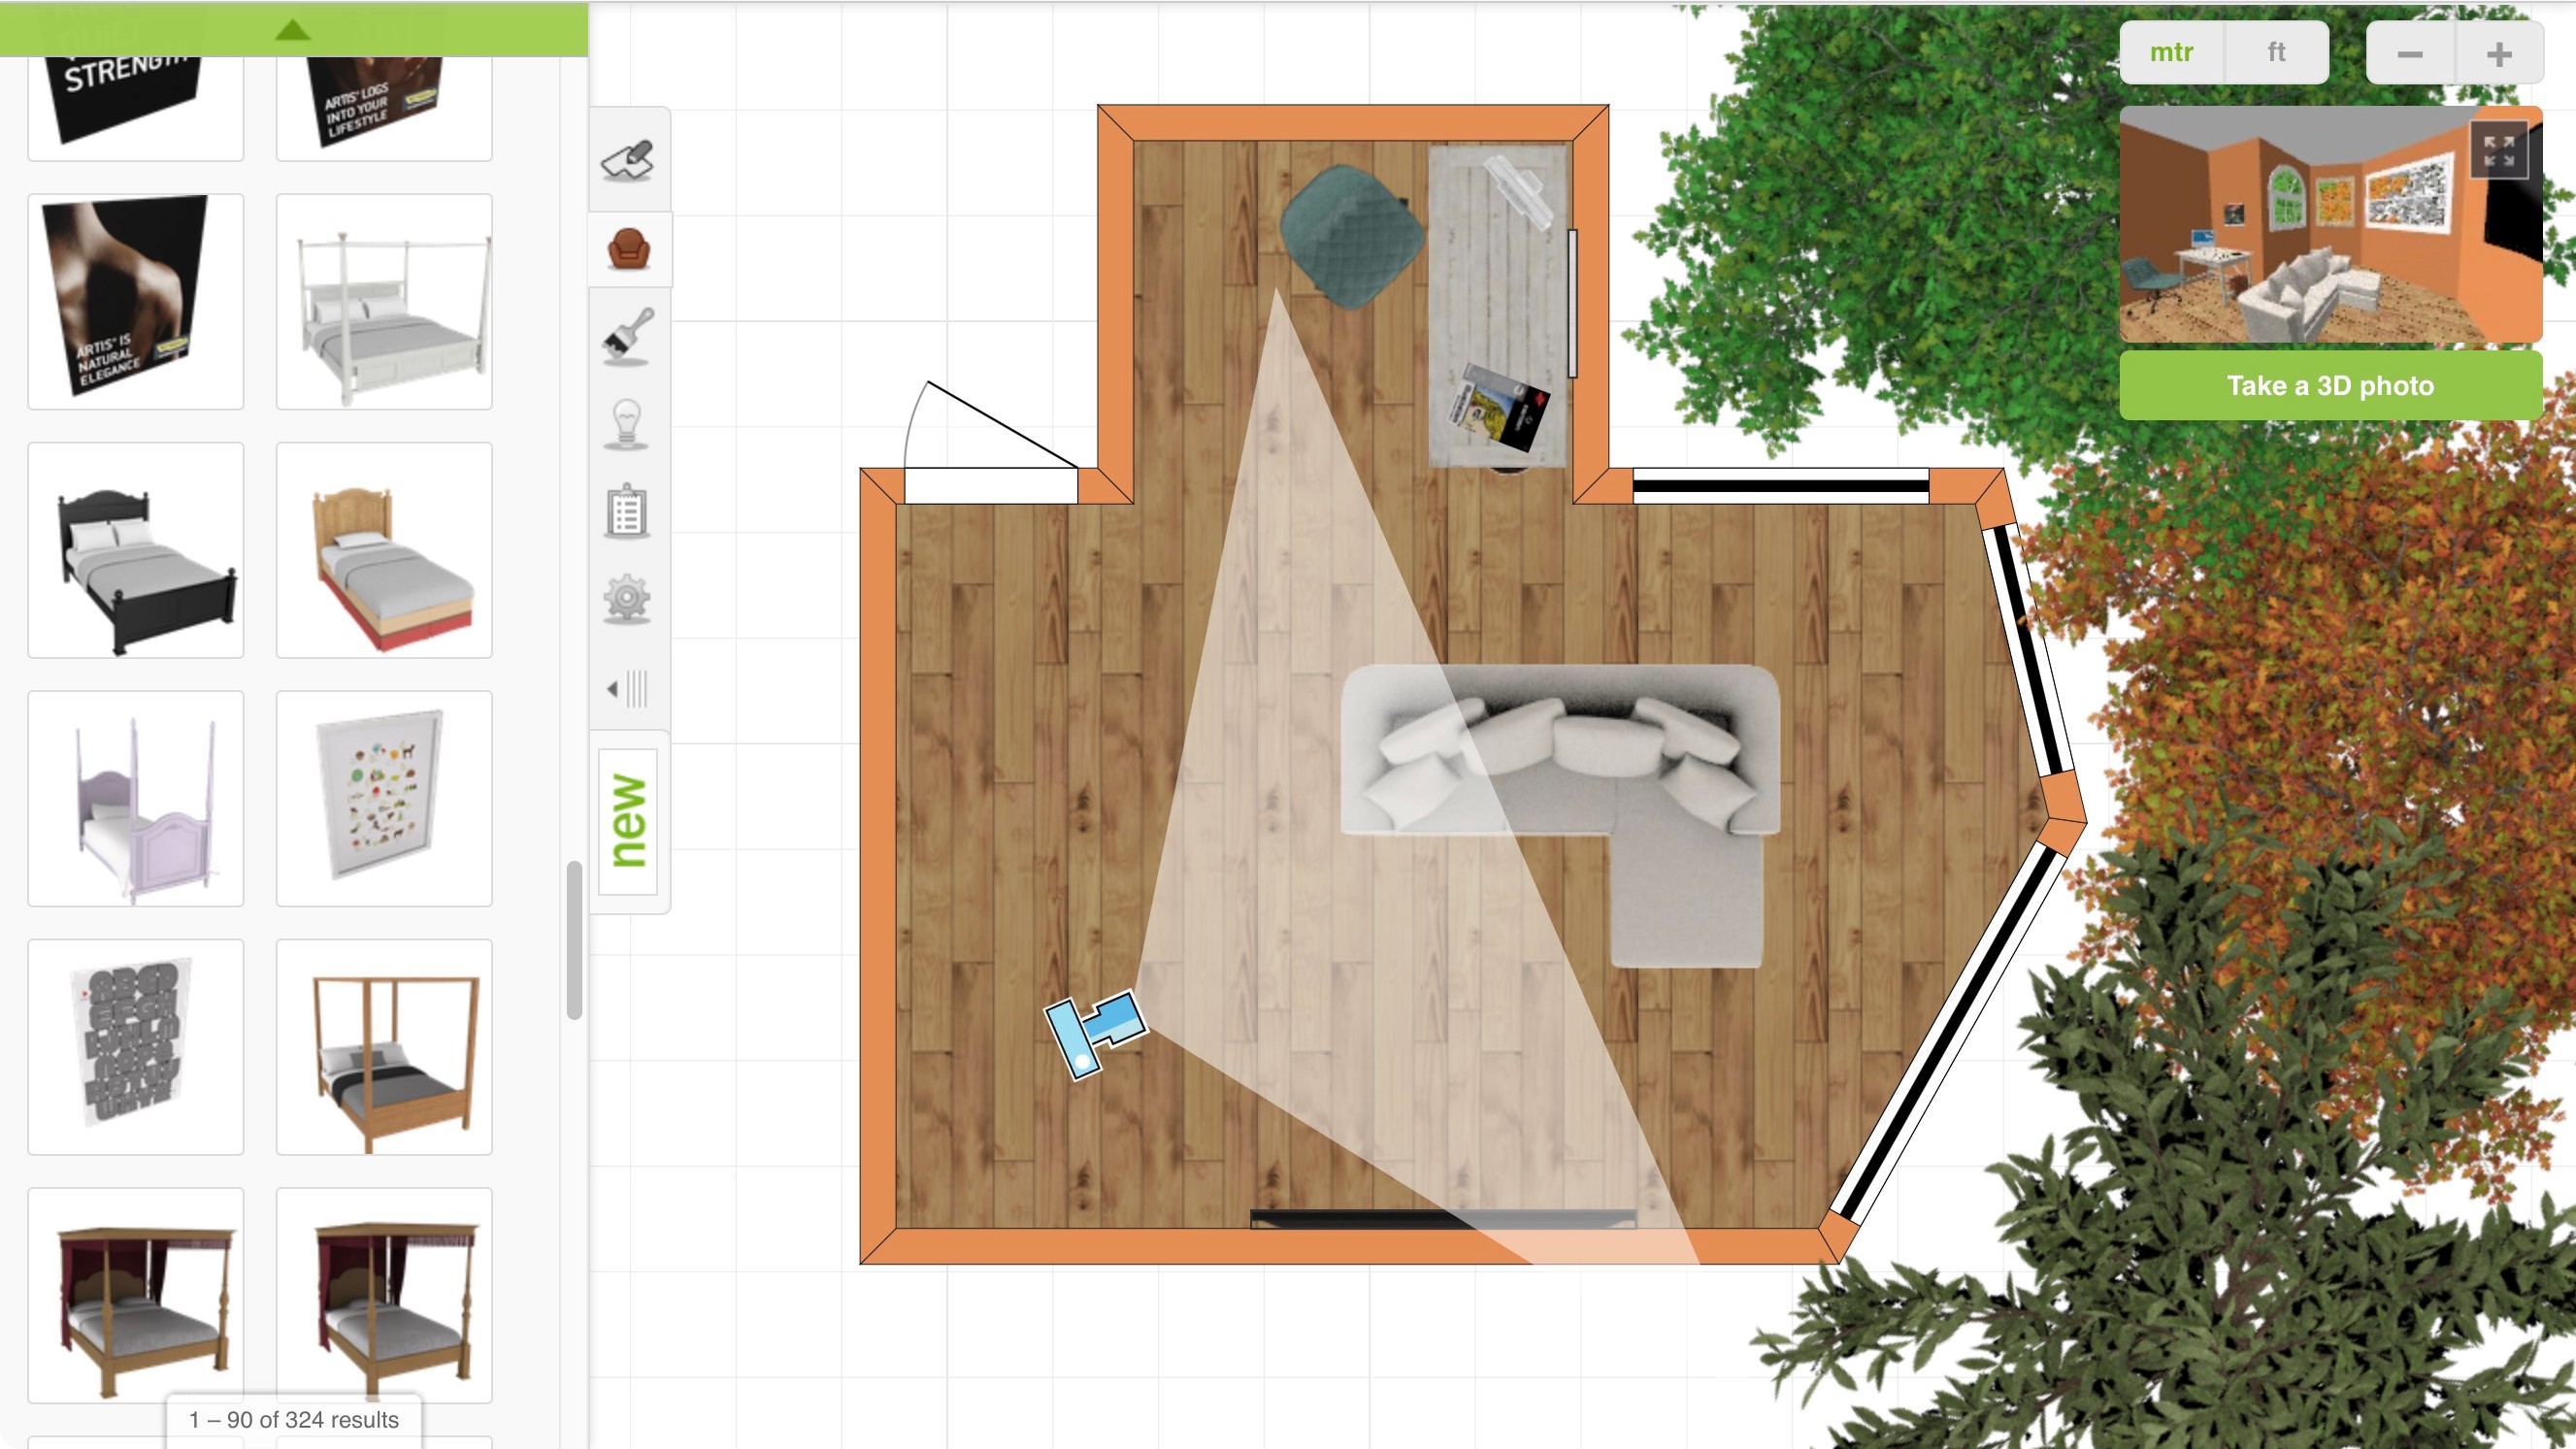
When it comes to furniture, you have a lot of choices on your hands. There’s also a large “new” button so you can check all the latest arrivals without having to find them by chance. It’s all broken down by categories such as Lighting, Dining Room, Kids’ Room, etc, and there’s a handy search field at the top to display exactly what you’re looking for.
Add as much or as little as you want by clicking and dragging. The interface is clever enough to know that if you add a potted plant - or anything else for that matter - over a table, it means you want it on top of that table, not on the floor. A good thing too because there doesn’t seem to be an option to raise an object manually.
It’s also a bit of a shame there doesn’t seem to be a way to customise the furniture: you can’t alter its dimensions, or even recolour it.
Painting
Speaking of recolouring, decorating your walls and floors is crucial. With that in mind, Roomstyler has a section entirely dedicated to this. This is where you’ll find carpets, tiles, wood flooring, painting, you name it, it probably has is.
And of course, you can mix and match, adding wallpaper on one wall, paint on the other, tiling on another side, the choice is entirely yours.
Display
If there’s a drawback to this service its the interface which locks you in a top down viewpoint. We couldn’t even find a way to rotate the room. Other services allow you to navigate through the room in 3D and even alter it while in that mode. Not so here. You can make use of the little thumbnail top right which shows what the camera sees, and even extend it to fill most of the page, but you can’t scroll or pan. You have to go back to the floor plan, move the camera around, and check again, which is somewhat convoluted and frustrating.
We also encountered an annoying glitch that sometimes happens when you click on your workspace, your design suddenly zooms in, and you can’t control it any longer. Other times the tool to pivot an object disappears. In both cases you need to save your work, even close the page entirely, and get back into it again for the glitch to resolve itself.
Renders
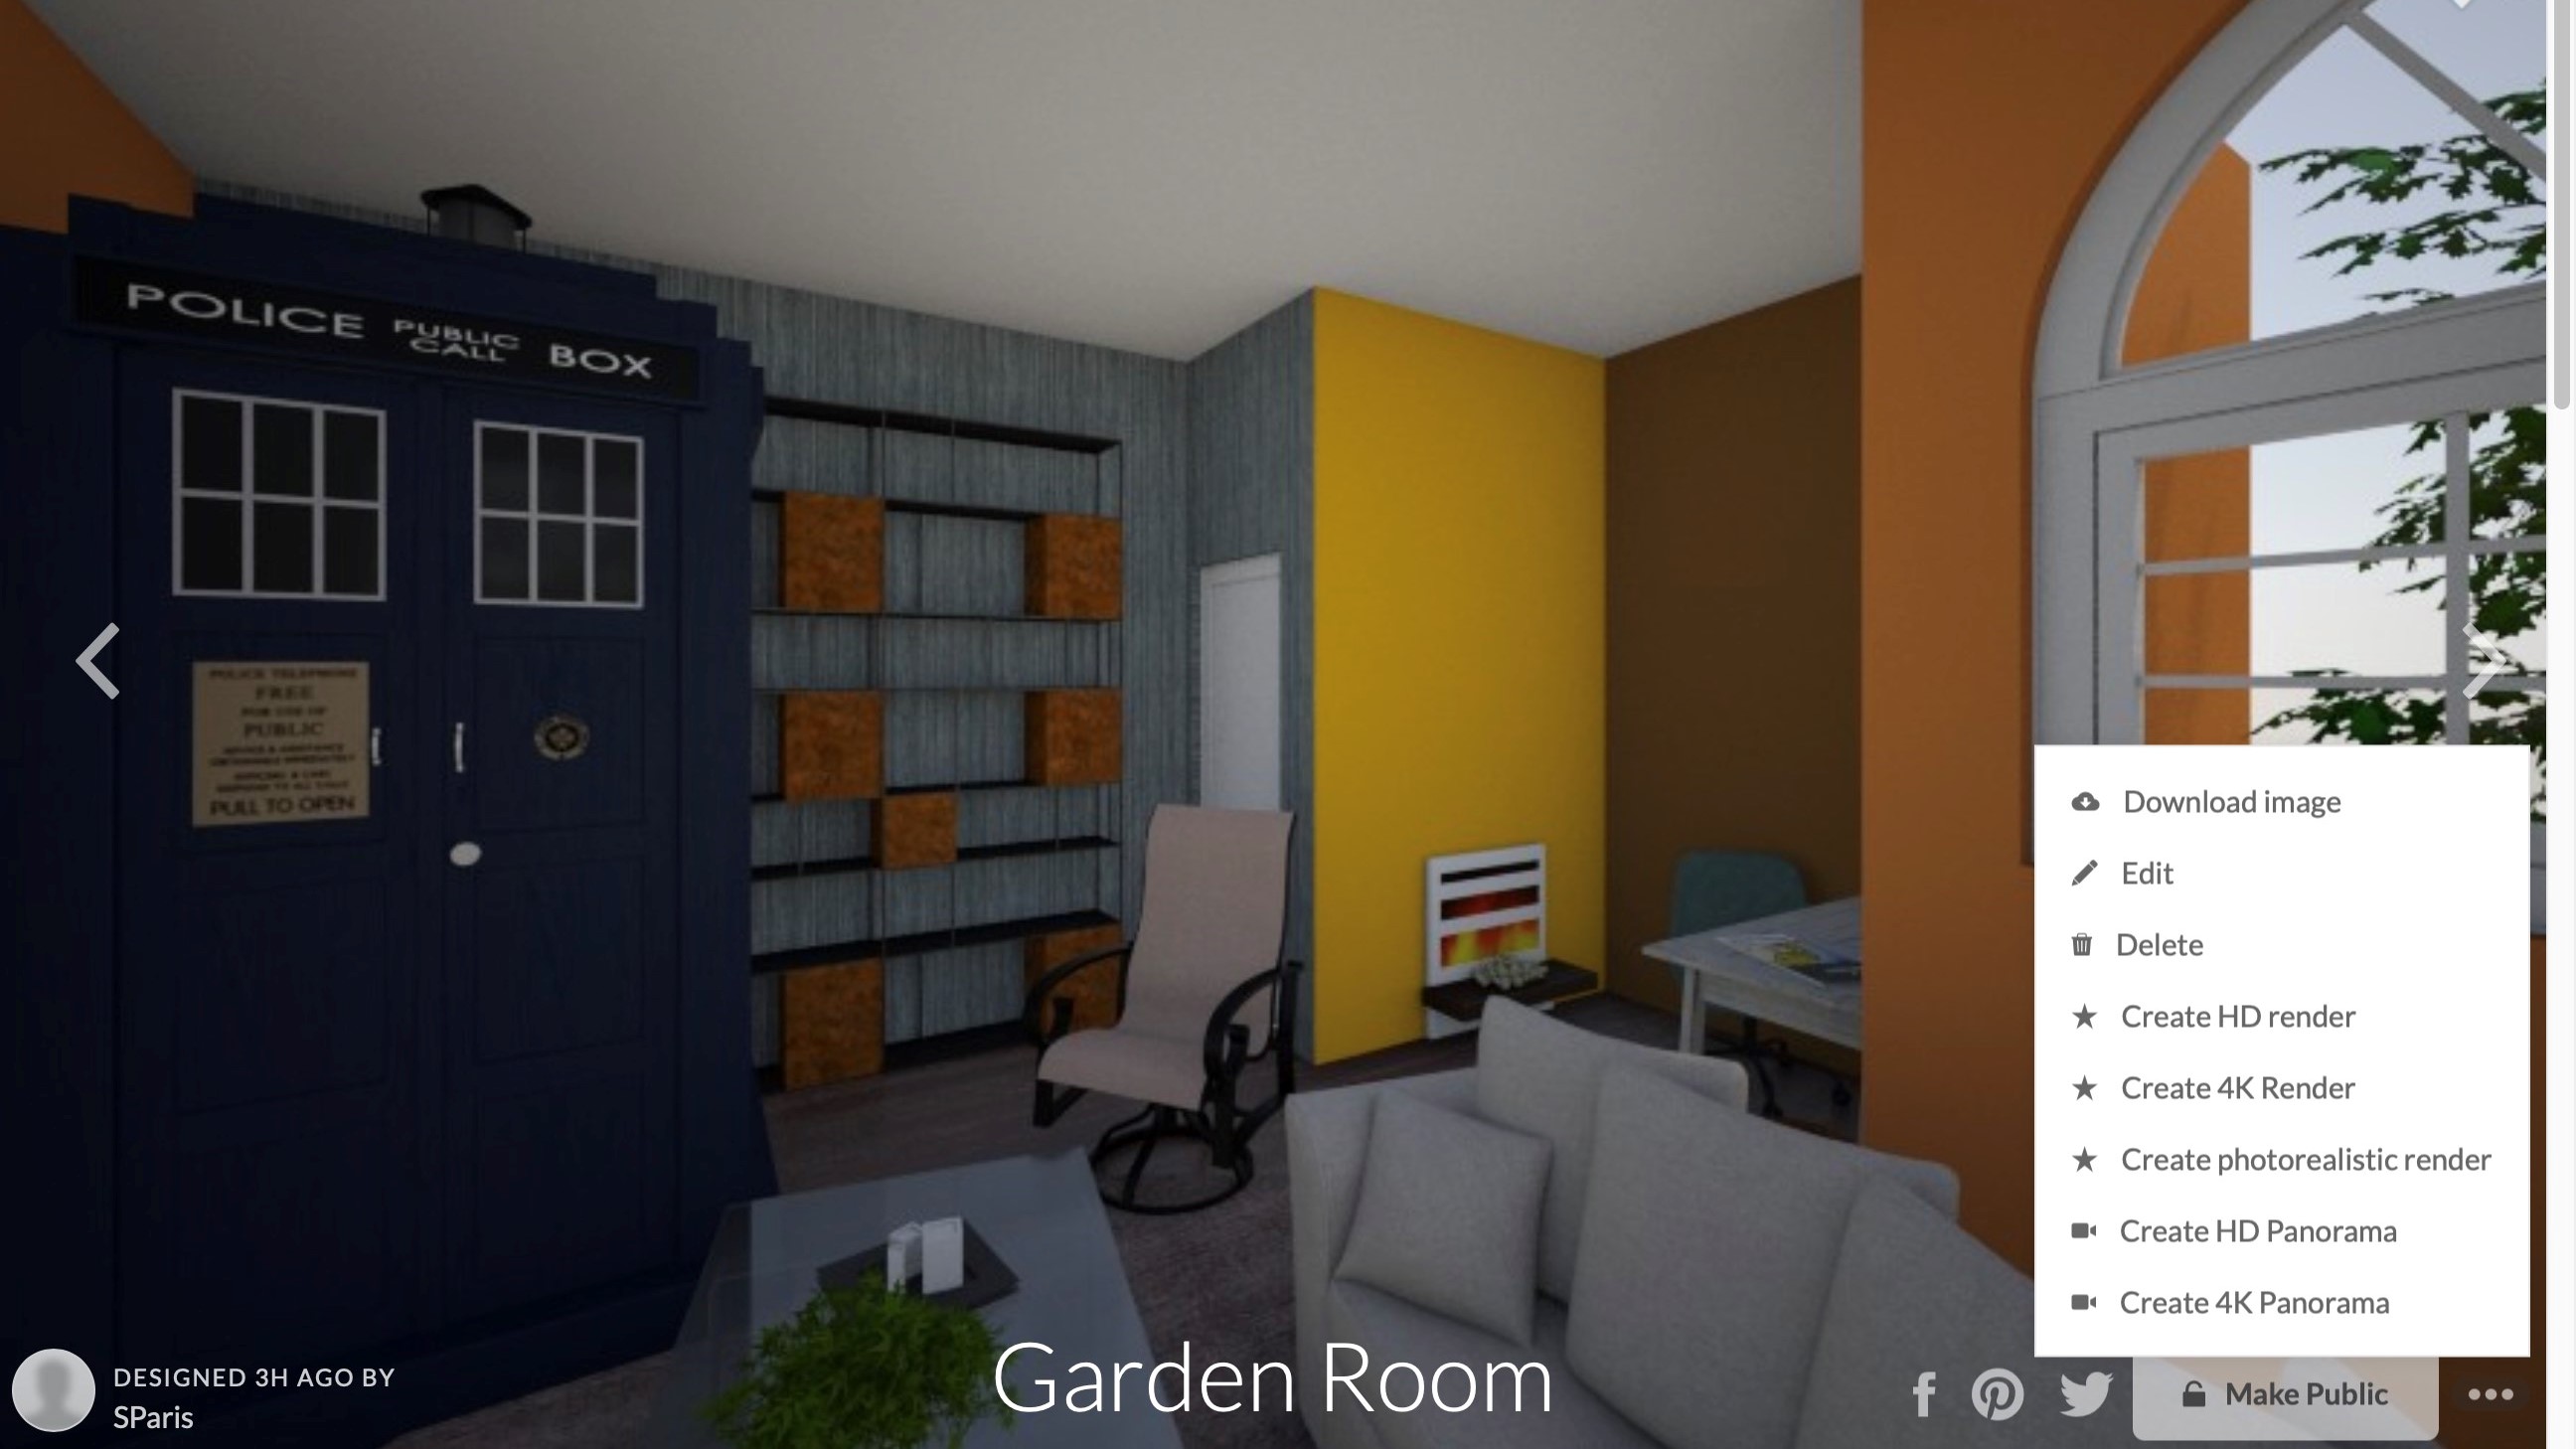
One main aspect of Roomstyler is being able to share the result of your creation with others. This is were rendering comes in: you use the camera to get the perfect angle of your room and click on ‘Take a 3D Photo’.
By default you’ll have a low quality render of 960x540 pixels. If you want higher quality (HD or 4K), or even photorealistic results, this is where a financial transaction rears its head.
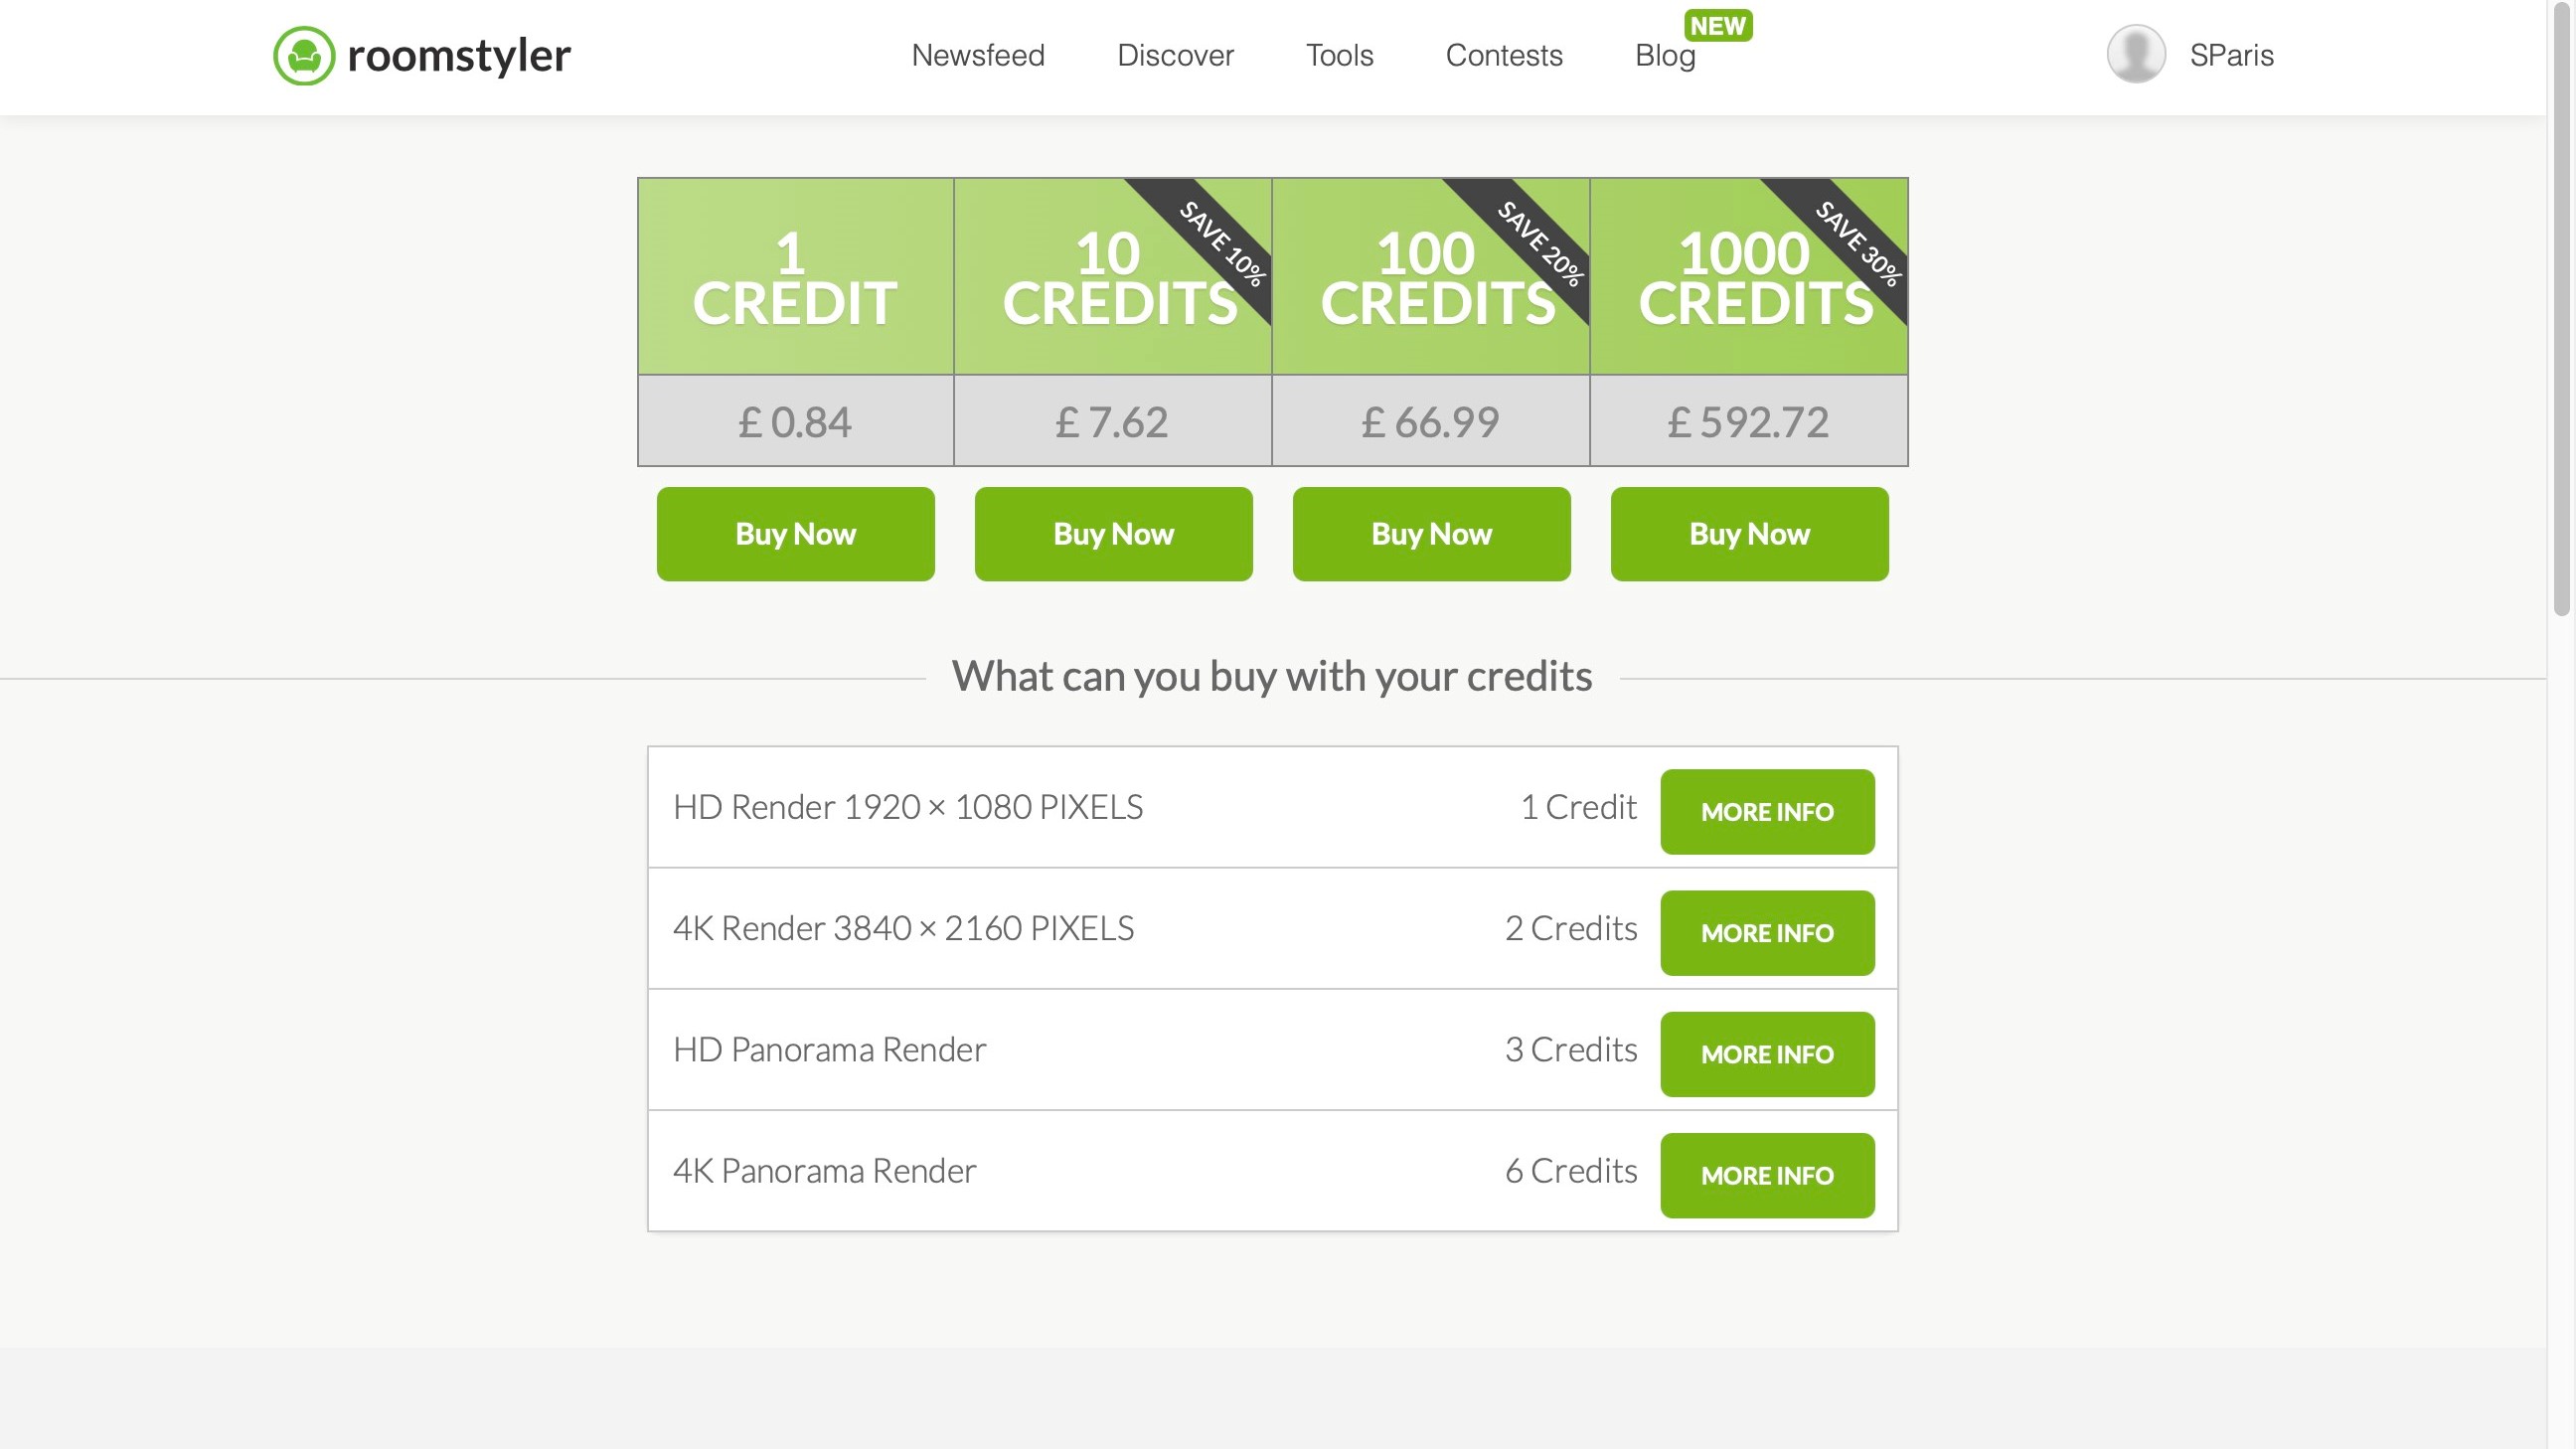
This is done in the form of credits. An HD render costs 1. 4K, 2. Photorealistic, and an HD panorama, that’s 3 each. And finally, you have a 4K panorama for 6 credits.
Should you buy one credit at a time, this will set you back £0.84, but as you’d expect, the more you buy, the cheaper each credit becomes: buy 10 credits and save 10%. 100, that’s a 20% saving, and if you opt for 1,000 credits, you can get them at a 30% discount.
Final verdict
Roomstyler is an easy to use 3D room design service, with many option to help you build either a fictitious location, or recreate an existing one in digital form. There are some limitations and a few annoying recurring glitches, but for a free service, it’s pretty good quality. It seems that money changes hands only when you wish to create high quality renders of your works, which seems to be an excellent deal all round.
- We've also featured the best home interior design software
Steve has been writing about technology since 2003. Starting with Digital Creative Arts, he's since added his tech expertise at titles such as iCreate, MacFormat, MacWorld, MacLife, and TechRadar. His focus is on the creative arts, like website builders, image manipulation, and filmmaking software, but he hasn’t shied away from more business-oriented software either. He uses many of the apps he writes about in his personal and professional life. Steve loves how computers have enabled everyone to delve into creative possibilities, and is always delighted to share his knowledge, expertise, and experience with readers.
