TechRadar Verdict
A good free video editing app with a well designed interface, let down by a poor selection of additional features in the store.
Pros
- +
Excellent editing interface
- +
Good range of tools
- +
The store options are a bonus
- +
Multi-platform (Android and iOS)
Cons
- -
Limited additional features
- -
Cannot edit effects
- -
The store is a little bare
Why you can trust TechRadar
Filmora Go is Wondershare’s mobile video editing app for Android and iOS, and is designed to help you create movies quickly, or - if you have the time - to allow you to fine tune your edit, pepper it with effects, and share it with the world. So how does it fare?
- Want to try Filmora Go? Download it here
- See our roundup of the best free video editing software
Getting started
When you first launch the app, you’ll notice it’s essentially divided into two: Templates and Projects. Let’s check the former first.
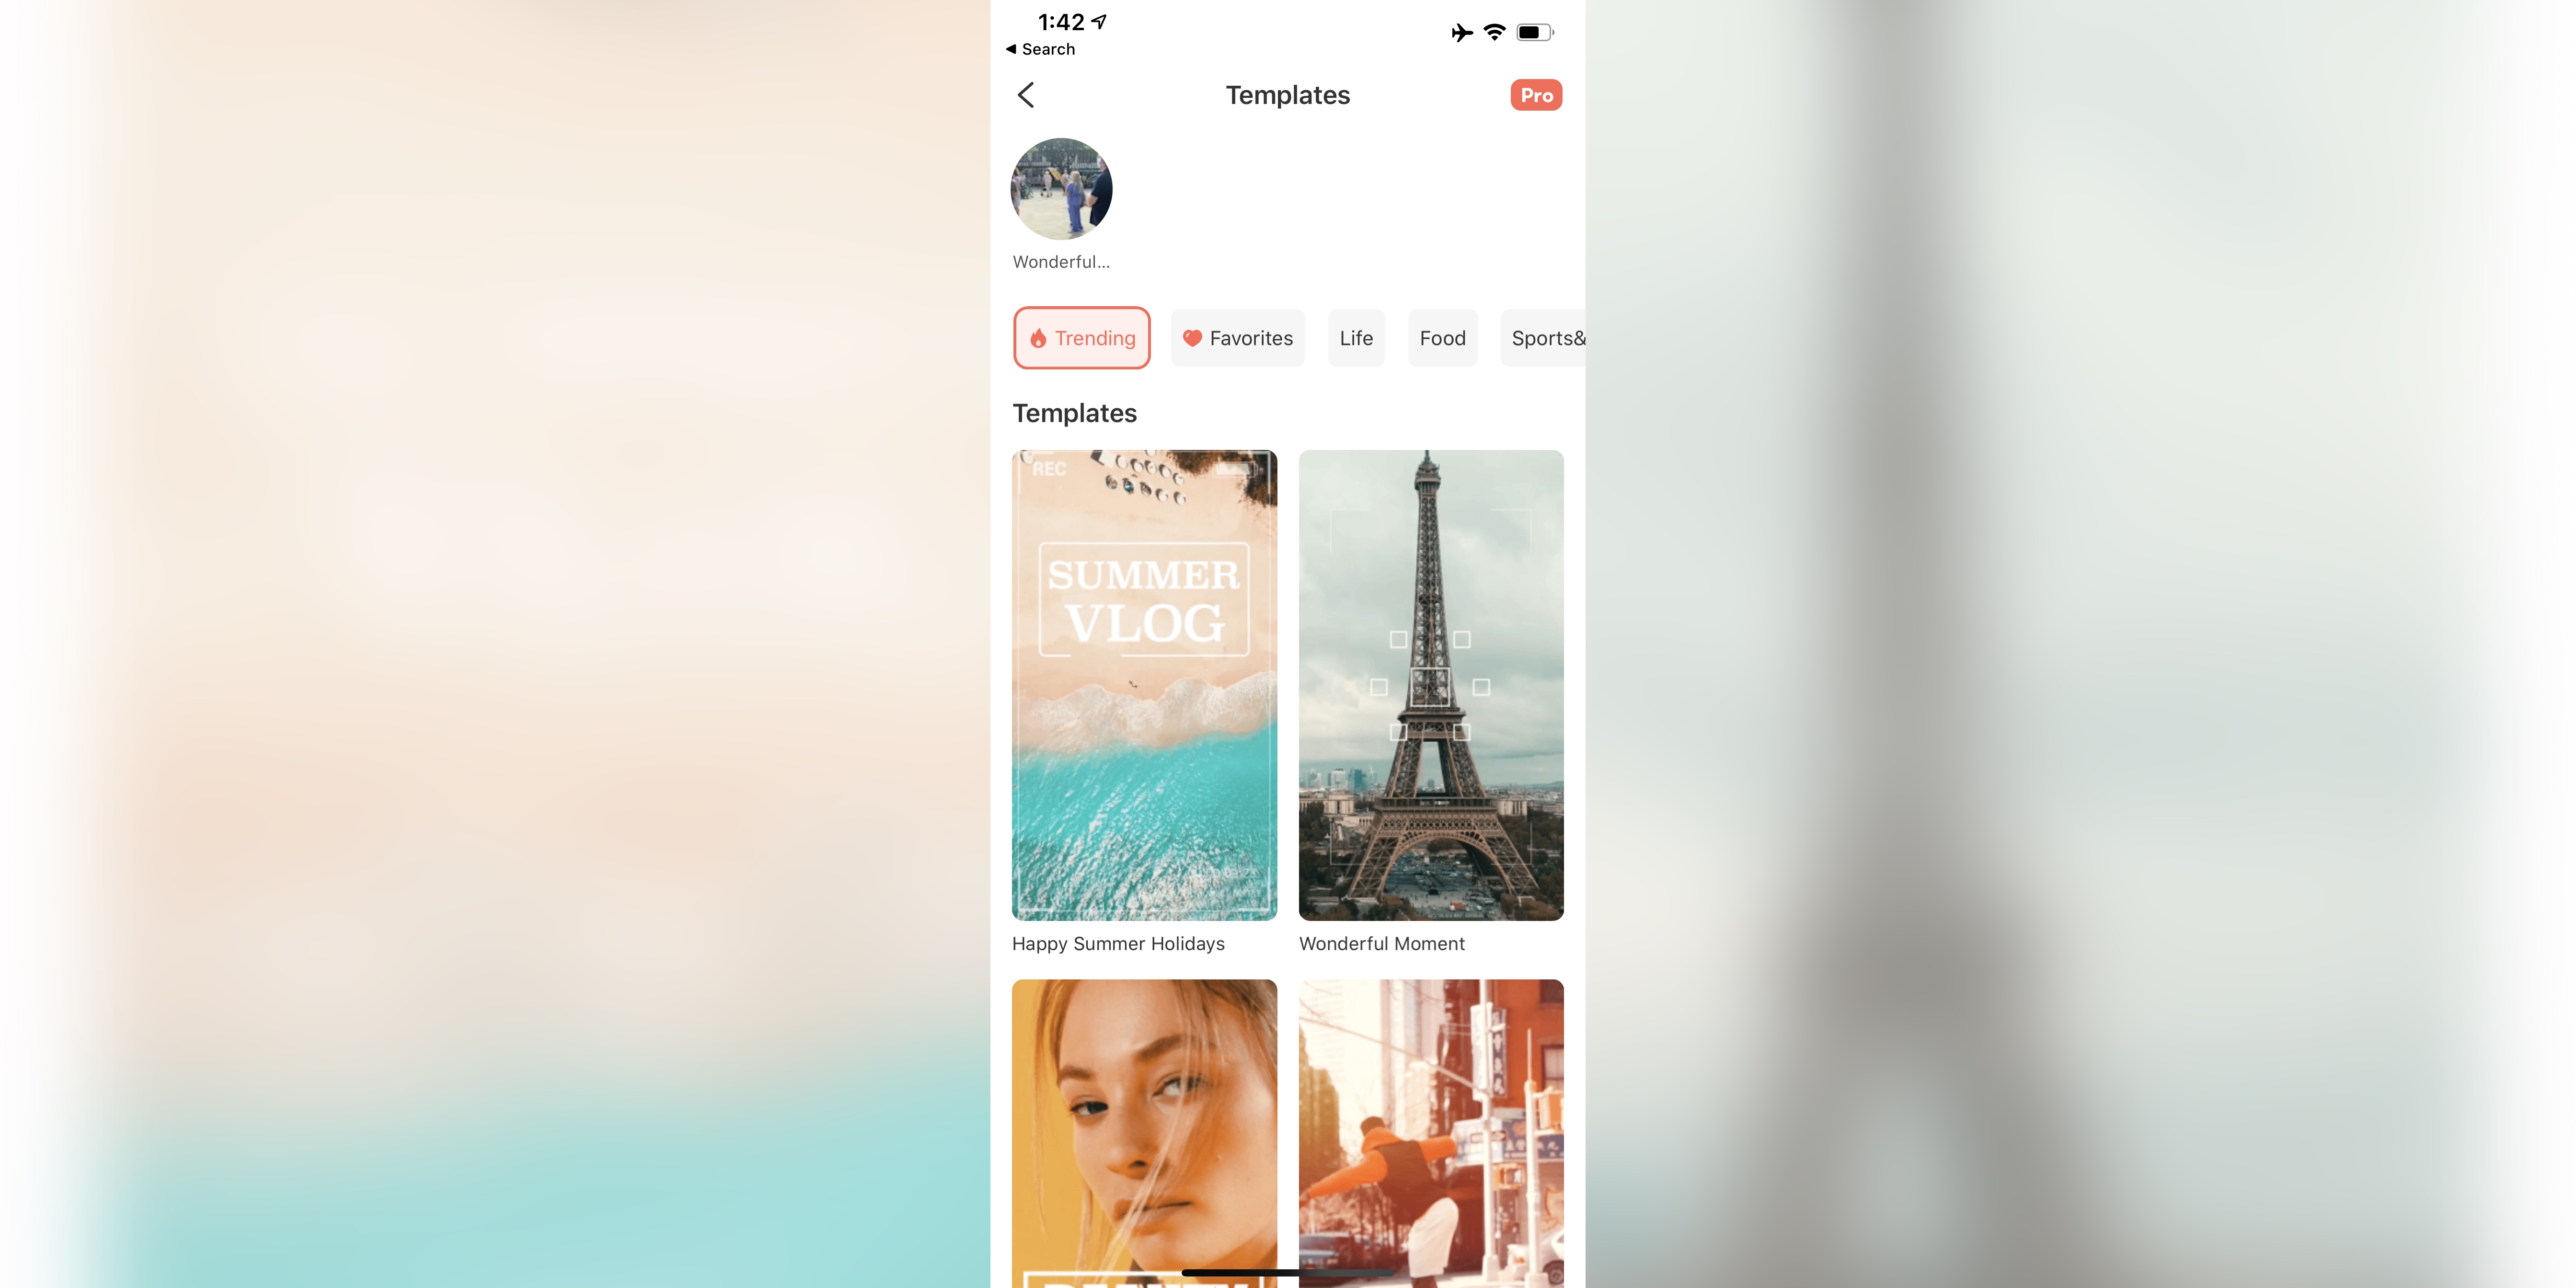
Templates
Templates are ready-made little projects, with music, titles, transitions, everything is ready for you to insert your footage into.
The ones on display on the main screen are the most popular options, but tap on ‘more’ to see all available templates. There are twenty of them, broken down into themes, such as Food, Fashion and Festival, however, only four of them are free and it’s perhaps not surprising that the four trending templates are them.
If you want to use the others, you need to go pro (which we’ll look at later).

It is possible to preview all templates, be they free or pro, to give you an idea of what you’re getting. Once you’ve made your selection, you then have to choose the clips you’d like to use.
At the bottom of the screen you’re informed how many clips you need, and the required length for each. This makes it easy to scroll through your available footage to choose the appropriate ones.
Sign up to the TechRadar Pro newsletter to get all the top news, opinion, features and guidance your business needs to succeed!
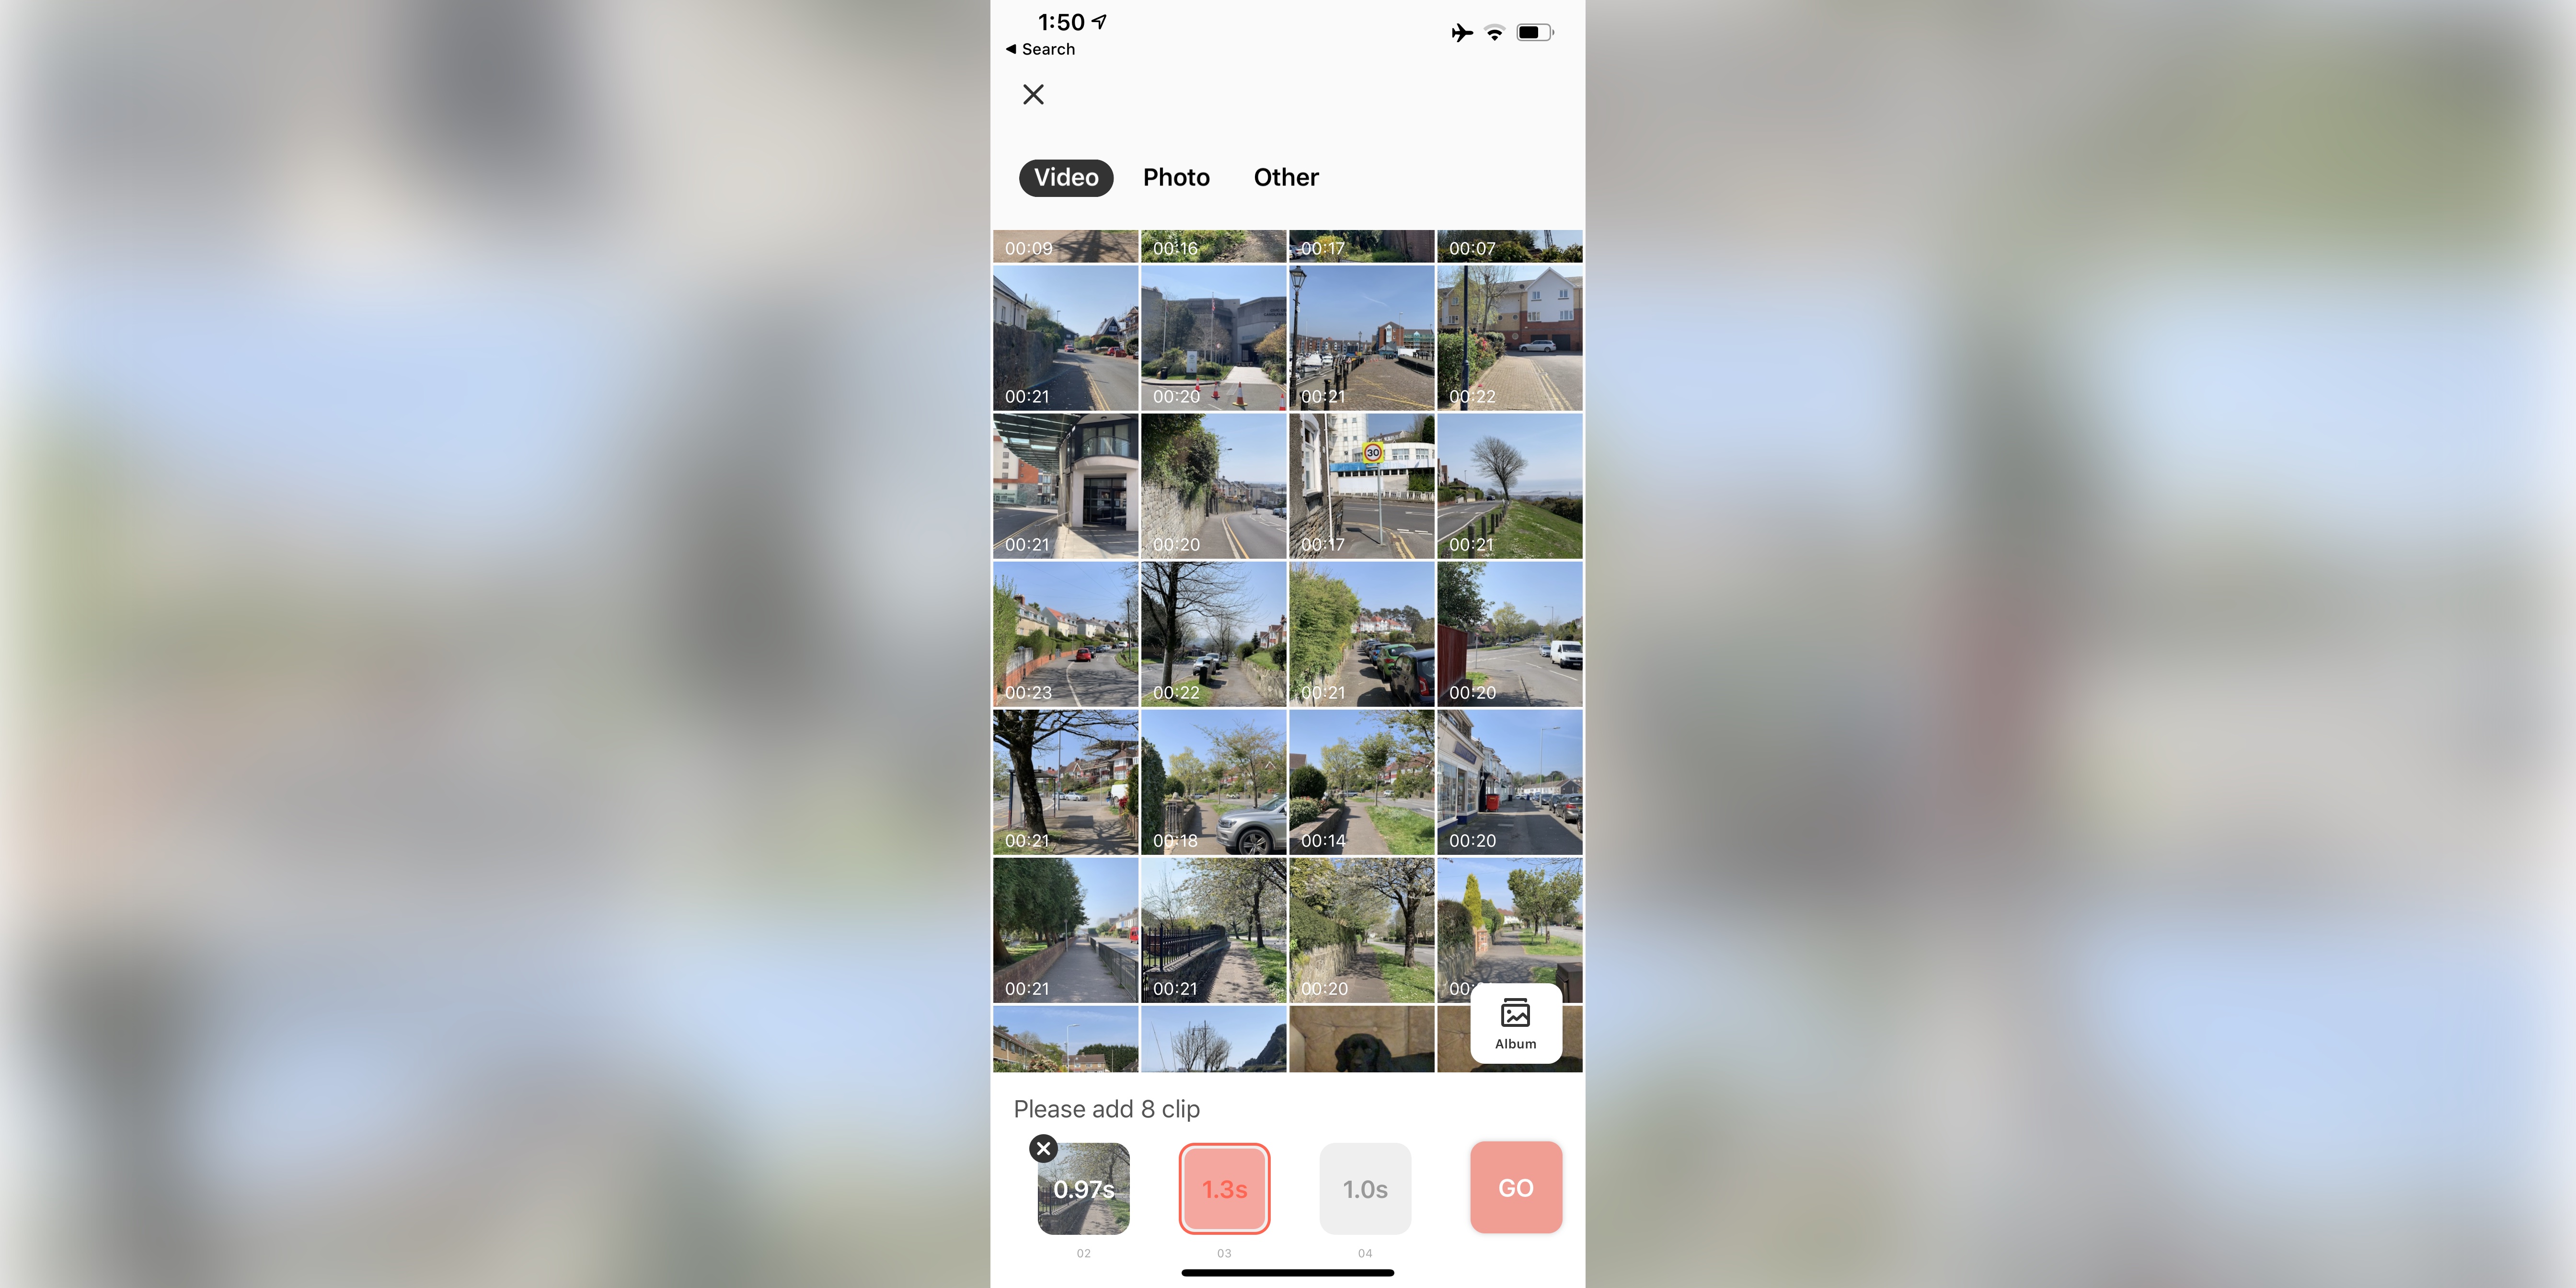
And although you cannot alter the length of each clip, you can select which portion of your footage you get to use (don’t worry if you forget this while building your film, you can also do this later on).
With all clips selected, tapping on go imports your footage into Filmora Go - which can take a few seconds.
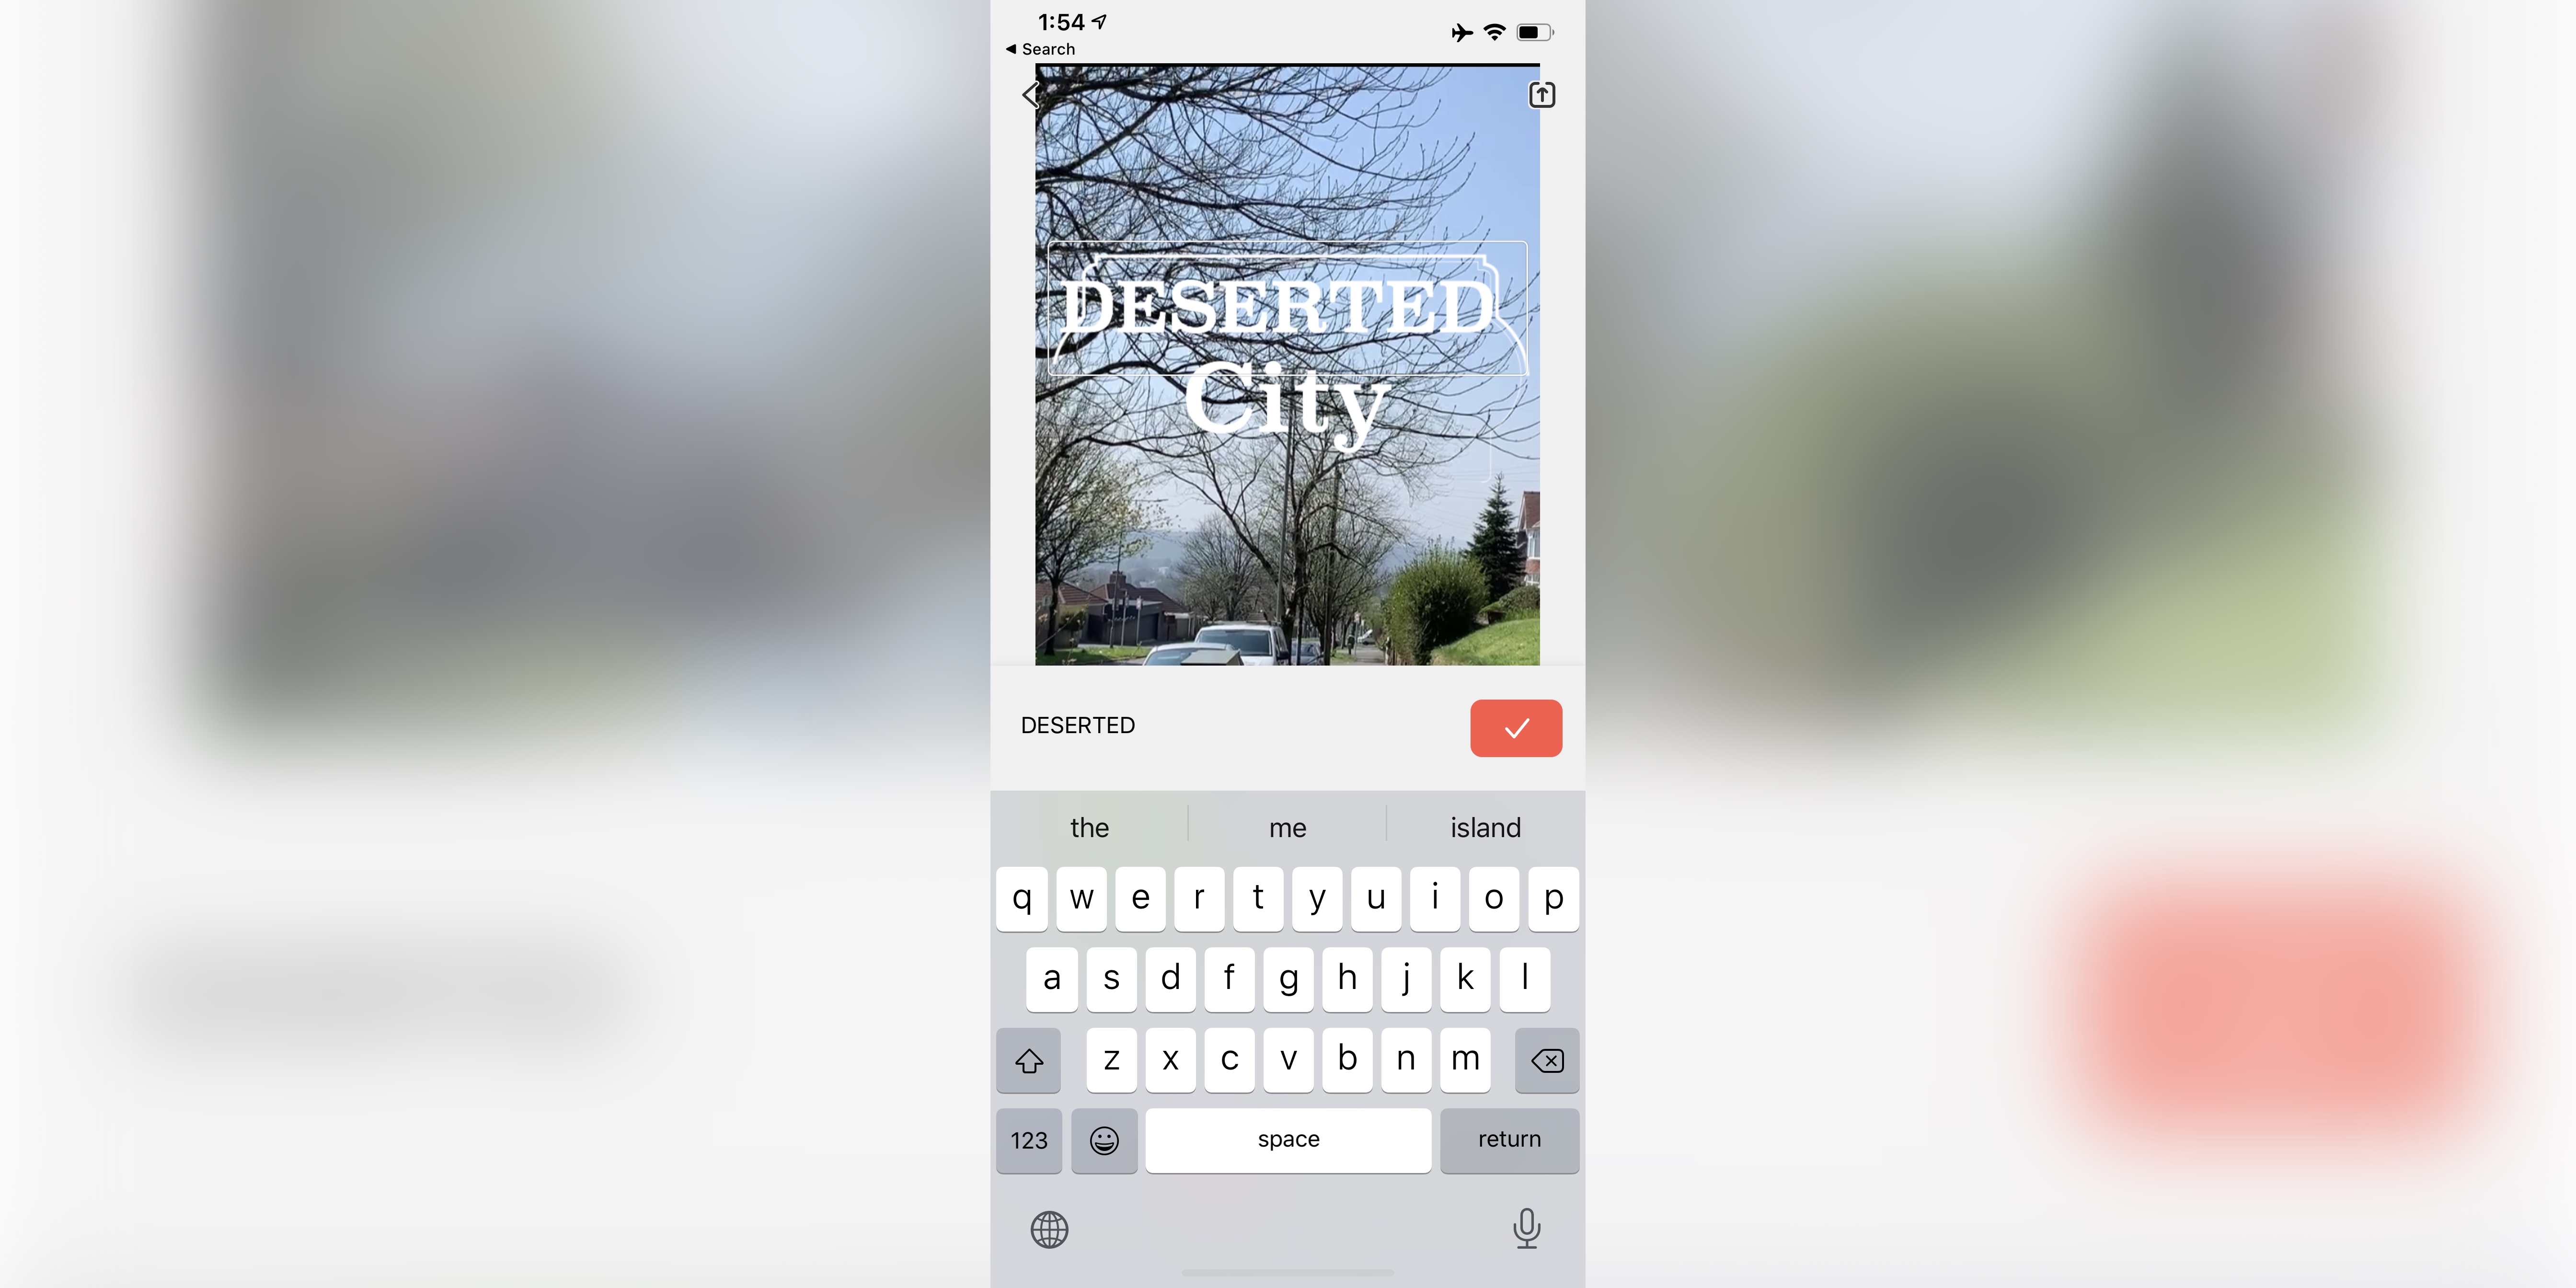
You’re then able to fine tune your video, although you really have few options: changing the default text is a given, and you can edit each video to make sure the section you wish to use is the one that’s selected, but that’s it. You can’t change the transitions, effects, nor the background music. It’s also important to note that the templates we’ve used all create a project in portrait mode, rather than the more usual and traditional landscape orientation.
Project creation
If you want more control over your creation, you need to forego these templates and create a project from scratch.
Just as with the Template section, you get to select the clips you’d like to use, although here, being able to trim the clips before you insert them is much more valuable, especially if your footage has a long duration, but don’t worry: you can alter your decision later on.
Also don’t feel you have to choose all the clips you’re going to use in one go. You can add more at any time during the creation process.
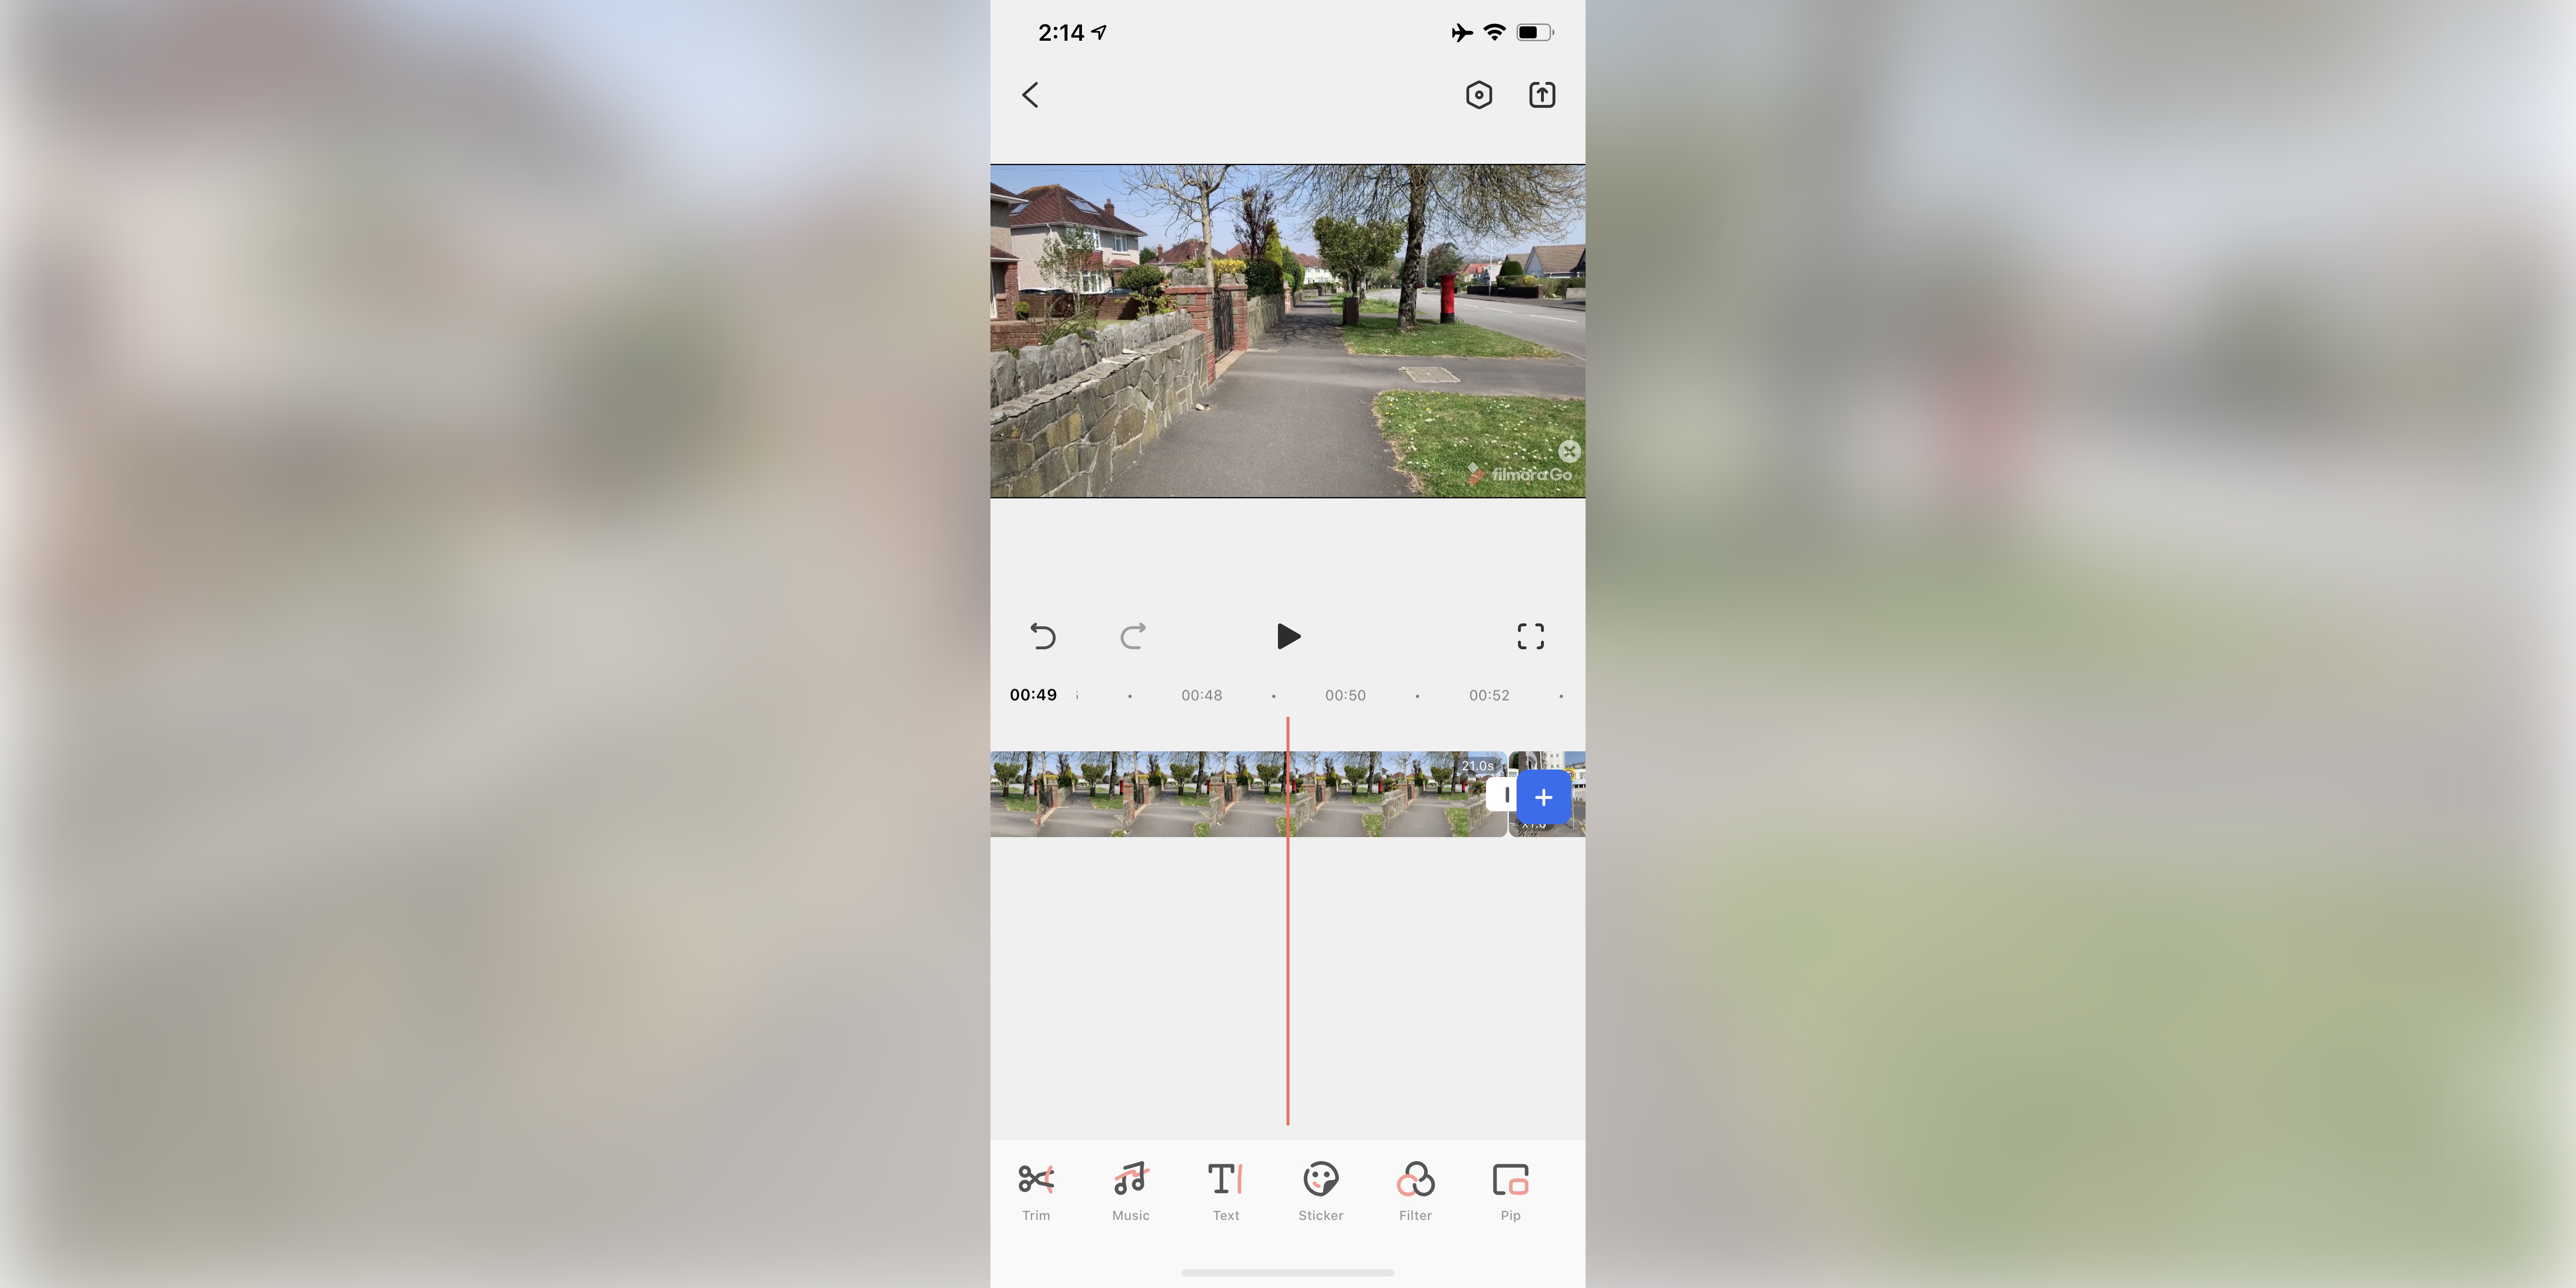
Once in the editing section, you’re faced with quite a large gamut of options.
All the tools you needs are located at the bottom of the screen, and they’re grouped into nine menus. Tap on ‘Trim’ for instance, for that menu to be replaced with another, offering you all tools aimed at modifying a selected clip. You can trim it, split it, duplicate it, alter its volume, rotate it, change its opacity, its speed, even create a freeze frame. You’re extremely well catered for.
It’s also possible to render your footage by dragging a selected clip along the timeline.
Other menus offer you the ability to add music and sound effects to your project (you can connect to the tracks stored on your phone, or use the ones supplied by Filmora Go).
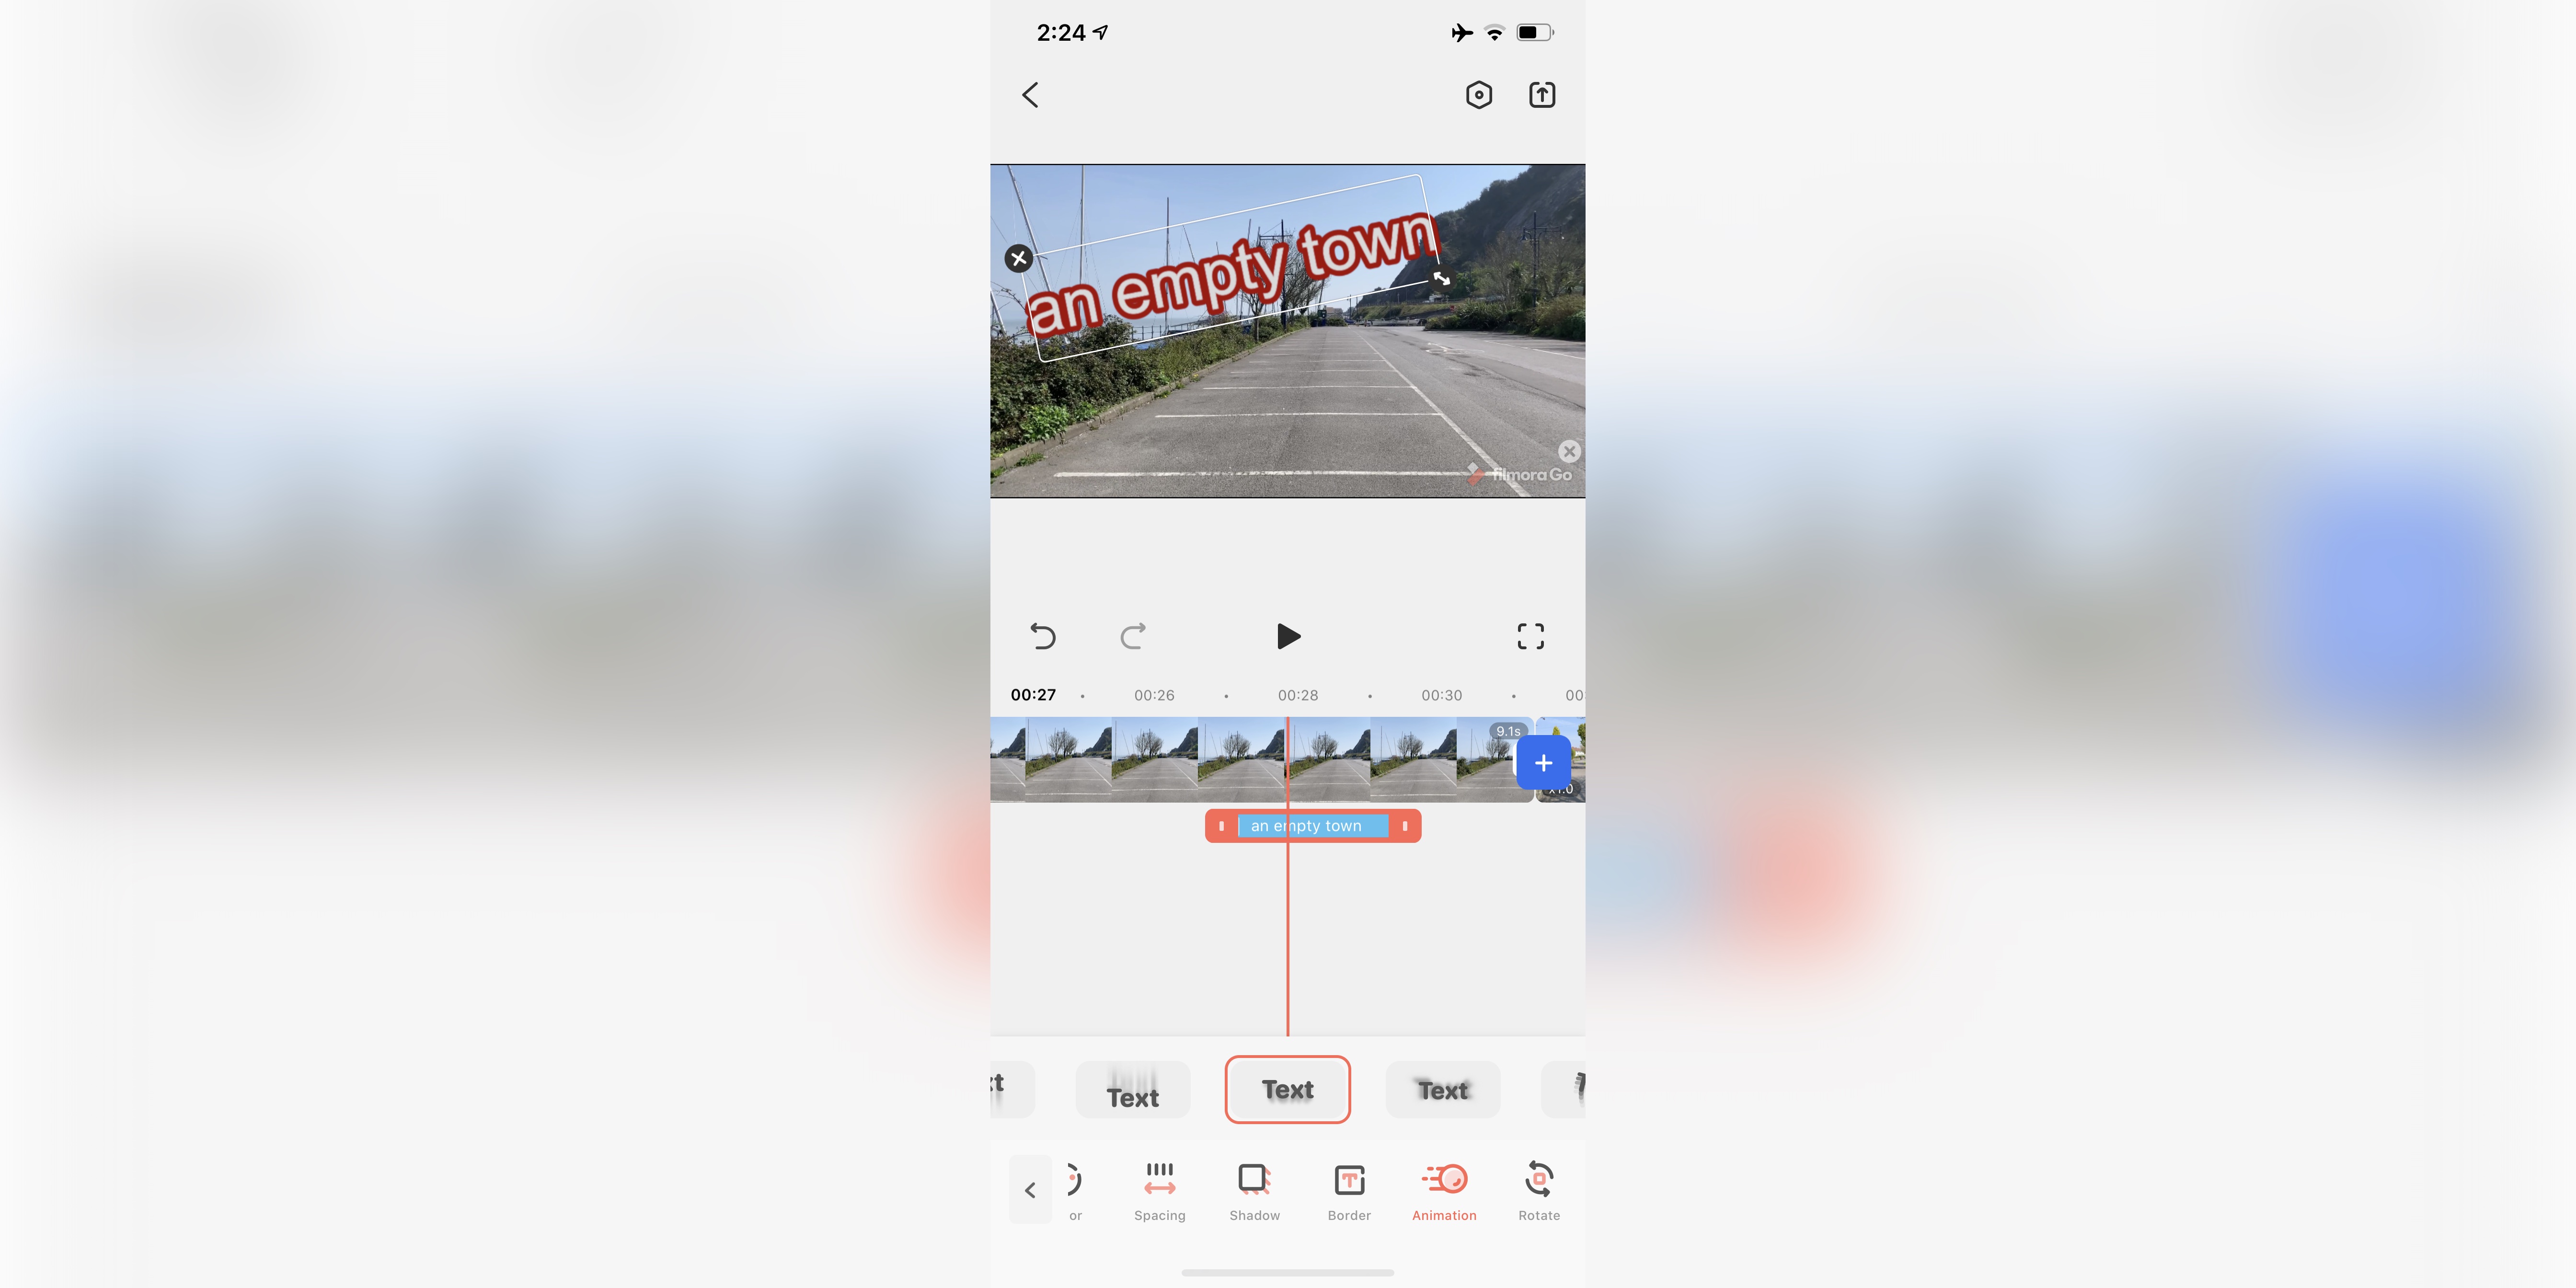
Adding text is more powerful than it originally seems, and includes the ability to alter your font and colour, add a drop shadow or an outline, and even apply motion effects to it. We practically liked the ability to alter its size, position and rotation using the usual gestures.
It’s possible to apply a bunch of animated stickers as well, although you have no control over their appearance, just their size and position on the screen.
What’s quite nice to see is that these addition to your project aren’t embedded onto a clip: they appear as floating clips, separate from your footage, and you’re free to reposition them and even alter their duration at will.
Filters let you perform pre-determined colour correction to a selected clip - or your entire project. You only get one free one (Landscape), and the other two presets (Cyberpunk and Black & White) are available in the Store for a fee. Think of them as Instagram filters, only with a very limited palette.
Should you find these options too limiting, you’ll appreciate the Adjust menu. These tools allow you tweak most parameters you’d want to work with on your clips, be it saturation, brightness, contrast, etc., and certainly makes up for the lack of choice in the Filters.
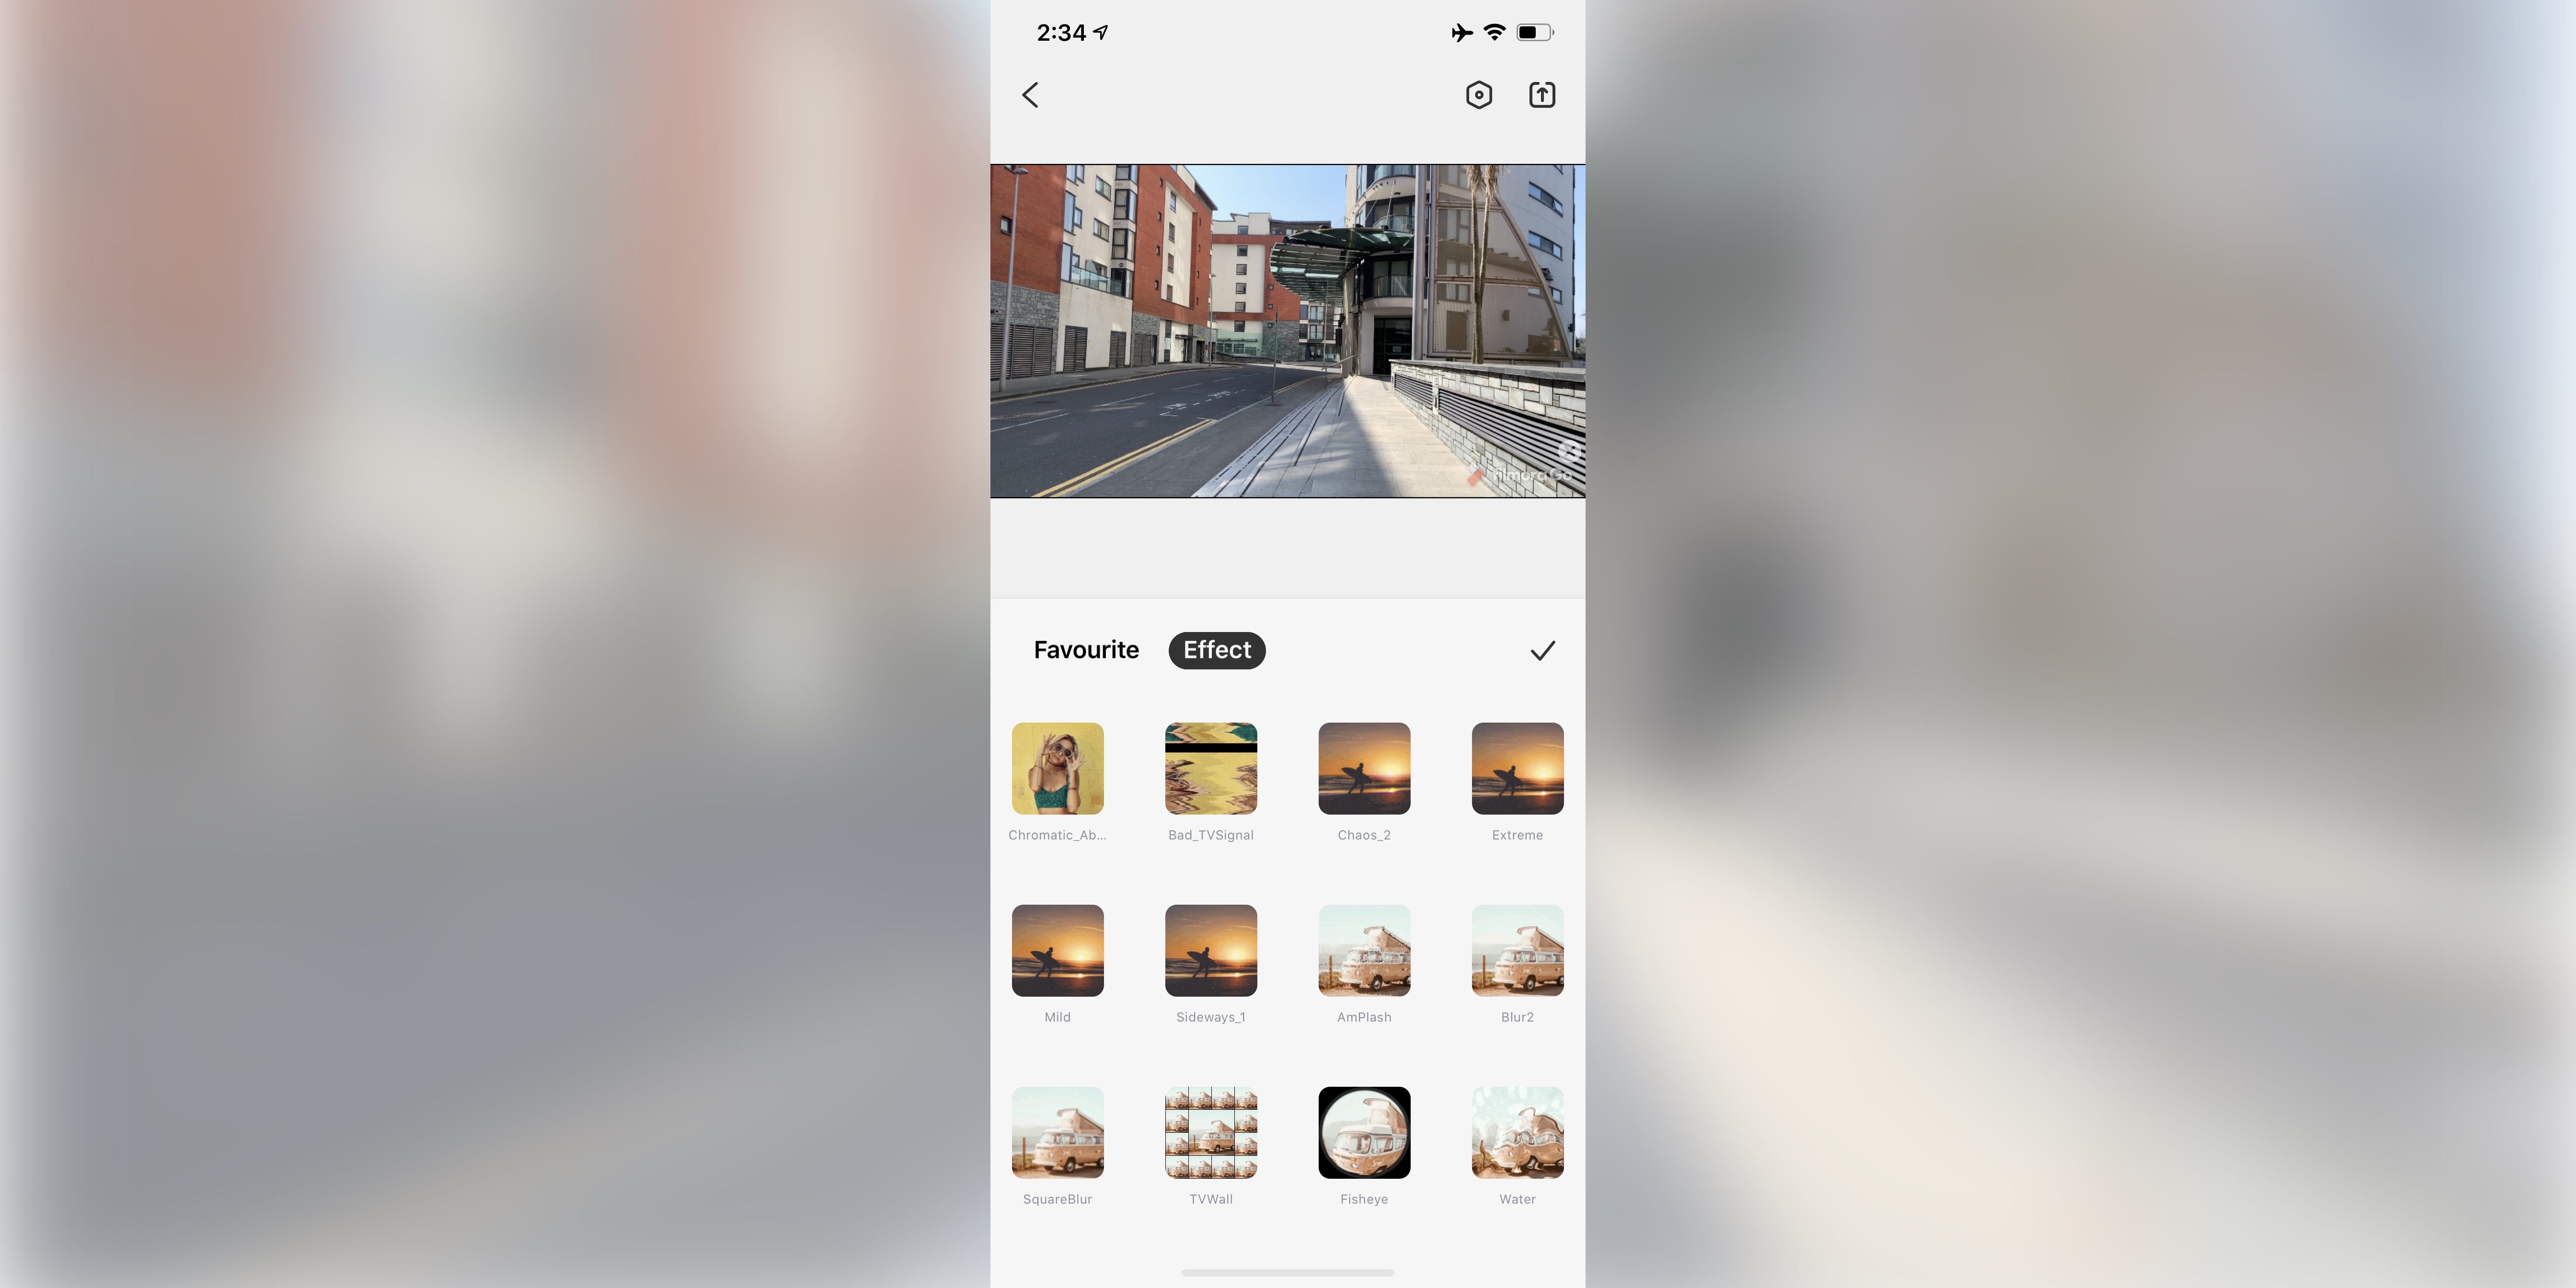
The Effects menu offers you a handful (12 to be exact) or effects which are designed to distort your video in some way. We found these options quite extreme, and since there doesn’t appear to be a possibility to alter their parameters, we felt this was a very limited and disappointing offering.
One thing worth noting however: like the text and stickers, these effects are separate from your clips, and you can move them around to place them wherever you need, even spanning multiple clips.
Filmora Go only lets you work with a single layer of video, however there is a PiP option (picture in picture) which allows you to place a clip over another (or range of others), resize it and reposition it anywhere on the timeline.
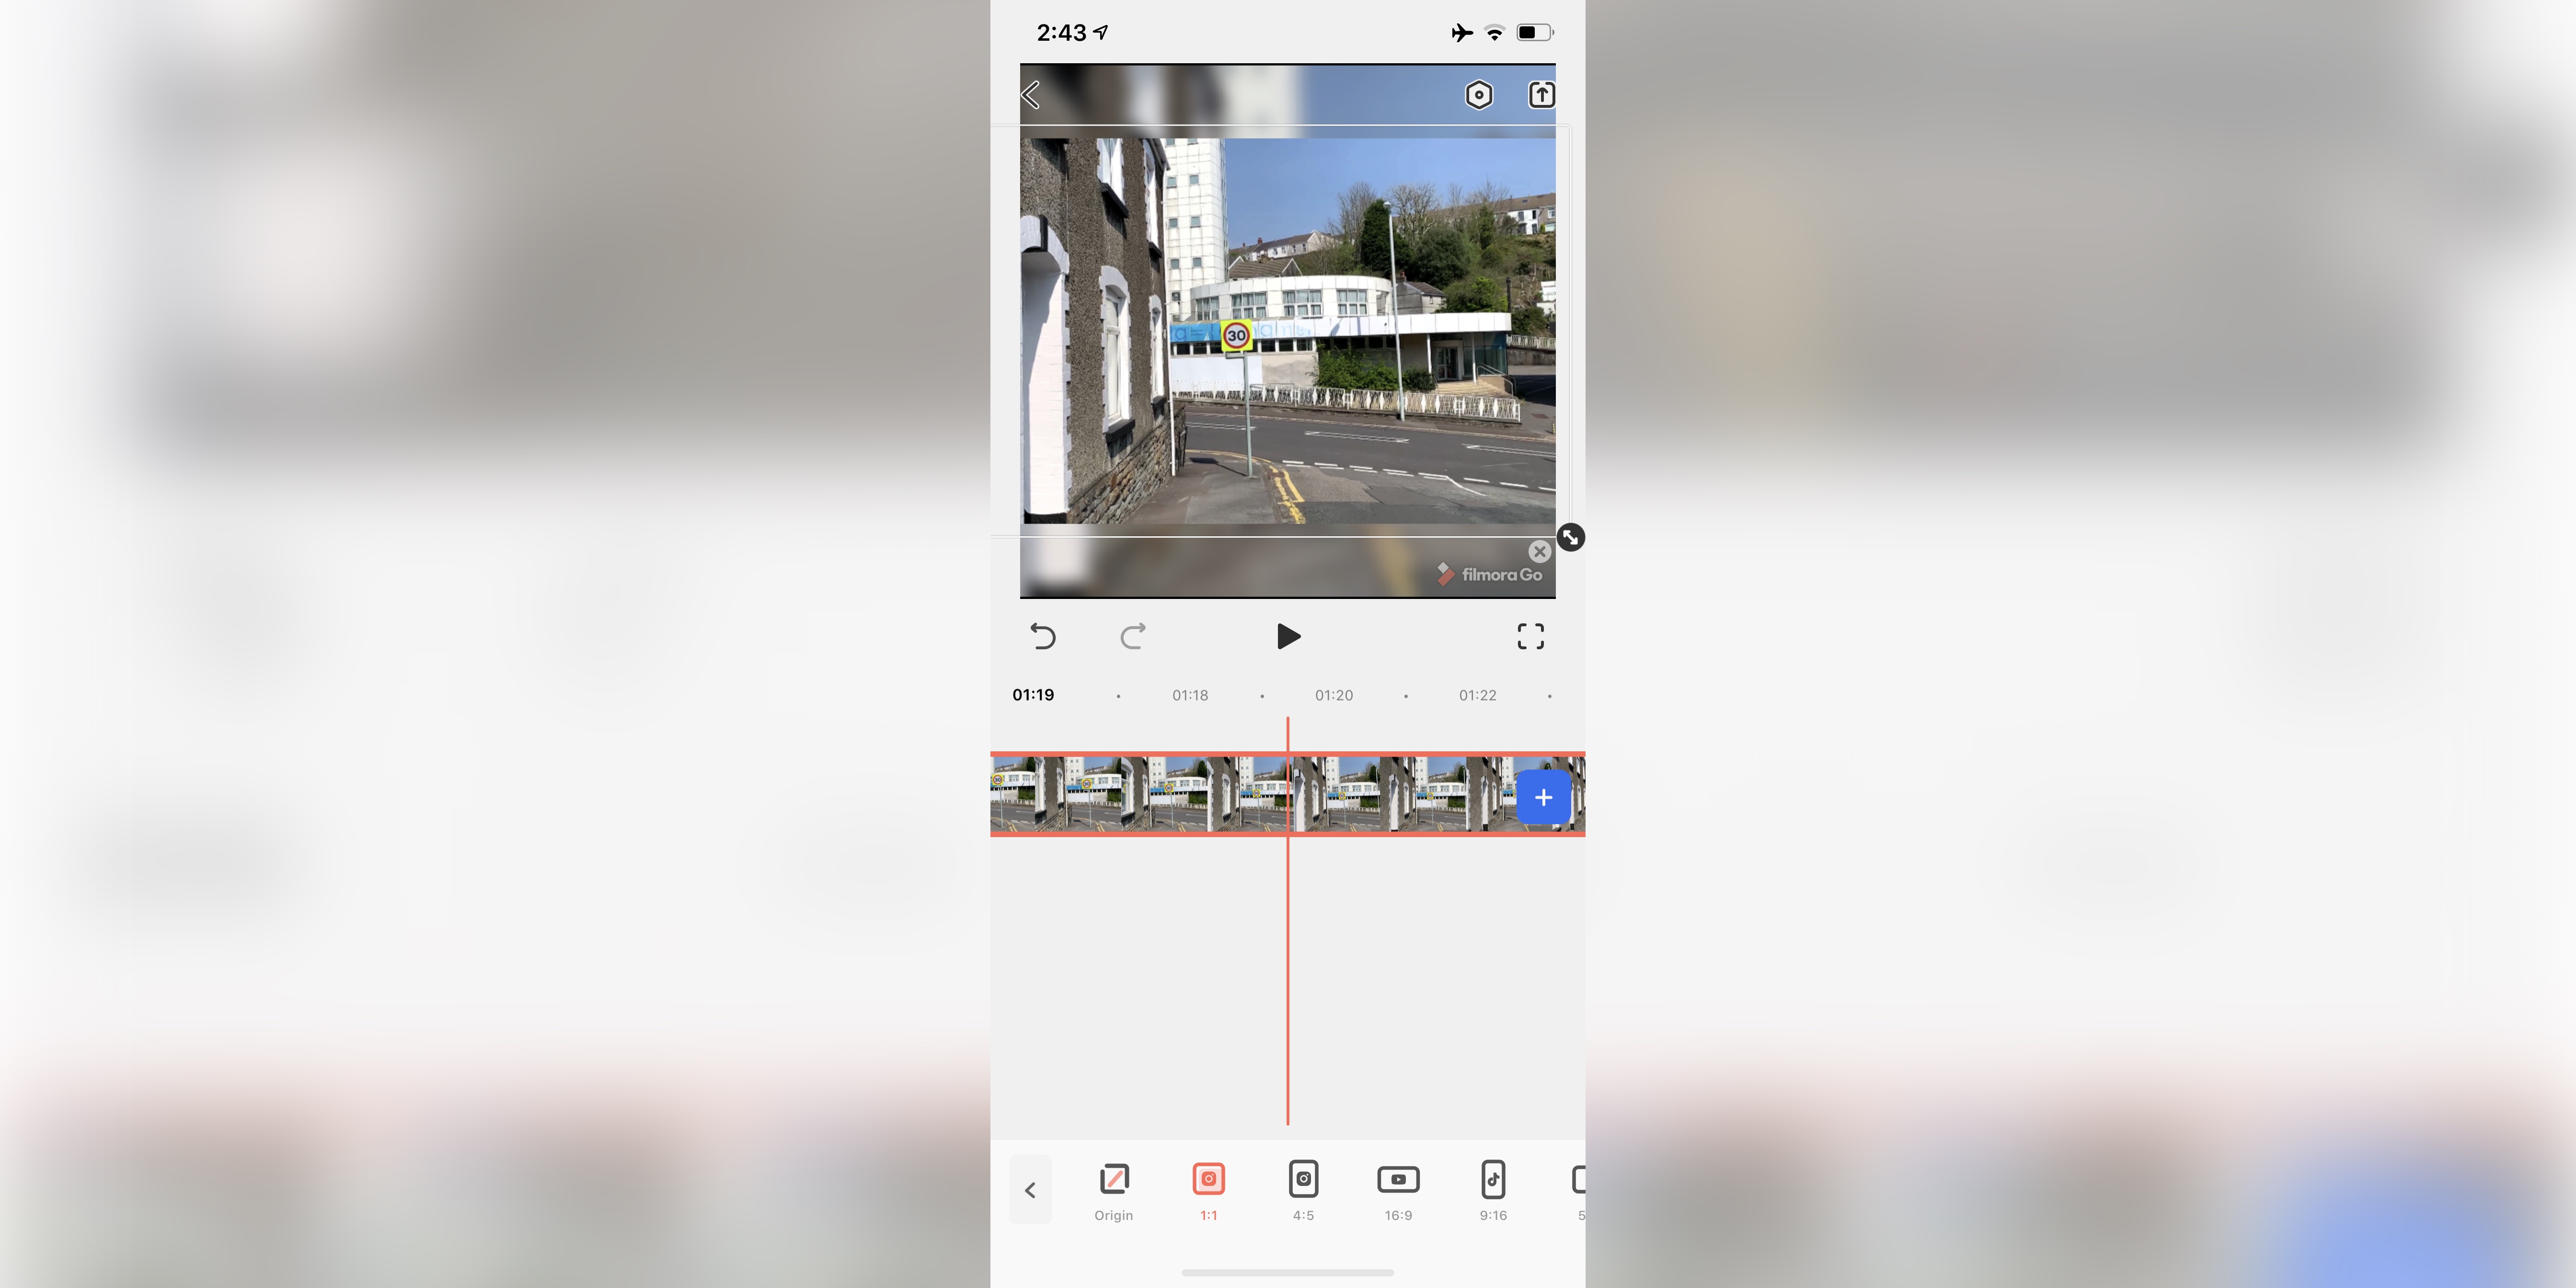
And the last option is Canvas - this is where you get to choose the overall format of your project. By default, this is based on the clips you’ve added, but you can alter that and have 5 different options - 1:1, 4:5, 16:9, 9:16 and 5:4.
Should you select a format that doesn’t match your clips’ dimension, you can resize your footage to fill the screen, and reposition it to show the part of the video you wish to focus on.
If you end up with back bars on the edge of your canvas, you can replace that with a colour of your choice, or an elegant blur effect, which seems to be all the rage at the moment.
Exporting
Whether you created a video with a Template, or from scratch, the export process is the same.
Once you’re done, you can share your work to social media sites like Instagram, YouTube and Facebook. Alternatively you can save it to your cameral roll, or send it to your friends and family via messages, mail, or other available means.
Do note that if you’re using the free app, your video will be watermarked, including a big ‘Filmora Go’ appearing at the very end of it. Your export is also limited to a maximum resolution of 1280x720 (or 720x1280 depending of your chosen orientation). All these restrictions go away if you upgrade to Pro.
Go pro
Pro is a subscription service which you can use to gain access to all the premium features on offer, with a promise of more being added over time to sweeten the deal. The watermark is immediately disabled, and you also gain the option of exporting your work at 1080P (but no higher - a 4K option would be welcome).
You have the choice of paying $6 (£4.99) per month, or $38 (£29.49) for the whole year (which includes a 3 day free trial so you can test all the features out before committing).
Should you really like what you see, you could choose to go for a one time purchase of $63 (£48.99) to give you access to all features for life with a single initial outlay.
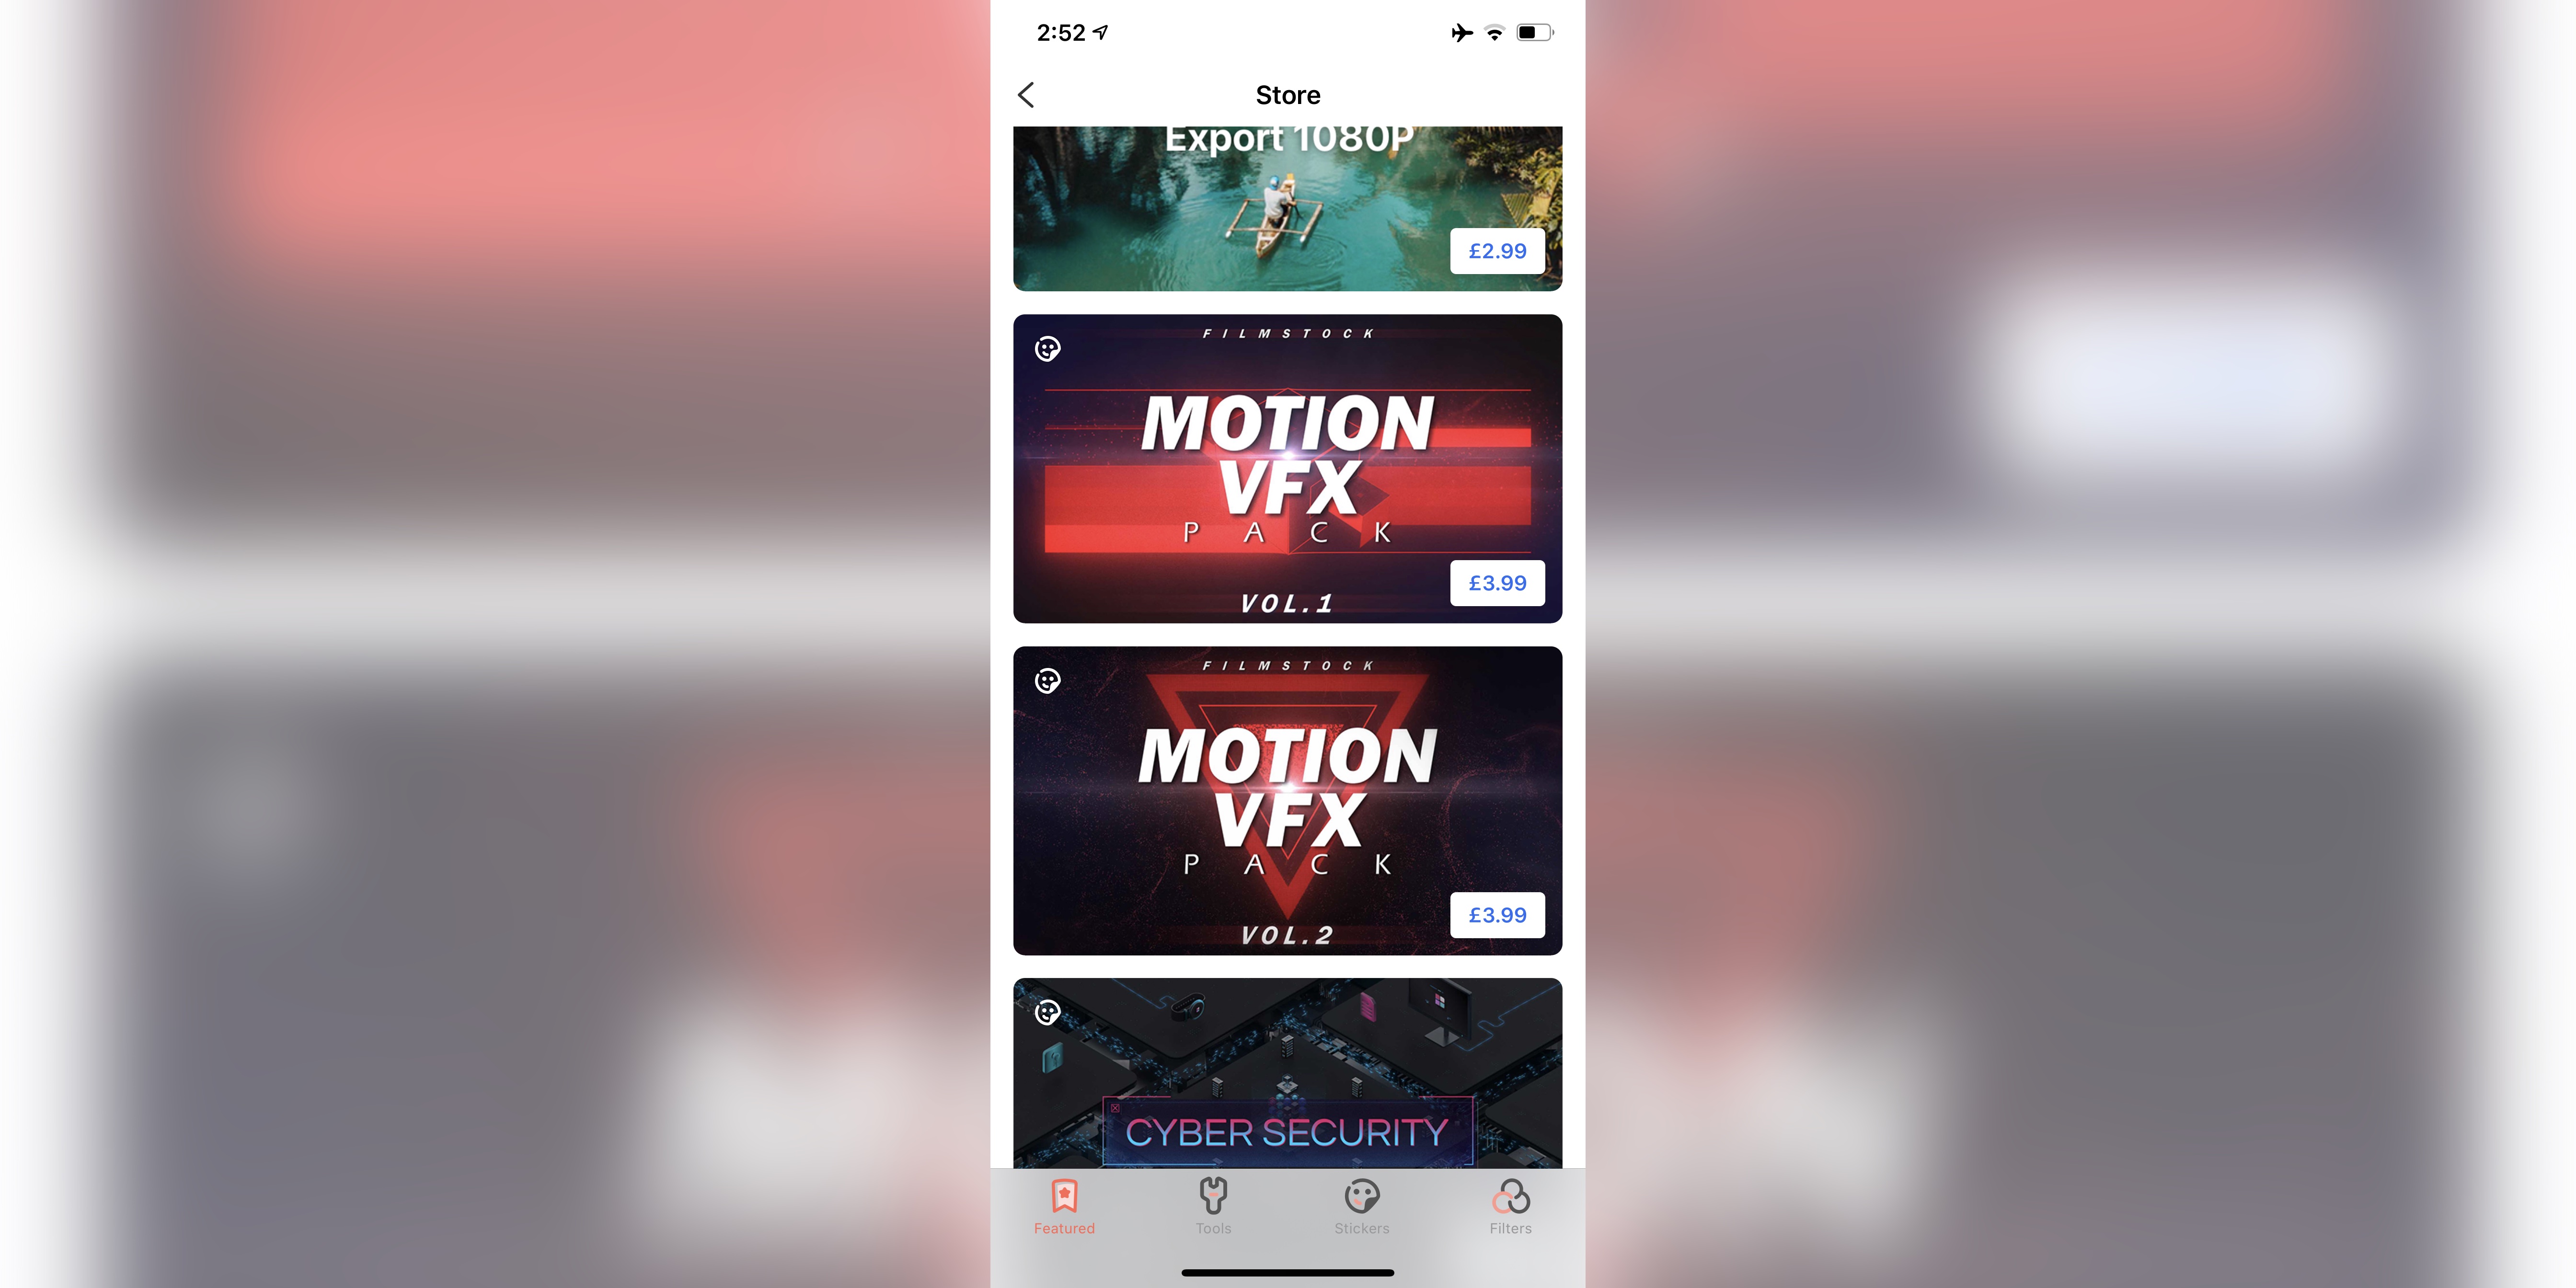
Store
If none of this appeals, there’s also the Store. This is more of an à la carte deal, where you can mix and match the features you’d like to get, while ignoring others.
You could for instance, remove the watermark for $5 (£3.99), or unlock the 1080P export feature for $4 (£2.99), and you can skim through all available packs - although as of this writing, they’re all for additional stickers, aside from the two filters mentioned above, which is disappointing.
Final verdict
The editing tools are excellent, and the template section is a great way to create a quick movie in seconds. We do like the option of being able to choose the environment you’d like to work in. The app however is let down by the limited number of additional features in the store which make it less of an incentive to purchase a subscription to this service, but maybe over time, this will become less of an issue.
- We've also highlighted the best video editing software
Steve has been writing about technology since 2003. Starting with Digital Creative Arts, he's since added his tech expertise at titles such as iCreate, MacFormat, MacWorld, MacLife, and TechRadar. His focus is on the creative arts, like website builders, image manipulation, and filmmaking software, but he hasn’t shied away from more business-oriented software either. He uses many of the apps he writes about in his personal and professional life. Steve loves how computers have enabled everyone to delve into creative possibilities, and is always delighted to share his knowledge, expertise, and experience with readers.
