


Need to know how to add text in DaVinci Resolve? The free program from Blackmagic Design is easily one of the best video editing software tools on the market - but how easy is it to go beyond cutting clips?
They say a picture is worth a thousand words, but how much more would a video with words be worth? Joking aside, adding text to video projects is crucial, whether it’s a title, credits, lower thirds, or helpful information, videos are often peppered with the written word, and it stands to reason that DaVinci Resolve would have the means for you to insert text anywhere on the screen.
Let’s delve a little deeper now to explore the various text and titling options available to you when you need more than images to express yourself.
- Best video editing apps: Tested, reviewed, and rated
How to add text in DaVinci Resolve: Basic steps
What to do
- Access the ‘Titles’ section
- Drag your chosen one onto the Timeline
- Customise to taste
What you'll need
- An internet connection (if you don’t already have Resolve)
- Clips and a project in progress
- Skill level: Beginner
Step 1: Options

You can access the text tools from many different Pages in DaVinci Resolve, but the Pages you’ll most likely be working in when you’ll need them, will be in the ‘Cut’ and ‘Edit’ pages. They will however be located in slightly different areas. In ‘Cut’, you’ll find a handy ‘Titles’ menu, top left of the interface, whereas in ‘Edit’, you’ll first need to click on ‘Effect’ (also top left), and from there, click on Titles, located in the ‘Toolbox’ sidebar.
Once activated you’ll find dozens of available text templates. You don’t need to add them to a project to see what they do: just mouse over them left to right to see a preview of the effect in the main Viewer window. Just for fun, you can even mouse over from right to left to make it go in reverse.
Step 2: Add text
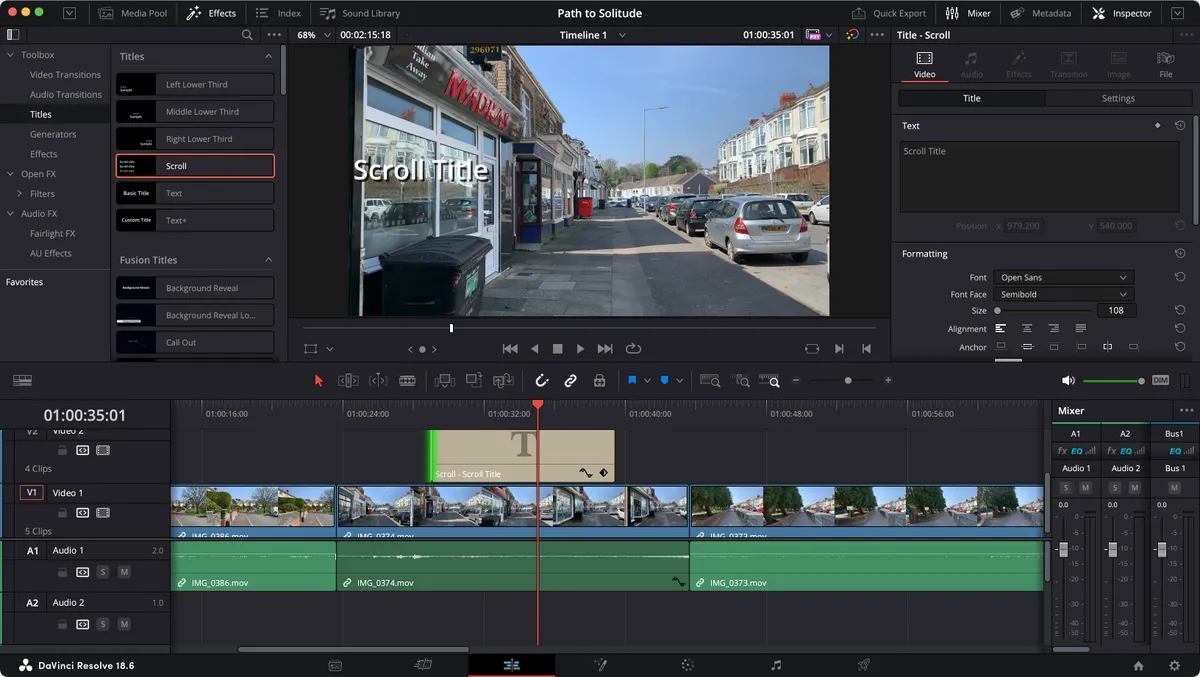
Once you’ve found the title you wish to use, just drag it from the list onto your Timeline. You’ll find you can place it anywhere: on top of a clip, so it’s superimposed over a moving image, under one, if you’re working with multiple layers, so the text ends up being under some but above others, or in between clips, so it’s seen solely on its own, over a black backdrop.
The default length for a title is 5 seconds, but it shouldn’t surprise you that you can alter that: move the cursor to either edge and drag it inwards or outwards. You’ll notice that Resolve has a snapping capability, switched on by default, which means that as you reach the playhead or an edit point, the edge you’re altering will snap to it. This is a great way to make sure you extend the clip (or move it) exactly where it needs to be.
Alternatively, click on an edge (it turns green), type ‘+’ or ‘-‘ and a value, and hit return. This will add or subtract that many frames from your text clip.
Step 3: Customize

Of course having ‘Sample’ as the text you’ve added is hardly useful, so let’s change that. Make sure the title box is selected for its values to appear in the Inspector panel. To ease matters, also make sure the playhead is over the text so you can see the changes you make in the main preview section.
The changeable parameters are divided into two tabs, ‘Title’ and ‘Settings’. Let’s look at the former first.
This is where you get to add your custom title - some titles offer different parameters for different lines, so you’ll see settings apparently doubled, but that’s just to be expected and will affect only one section of the title.
You get to alter the text of course, but also choose a font more to you liking, a colour, size, tracking and spacing, and any other parameter unique to your chosen title.
Notice that every single parameter is keyframeable, meaning that every value can change over time, even the font
Step 4: Motion

Now let’s explore the other parameters, by clicking on ‘Settings’ in the Inspector panel, located directly to the right of the ‘Title’ tab.
This is where you’ll find the more traditional values you can manipulate, which is why it’s important to know you’re working on the right clip by making sure it’s selected in the timeline (a red border surrounds it) - we don’t want to start changing values for a different clip, especially one your playhead isn’t over so you won’t even see the changes occurring.
You could click on a field to select it and type in a value, but there’s a much more powerful method to apply changes: mouse over a field and your cursor will switch to a thick white line with an arrowhead on either end. When that happens, click and drag left or right to decrease or increase the value respectively. The more you drag the more the value changes. This is not only faster, but you can also see the change happen in real time in the preview section (as long as the playhead is over your text clip, of course), allowing you to make precise changes with no guesswork.
And as you’d expect, every single parameter is keyframeable, allowing you to create unique animations, and changes.
Step 5: Fusion

You might’ve noticed two categories in the list of available titles: basic Titles and Fusion Titles. The difference being the latter were created using DaVinci Resolve’s Fusion tool, so let’s take a quick look at it by going to Workspace > Switch to Page > Fusion.
Fusion can look intimidating at first glance, but it offers a lot of flexibility to help you create truly unique effects. Also, once you get used to its way of working, you’ll wonder how you managed without it.
Essentially, Fusion works with nodes. You start with a ‘MediaIn’ and a ‘MediaOut’ node, and each one you add in between them are like a different customisable filter that you’ve applied to your clip.
The best thing about it is you can switch back to the ‘Edit’ page to see the effect you’ve created applied instantly to your project. Fusion and Nodes is a massive subject which we can’t hope to teach you in just one step, but this is just to offer you a tiny taste of the massive special effect possibilities contained within DaVinci Resolve.
Final thoughts
Adding titles to a video is a crucial element of any video editor - even the best free video editing software needs to offer this. And DaVinci Resolve excels here, as you’d expect from a professional-grade tool.
Not only does it offer default templates you can add and customize, but the keyframe capabilities, coupled with Fusion, can help you create truly unique titles that would complement the unique projects you’ll be creating with this impressive video editor.
For more help, see our guides How to download DaVinci Resolve and How to use DaVinci Resolve.
