TechRadar Verdict
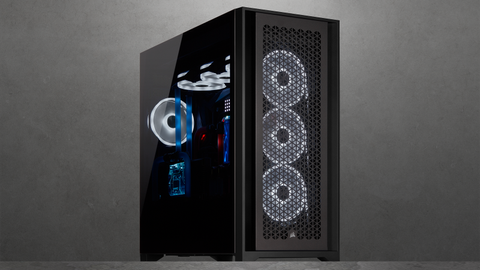
The Corsair iCUE RGB 5000x is a hulking glass beast of a case that almost has it all with good airflow, a breezy amount of space for efficient building, RGB fans, and an incredibly sleek look. However, the $200 price is rough when considering less expensive alternatives.
Pros
- +
Incredibly stylish and open design
- +
3 Corsair RGB fans
- +
Great out-of-the-box airflow
Cons
- -
Far too expensive
- -
Attaching and removing most removable internal pieces is frustrating
- -
Very heavy and takes up a lot of space
Why you can trust TechRadar
Two-minute review
Front: up to 360mm for a radiator, or 3x 120mm/2x 140mm fans
Top: up to 360mm for a radiator, or 3x 120mm/2x 140mm fans
Back: 1x 120mm fan/radiator
Motherboard fan tray: 3x 120mm fans, or a 360mm radiator if you’re feeling confident
Max GPU length: 15 in
Max CPU cooler height: 6.7 in
Max PSU length: 8.8 in
Included fans: 3x iCUE SP RGB Elite (120mm)
While the size of the box the Corsair iCUE 5000x comes in is plenty surprising, actually seeing it in all its imposing and reflective splendor is much the same feeling as looking up at an impressive skyscraper. This PC case is not stingy at all when it comes to looks, and the first thing you will likely think after you’ve struggled to remove it from its packaging is, “Wow, that’s a lot of glass.”
The case is incredibly heavy, but once set on a table it’s obvious most of the weight comes from the four large tempered glass panels that adorn the front, top, and sides. The top and front panels are very easily removable, with strong magnets holding them in place instead of screws or latches. The front panel has some sizable gaps to let air flow through, and underneath there are mesh coverings (also held on with magnets), which is good to know for those that own pets. And let’s not forget the three iCUE SP RGB Elite fans in front that justify the “RGB” in the case’s name.
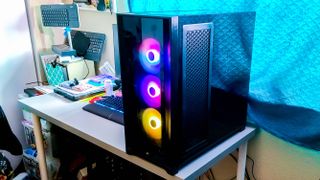
These fans immediately add an impressive amount of RGB capability straight out of the box, and they are all conveniently pre-connected to a PWM repeater and an RGB controller on the back of the motherboard tray. Speaking of convenience, opening and closing the case itself is incredibly easy to do. The iCUE 5000x has two screws at the top and bottom of each side panel, which stay in place once fully unscrewed. Once the screws are removed, the panels swing away from the case on a clever hinge mechanism in the front corner. This makes removal and reassembly very easy and straightforward, if only slightly more complicated than removing the top and front.
There are plenty of accessories included with the case. One of these was an optional PSU cover, which we will not use for reasons that will be addressed later on. There are already three high-quality Corsair Velcro straps installed in the cable bar holding the I/O and fan cables in place, but apparently that wasn’t enough, so they included 12 more straps, which is always nice to have. A small reminder of how much Corsair cares.
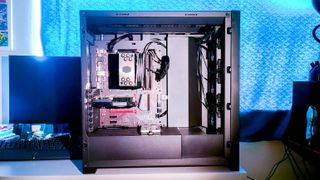
There are several internal pieces that need to be removed in order to clear the way for cable routing (the cable bar, cable shroud, and motherboard fan mount), and they are screwed down in multiple locations within the case. The screws that hold in a lot of these pieces are not easy to locate by eye, and the manual that comes with the case isn’t the easiest to read, so proceed with caution and make sure all screws are removed before trying to remove pieces.
The part that causes the most trouble is the cable shroud that sits on the front right side of the motherboard covering the rubber grommets; presumably to minimize how much cable is shown. Not only that, but the screws and screw holes for it seemed somewhat worn after just one build in this case, which is worrying when you consider future builds outside of the first one. It doesn’t help that these covers feel a bit flimsy and bendable, so keep it in mind to have a gentle hand when removing and reattaching them.
However, these problems quickly pass once everything is removed. Actually installing the motherboard and routing the cables is very easy, and the fan controller makes plugging the fans into the motherboard headers a simple one cable task. In a remarkably short amount of time, the motherboard is fully screwed down and wired.
It is quite a marvel how much space there is inside the case, even with the motherboard installed. It almost looks small compared to everything else, which isn’t necessarily a bad thing! The clearance above, below, and to the side of the motherboard is perfectly comfortable for slipping cables (and their connectors) through easily, and the rubber grommets are conveniently and strategically placed for your routing pleasure. With the exception of the removable internals, it really felt like Corsair had everything in mind when it comes to the building process.
This is the system we used to test the Corsair iCue 5000X
CPU: Intel i5-8600k @ 3.6GHz
GPU: Zotac GTX 1050Ti
RAM: 2x 8GB Corsair Vengeance LPX 2400
Motherboard: MSI Z370 Gaming Plus
SSD: Crucial MX500 1TB
Power Supply: Corsair CX650 Bronze
Keep in mind, there is a “motherboard accessory cover” on the back of the motherboard tray that, for some reason, conceals the area behind the PCB where you would screw in mounting brackets for a CPU cooler. In this case, we are using a Hyper 212 EVO RGB Black Edition, which has a metal bracket you need to install there. Luckily, the bracket on this motherboard is already installed since it is being transferred from another computer. However, most people will likely not have their cooler pre-installed and will be working with a new motherboard. The process of removing the accessory cover looks about as irritating to wrestle with as the other internals. It seems like a slightly unnecessary accessory to have, especially considering that it’s pre-installed and you will probably need to remove it anyway.
This seems to be a recurring problem with this case in particular, and considering its already expensive price point, things like this become less of something to put up with for an otherwise good case, and more of a damning flaw for what is supposed to be a premium case. For those that do have the $200 to shell out for a case, we imagine you would want the best of the best at that point; it’s not a good look when something small like the accessories and covers aren’t designed for functionality and convenience.
During reassembly, re-attaching the internal pieces is a hassle. The cable shroud is a little difficult to hold down and screw in from the back side, and it seems to press down a little too hard on the 24-pin power cable for the motherboard. It eventually does fit with some squishing, but keep that in mind if you are using the stock cable that comes with your PSU; this issue could probably be alleviated with a flatter ribbon cable.
Screwing the motherboard fan mount back in is a little fiddly as well due to two hand screws that go inside the front corner of the case. For some reason, the top screw on this particular case just won’t go in, so it will just have to stay unscrewed in case the threads get stripped or the case gets scratched. The same issue can be found with the bottom of the cable bar.
Despite these problems, the cable bar does an excellent job bundling up the cables. They would look good on the backside as they are, but the case also comes with an easily removable steel door that covers up the entire back side of the motherboard tray. This gives it a very clean look and provides a flat surface for the side panel to cover.
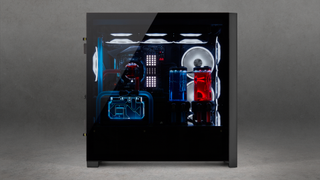
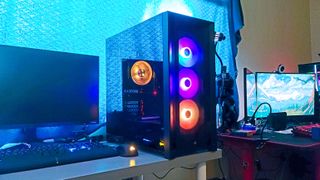
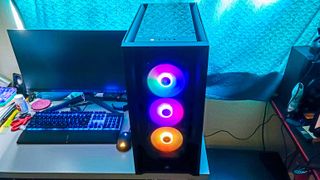
After everything is closed up and screwed down, the view from the front is astonishingly sleek and clean. The trouble to put it all together is definitely worth it for the looks, and it even makes the modest hardware look damn good inside. Once it’s closed up and wiped down, it is truly a glorious obelisk of glass. It boots up smoothly, and the fans come to life with the default rainbow lighting. The style factor on this thing is no joke.
To test the cooling capability of the case right out of the box, Cinebench, 3DMark, and Geekbench are our tools of choice, in conjunction with HWinfo64 to measure CPU temperatures. For these tests, the only cooling solution that’s used (which isn’t provided by Corsair) is the Hyper 212 EVO Black Edition, so keep in mind that you will most definitely get better temps with a liquid cooling solution and/or more fans.
Temperatures stay rather consistent, for the most part, across tests. In the Time Spy set from 3DMark, GPU temps stay below a cool 65C, and the CPU spikes at 75C briefly, but averages at about 43C over the course of the benchmark. In the multi-core CPU benchmark with Cinebench, HWinfo64 picks up a max of only 73C, which is quite impressive considering how much room there is for additional cooling to improve that number. Over the course of the benchmark, CPU temps hovered at an average of 60C.
While idling, HWinfo64 measured an exceedingly breezy average of 28C over 8 hours. In Minecraft, the temperature only jumps up to around 40C. It’s not hard to imagine that the mesh coverings and large openings on the front and top greatly aid in these results. It’s safe to say that the case does its job quite well right out of the box, with a relatively cheap air cooler to boot, and the cooling can only get better from there with plenty of room to add fans or radiators.
The Corsair iCUE RGB 5000x is a delightfully stylish case, sporting four tempered glass panels, 3 high quality RGB fans, and is a delight to build in once you push past the irritating accessories and covers inside. Actually installing components is a breeze, and once it’s put back together, it’s truly a sight to behold. Not only that, the cooling performance right out of the box is quite good. However, the case feels far too pricey to justify buying, considering other options that are cheaper, similar performance-wise, and not as difficult to dismantle. Some accessory choices outright provide unnecessary barriers to the build process, and it would have been quite the ordeal if there were more complicated cooling setups to install. However, the aesthetics and clean look of the case, once put together, almost justifies the hassle. If you have the money to shell out, and space to spare for a truly impressive, imposing, and cool-looking case, then this may be the case for you.
Buy it if…
You want a stylish and imposing case
With a premium price tag, you also get premium design: all the tempered glass you can dream of, with RGB fans and controllers pre-installed.
You need good cooling
Fortunately, this case isn’t all looks and no functionality. The iCUE 5000x does a very good job keeping things cool right out of the box, which is thanks to mesh coverings that allow lots of space for airflow around the top and bottom panels.
You want a case with a lot of space
Given its size, the iCUE 5000x is definitely not stingy when it comes to extra space. You would be hard-pressed to find a cooling setup or GPU that wouldn’t fit in this thing, and building inside of it doesn’t feel cramped in the slightest.
Don’t buy it if…
You’re looking for something lightweight
With its metal frame and four tempered glass panels, this case is very heavy. It isn’t so bad once the glass panels are removed, but once you put it down somewhere after it is put together, it may become an ordeal to pick it up and move it again.
You’re on a budget
Easily the silver bullet when it comes to this otherwise great, if somewhat flawed, case. There are plenty of alternative cases that arguably look just as good, perform similarly, and are priced $50-$75 cheaper.
You want an easy build experience
The high price would probably be worth it if the accessories and covers inside the case weren’t so irritating to build around. The process of removing/reattaching most internal parts in order to clear the build space was time consuming and frustrating. Some screws were so precarious that they had to be left undone out of fear that they would scratch the case or strip the threads.
