How to build the best Raspberry Pi 2 media server
Make your own streaming media server
Introduction
Who needs the likes of Sky Anytime or Virgin Media's On Demand services when you can build your own personally tailored digital media library?
This is a library that contains your personal, curated collection of music, TV shows and movies. It's accessible from any room in your home (or outside it), and there's no digging through CDs, sitting through DVD intros or flicking through someone else's choice of content, 90% of which you have no interest in.
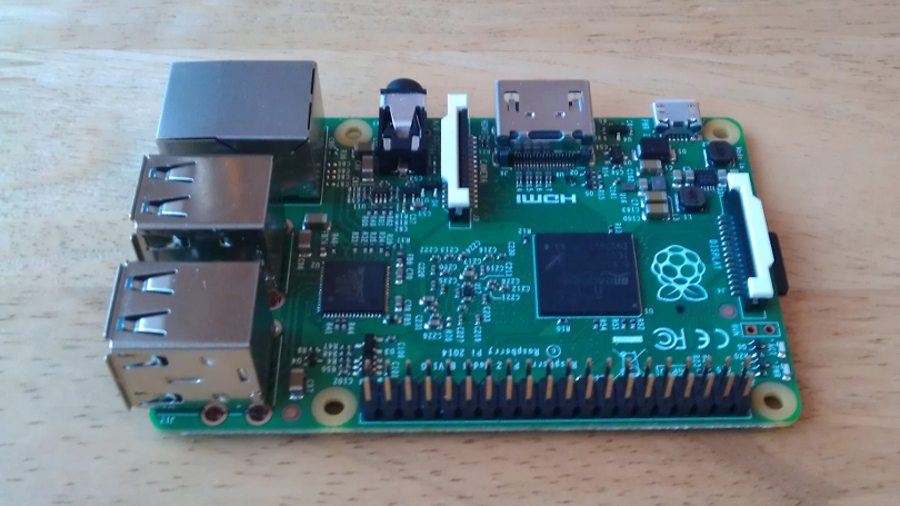
In this tutorial, we'll show you how to build your own media server using the versatile – and incredibly cheap – Raspberry Pi 2.
We're not just talking about any bog-standard media server either – no, thanks to the Pi 2's quad-core processor and 1GB RAM, you can run the frankly fabulous Plex Media Server directly from it. We'll reveal the easiest way to get it up and running on your Pi, plus show you how to hook it up to all your stored media and configure it so you can access your content from anywhere – not just your own local network.
The Raspberry Pi 2 as a media server
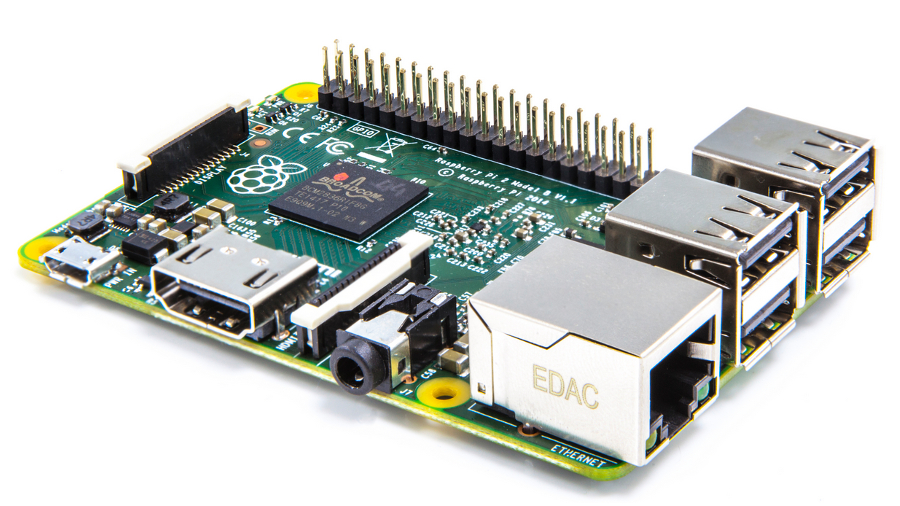
You might be wondering why you'd choose to build a dedicated media server when any modern PC or Mac (sporting a 2GHz dual-core processor or chipset with hardware accelerated video decoding) can do the job. Two reasons: convenience, and energy consumption. Use the Raspberry Pi 2, and its small form factor allows you to place it anywhere. And you don't even need to hook it up to a TV, keyboard or mouse – as we'll reveal, you can set it up remotely over your network from your computer or even your mobile.
There are some compromises to be made by choosing the Raspberry Pi 2 as your media server. First, while the quad-core processor and 1GB RAM make it a practical beast for running the demanding Plex, there are still performance hurdles to overcome. Be prepared to give it time – and by time, we mean days rather than hours – to index your media collection, particularly if it contains hundreds of hours of TV shows and movies.
Once the content is indexed, however, browsing your server is fast and responsive – much quicker than trying to access it directly from a Network Attached Storage device like Zyxel's NSA325 model, for example.
The second issue is transcoding. Transcoding occurs when the server has to convert your media files into a compatible format to play back on other devices. Transcoding requires a lot of processor grunt or hardware-accelerated video decoding, but if your video is encoded in MP4/H.264 format, then you won't need this feature except when accessing your media over the internet (and the Pi can accommodate some transcoding of MP4 files to optimise for streaming). That's because most devices play this format natively – all you need to do is configure each of your Plex apps to use "Direct Play" where possible, and we'll reveal how later.
Storage considerations
When it comes to storage, you'll need a large external hard drive to store your media on. This can be plugged directly into one of your Pi's four USB ports, or you can store your media on a network hard drive and access that instead.
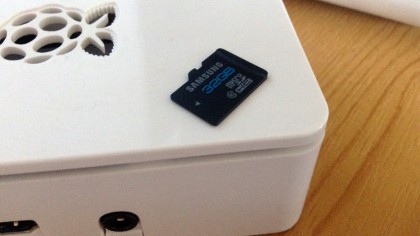
You'll also need to store both your Pi's operating system and all the files Plex needs and creates on a microSD card. Media server support files – metadata, transcoded files and so on – take up gigabytes of room, so the standard 8GB SD card won't cut it for larger media libraries.
While it's possible to reconfigure your server to store Plex's configuration files on another drive, we recommend you simply purchase a larger SD card. Consider 32GB a comfortable minimum (see eLinux.org for a list of compatible cards).
One final consideration is your network. While it's technically possible to add Wi-Fi to your Raspberry Pi, we're going to assume you're plugging it directly into your network router or via a HomePlug socket.
Obtain the OS
Your Raspberry Pi 2 is going to be a dedicated media server, so for simplicity's sake we're going to install a ready built OS (Minibian) with a click-to-install version of Plex on it courtesy of HTPC Guides. Start by visiting the installer page on a Mac or PC where you'll need to share the post as instructed to reveal the download link.
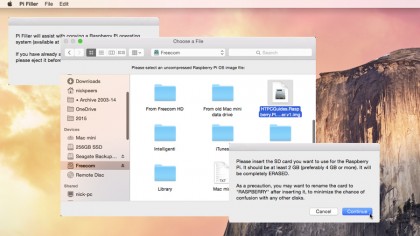
Save the ZIP file to your hard drive, then extract the IMG file you'll find within. Now you need to write this IMG file to your SD card – note this will wipe everything on the card, so take a backup first.
Windows users can clone the IMG file to SD using Win32 Disk Imager, while Mac users can avoid using Terminal thanks to a pair of handy utilities from IvanX.com – use Pi Copier to save a snapshot of your SD card if it's got data on it, and then Pi Filler to copy the IMG file you downloaded to the card.
Installation and setup
The image you've created means that Minibian is set up and ready to go on your Pi. However, there are some additional steps to perform that require you to first hook up your Pi to a monitor (via HDMI) and USB keyboard. Pop the card into your Pi (face down) and click it into place. Now plug it in to the mains and you'll see it boot.
Wait for a series of messages to scroll by, then start by changing the default passwords for both the root user and your default 'pi' user. To do this, log in using root as your username and htpcguides as your password when prompted.
Next, type sudo passwd and create a new password for the root user. Now type sudo passwd pi and create a new password for the pi user account.
Next, regenerate your SSH keys with the following two commands:
rm /etc/ssh/ssh_host*
dpkg-reconfigure openssh-server
Now you need to type the following to use all the available space on your SD card:
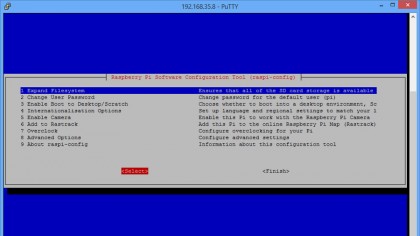
raspi –config
Choose 1 to expand the file system, then select Finish, reboot when prompted and log back in again as the root user, this time with your new password.
Installation and setup
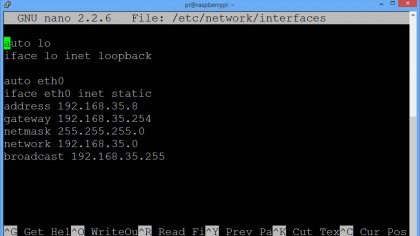
This next step gives your Pi a static IP address, which means you can always find it on your network. Once done, you'll be able to access your Pi remotely using a tool like Putty for Windows, Terminal on the Mac or Serverauditor for mobile, meaning you'll no longer need to connect your Pi to a monitor or keyboard.
First, type the following command:
sudo nano /etc/network/interfaces
This opens a script file. Now change iface eth0 inet dhcp to iface eth0 inet static and then add the following lines directly beneath it, changing the 'x' and 'y' entries to match those of your network (for example, 192.168.35.8):
address 192.168.x.y
gateway 192.168.x.z
netmask 255.255.255.0
network 192.168.x.0
broadcast 192.168.x.255
Press [Ctrl] + [O] followed by [Enter] to save your changes, then [Ctrl] + [X] to exit the nano editor. Now type the following command to reboot before logging back in again as the root user:
sudo reboot
You're now ready to install Plex and some other software – type the following commands to get started:
cd /root/HTPCGuides
sudo git pull
sudo bash install.sh
Wait for required components to be installed, then you'll find yourself at the Installer menu. Use arrow keys to navigate the list, pressing [Space] to select each item you wish to install – the minimal suggested are Plex, Samba, and NFS Tools. If you need to sync files between your home computer and storage device, also install Syncthing.
When everything's installed, type exit and then log in as the pi user.
Connect external drives
You need to configure Minibian to mount the external drive (or network share) automatically on boot in order for Plex to be able to access your media library. First, create the required directories in the /mnt folder:
Cd /mnt
sudo Mkdir
sudo Mkdir
(Change and to your desired folder names, such as video or music.)
Next, you need to identify your drives. Minibian can detect both ext and FAT-formatted drives automatically; if your drive is NTFS, you'll need to install NTFS-3G – type sudo apt-get install ntfs-3g to do so.
To identify your USB-attached drive, make sure it's connected and then type the following command:
ls –laF /dev/disk/by-uuid/
Make a note of the eight-digit ID – for example, 410E-9EE5 – that's listed next to the sda1 entry; this is the UUID of your drive. Write it down.
If your media is stored on a network attached drive, you'll need to install a couple of utilities and know its IP address in order to find out the information you need:
sudo apt-get install cifs-utils (when prompted, keep the locally modified version)
sudo apt-get install smbclient
smbclient –L 192.168.x.y
Make a note of any share names.
Now you're ready to configure your Pi to automatically mount your external drive on startup. First, type the following line:
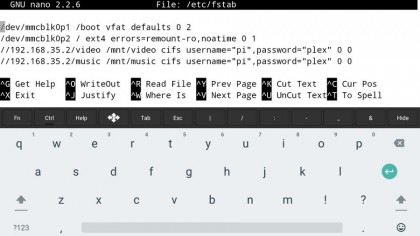
sudo nano /etc/fstab
Add a line for each mount using the following syntax for USB drives:
UUID=0000-AAAA /mnt/ vfat uid=1000,gid=1000,umask=077 0 0
Replace UUID with that of your drive, and change /mnt/share1 to point to your chosen share folder. If your drive is NTFS, replace vfat with ntfs-3g, and if it's Linux, change it to ext4.
To connect to a network drive, use this syntax instead:
//192.168.x.y/ /mnt/ cifs username=,password=,uid=1000,gid=1000 0 0
Change the network address and /mnt/share1 paths as required, and input the and required to access the network drive (note, this is not your Pi credentials, but the credentials you use to connect to the drive itself).
Once done, save the file, close nano and then type the following line:
sudo mount –a
This will re-mount the directories – type cd /mnt/ and then type dir to verify the drive has been mounted and is listing its contents correctly.
Plex Media Server
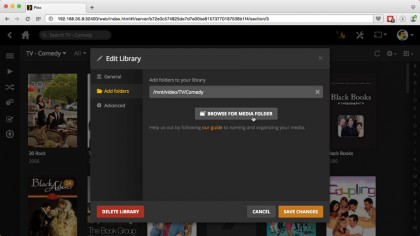
Now Plex is installed on your Pi, you can configure it remotely from any computer, phone or tablet on your local network via a web browser: go to 192.168.x.y:32000/web/, where 192.168.x.y is the IP address assigned to your Pi.
Once logged in, start adding media folders to your library – you'll find them under the /mnt directory. Plex will process libraries one at a time, but you can still set them all up now and leave it to manfully plod its way through each one in turn. Keep checking back to see how things are progressing, but as we said previously, adding a large collection of media can take many hours to complete, so consider setting it up and leaving it to run overnight.
Once your media libraries are up and running, it's time to test Plex's capabilities. Once you've installed the requisite app on your set-top box or mobile device (which you can subsequently fling to your TV using Chromecast), take the time to go into the app's settings to make sure it's set to use Direct Play wherever possible before testing it with one or two videos from different libraries.
With Direct Play enabled, you can easily run multiple videos simultaneously over your local network, particularly if they're non-HD.
You can also access your media outside your local network, although it's worth noting that your Pi will have to perform some limited transcoding to optimise the stream, so expect a lengthy pause – at least a minute – after selecting the movie before it begins. Note you'll need to sign up for a plex.tv account for this feature to work – then open Settings > Remote Access, sign into the Plex account and you should be able to get it to work.
And there you have it – a Raspberry Pi 2-powered media server running Plex with few problems. What are you waiting for? Those six seasons of Community (never mind the possible movie) won't watch themselves…