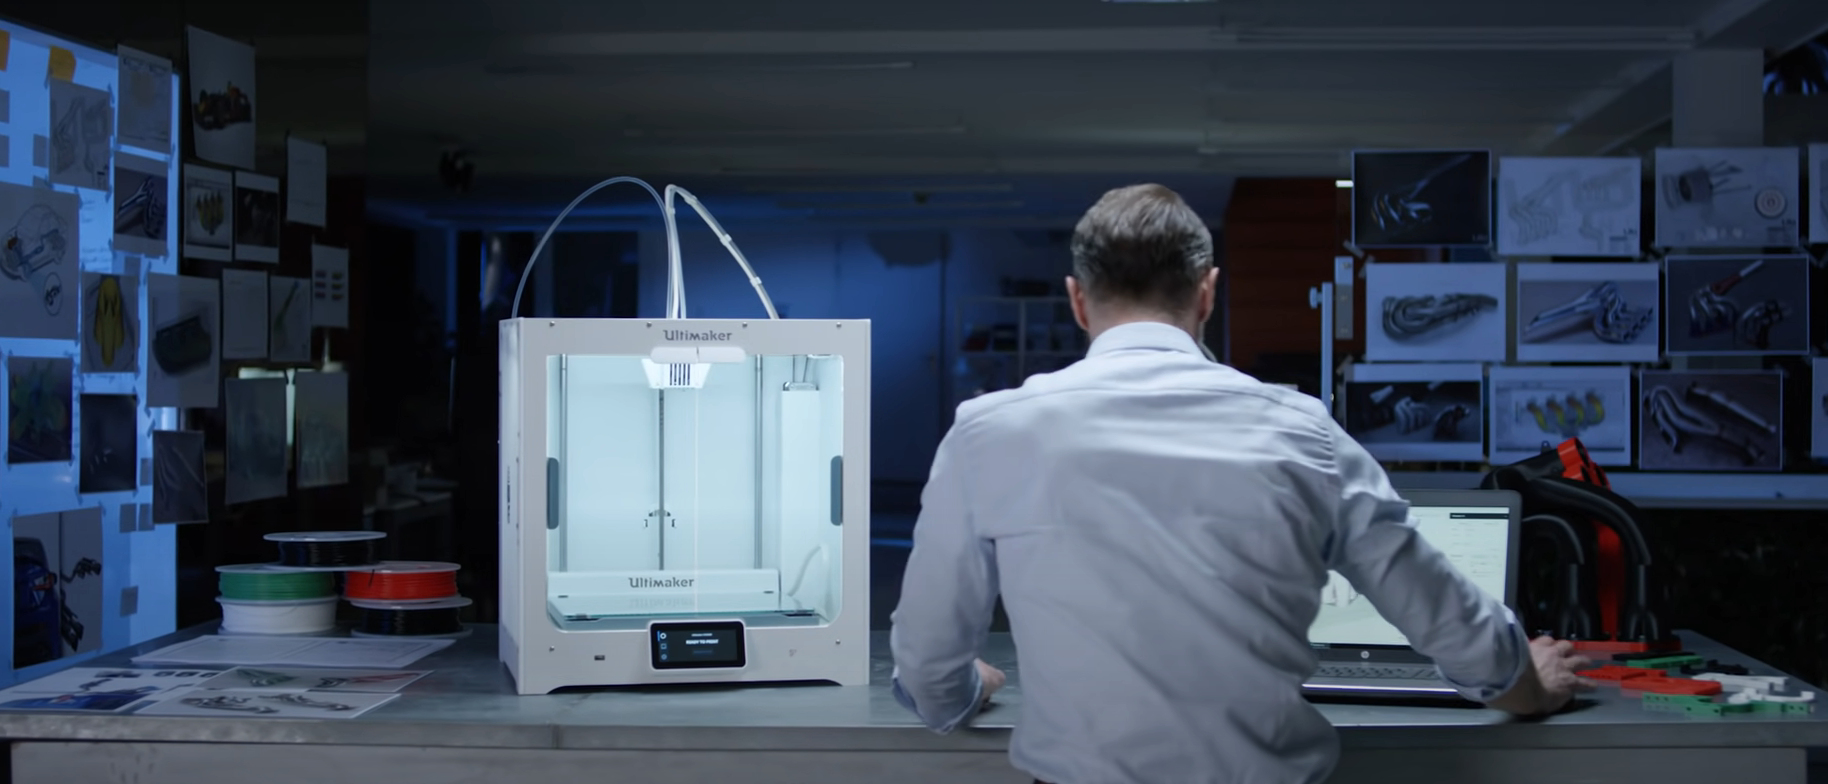
TechRadar Verdict
Price tag aside, the Ultimaker S5 has a very broad appeal for any commercial 3D printing need. Engineers will enjoy its flexibility to accurately produce complex models nearly flawlessly, and those who need prints with dual filaments or challenging materials can also reap the benefits of this machine. The Ultimaker S5 means business, and there’s no denying that future firmware tweaks will continue to improve this already impressive machine.
Pros
- +
Good print quality
- +
Utilizes variety of materials
- +
Excellent software
Cons
- -
Expensive investment
- -
Minor print flaws with PVA
- -
No updated app
Why you can trust TechRadar
There’s a lot to take in with the Ultimaker S5. For starters, its massive footprint is the first thing that jumps out at you. Second, is its impressive build quality and just how much thought has been put into every part of this machine. It requires barely any assembly once unpacked, apart from threading through your filament of choice and running through some simple setup steps with the embedded software.
Its ease of use is just the start – the Ultimaker S5 packs a lot of printing options and features that will momentarily make you forget about its slightly eye-watering price tag. Anyone interested in a reliable, easy to understand 3D printer that can churn out designs with minimal fuss is going to love the Ultimaker S5. There are some nuances with printing that will boil down to the kind of materials being used, but when it comes to software and execution alone, the Ultimaker S5 absolutely won us over.
Features such as dual-extrusion and swappable print cores make the Ultimaker S5 an absolute must-have for anyone who has changing 3D-printing requirements and wants a quicker way to reconfigure a printer for a particular print job. And if you can afford it, the Pro Bundle makes this reconfiguration even easier to manage - deftly swapping filaments and keeping things running smoothly with minimal supervision.
Price and availability
Print technology: Fused filament fabrication (FFF)
Print volume: 330 x 240 x 300 mm (13 x 9.4 x 11.8 in)
Print head: Dual extrusion print head with a unique auto-nozzle lifting system and swappable print cores
Extruder (feeder): Geared feeder with an abrasion-resistant knurled wheel, Bowden extruder setup
Print platform: Heated glass build plate (20 - 140 °C)
Control interface (display): 4.7-inch (11.9 cm) color touchscreen
Connectivity: USB port, LAN or WiFi with local or remote access via Ultimaker Cura and Ultimaker Digital Factory
Dimensions and weight (incl Bowden tubes and spool holder): 495 x 585 x 780 mm (19.5 x 23 x 30.7 in), 20.6 kg (45.4 lbs)
Power: Input 100-240 V AC, Output 24 V DC, 500 W
Supported file types:
Ultimaker Cura: STL, OBJ, X3D, 3MF, BMP, GIF, JPG, PNG
Printable formats: G, GCODE, GCODE.gz, UFP
Supplied software:
Ultimaker Cura – print preparation software
Ultimaker Digital Factory – printer management software
The Ultimaker S5 is available now, and is priced at $5,995 (around £4,360; AU$8,080). The price also includes their enterprise software Ultimaker Essentials, which allows for printer management, plugin support, firmware firewalls, and more. There’s a host of other software on offer as well, tailored (and priced) according to your business needs.
In addition to the base 3D-printer, Ultimaker also offers the Pro Bundle, which adds on an automatic material handling module as well as an air filtration component. This bumps the total price up to $9,550 (around £6,950; AU$12,875) – the price you’ll have to pay for complete peace of mind when it comes to your 3D prints.
Either is a steep investment to make, but the Ultimaker S5 isn’t geared for the everyday hobbyist – there are plenty of other 3D printers on the market for that. This printer is purely for professionals to toy around with, and designers and engineers are going to appreciate the variety of prints that can accomplish with this printer.
Design
The Ultimaker S5 is certainly a hefty piece of kit, weighing in at 20.6 kg (45.4 lbs). It’s certainly not portable, and we highly, highly recommend moving it around as little as possible – and with the help of another person.
Sign up to the TechRadar Pro newsletter to get all the top news, opinion, features and guidance your business needs to succeed!
It measures a stout 495 x 585 x 780 mm (19.5 x 23 x 30.7 inches), so it’s not quite something you’d like to perch nearby on your desk. You’ll want to set up the Ultimaker S5 in a dedicated area, so that it can print undisturbed, and you’re not interrupted by its gentle whirring. Glass doors in the front help to keep prints safe, and the overall structure and build quality of the Ultimaker S5 is strong and very impressive.
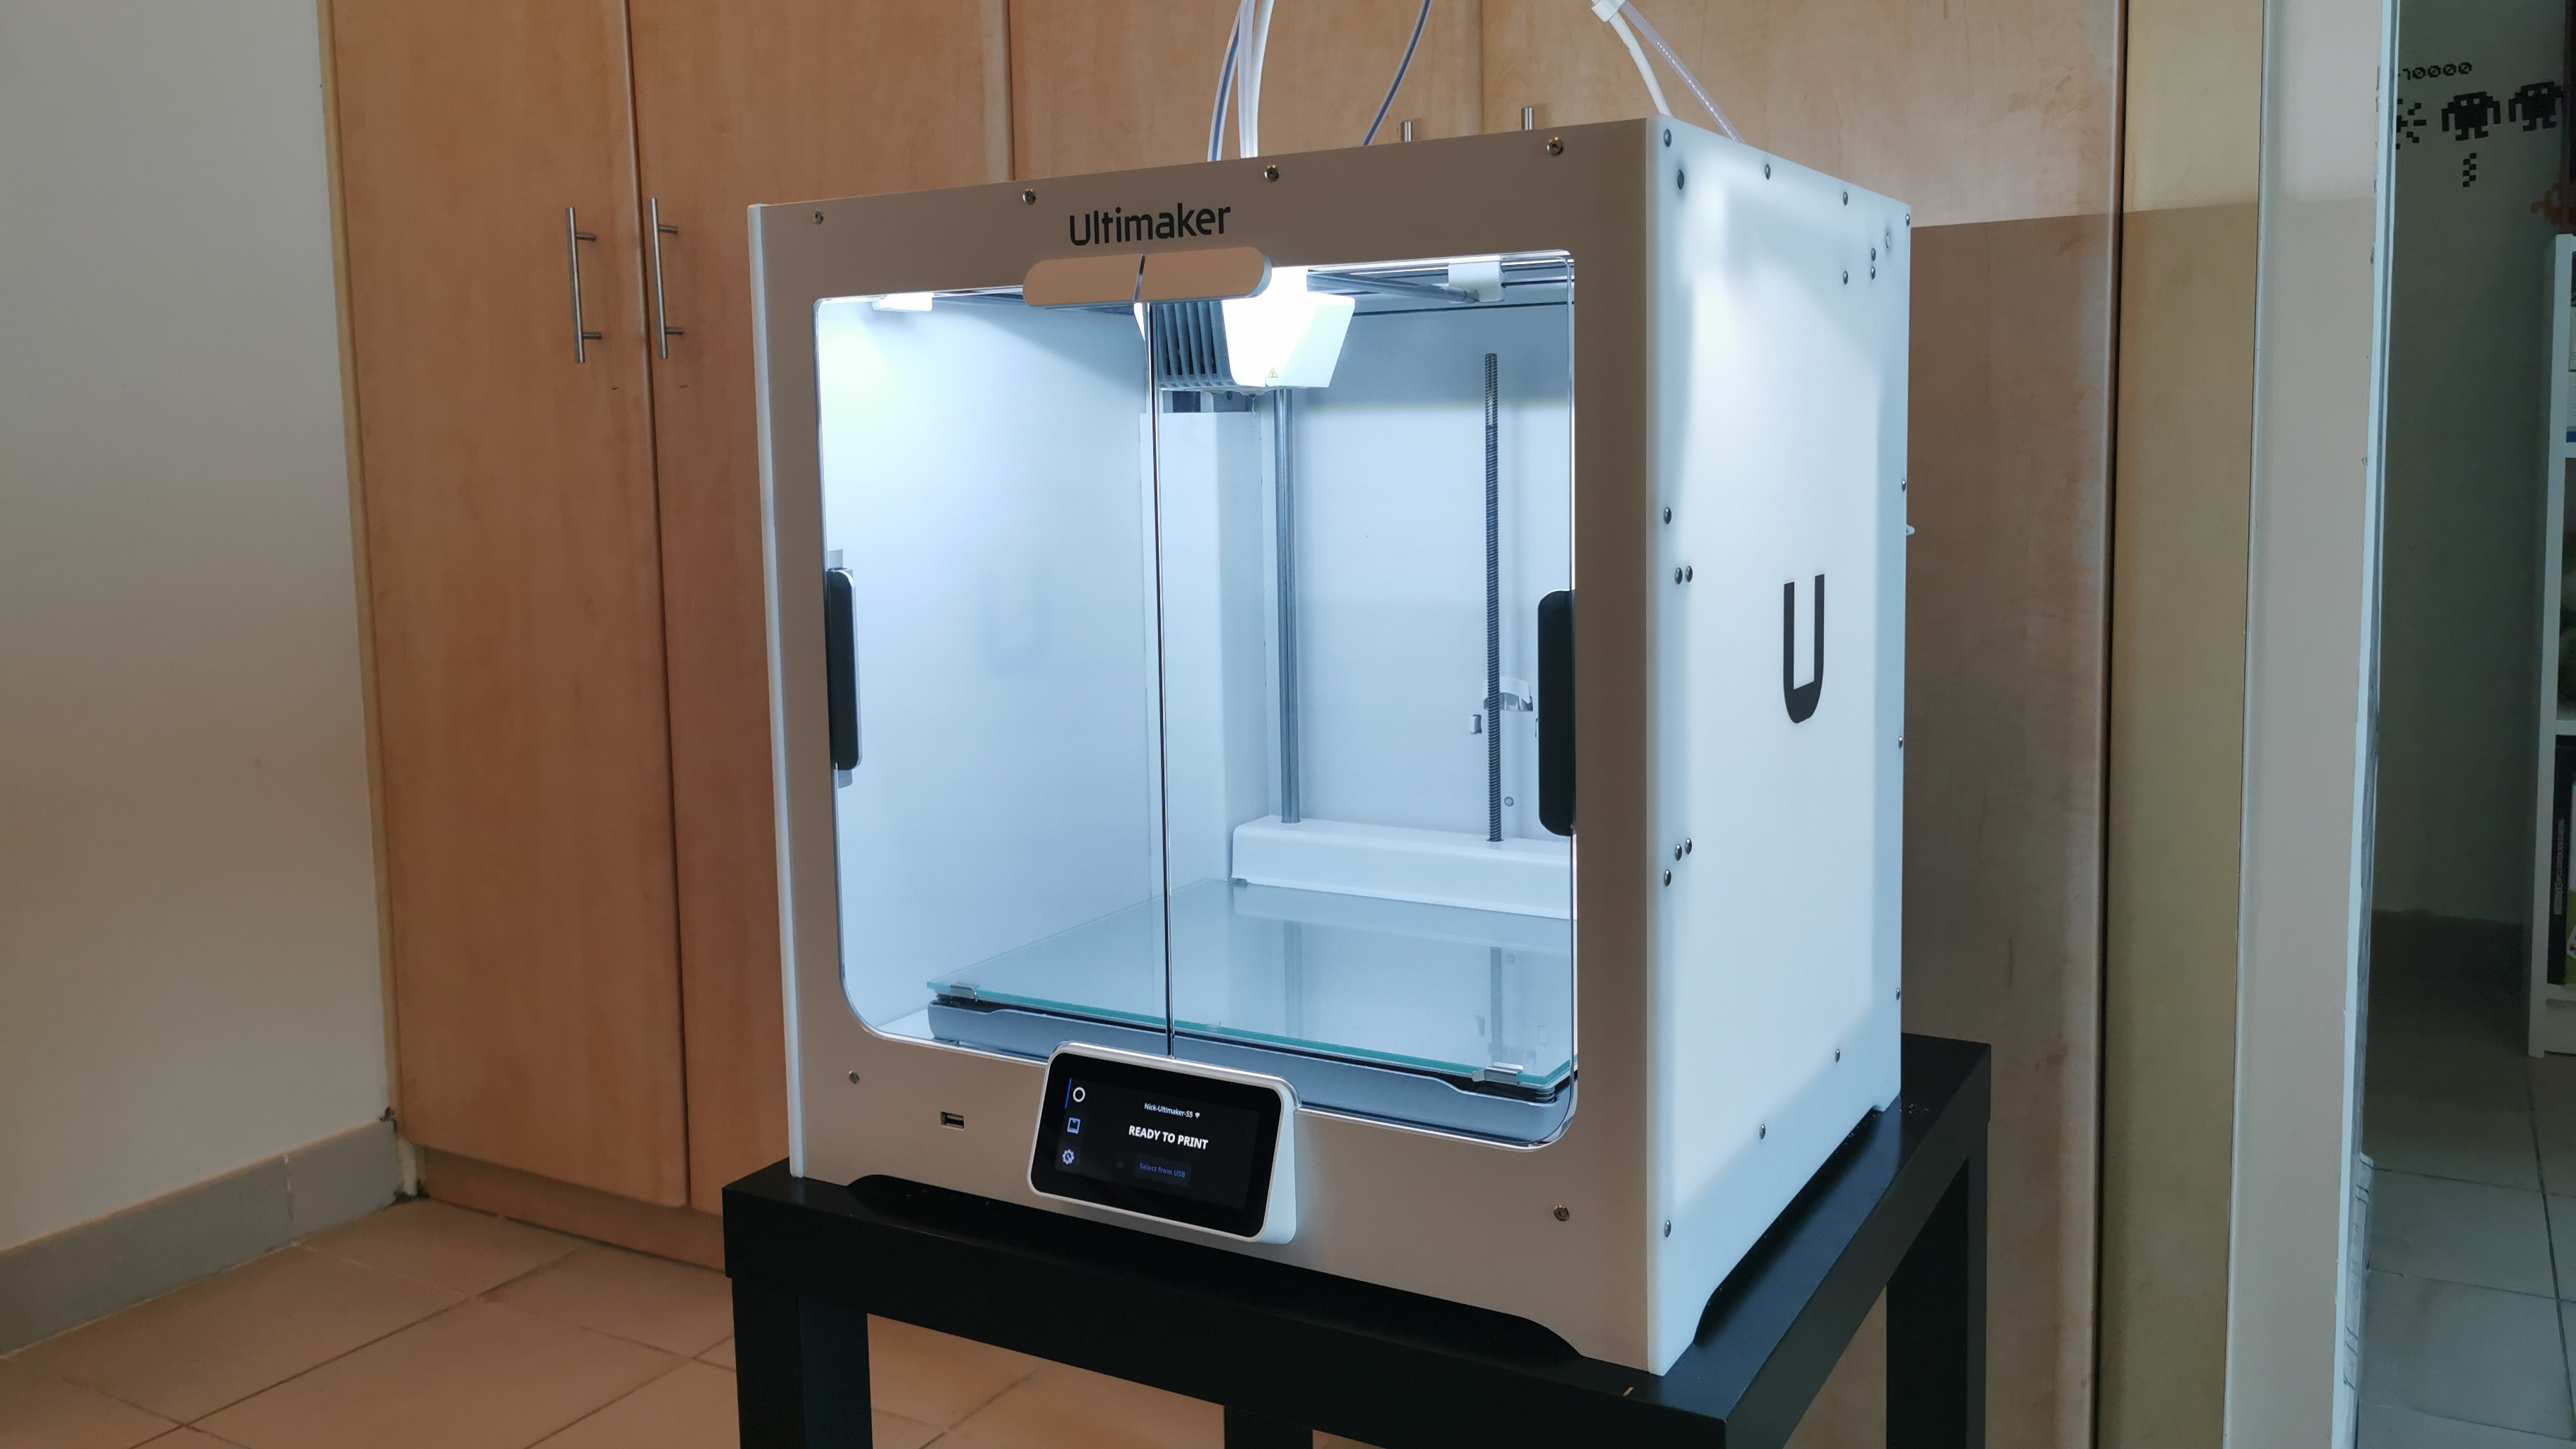
The build volume is quite impressive, sitting in at 330 x 240 x 300 mm (13 x 9.4 x 11.8 inches). That’s enough room for some fairly sizeable models to print comfortably, and with PVA supports from the second extruder, your prints will remain secure on the print bed.
The bed itself is heated, and you have a sheet of glass that you slide on top of it. Two clips at the front of the bed hold the glass in place, which you can easily slide out again if you want to carefully remove a print from it. We wish that Ultimaker included a second glass panel as well, so that a blank one can be swapped in while the other cools down before a print is removed. Certain users may prefer an aluminum build plate instead, but there’s unfortunately no official way to request one, so you’re stuck with a single glass one for now.
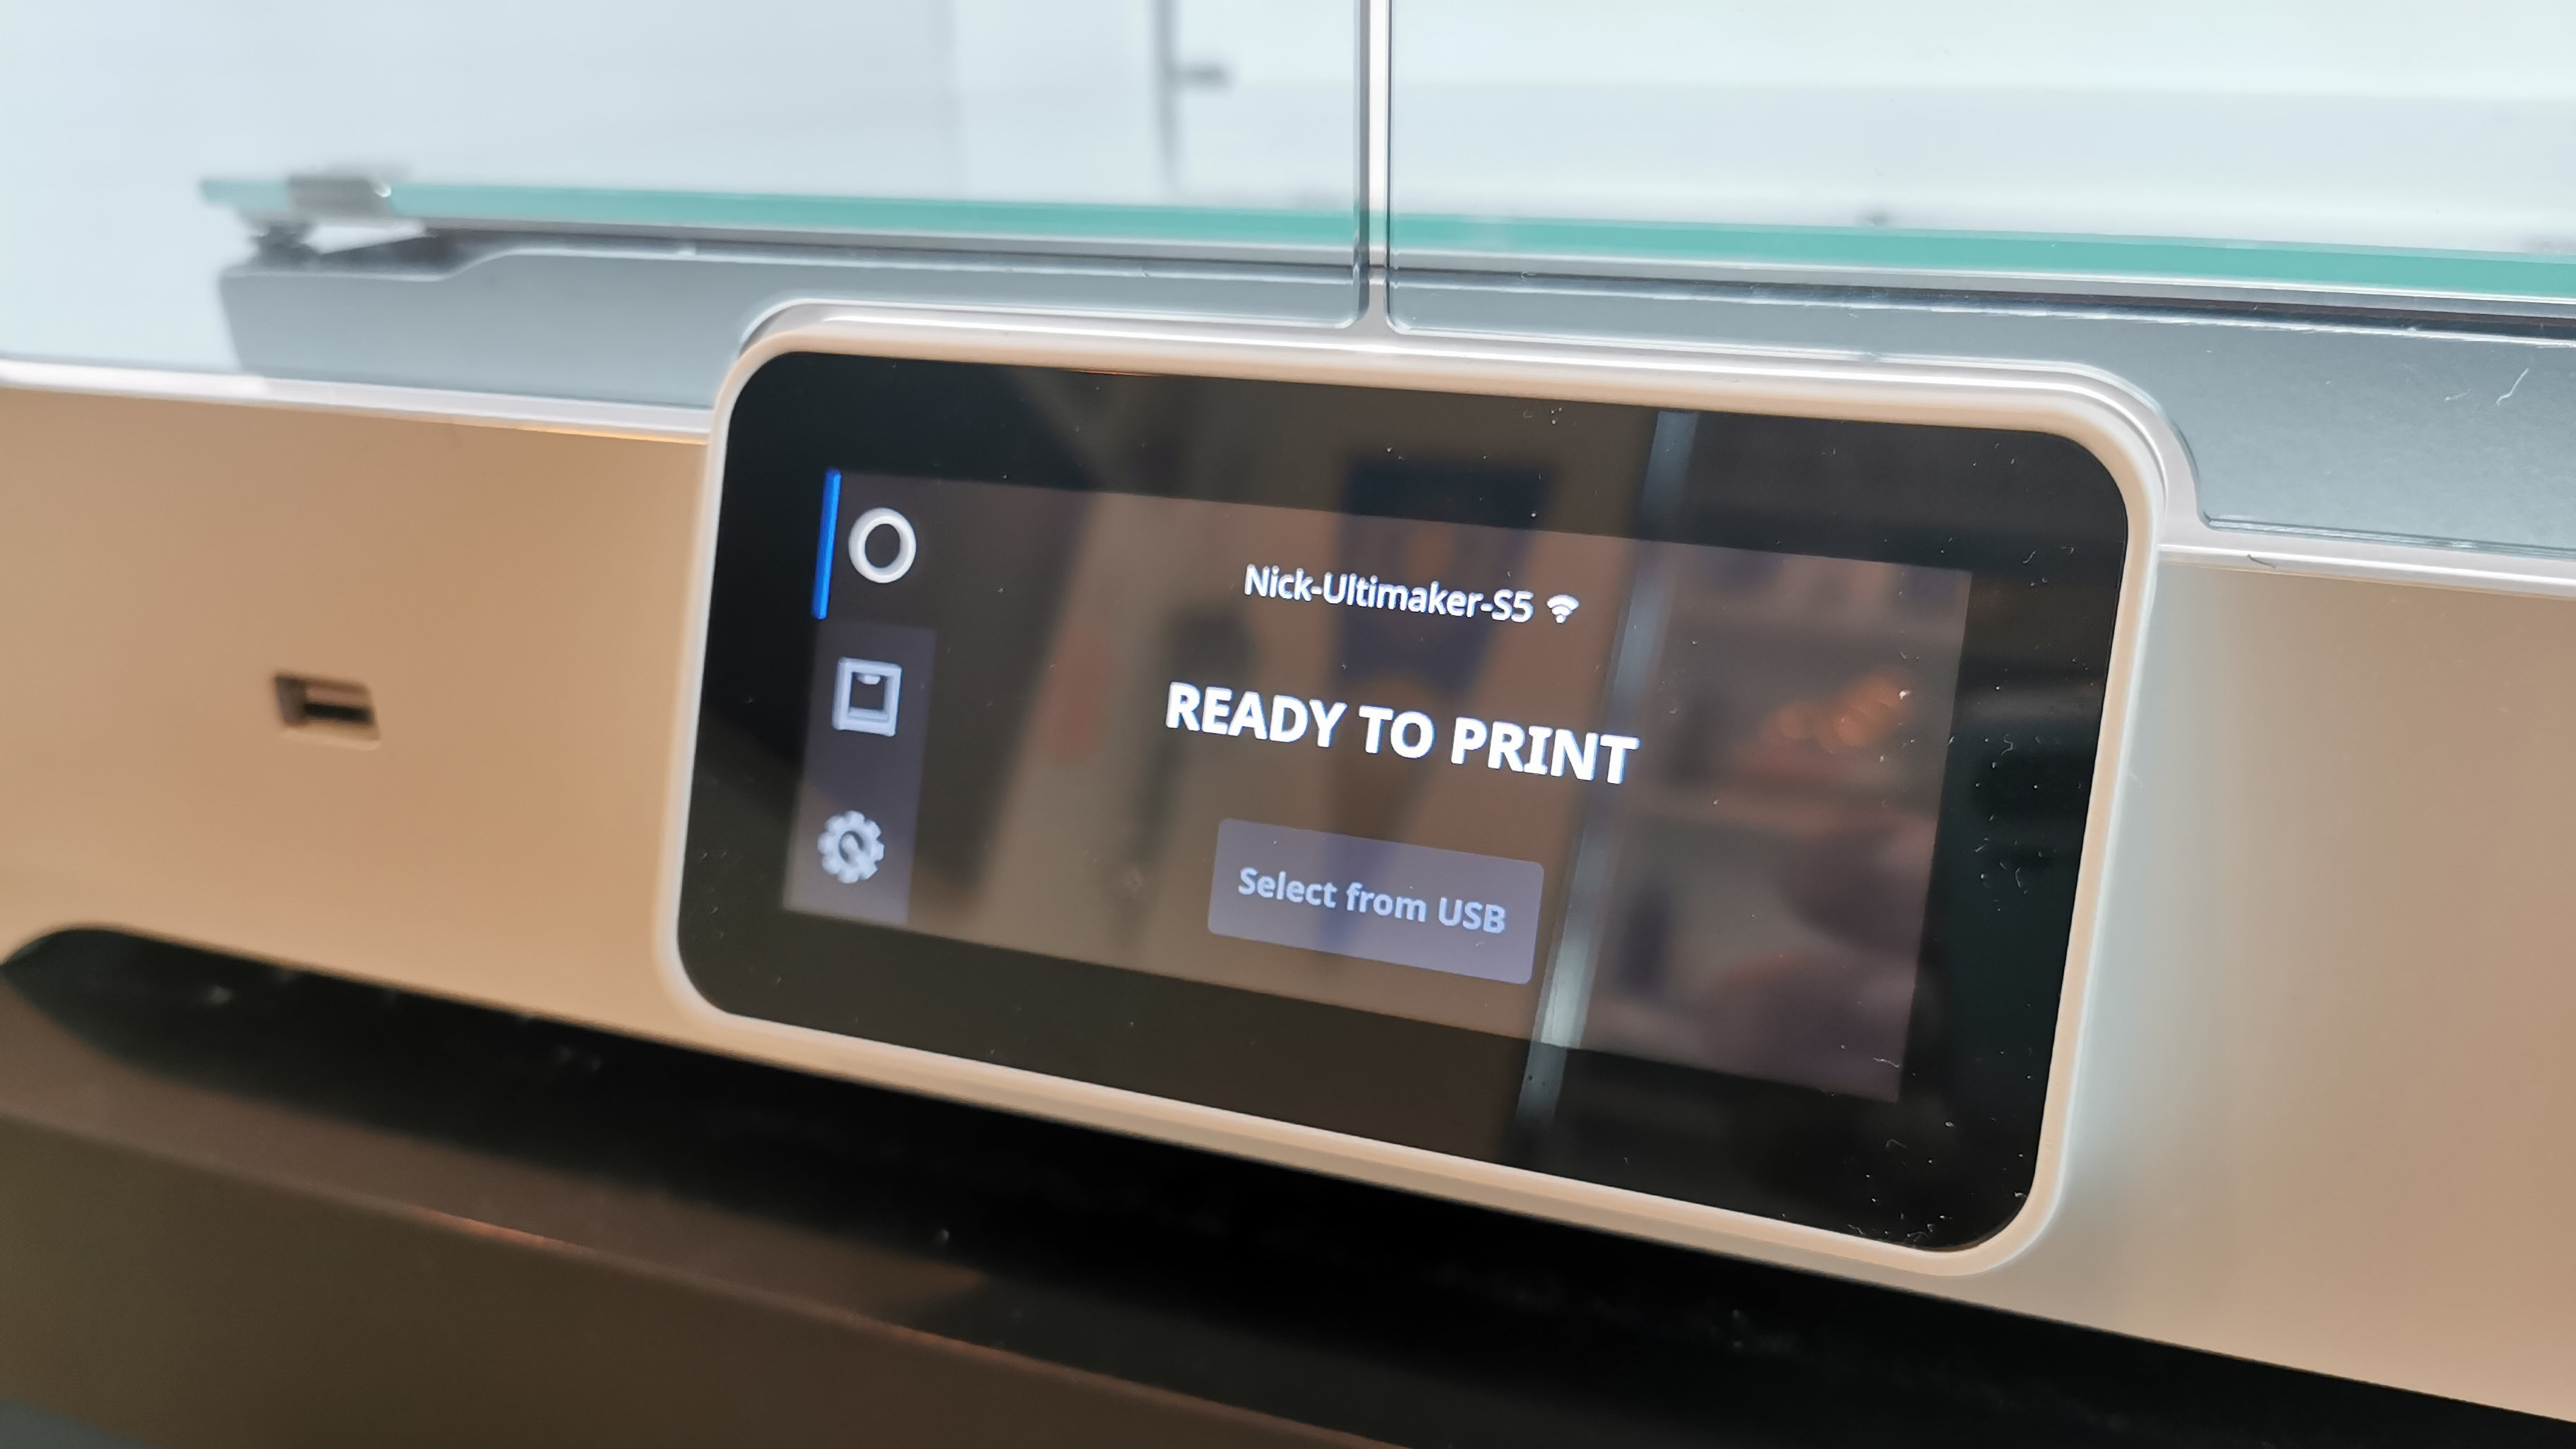
Near the bottom of the Ultimaker S5 is a large, color touchscreen, which is what you’ll use to interact with and set up the printer. It’s clear and easy to navigate around, though it can be a bit difficult to read from higher angles. There’s also a USB Type-A port at the front to read files off a thumb drive, and a LAN port at the back if you prefer using a wired connection than Wi-Fi.
Features
The Ultimaker S5 has an impressive list of features that can cater to a variety of 3D printing needs. Its biggest selling point is the multitude of filaments it can handle, along with dual-extrusion. At the back of the unit, you’ll find a spool holder that can hold two spools of filament, and feed them into separate Bowden tubes that lead to the actual print head.
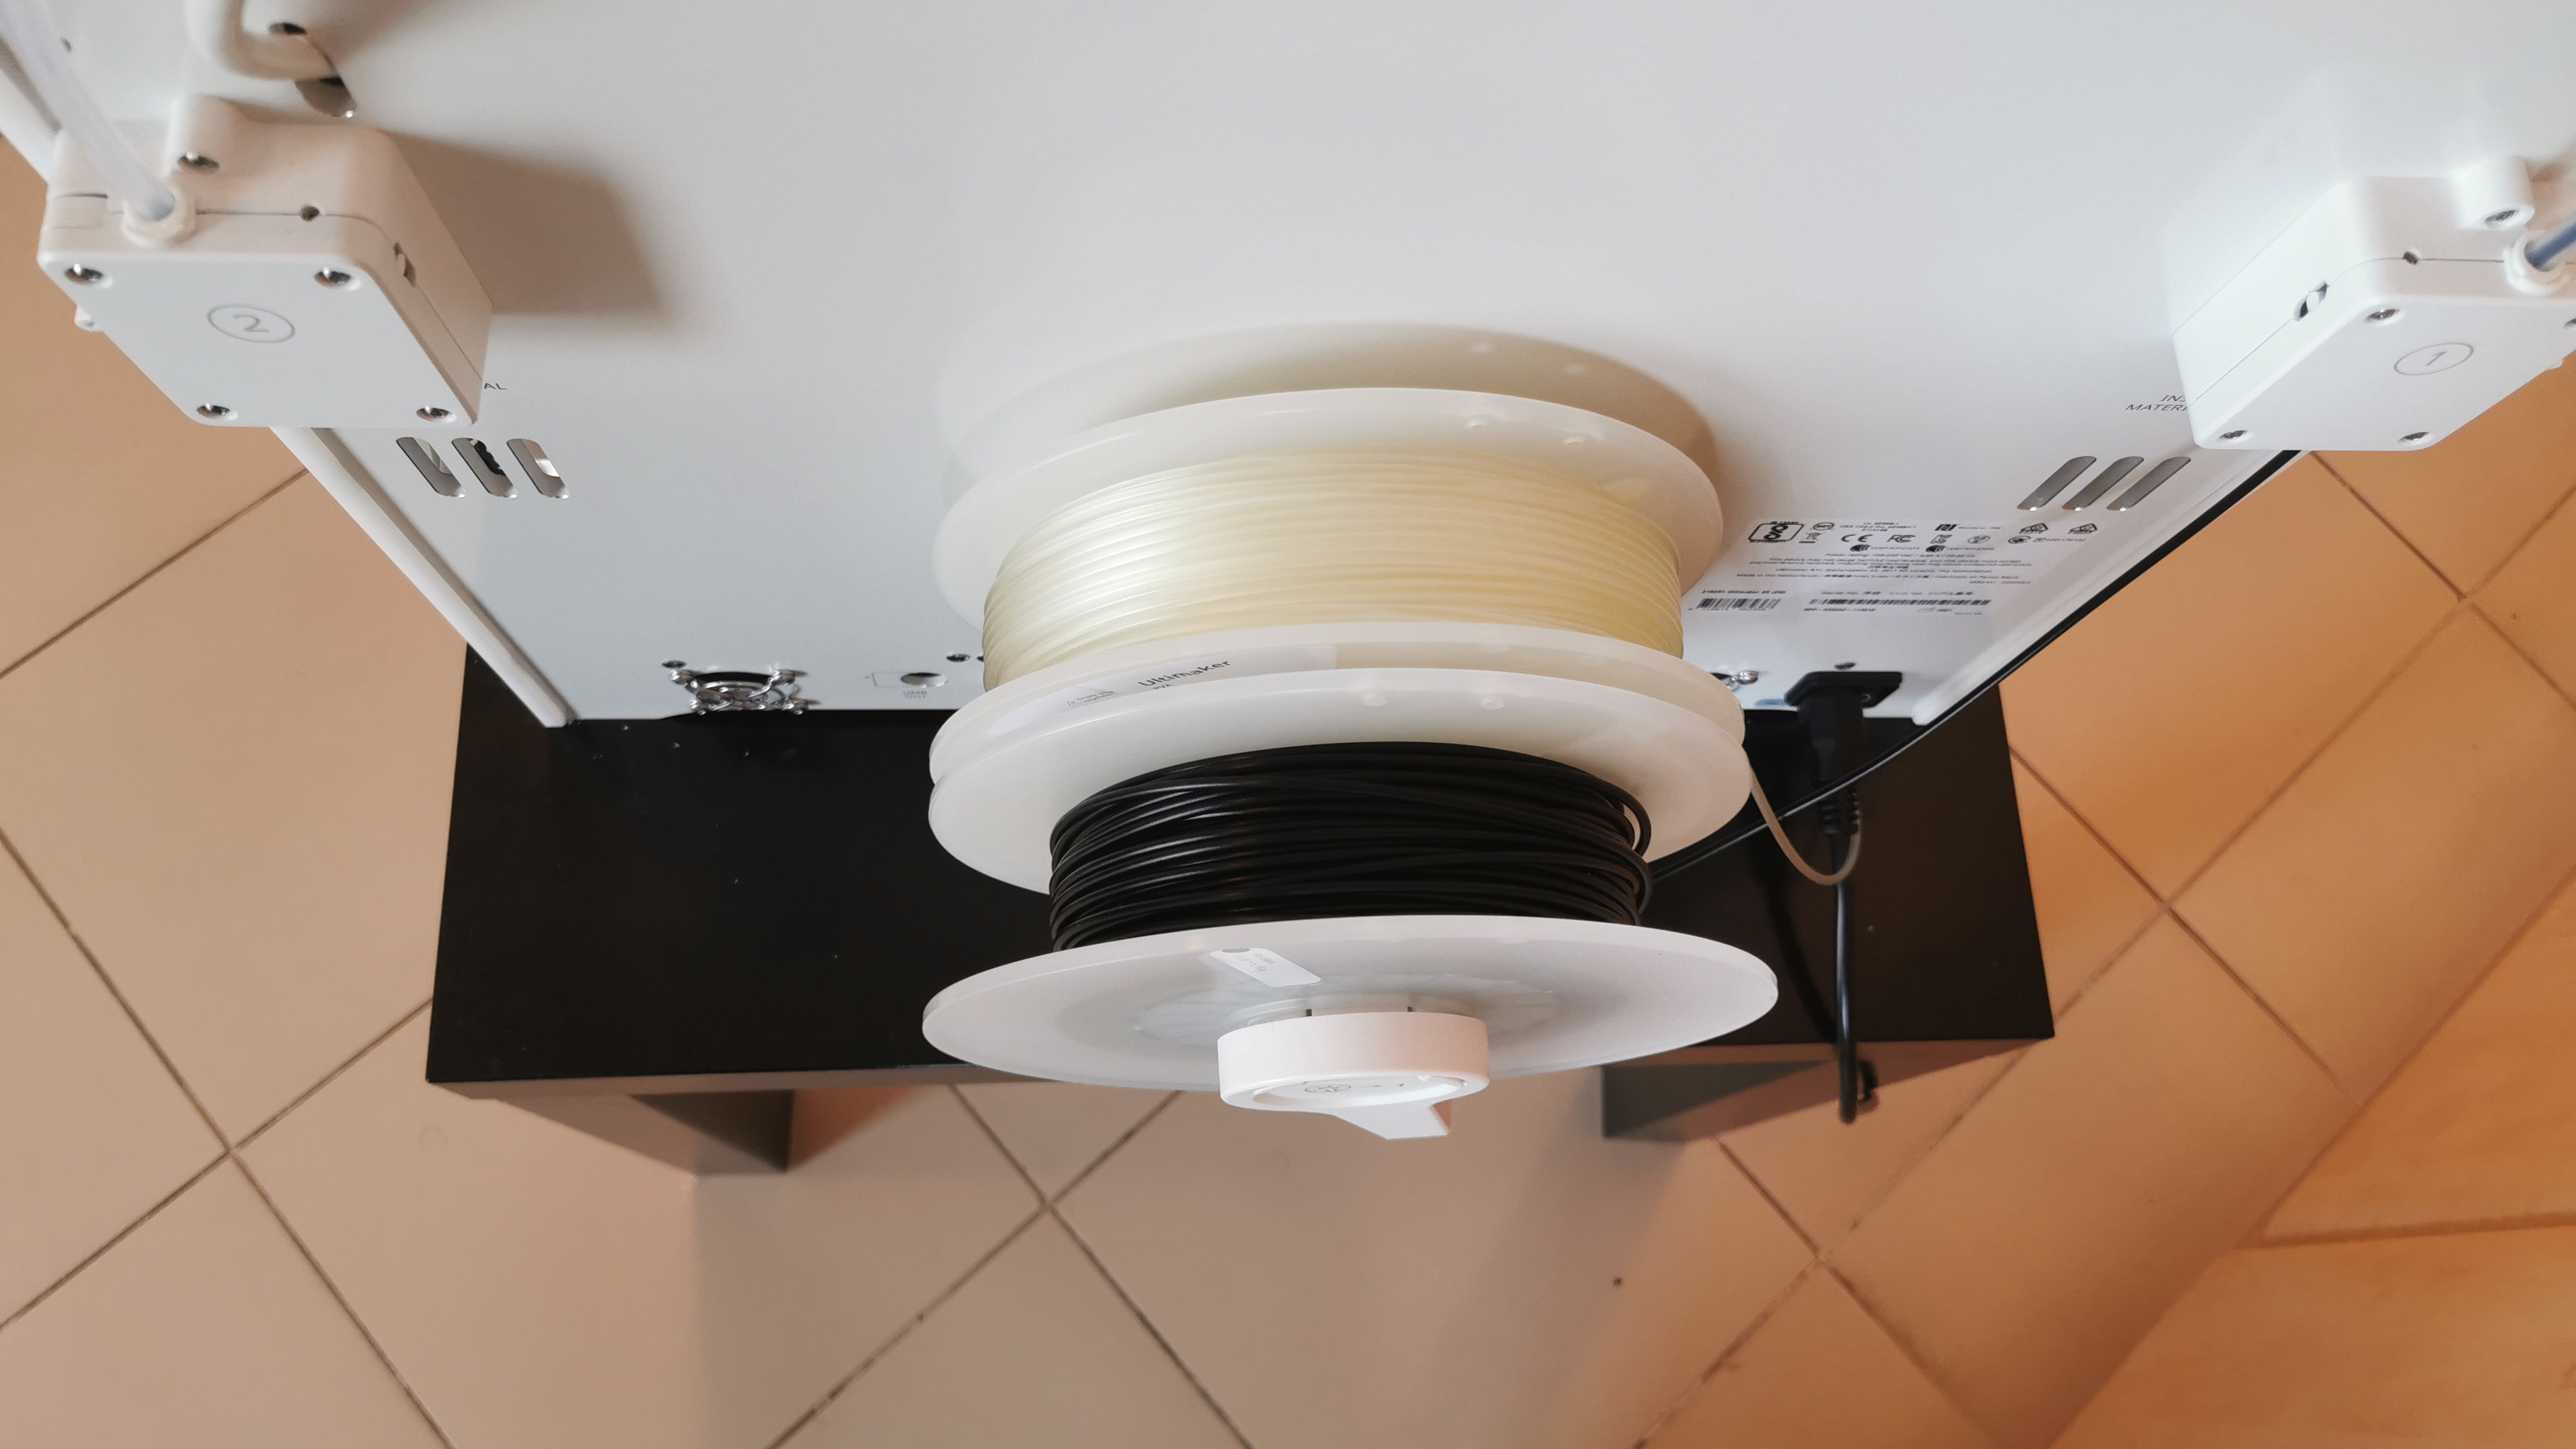
While third-party filaments can work in the Ultimaker S5, filament that’s made by Ultimaker has an added advantage of having a small NFC tag attached to it. Simply place the spool on the holder, and the machine will automatically read the tag and apply the correct material settings, making it even easier to swap out materials at any time.
Another advantage to the Ultimaker S5 is its print cores – while most 3D printers come with one fixed print head, you can swap out the print cores on the Ultimaker S5 at any time. This allows you to change the thickness of material being extruded, or if you’re handling materials that only specific print cores are able to print. The cores behave like printer cartridges – simply pop open the printing compartment, press down on a print core to release it, and then snap in the new one. The Ultimaker S5 ships with one core already installed, and two more in the accessories box.
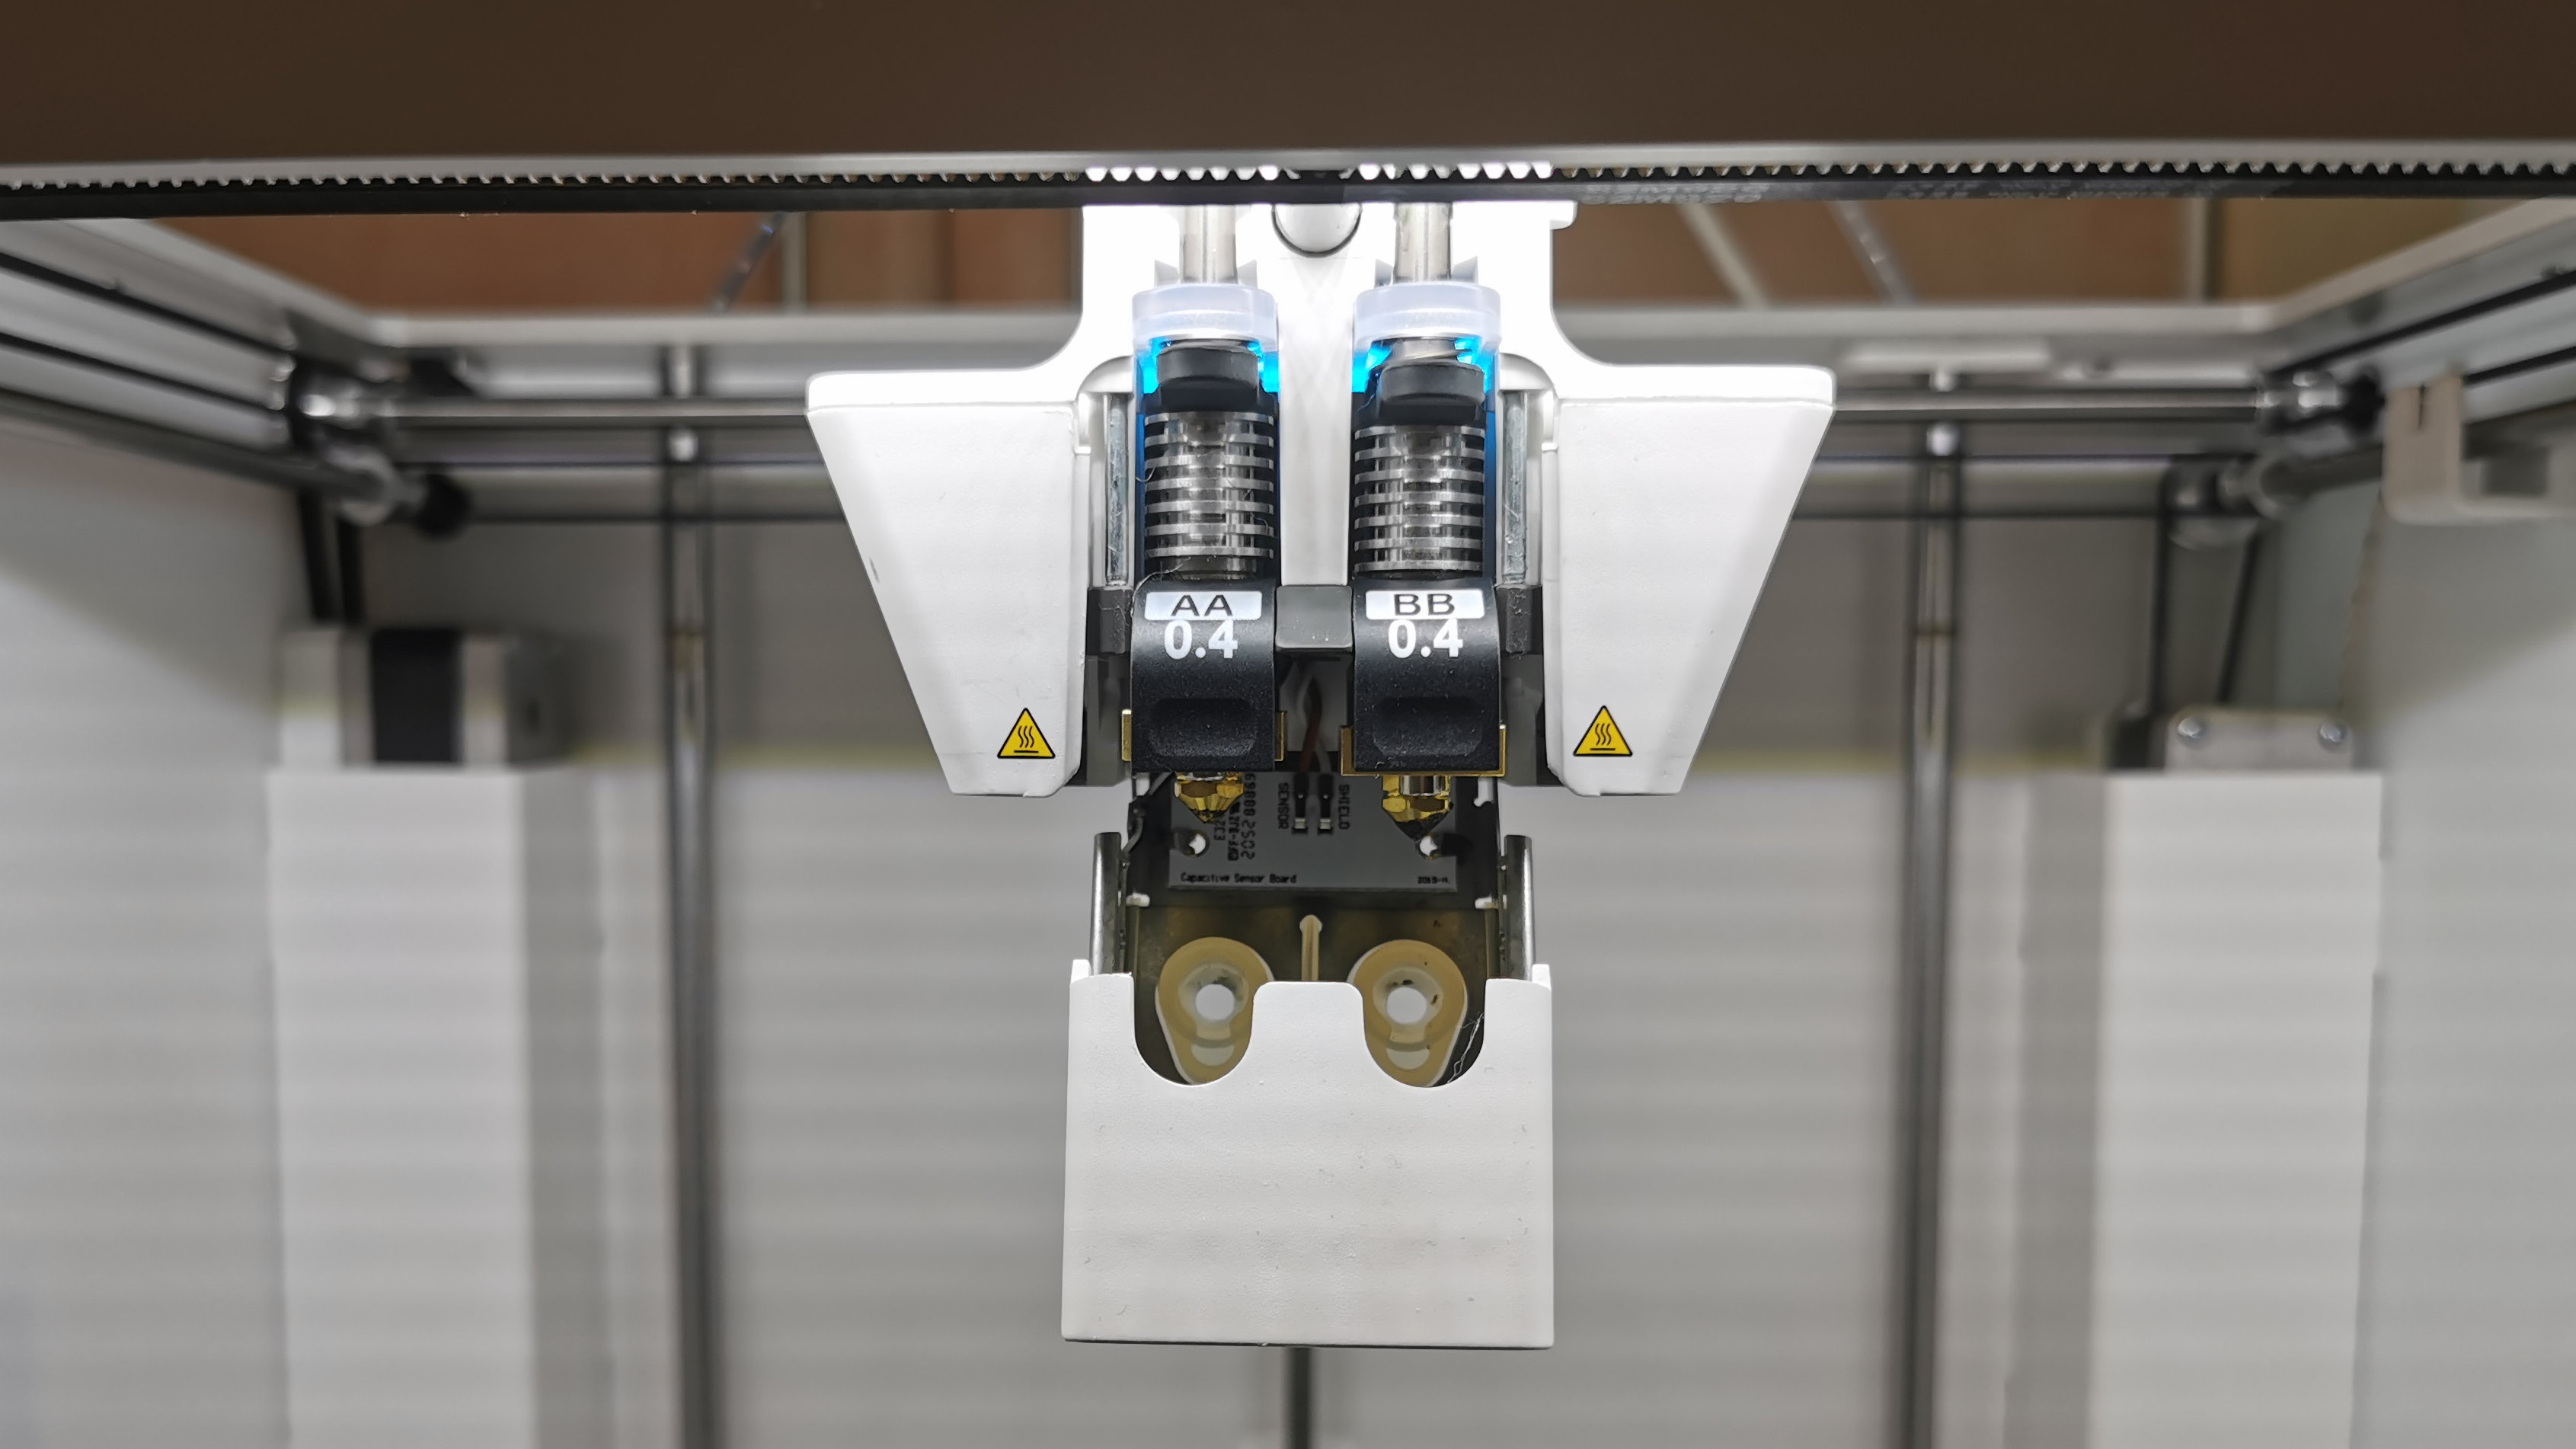
Depending on what model you’re printing, the Ultimaker S5 will utilize the correct print head. If you’re printing a model with two different colors of filament, it will quickly swap between each print head on the fly, navigating to a special corner that physically flips a lever to lower or raise the second print head for printing.
The print heads move along an X and Y axis, while the print bed itself moves on a Z axis as the print is produced. The movements themselves are very smooth, and an accurate series of gears and belts moves everything with absolute precision. Ultimaker also includes a bit of maintenance kit to ensure that everything remains well lubricated and operating smoothly as time goes on.
The Ultimaker S5 is well-illuminated by a concealed strip of LEDs, making it easy to keep an eye on the progress of your print jobs. There’s also a small camera located in one corner that lets you remotely check how much of your print has completed or if there are any problems.
Setup and Software
The Ultimaker S5 comes packaged up extremely securely, with plenty of foam and padding keeping everything in place. Once unpacked, you simply snap away zip ties holding the print head in place, and install the glass panel onto the print bed.
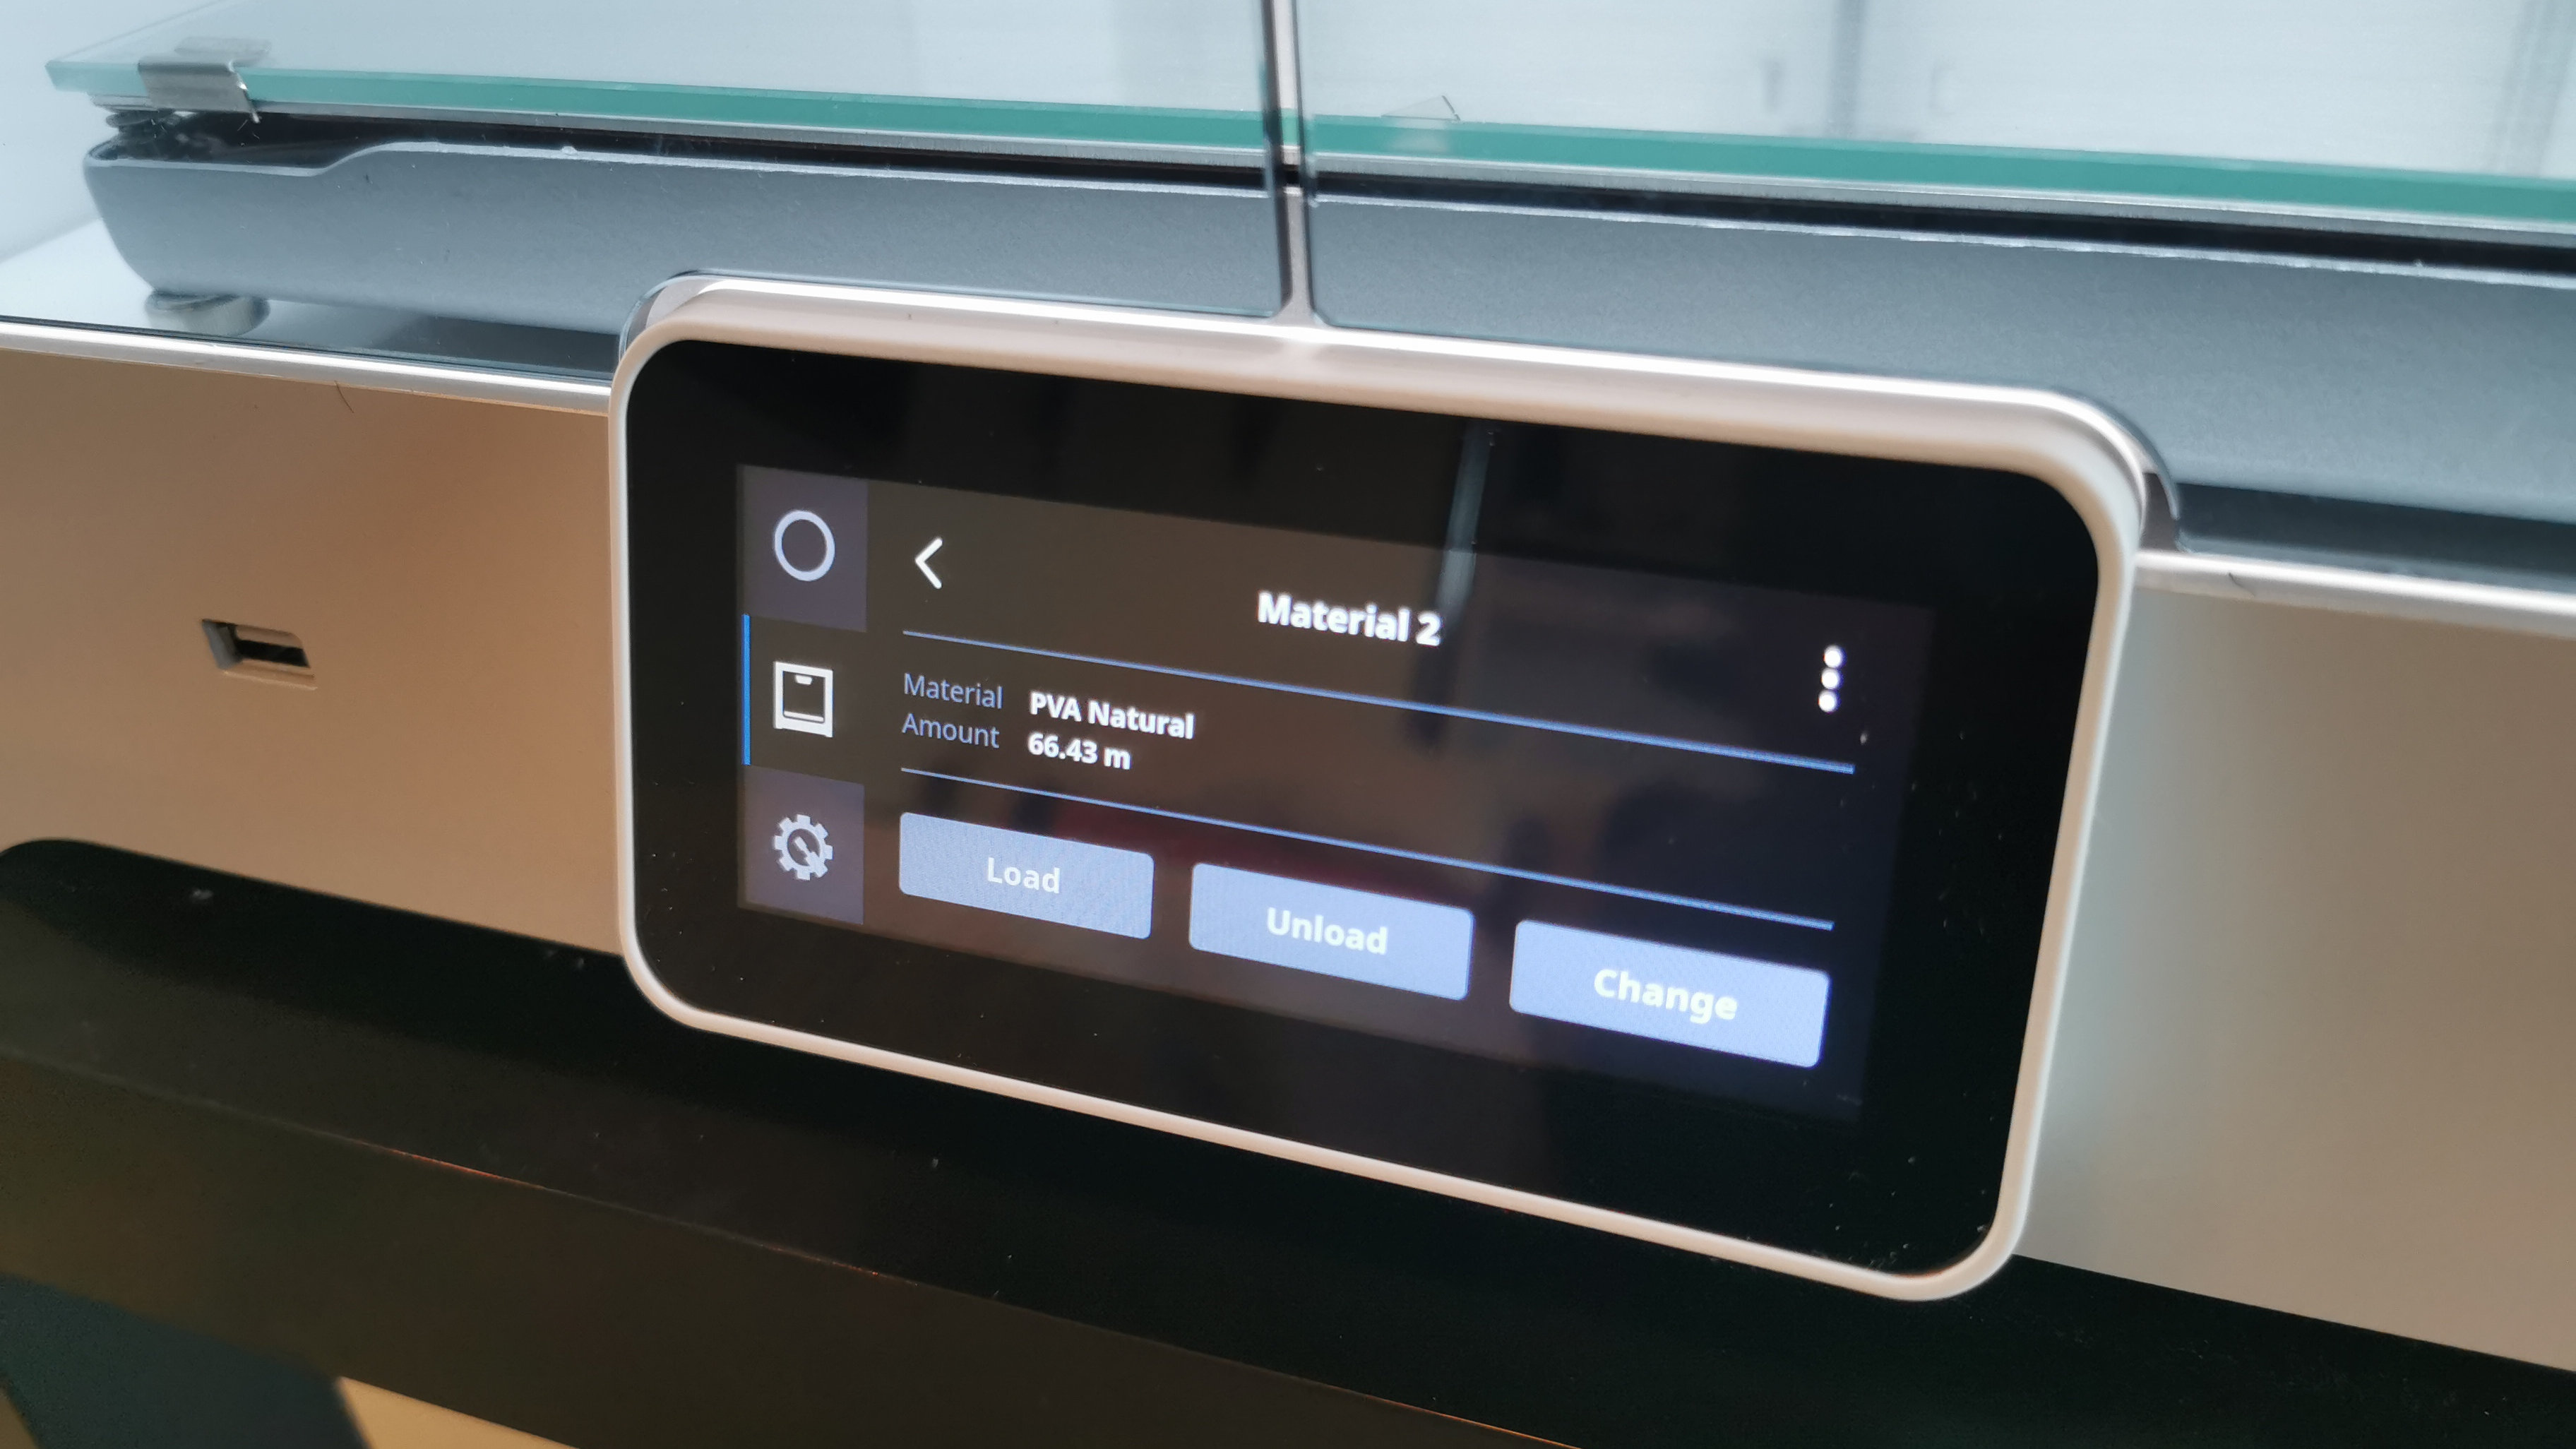
Once it’s switched on, you’ll go through the setup via the Ultimaker S5’s LCD screen. You’ll be able to connect to a wireless or wired network, load filament using detailed instructions, and then prepare for your first print job.
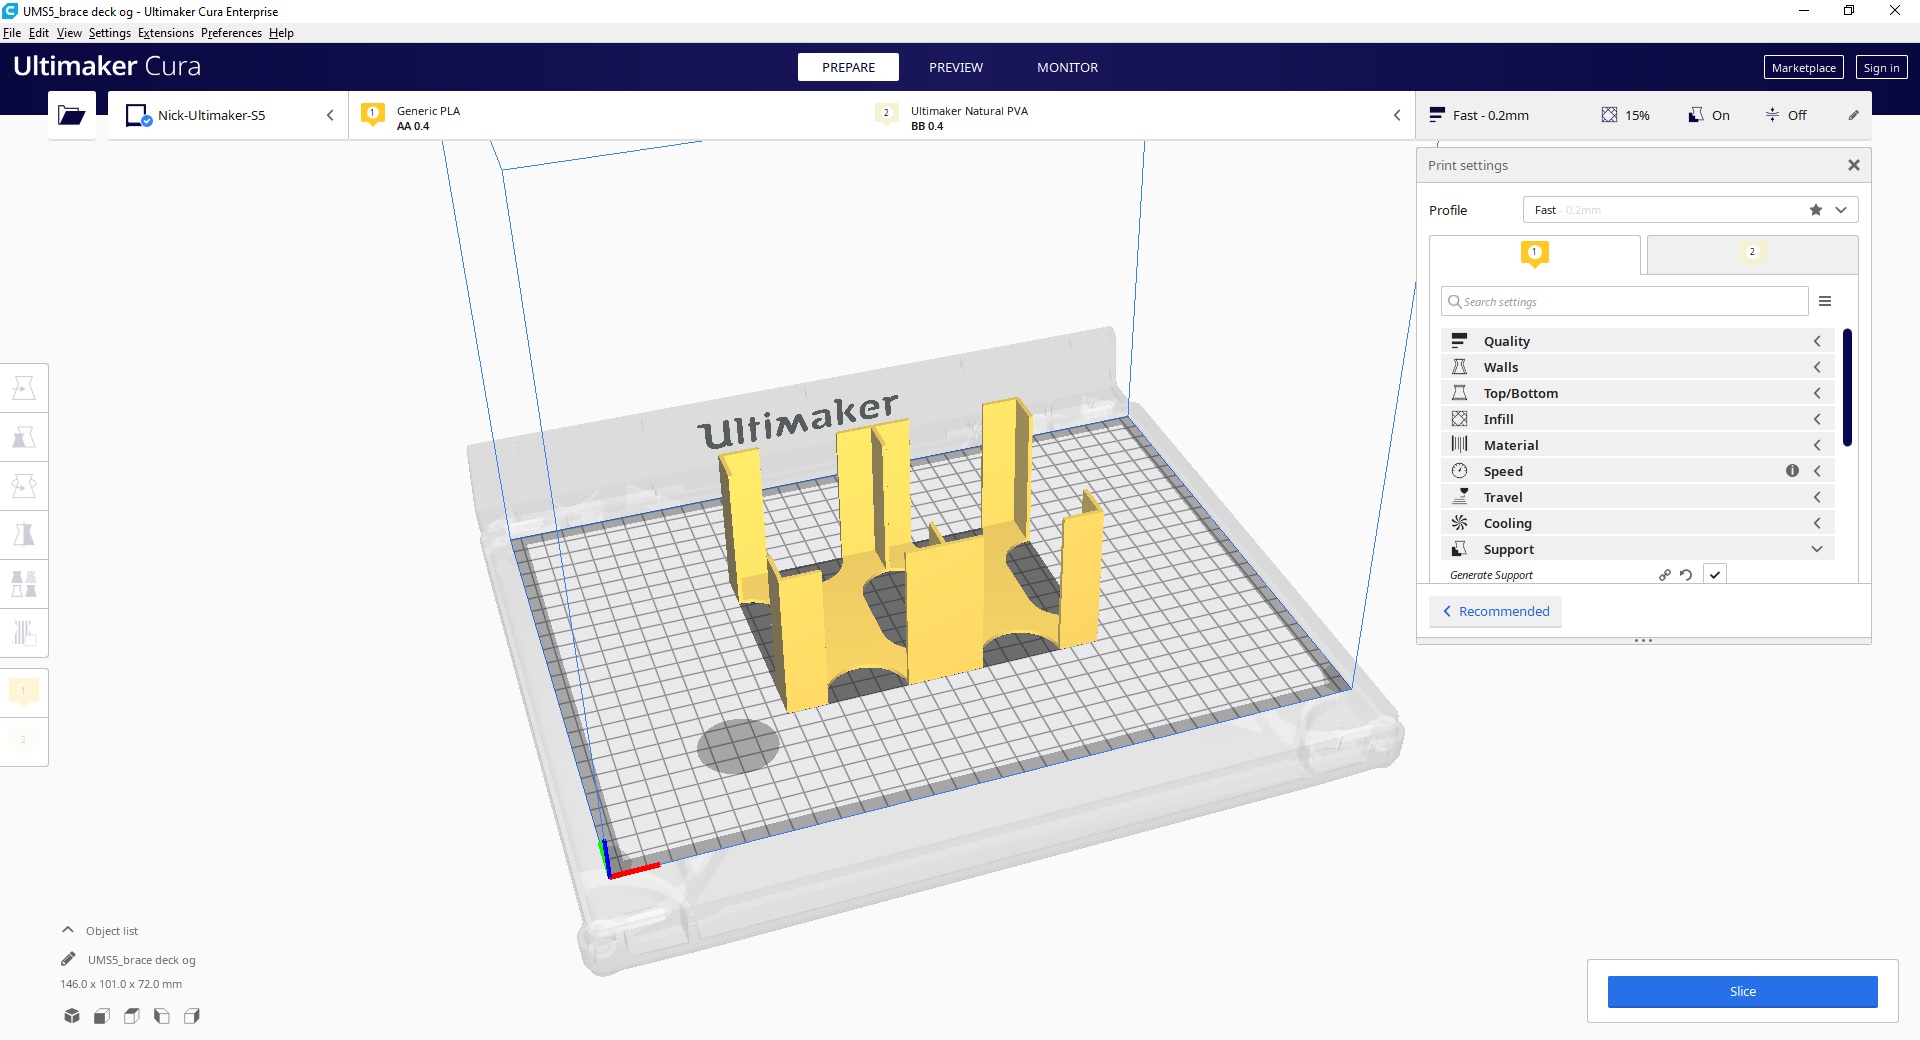
3D printers are only as good as the software they come with, and thankfully Ultimaker S5 has plenty to show off. Firstly, Ultimaker Cura is what you’ll use to load models and prepare them on the build plate. The software needs a bit of time to get used to, but it’s worth taking your time to ensure that all of your print settings are correct, just to minimize the chance of failed prints. Selecting print quality is very simple – there’s a dropdown of presets that range anywhere between 0.6mm to 0.06mm in filament thickness, which determines the final quality of your print. Ultimaker Cura will also show you where and if support structures are required, which again you can configure to be printed with material from either print head.
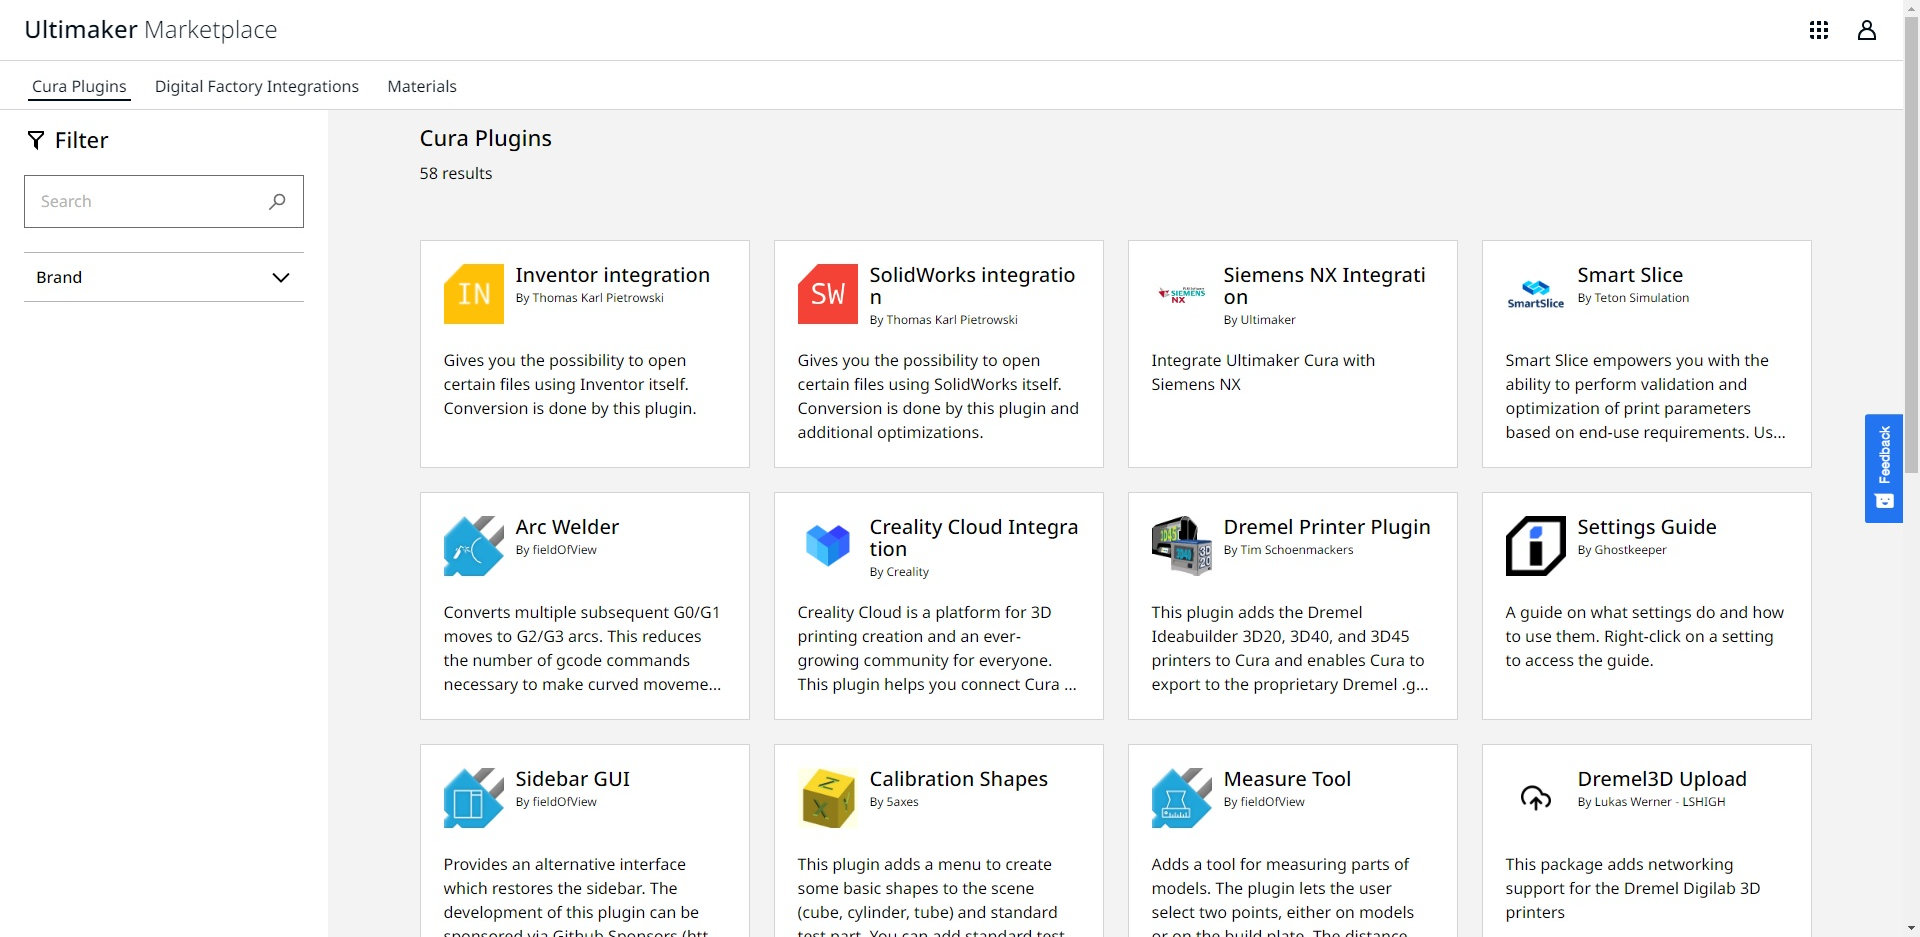
Ultimaker Cura also links into Ultimaker Marketplace, which lists various plugins that work with the software to make your workflow easier. From integrating new printers to broadening file compatibility, everything is synced to your Ultimaker account, and activating any of these plugins is extremely easy.
Lastly, Ultimaker Digital Factory is truly where the Ultimaker S5 shines. With this web-based management console, you can see what’s currently printing, look back at previous print models, and also manage projects and team access. It’s the core of what makes Ultimaker S5 so unique when it comes to working on important projects together. In this way, several members can quickly upload prototypes and make changes on the fly, as well as looking at print history.
You’ll also be able to delegate who has access to printing, as well as share printers with other users and control security settings such as disabling access to the local web interface or requiring a PIN to change any settings on the printer itself.
Of course, this excellent integration comes at a price – the basic version of Ultimaker Cura is free to download and use, but any further integration or access to Digital Factory will require a special subscription. Ultimaker are very flexible on this, and should any of their upfront pricing not be quite what you’re looking for, they’re able to work with companies to come up with something that’s a better fit.
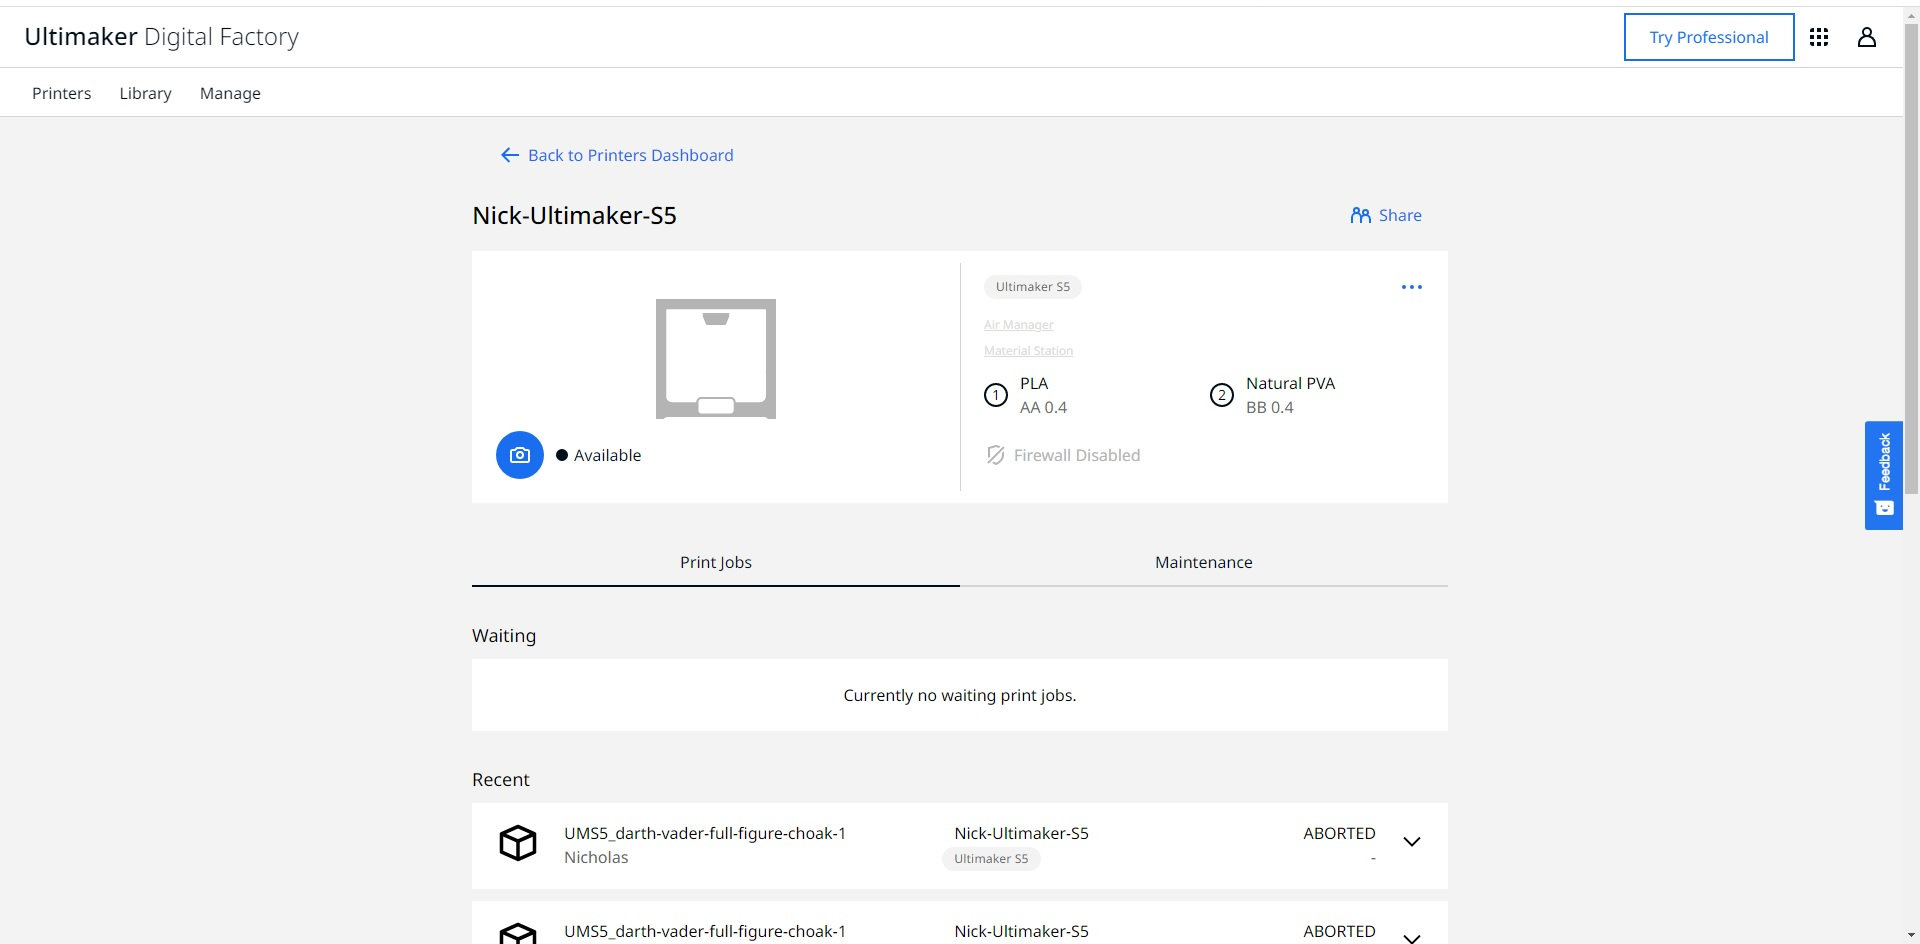
What’s slightly odd is that the Ultimaker S5 doesn’t have a companion app to go along with it. While an Ultimaker app does exist in the Google Play store when we checked, it hasn’t been updated since 2018, and Ultimaker commented that they’re actively trying to encourage users to access their printers through Digital Factory rather than relying on an app. While Digital Factory will work in any browser on mobile or desktop, we still find it odd that these features couldn’t have been built into an app instead, which would provide for much faster access and control to the printer.
Performance
The biggest challenge with 3D printing is ensuring that you don’t end up with a failed print. This could be due to any number of reasons – running low on filament during a print, uneven bed levels, poor filament heating – the list goes on. Thankfully, the Ultimaker S5 tries its best to minimize failed prints by taking a few extra steps that other 3D printers might not.
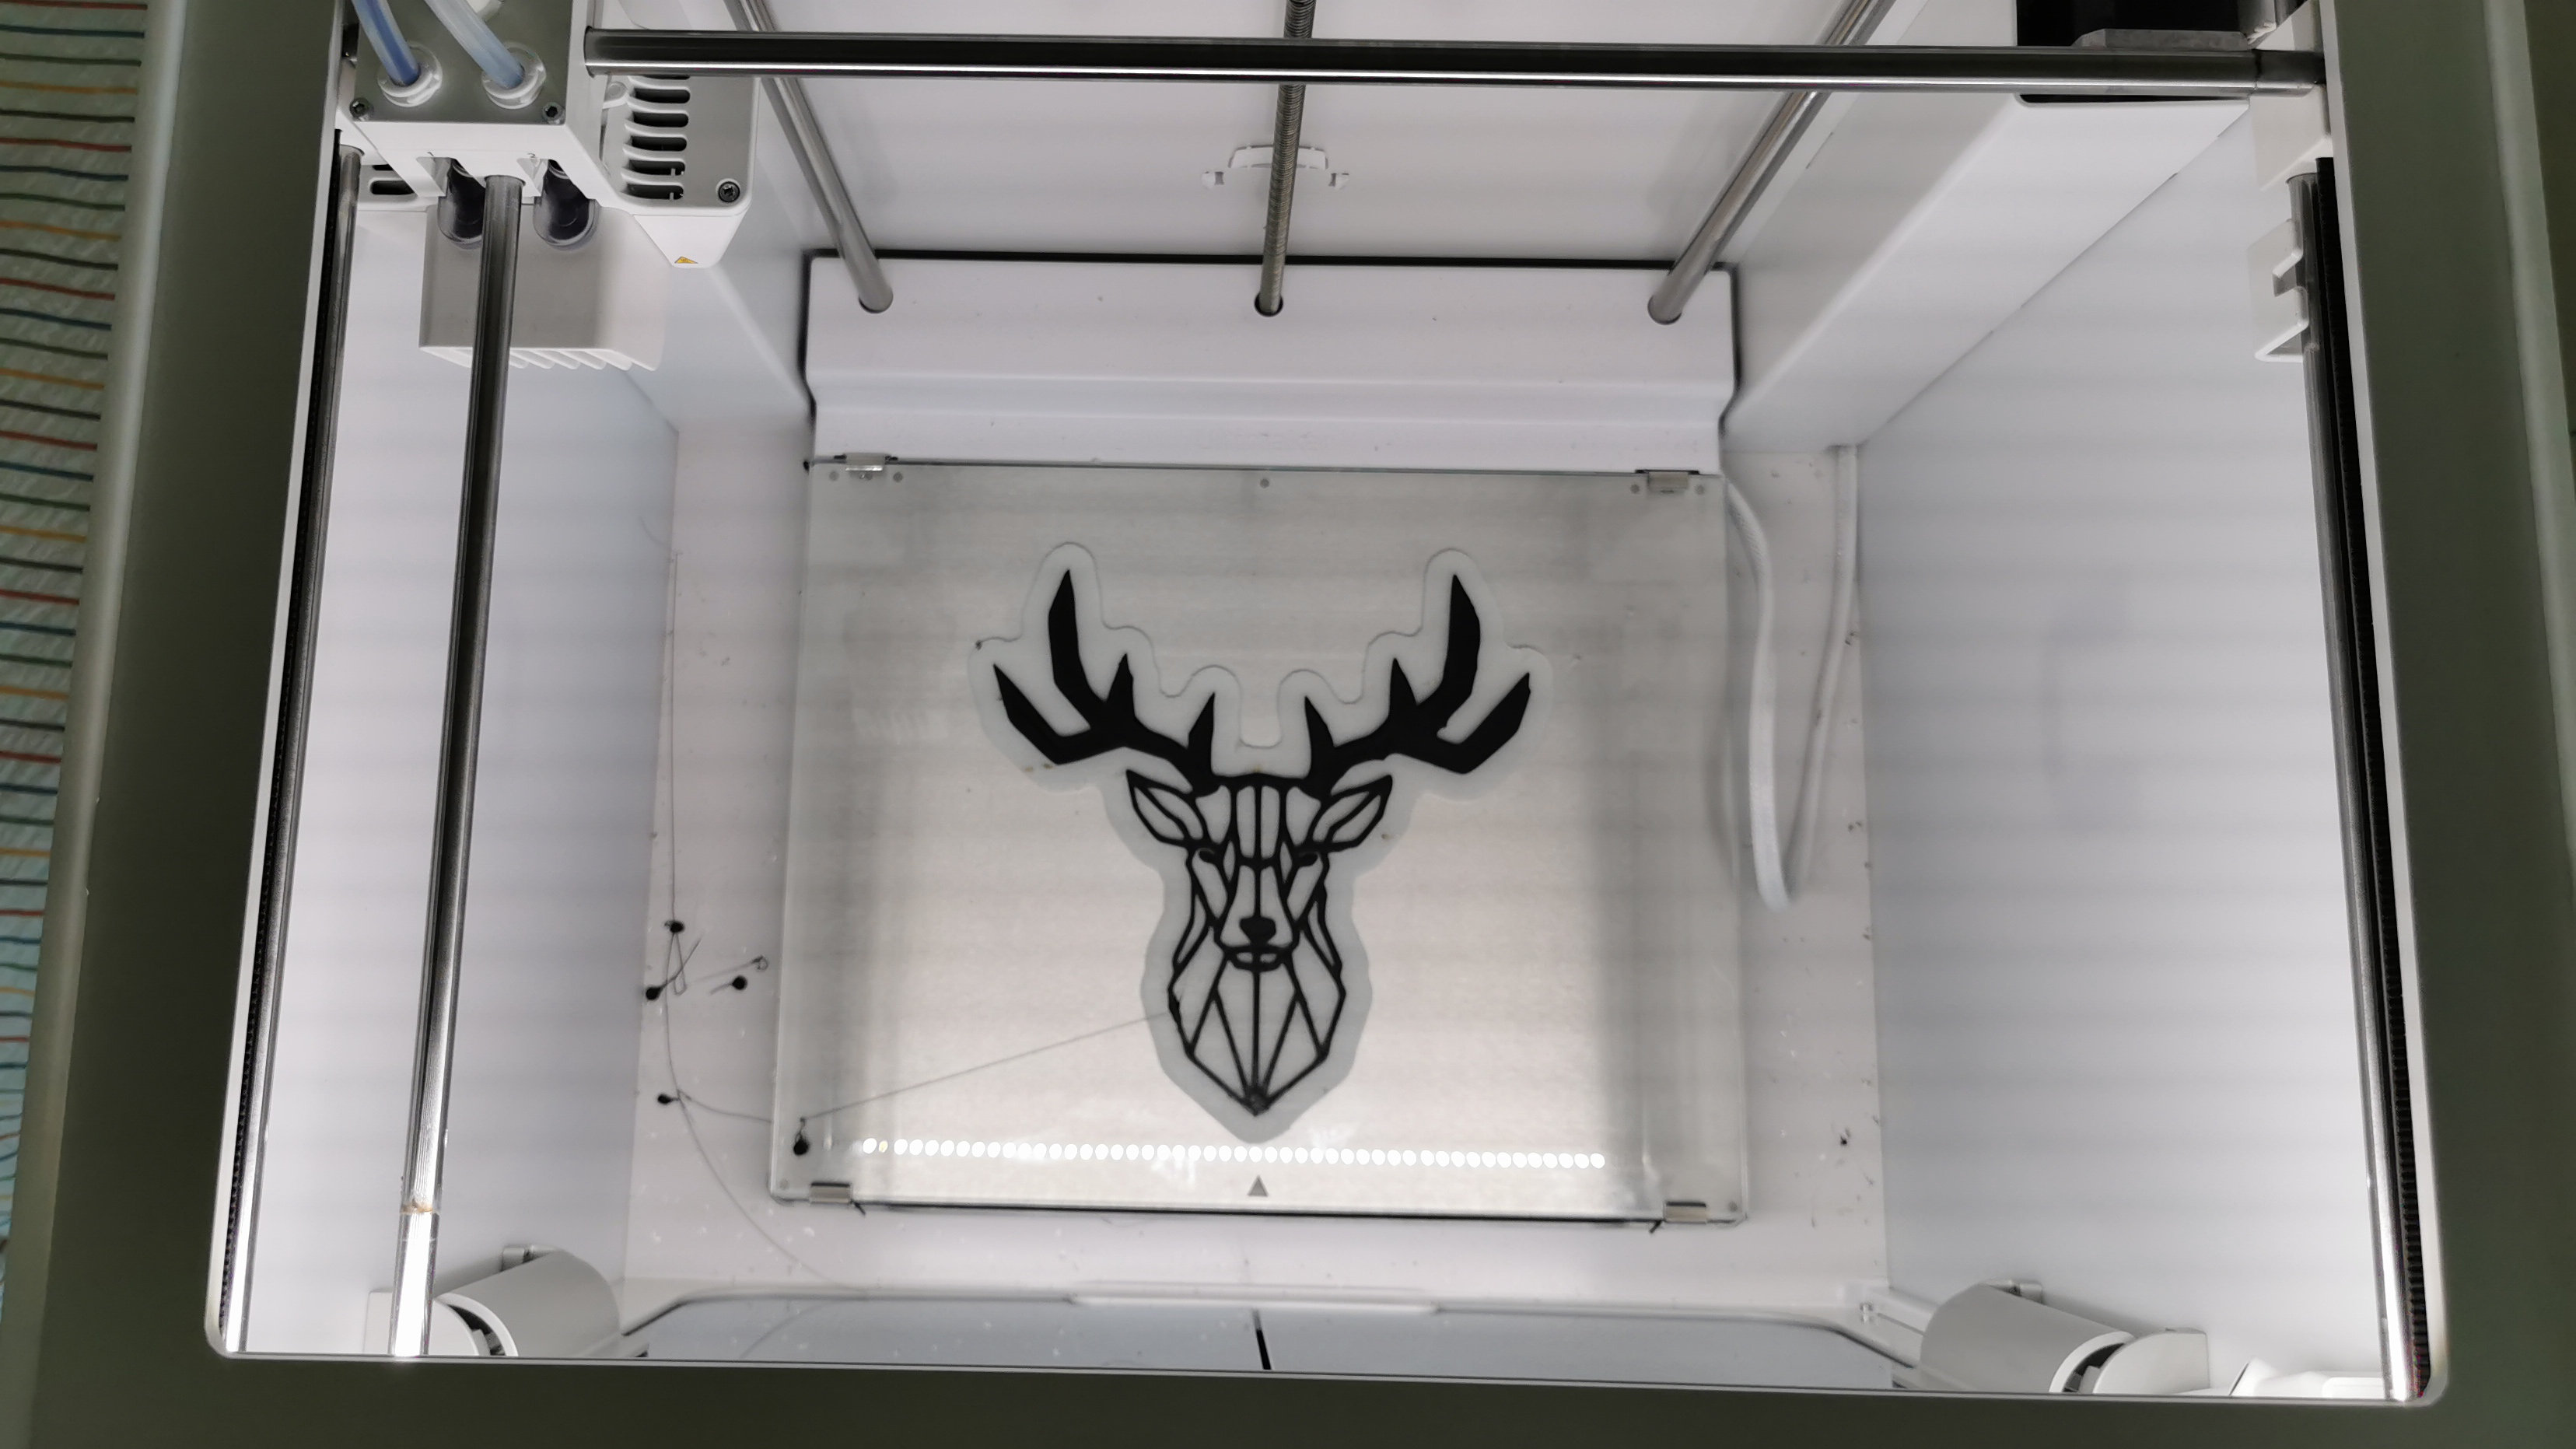
For one, bed leveling is done automatically, and before every print the Ultimaker S5 goes through a checking process across the print bed to ensure that it is entirely level. This does mean that you’ll have to wait an extra 2-3 minutes before every print job, but it’s a small price to pay to avoid your print peeling off the print bed or warping.
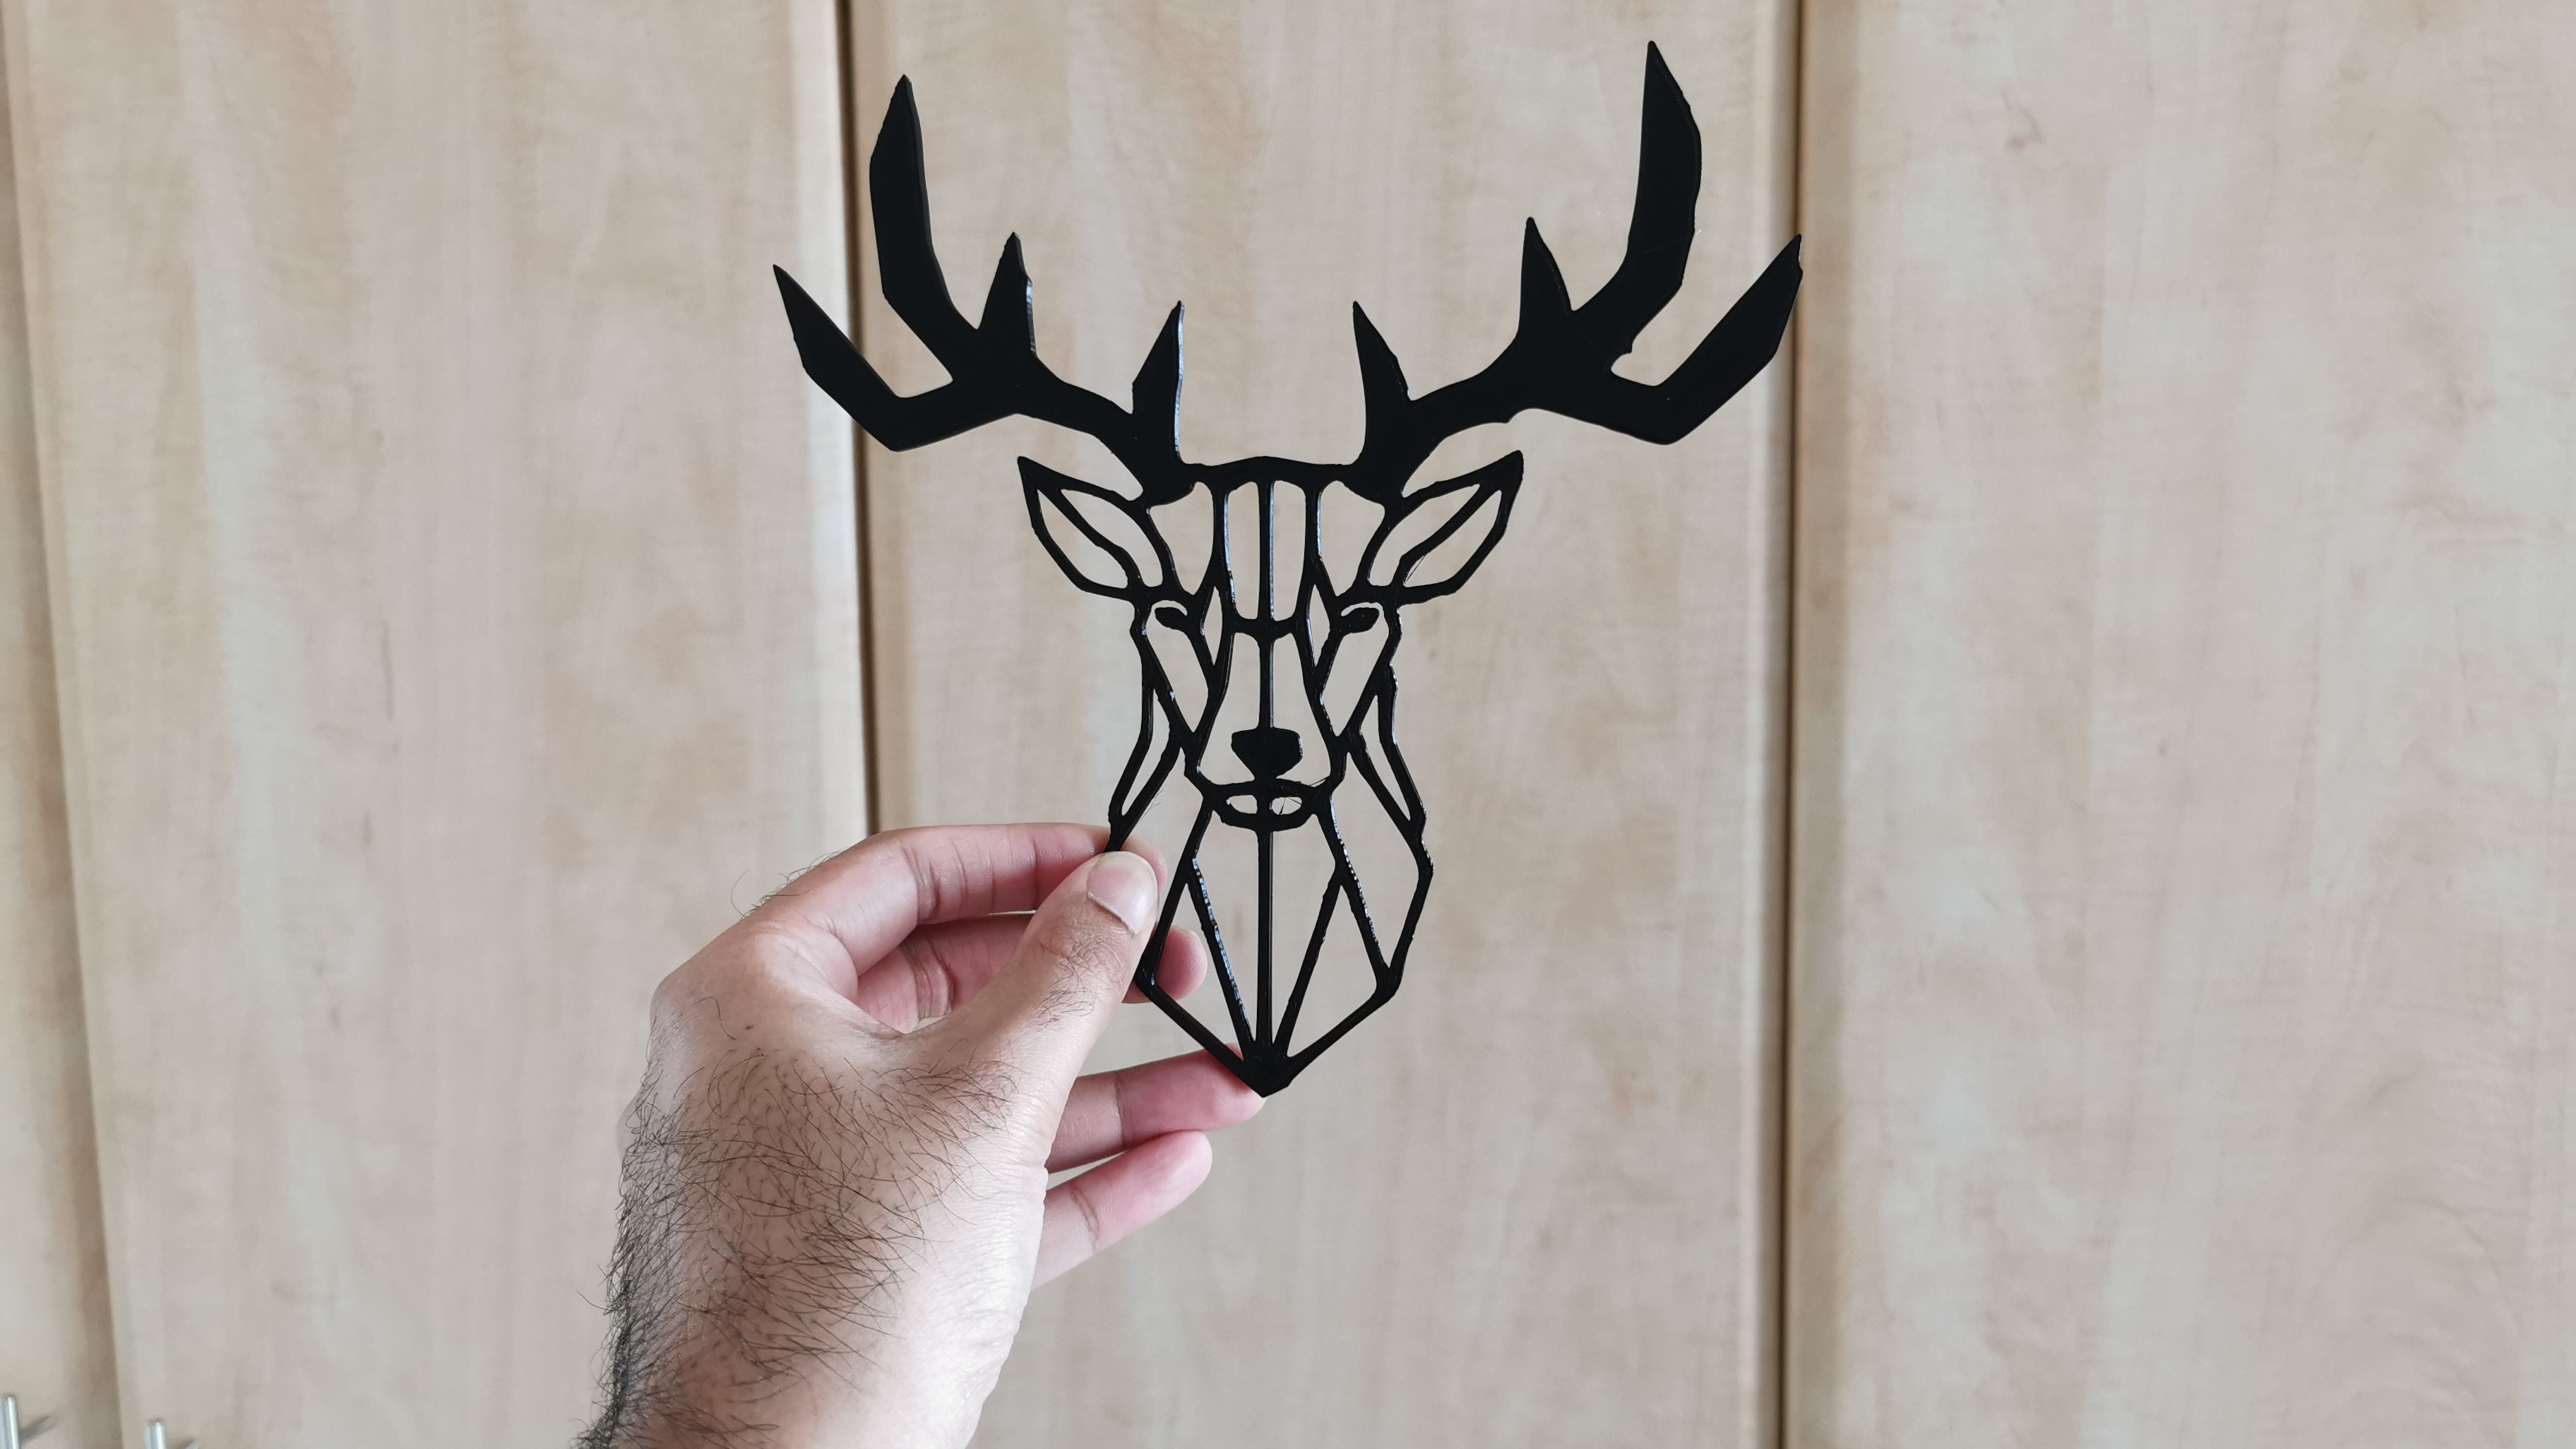
Secondly, the Ultimaker S5 will tell you if you’ve run out of filament, so you can quickly add more and resume your print job. This is something that cannot be appreciated enough, and especially when you’re printing complex parts, you’ll want to ensure that your 20-hour print is going to finish successfully.
Ultimaker advises that you use its ‘Tough’ filament with the Ultimaker S5, which is stronger than regular PLA and isn’t prone to warping during large print jobs. Our review model shipped with Ultimaker’s standard PLA due to stock shortages, but it was just as durable and printed excellently. We did do some other prints with other filament manufacturers as well, and we could clearly see the difference in print quality with the cheaper PLA. So, if you’re investing in something as expensive as the Ultimaker S5, make sure you’re also investing in high-quality filament.
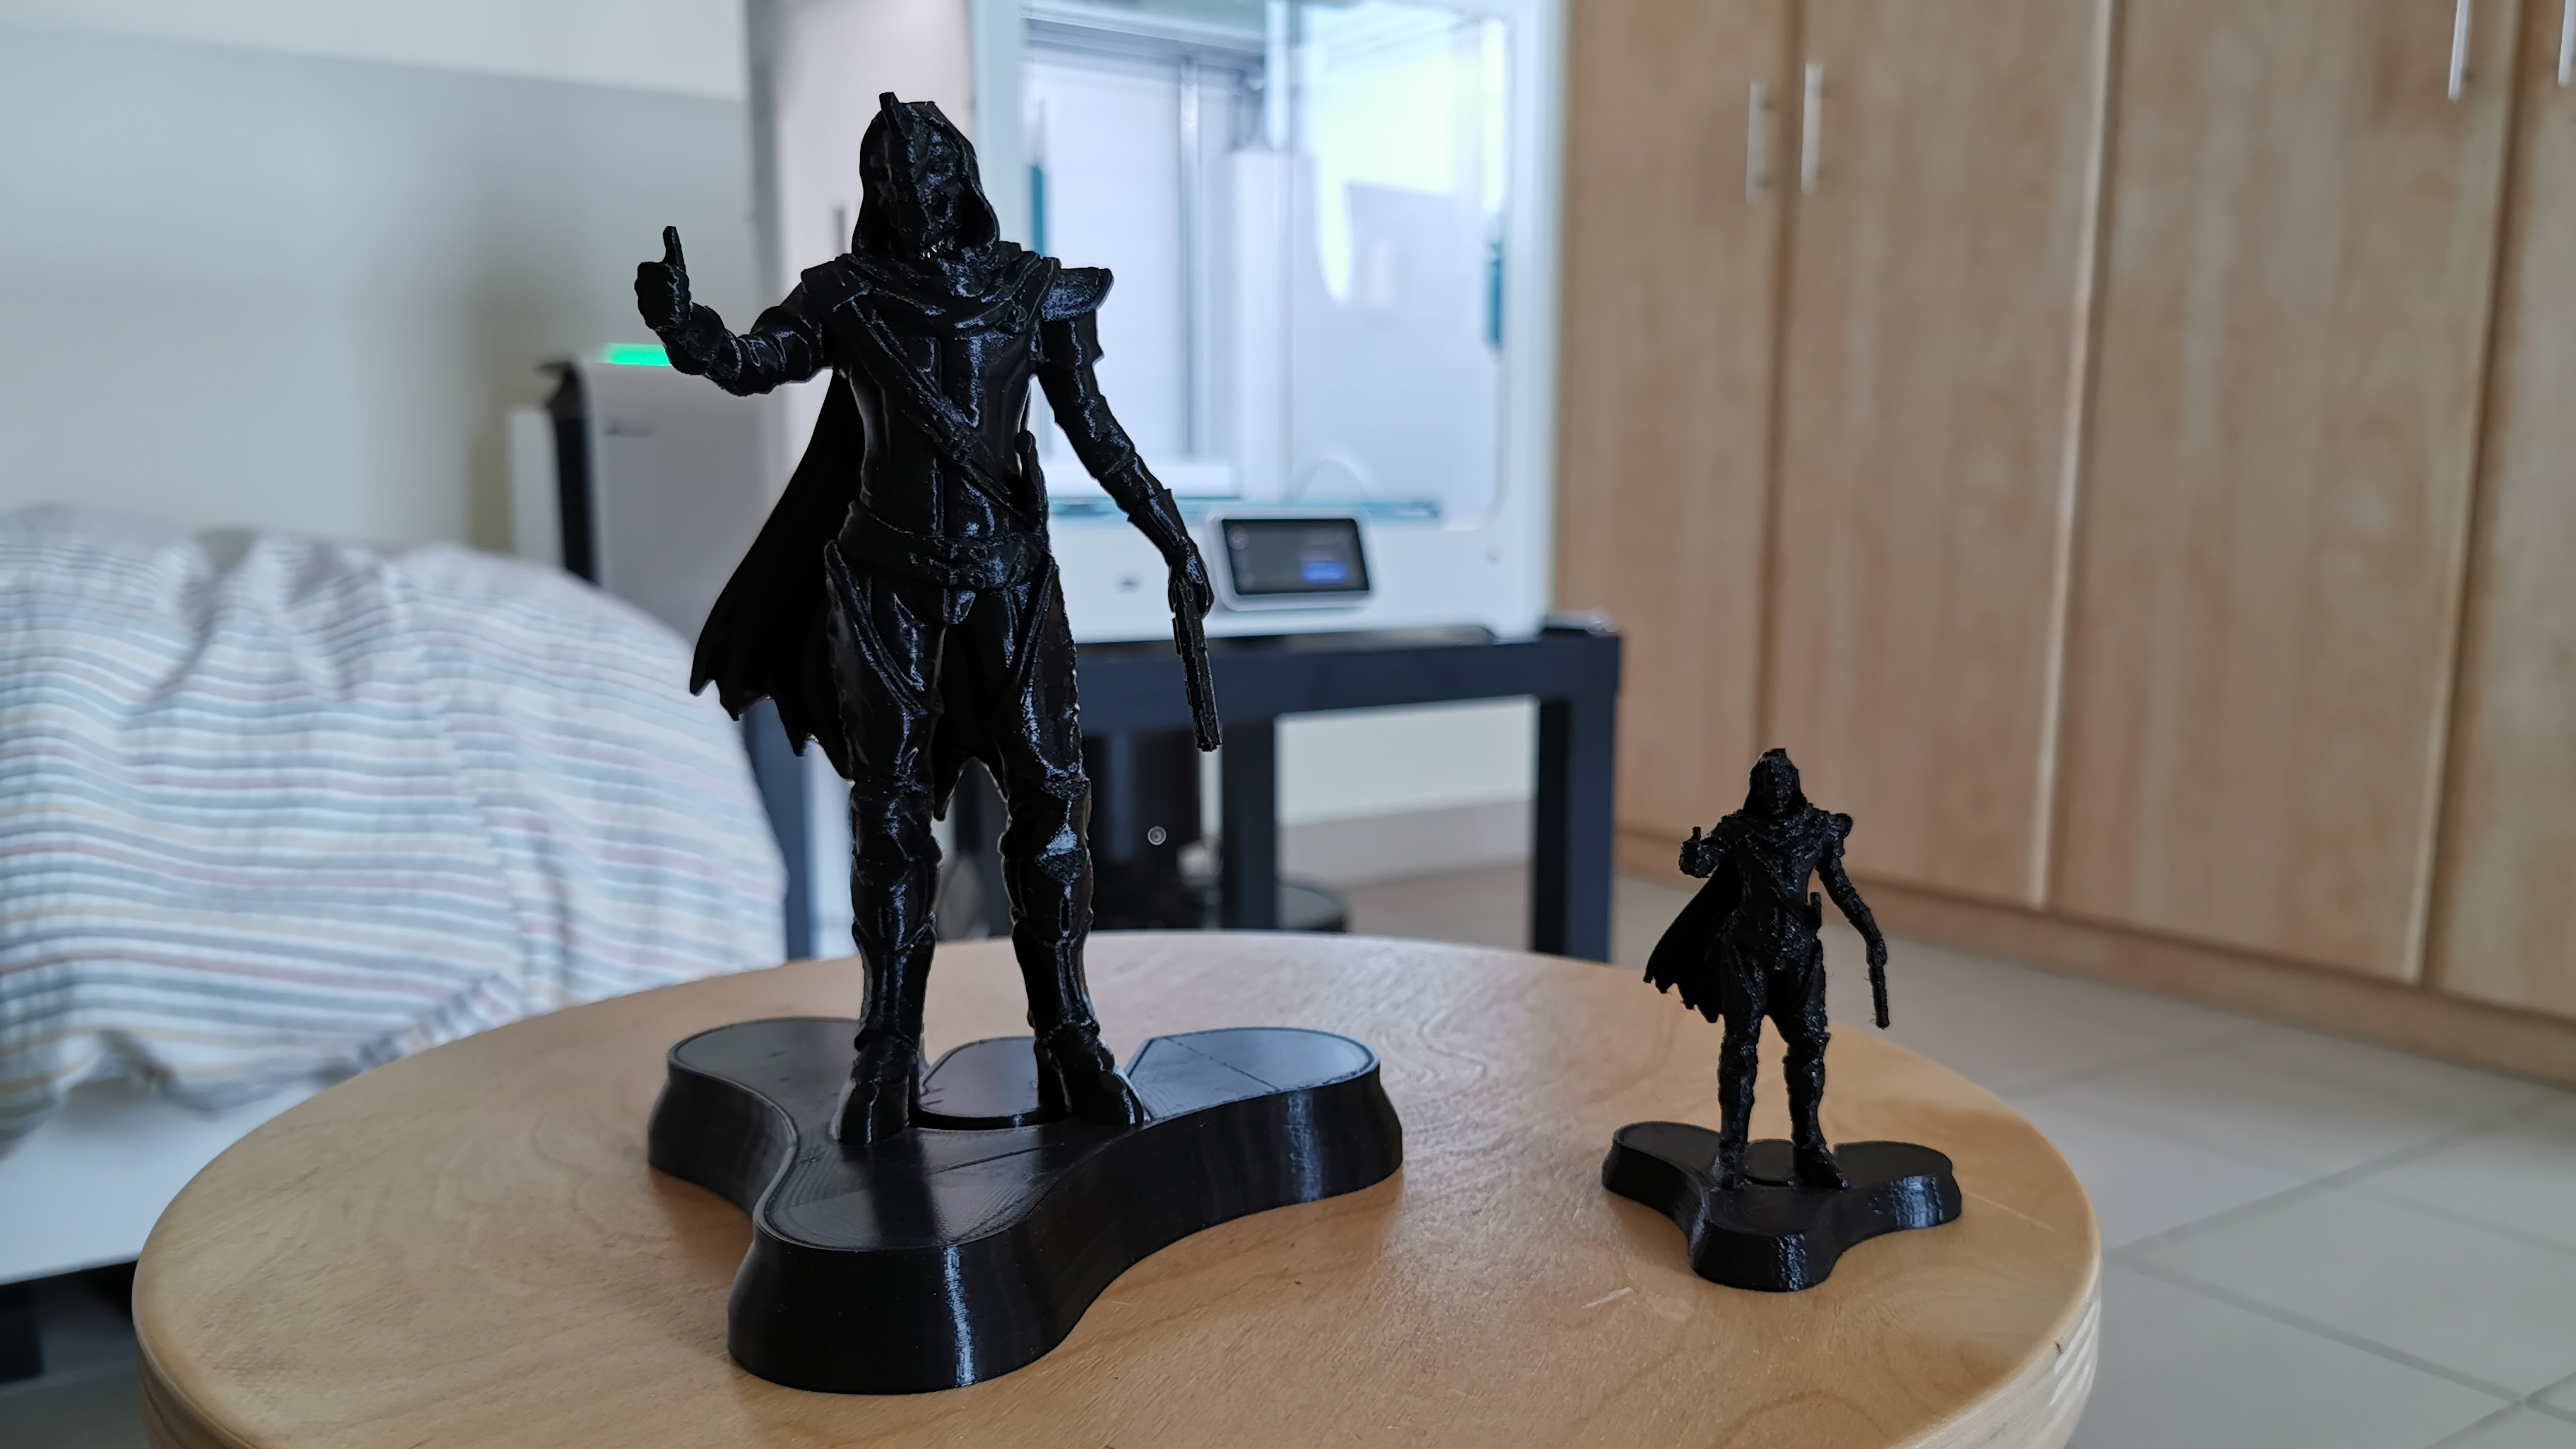
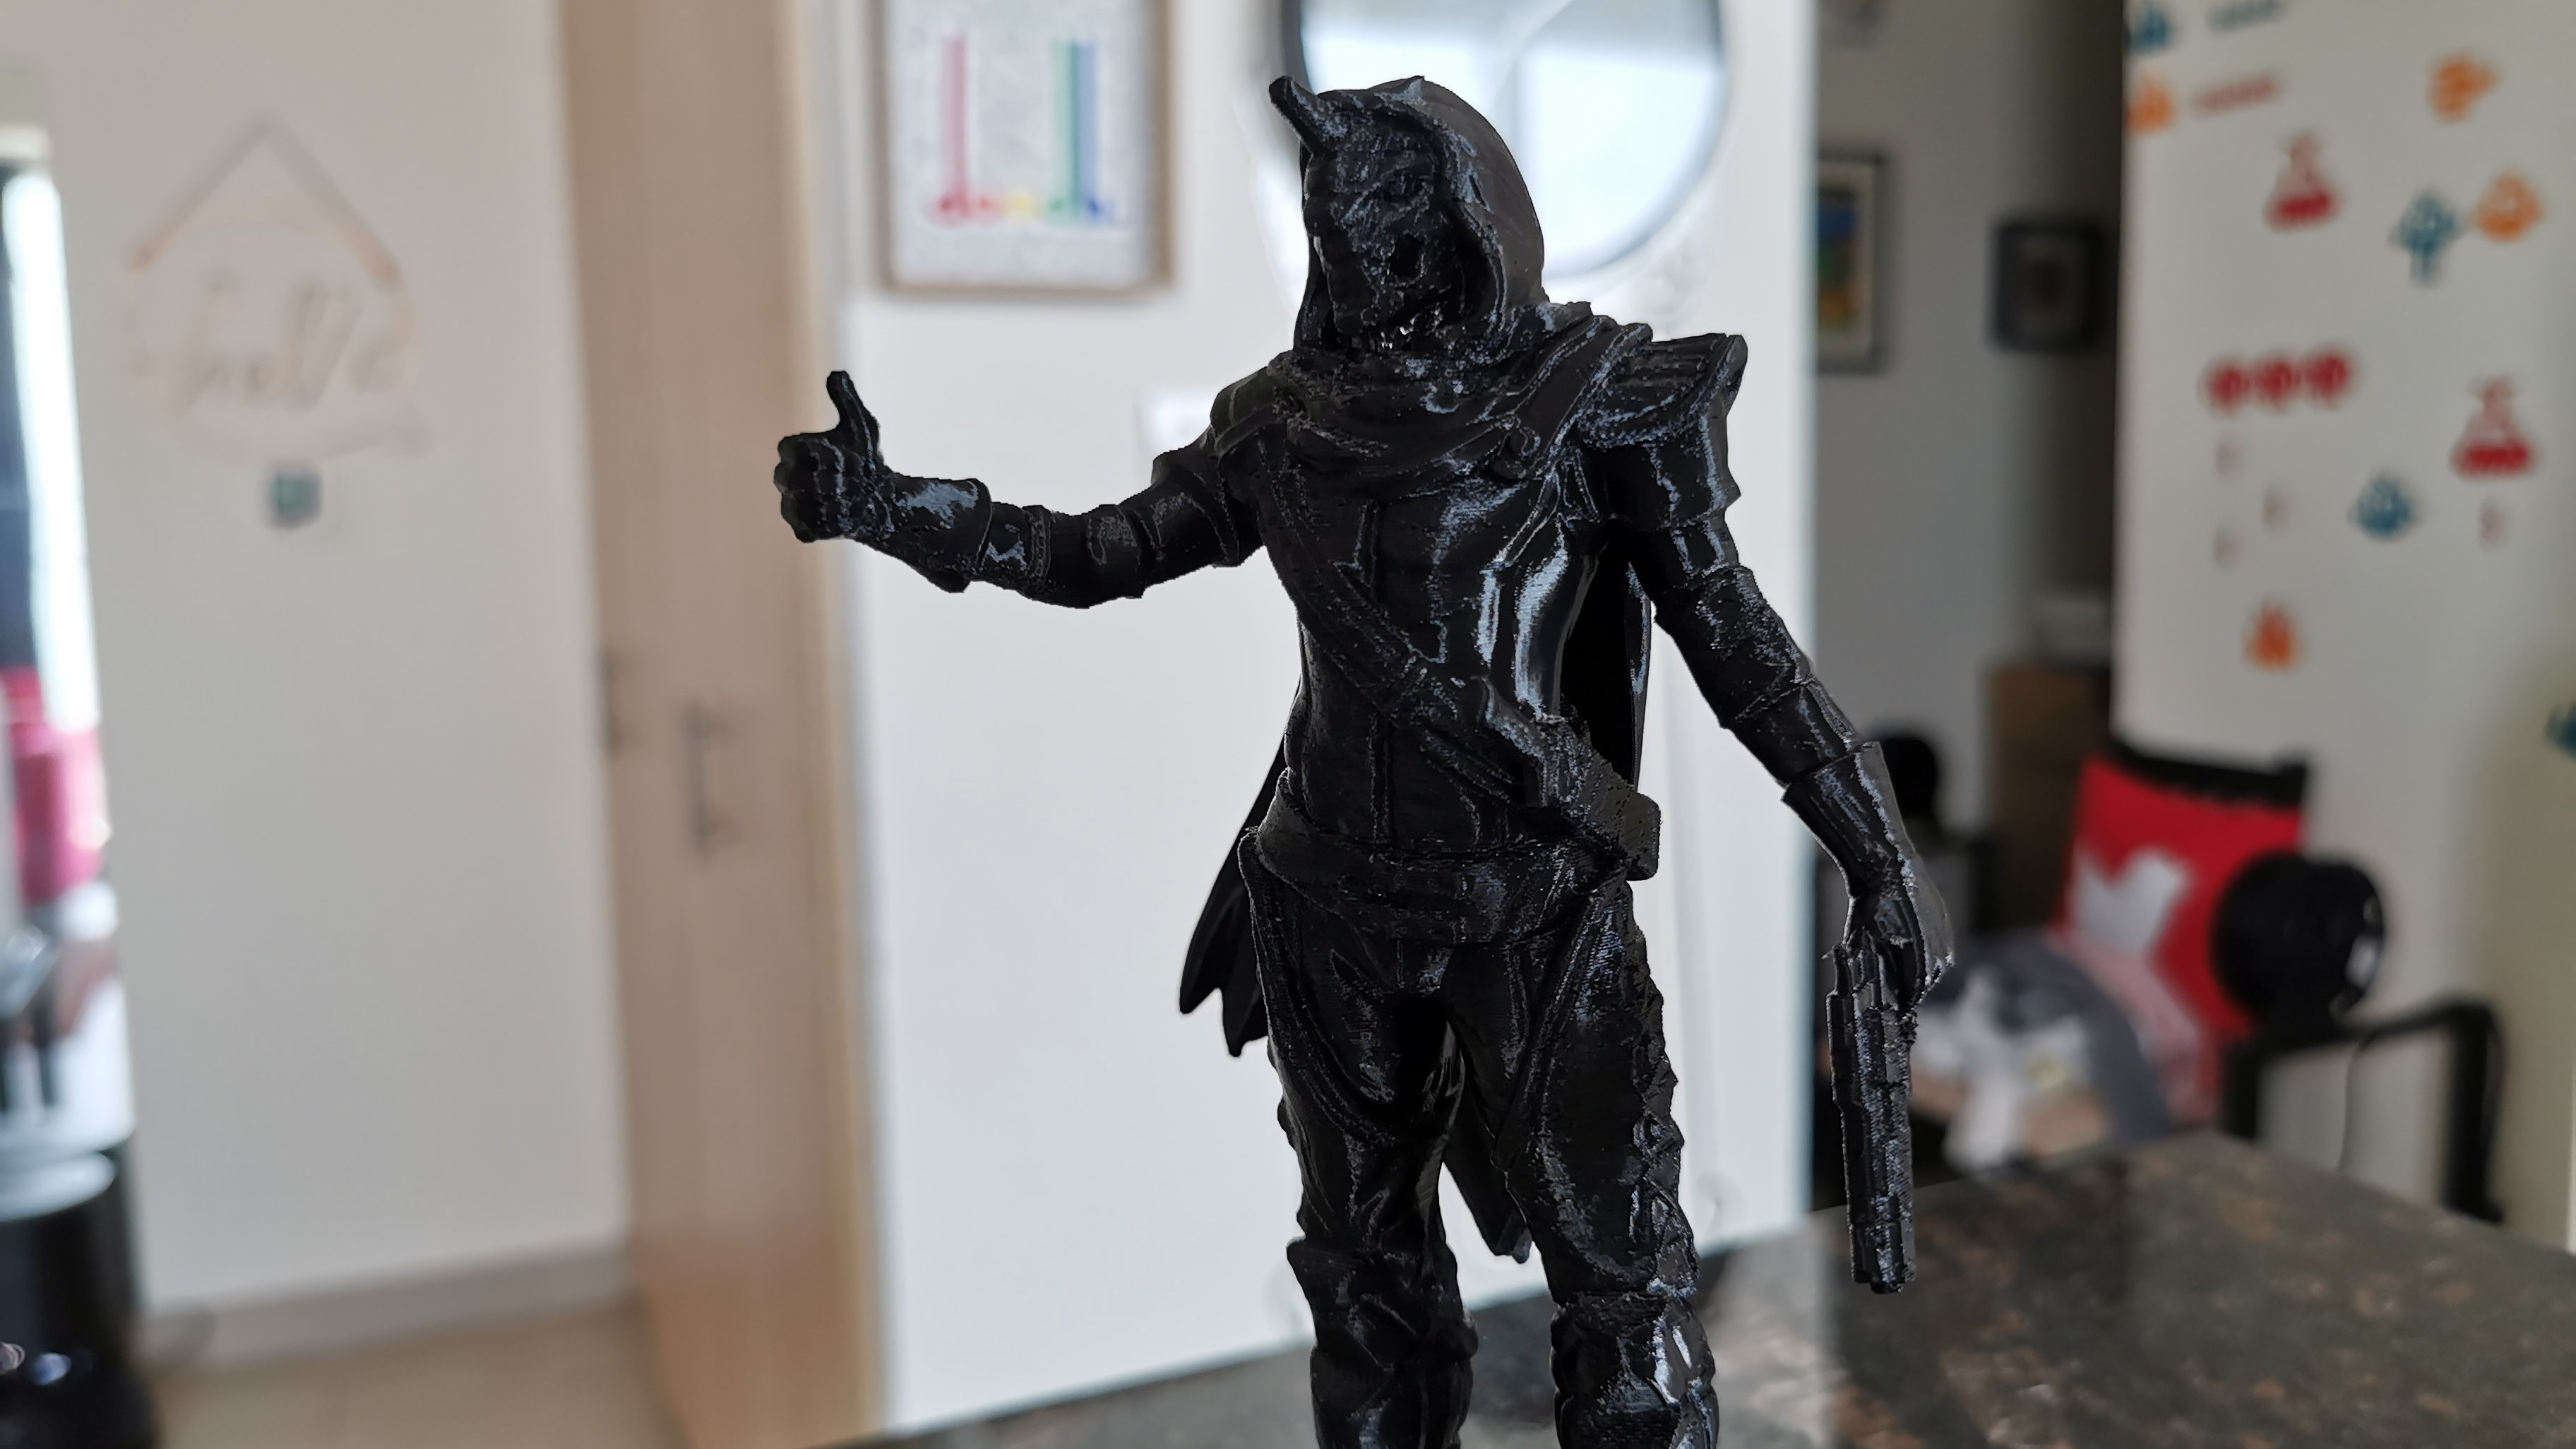
As with any 3D printer, the quality and printing time of your prints will vary greatly depending on your model and print settings. We printed a small-scale figurine from the game Destiny on a draft print first, before scaling the model up and reprinting it at higher quality setting. The resulting print quality is plain to see – the draft print loses all detail of the model, and retains the basic shape. This is great for when you want to see if a model will actually print properly before committing to a higher quality print. The draft 0.2mm print took around 5 hours to complete, while the full-scale model took a staggering 32 hours to print at a layer detail of 0.1mm.
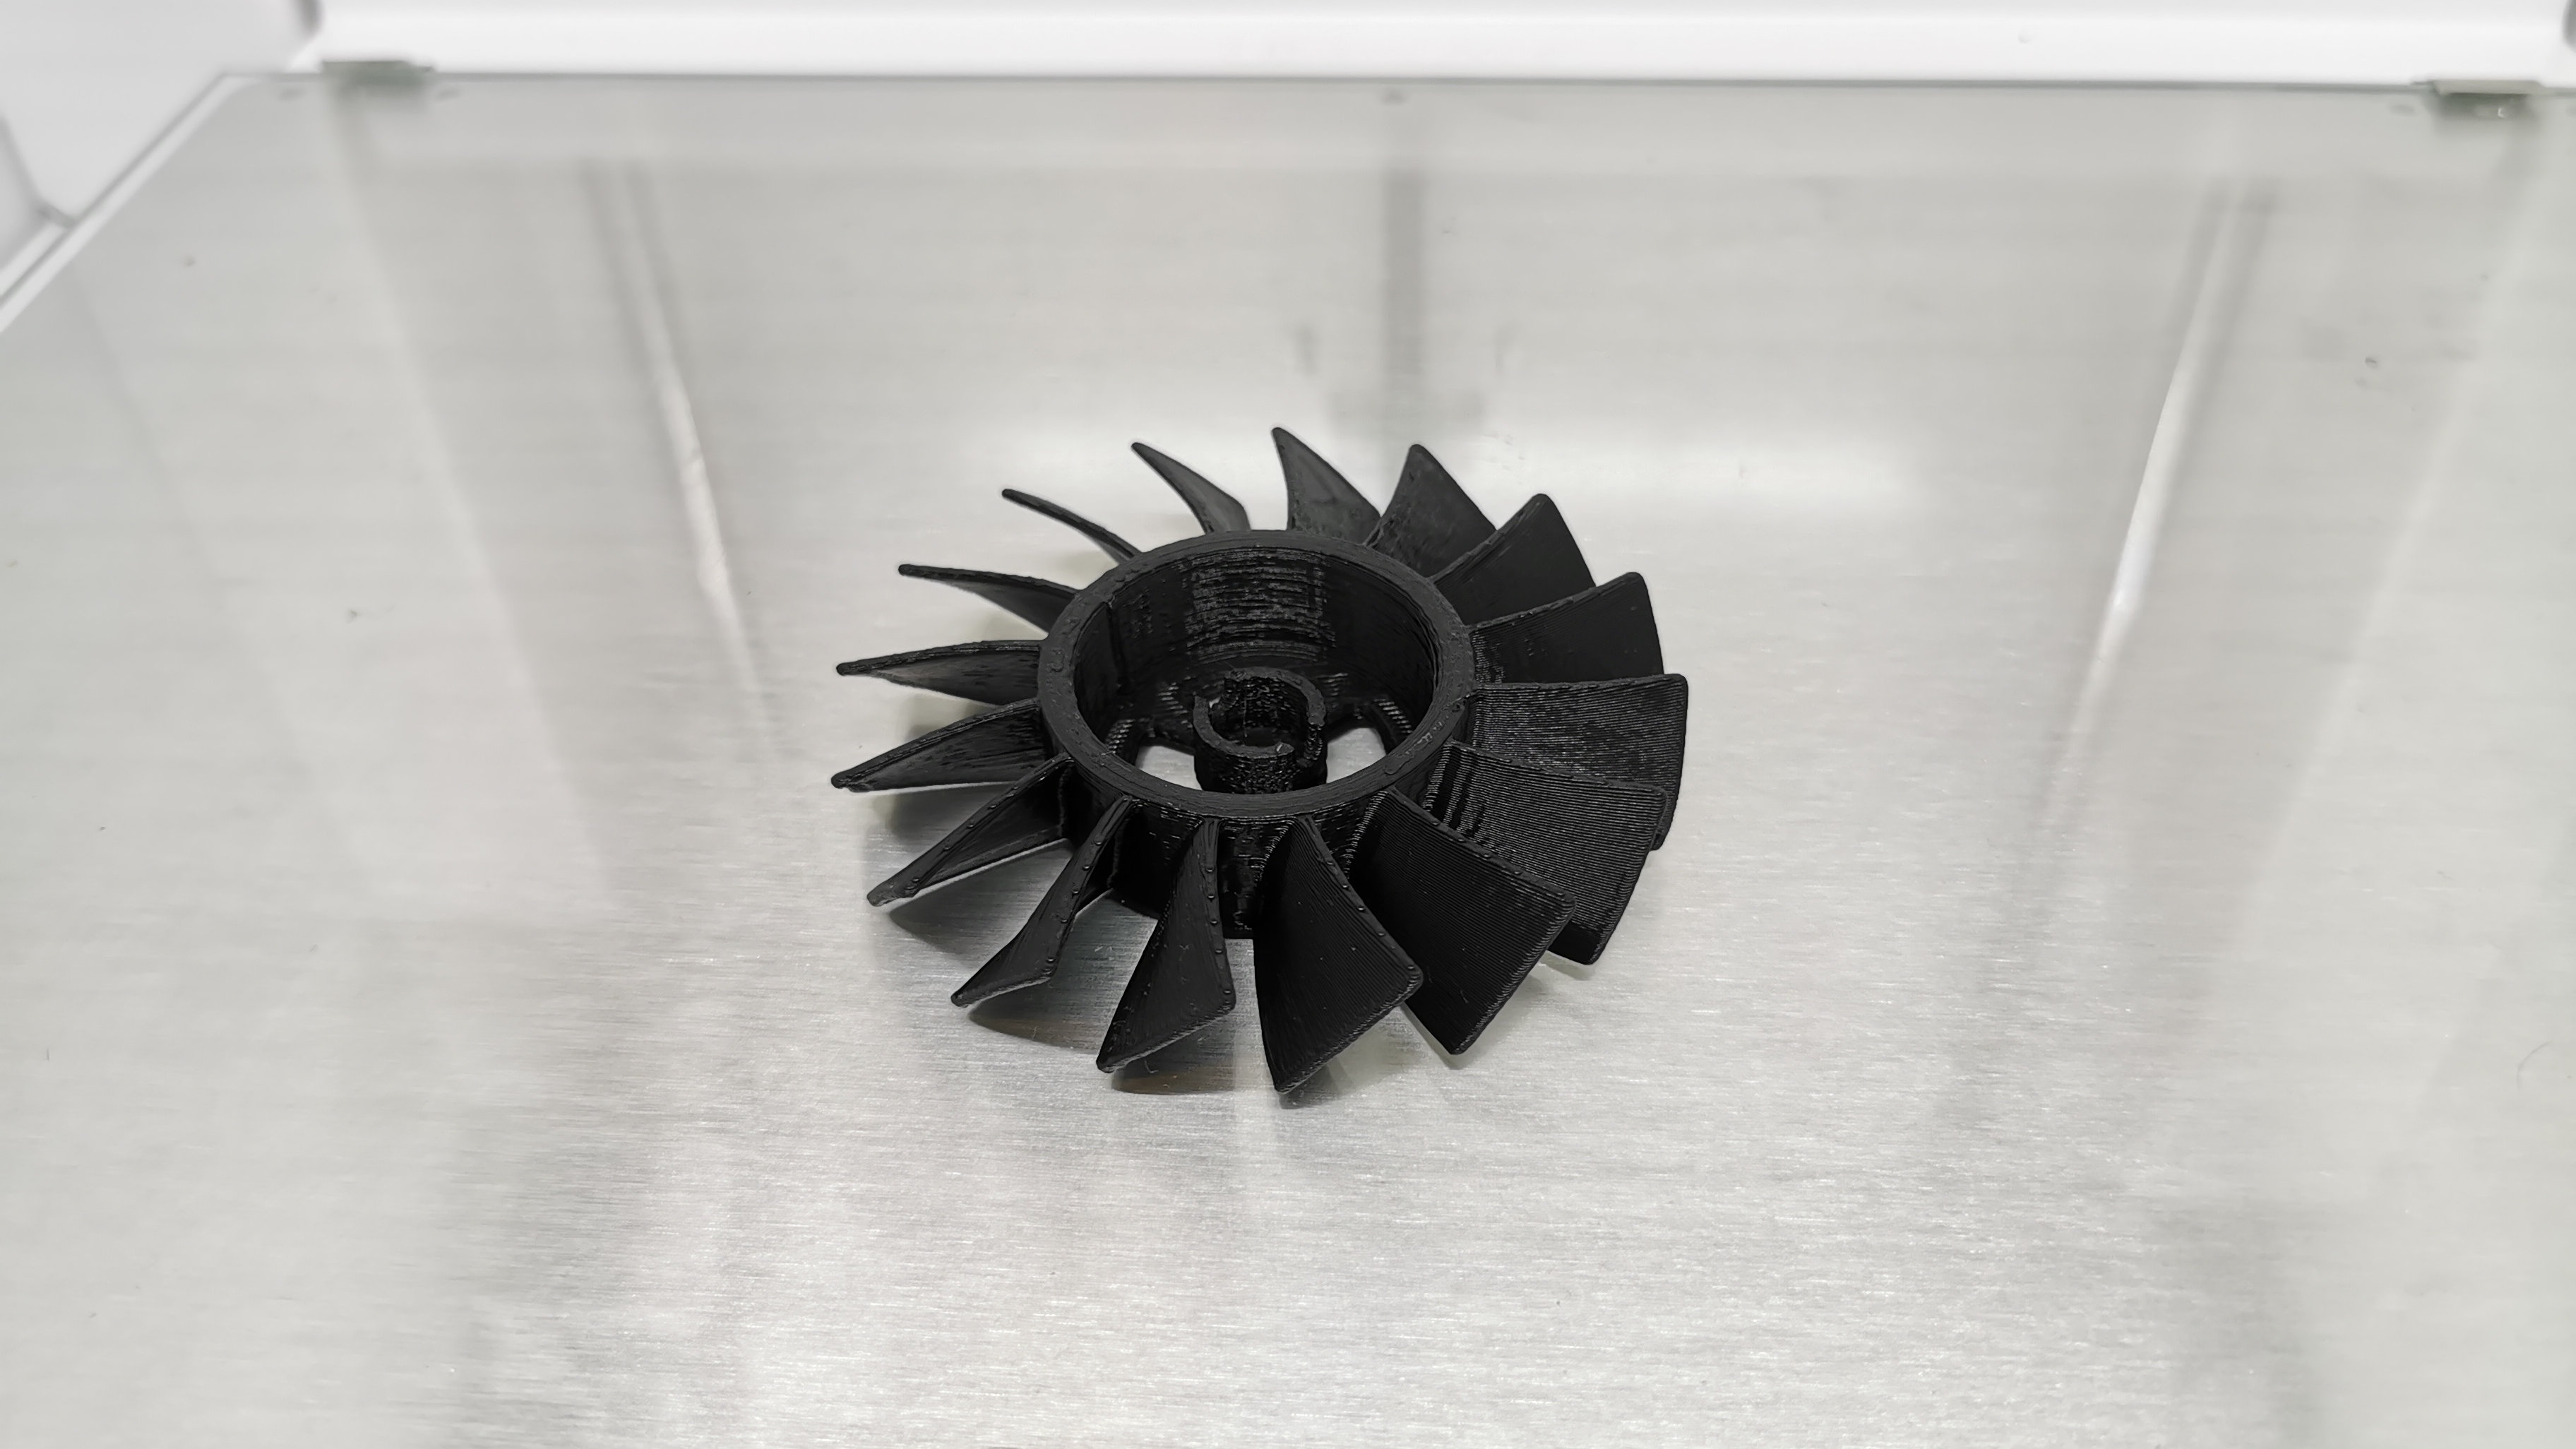
Figurines are cool, but where the Ultimaker S5 really shines is with complex engineering models. Whether it’s parts for a mock-up car engine, intricate models to place in an architectural diorama, or new fan blades for a redesigned cooling system, the Ultimaker S5 is more than capable of handling anything that you throw at it. A turbine fan that we printed came out very well, and fitted effortlessly on the shaft of an electric motor.
Removing your completed prints from the Ultimaker S5 might occasionally pose a slight challenge if you haven’t prepared your print bed correctly. Ultimaker includes a simple glue stick in the box, and advises that a thin layer of glue is applied to the glass panel before printing starts. We did several prints with and without applying the glue layer, and definitely found that for larger, more delicate prints, the base glue level was a necessary precaution. One print that we did without the glue layer ended up warping horribly as we tried to pry it off the still-warm bed, so if you aren’t utilizing the glue, make sure your print and the print bed are cooled completely before attempting to remove anything.
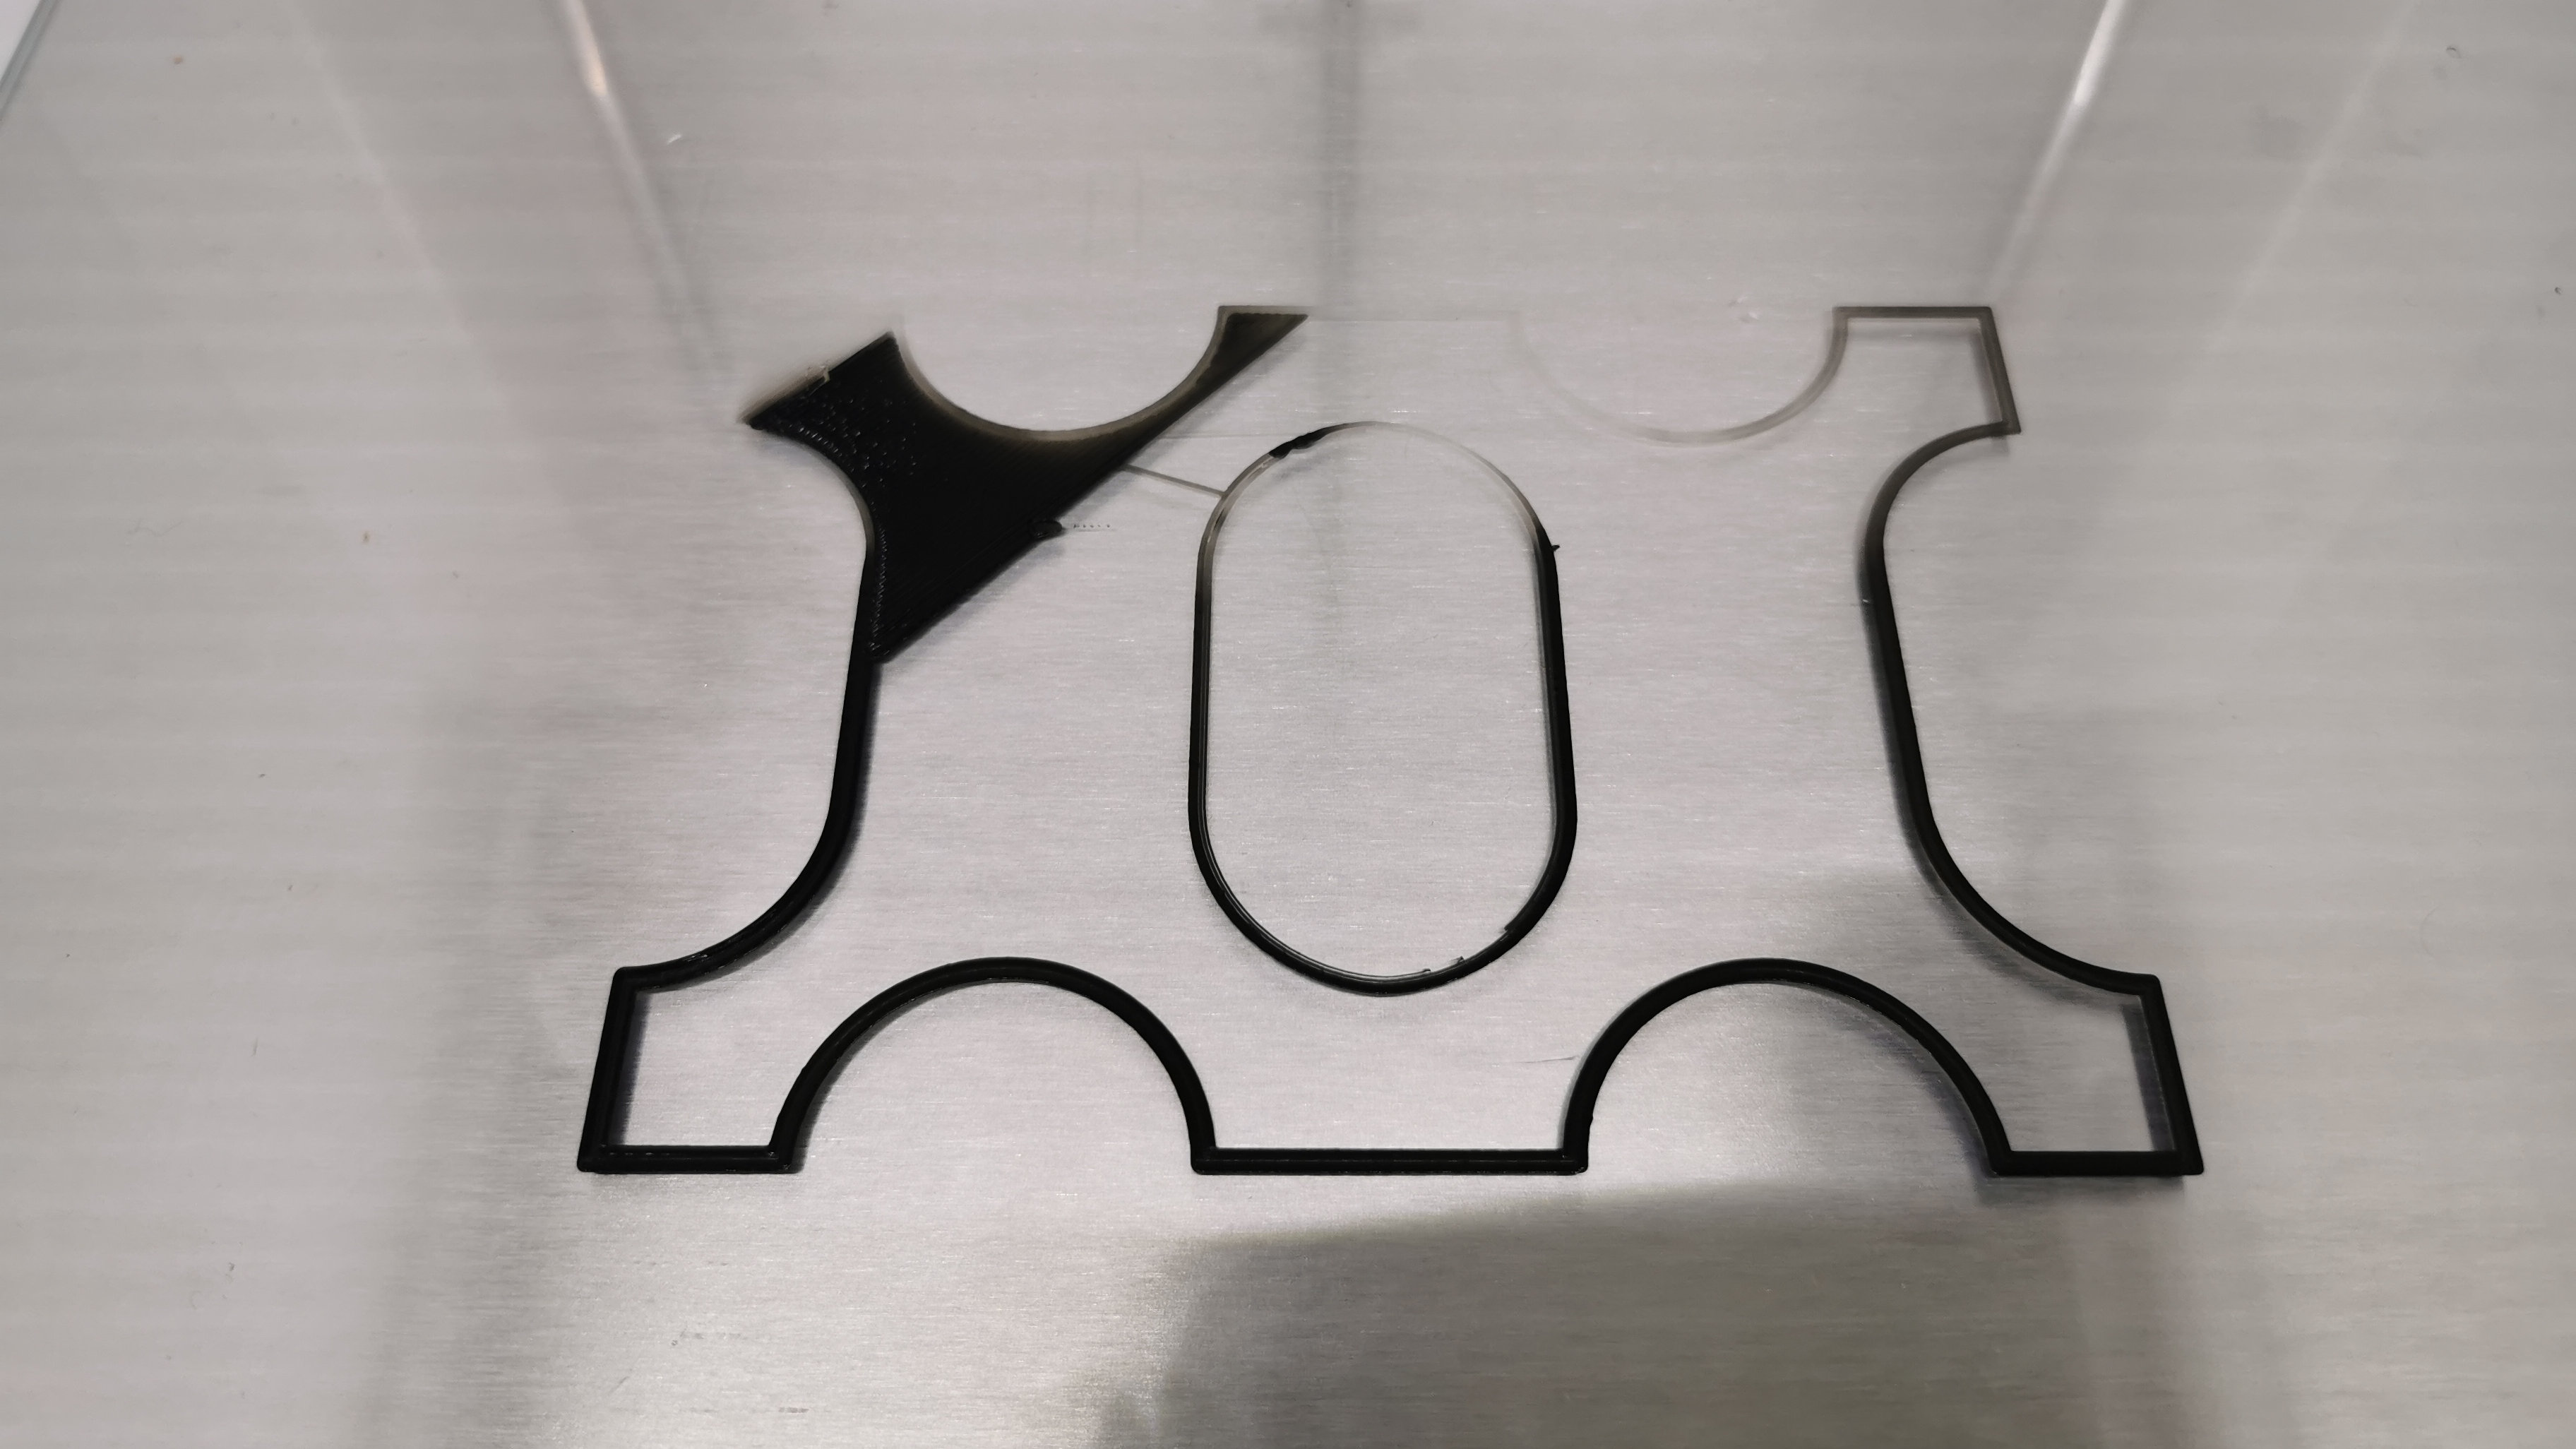
Another time we ran into some awkward printing issues, where the automatic bed leveling was refusing to work properly, resulting in haphazard prints and wasted filament. Thankfully, Ultimaker provides a bed leveling troubleshooter that walks you through a manual leveling process step by step. Once this was done, prints turned out again without any issue. The support team is also very responsive to customer issues, so if there’s anything that isn’t working properly, they’ll respond quickly with advice or ask for detailed system logs to help you troubleshoot.
PLA + PVA
PLA filament is something you’ll see in any 3D printer, but the Ultimaker S5 takes things one step further by including PVA filament via its second print core. PVA is a semi-transparent filament that is printed alongside a PLA model, providing structural support as the model is completed. This prevents the model from warping, sagging, or even falling over due to an odd center of gravity. While print supports can still be done using regular PLA filament, they have to be removed manually by being snapped off, which often leaves a rough edge. With PVA filament, all you have to do is drop the completed model into water, and within hours it will dissolve away, leaving your finished model.
For larger models with a lot of PVA supports, it can take more than 10 hours for all of the PVA to dissolve away, and we recommend using slightly warm water to help the process move along faster. The wait is worth it – the finished model looks great and may merely only require a little bit of cleaning up of the jelly-like PVA after it’s done soaking.
It is however, far from perfect. There were definitely parts of our models where the PVA had bled slightly into the PLA, so that when it dissolved away, small imperfections and holes were visible in the model surface. This happened often enough that almost any model we printed using PVA supports had a small imperfection somewhere, so this is something you’ll need to keep in mind if you’re looking for absolutely flawless prints.
The other thing to note about PVA filament is that it is very sensitive to humidity, and won’t be safe to be left on the printer spool if you’re not using it regularly. Our test PVA spool eventually stopped printing properly after a month of being on the printer for everyday printing, with the filament sizzling on the print bed and curling up in various places. Ultimaker does include instructions to ‘dry’ out the spool using the print bed, but even after following these instructions we were unable to restore the PVA filament to its original use.
Time to go pro
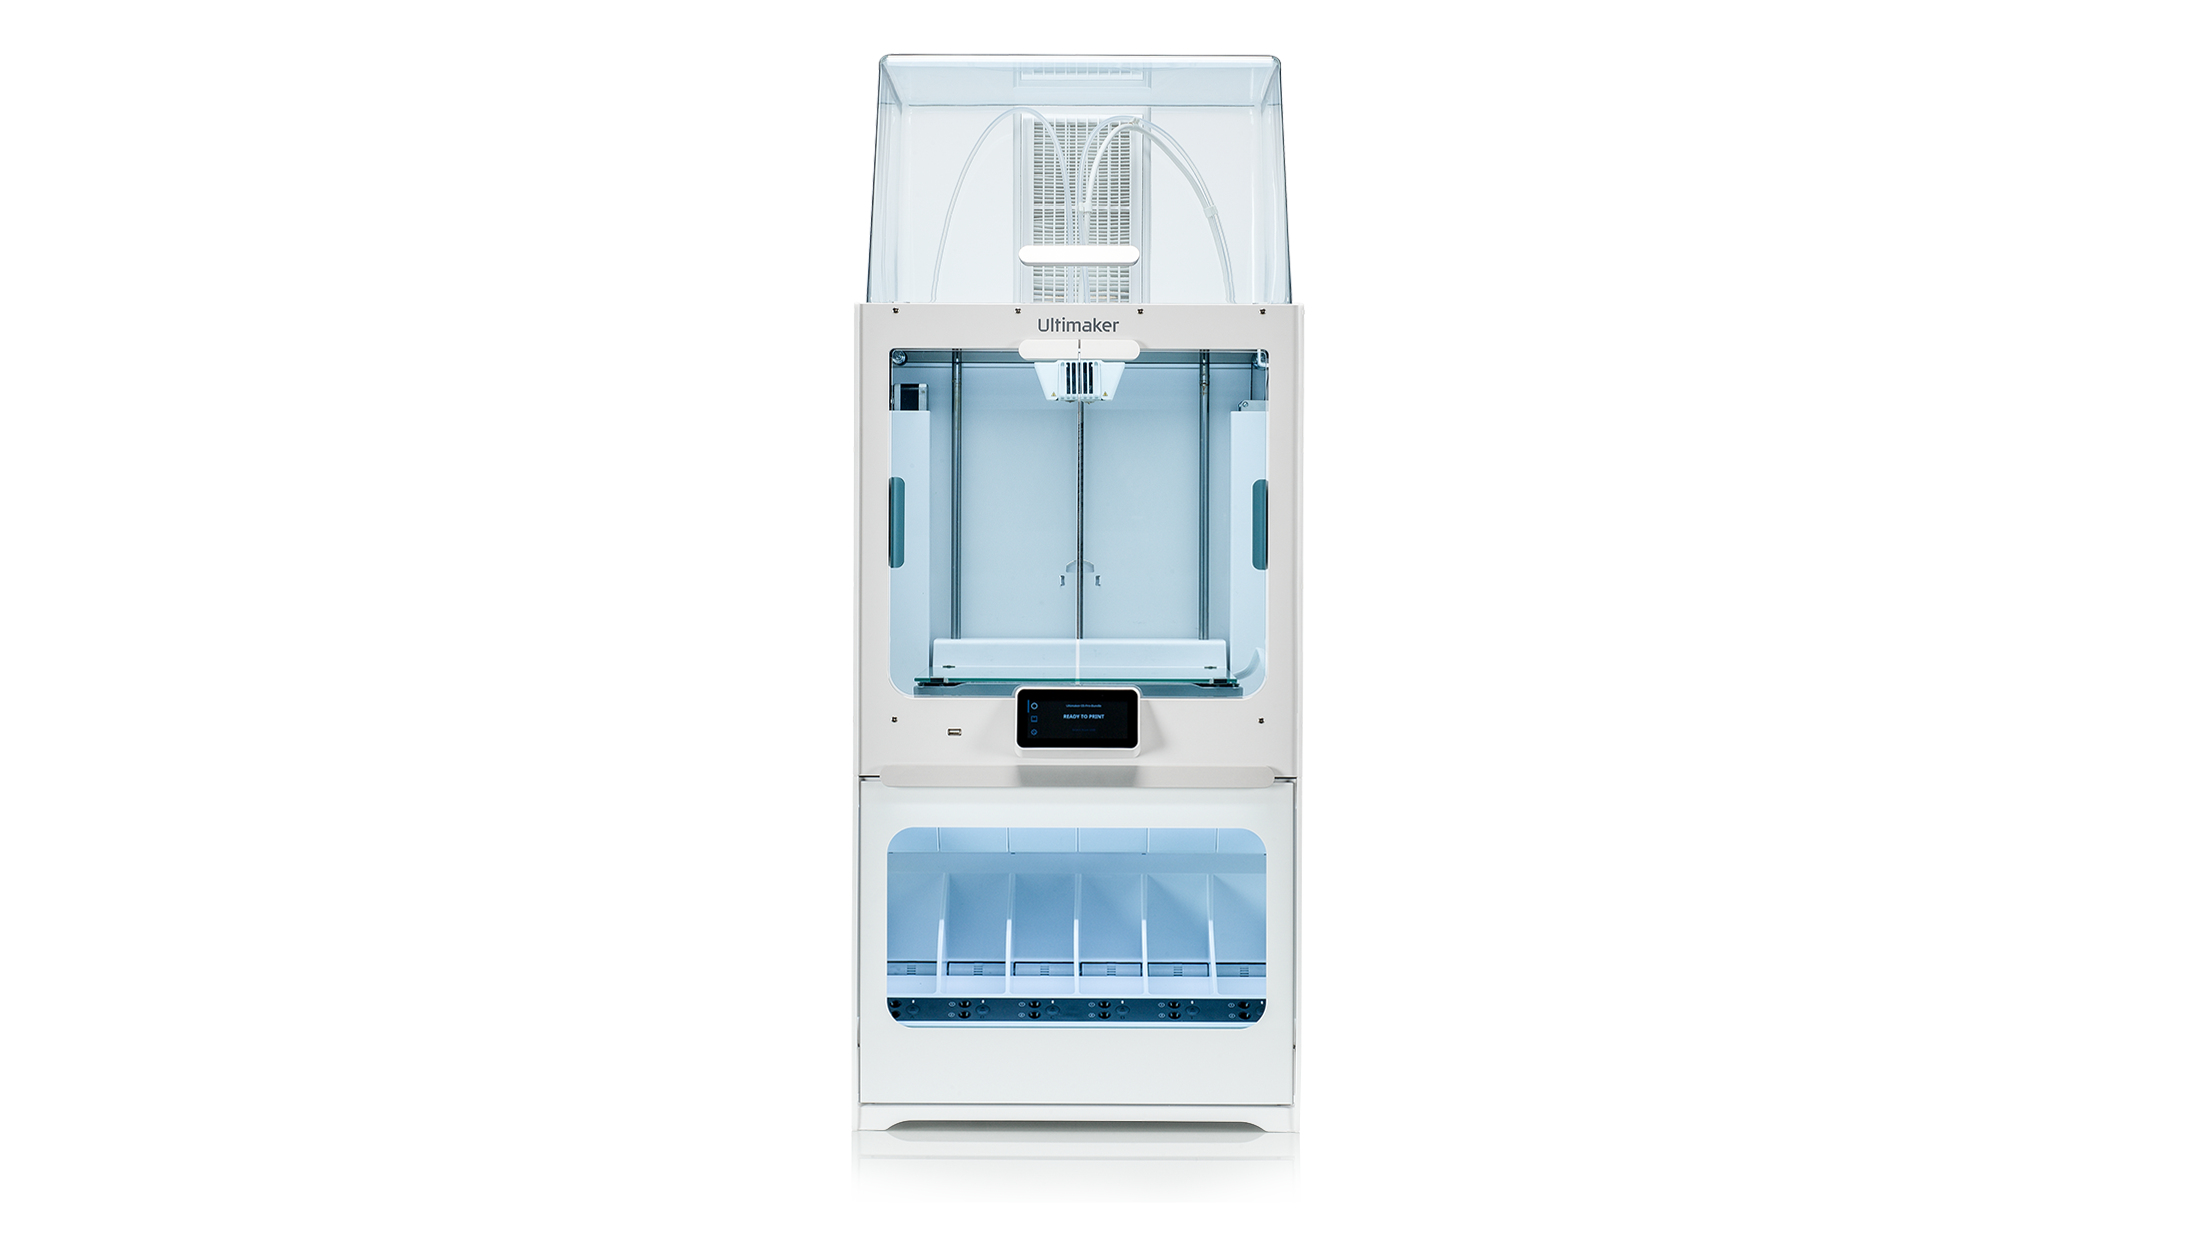
For the ultimate 3D printing solution, Ultimaker encourages you to opt for their Pro bundle, which adds on two separate components to the S5. First, there’s an automatic material handing station which has room for 6 separate spools of filament. The chamber is also humidity-controlled, so if you’ve got spools of PVA filament or other sensitive materials, they’ll be kept safe with minimal intervention. The material station is able to automatically load filament depending on what your print job requires, which again minimizes exposing the materials to humidity and other elements.
Secondly is an Air Manager that sits atop the Ultimaker S5, helping to circulate air properly through the machine and filter out 95% of ultra-fine particles. Again, this is most practical for when you’re printing with materials that are highly susceptible to interference, or for when you just want to have a closed system for undisturbed printing. If you make the investment for these add-ons, you’ll definitely reap the rewards, but you’re still able to make perfectly good prints even without them.
Final Verdict
The Ultimaker S5 demands little supervision once it starts going, which means you can easily queue up a print job, walk away, and come back in a few hours to a fully-completed print that’s ready for use. The combination of software and materials at your disposal is equally impressive, and the ability to work together as a team on a single print project is also a huge bonus. Clear, easy-to-follow instructions makes setting up the Ultimaker S5 very easy, and there’s a wealth of learning information on the site to talk you through every single feature at length.
When it comes to efficiency and speed of printing, there’s a lot to look into with the Ultimaker S5. Do you just want rough draft prints that don’t have to have much detail but are more about testing the possibilities of a particular model or idea? Then you’ll have no problems waiting for a model to print in a few hours.
But if you’re looking to print highly detailed models, then you’ll need to be patient and let the Ultimaker S5 do its thing, especially if you’re printing with PVA supports. Your patience will pay off with a beautifully printed model, but if time is of the essence, then you’ll want to switch to other print modes for faster results.
Overall however, the Ultimaker S5 is a fantastic piece of engineering, and regularly impressed us with what we could churn out of it. It’s something that will take pride of place in any space – be it a school lab or an engineer’s office. It’s a sizeable investment to make, but this is something that professionals are certainly going to opt for, especially for complex builds that require more than one person to work on.
The breath of software and support for the Ultimaker S5 makes it one of the most competent 3D printers we’ve tested, and an excellent choice for anyone who wants a professional printer with a sizeable print volume and excellent material handling.
A former IT & Marketing Manager turned full time Editor, Nick enjoys reviewing PC components, 3D Printers, projectors, and anything shiny and expensive. He can also be found baking up a storm in the kitchen, which we are more than happy to encourage.
