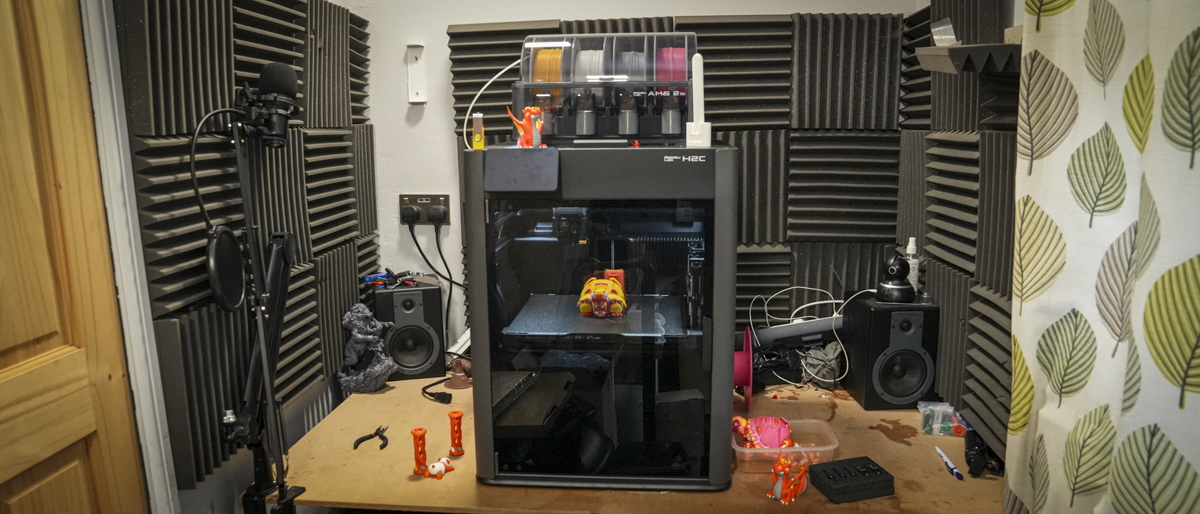
TechRadar Verdict
The H2C isn't it exactly what we were expecting? It's a multi-nozzle changer rather than a tool changer; however, it is still impressive in that it delivers the ability to print with seven filaments out of the box and cuts down on waste. So, whilst it's still not perfect, it's a huge step in the right direction and again reinforces Bambu Lab's position in innovation.
Pros
- +
Innovative and far lower waste
- +
350 °C nozzle, 65 °C chamber.
- +
AMS expansion up to 24 filaments.
Cons
- -
Premium pricing.
- -
More moving parts than H2S/H2D.
- -
AMS dependency increases footprint and cost.
Why you can trust TechRadar
The H2C is the latest iteration of the Bambu Lab H series 3D Printers, which caused a stir with the release of the Bambu Lab H2D I reviewed - a large-format dual-nozzle, fully enclosed printer with tool-swap modules and the ability to work with a multitude of different materials. Next in the line-up was the H2S (read my review here), which simplified things with a single nozzle, but again offered that large format at a lower cost and a larger print area.
The H2C now expands on that ecosystem by offering a multi-nozzle changer tool head. This is built with essentially the same hardware as the other H series printers, and the big difference here is a new module on the right-hand side of the machine. As you open the door, it features six additional nozzles that can be swapped in and out of the tool head for different filaments without needing to purge as much filament as was usually required with the previous system.
It's fascinating to watch from the outset, and while it takes about 20 minutes to fully set up, popping in each of the heads into the magnetic carriers and installing the AMS and second filament, the process is still exceptionally easy. Bambu Lab always provides great literature to guide you through, even with this pre-release version I've looked at for the review.
When it comes to a side-by-side comparison between the H2C, H2D and H2S, all three look very similar. Only when you get down to the cooling inside do you notice the differences. What's great to point out right from the outset is that I did check whether it is possible to upgrade from the H2S to the H2D to the H2C with Bambu Lab, and essentially, each is compatible with the next. So, if you want to start at the budget end and then upgrade to the H2C flagship model, that's going to be completely possible.
Bambu Lab, unlike some other manufacturers, have ensured consistency with the use, so while the design of the machines, such as the A1 Mini and A1 at the entry level, are very different, the user interface and general use of the machine are very similar. So, if you are used to any of the Bambu Lab machines, even the introductory Mini, then going from that over to the H2C, despite the boost in professionalism and workflow, the learning curve will be minimal.
Essentially, when the H2C was initially announced, we were hoping for a multi-tool changer in the same vein as we've recently seen from Snapmaker U1 and in the past from Prusa XL, both featuring multi-tool heads that eliminate purging on the scale we're so used to with these multifilament AMS units.
The H2C utilises a hot-end change system that sees six mechanically mounted hot ends that are inductively heated and enable switching between them. It's quite different from a multi-tool head system, and although filaments still need to be retracted when the nozzle is changed, as each filament is assigned a nozzle, the amount of purging is far less.
Sign up to the TechRadar Pro newsletter to get all the top news, opinion, features and guidance your business needs to succeed!
I'll come on to the design of this in more detail later, but needless to say, it's an improvement and a definite step forward, as well as an extremely innovative way to tackle the issue.
So, whilst the H2D was seen as a professional machine, the H2C is once again another level up. It's really designed for a small production environment that needs to cope with multiple materials. The H2C is a multifilament machine that enables you to quickly work with up to seven filaments and expandable to 24 filaments in a lot less time.
To give you an example, when printing out a four-colour model that would take 1 day, 5 hours, and 6 minutes on the H2D, on the H2S it would take 1 day, 16 hours, and 51 minutes. On Bambu Lab's H2C? That same model would take just 16 hours and 42 minutes. So, quite a significant difference with this new model.
BambuLab H2C: Price and availability
The H2C is available now globally from the Bambu Lab website, aside from the US, where the product will be listed but at present will not be available for purchase. The availability and price have been confirmed for those in Europe; the US prices below are an estimate, but could be higher.
H2C AMS Combo = €2249 / $2399
H2C Laser Full Combo (10W laser) = €2799 / $2949
H2C Laser Full Combo (40W laser) = €3349 / $3599
H2C AMS Combo + Ultimate Set = €2749 / $2949
H2C Laser Full Combo (10W laser) + Ultimate Set = €3299 / $3499
H2C Laser Full Combo (40W laser) + Ultimate Set = €3849 / $4149
Bambu Lab H2C: Design
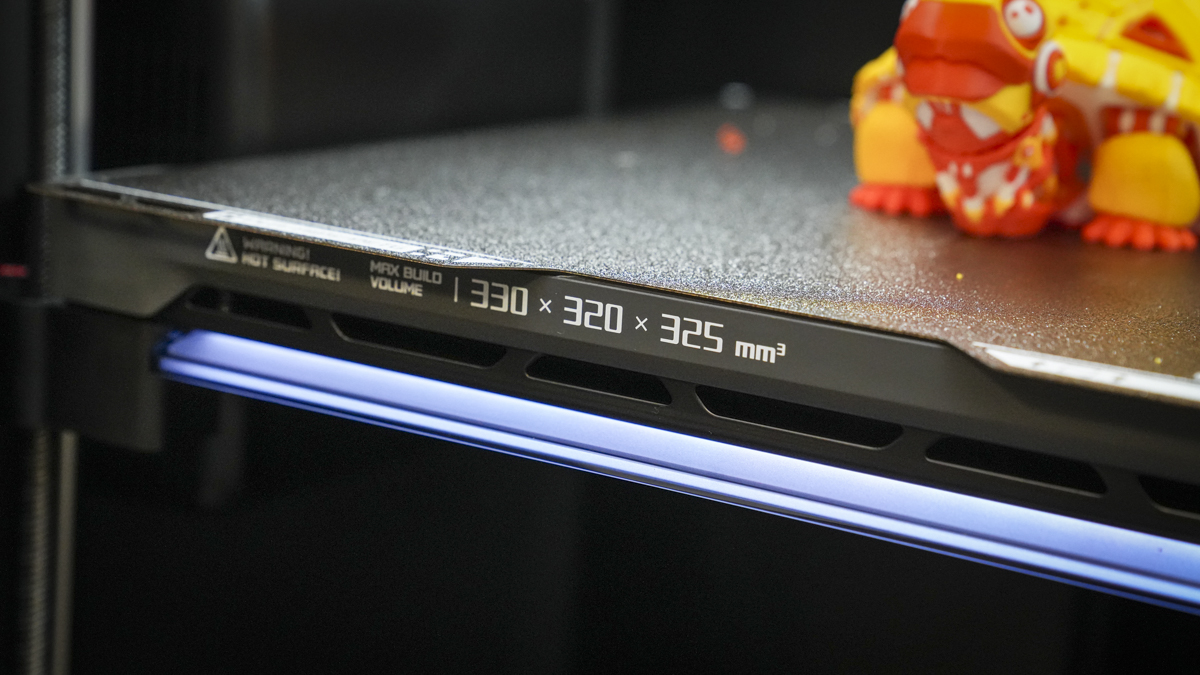
Build volume: ~305 × 320 × 325 mm (single-head mode) / ~300 × 320 × 325 mm (dual-head envelope) – same envelope as H2D.
Max nozzle temperature: 350 °C
Chamber temperature: 65 °C, active heating.
Extruder: PMSM servo motor, 10 kg extrusion force.
Hot-end change: six interchangeable hot-ends, inductive heat-up in 8 s, contactless data.
Cameras & sensors: multiple on the tool head, BirdsEye camera
Compatibility with AMS: supports scaling to 24 filaments.
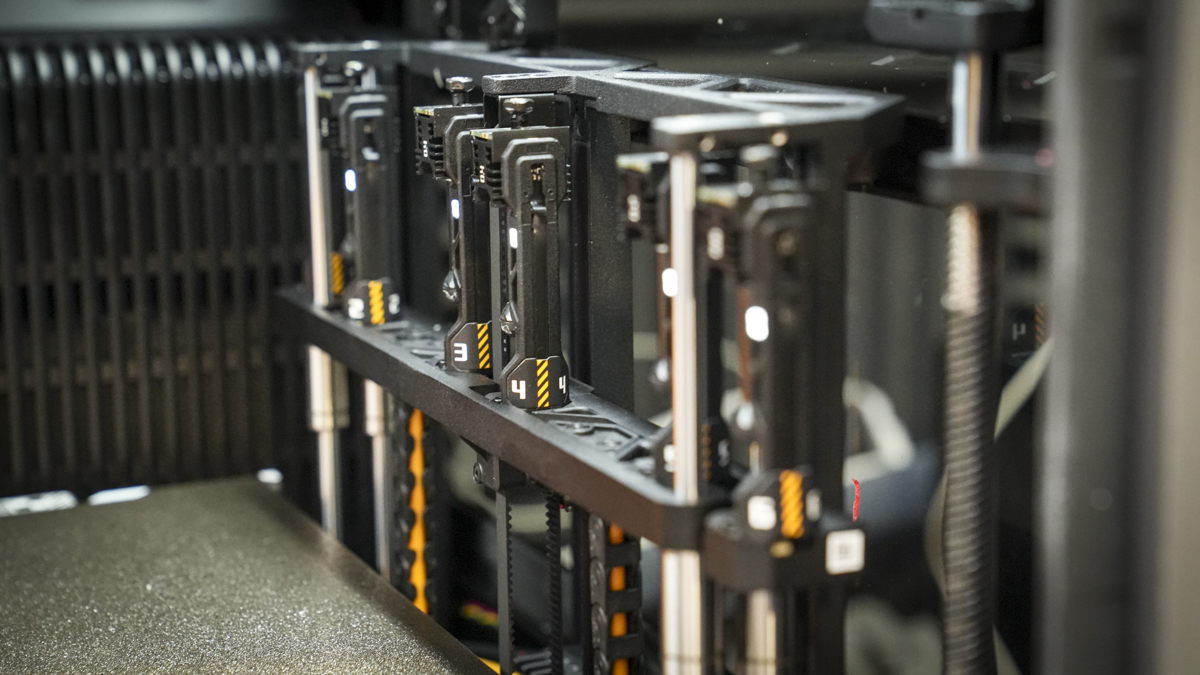
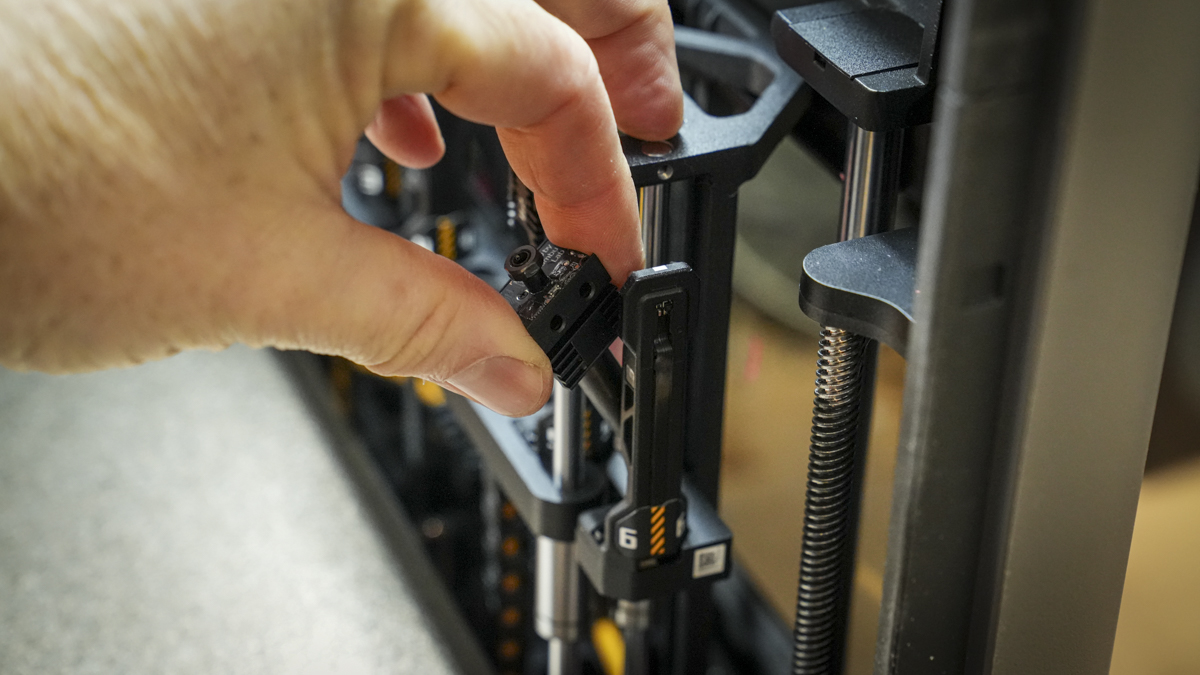
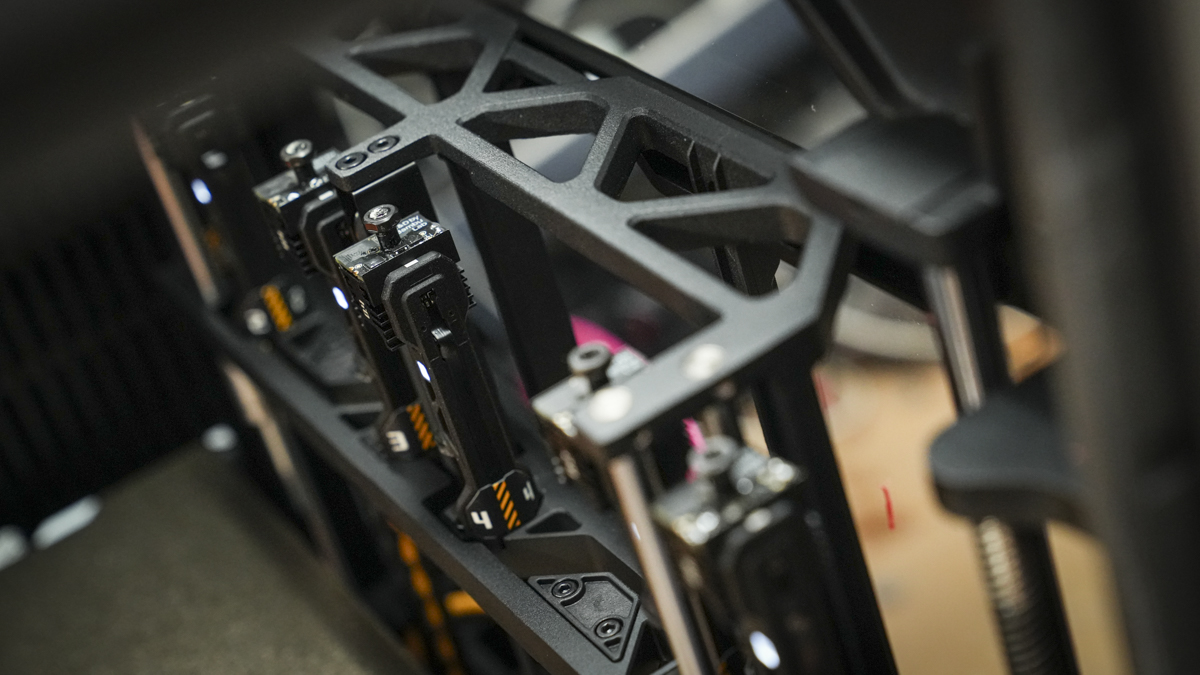
The H2C is almost identical in looks to the H2D and H2S. The real change comes with the tool head, which features the usual fixed nozzle on the left, which is fed through the exterior feed, usually a single filament popped onto the spool holder on the left-hand side, and a right-hand nozzle that is fed through the AMS. However, while this nozzle is also usually fixed, now it has access to the five additional nozzles held in a magnetic carrier system on the right-hand side of the machine, known as the Vortek System. It's this new system that everyone is getting very excited about, as it's a completely different approach to the multi-tool head designs that we've seen from Prusa Research and Snapmaker.
Essentially, instead of having one head per filament, here you have one nozzle per filament. The nozzles on the right are loaded in and out of the tool head, and the filament is then loaded into or out of the nozzle. Once loaded, there is still retraction and purging, but as the filament has its own nozzle, the volume of purging is greatly reduced.
This system also means that you can essentially use some nozzles for greater use materials and then the others for the lesser-used materials. So if you had a say, a 12 colour print, you could attach 3 AMS through the right tool head, assign the dominant colour through the left nozzle, the second, third and fourth most used filaments through the first three heads on the Votek system and then the additional eight colours through the remaining three nozzles on the Vortek system. While these nozzles would still require the same amount of purging as the nozzles on the H2D, it would only be for the lesser-used filaments, helping to speed up overall print times.
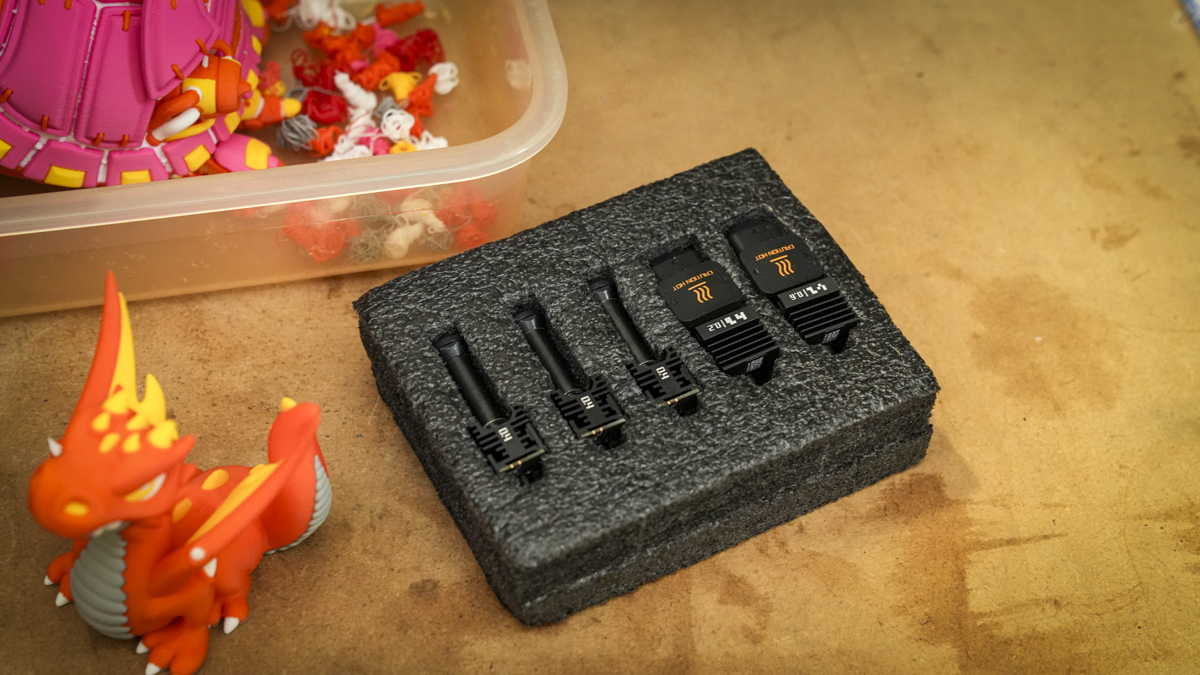
In the package I reviewed, this included 4 Vortek 0.4mm Induction Hotends, a 0.2mm, and a 0.6mm. The other models feature either a 40W or 20W laser and additional hotends. For this review, I was also sent enough 0.4mm nozzles to fill the Vortek system.
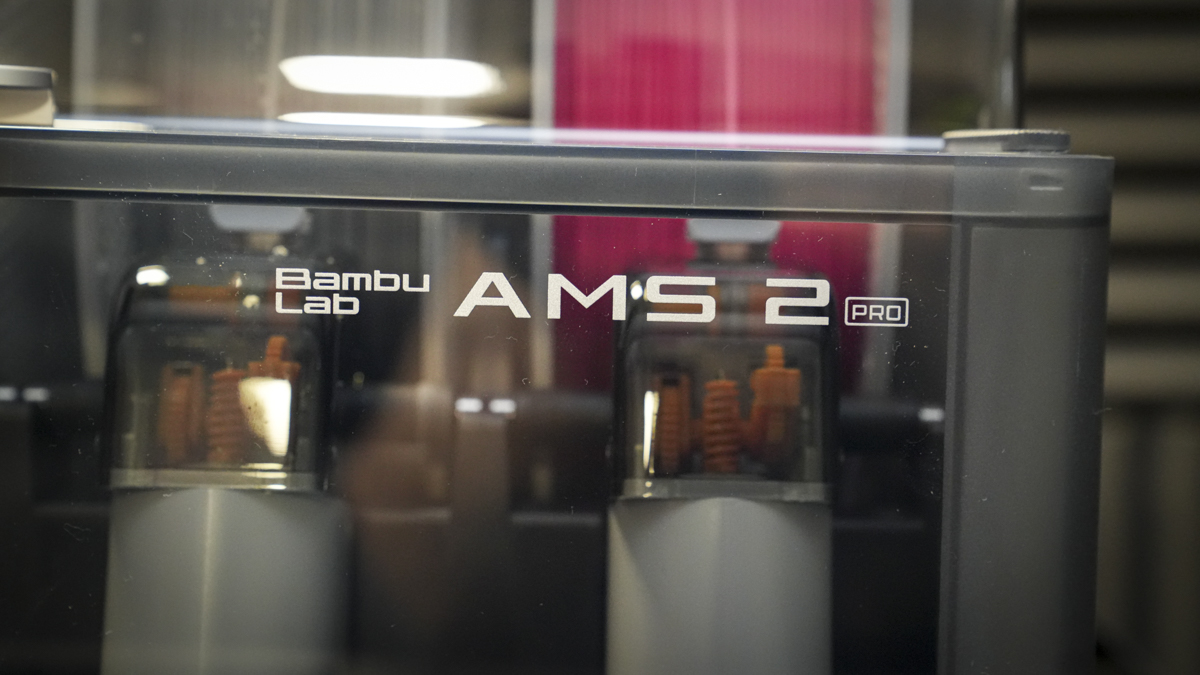
It's also worth noting that there are several versions of the printer, as with the H2D, and in this review, I've looked at the base model, which includes the H2C with AMS 2 Pro.
The hot end looks very similar to the one used on the H2D. The only difference is that there's now auto Vortek hot-end swapping, and each of the hot ends is held in place by a new mechanism. This enables quick swapping automatically within the machine itself, so no manual intervention is required by you. The Vortek system, which is essentially a clever hotend mounting system, is mounted on the right of the machine, and as you run through the first configuration, you'll be asked to install each before, seeing each of the nozzles raise and lower on that carrier.
One technical point about this new head is that it can't swap between nozzle sizes during a print. In my review, when I first started off, I had 0.4 mm, 0.6 mm, and 0.2 mm nozzles loaded. While they were all installed, I couldn't actually utilise the 0.4mm hotends on a single print with the 0.6 and 0.2 sat empty. The use of different nozzle sizes might be something they're able to do later, but I know it's been a challenge for many manufacturers, especially if you're looking to create a system that can do fast and slow printing within one model.
As we've seen with the other H series machines, the motion system uses CoreXY, or at least a variant, and incorporates vision encoding for high-precision accuracy, as long as you've got the plate in and run through the process.
Interaction with the machine is done through the touchscreen or software. Again, this is based on PrusaSlicer and called Bambu Studio, which is a great customisation of the software and gives you plenty of control. On the machine itself, there's once again that 5-inch colour touchscreen with intuitive AI, and if you're used to Bambu Lab printers, it'll be straightforward. If not, this is one of the easiest UIs available and will take no time to navigate.
Once again, the design and build of the H2C is absolutely premium and aimed at the professional market. The whole exterior is made of glass and metal, giving it that premium feel, and because the whole unit is fully sealed, you've got a temperature-controlled enclosure with automatic venting. This enables you to print a multitude of materials in their best possible environments, including printing PLA without needing to take the top off or open the door.
BambuLab H2C: Features

If you run through the features, you'll see that, for the most part, it's exactly the same as the H2D and H2S in appearance, build quality and almost everything else aside from the new toolhead and vortek system.
That means that those two machines can be upgraded to the H2C if you have the time and money to do so, although that won't be possible until next year, when the upgrade kit becomes available. Just as a note, I did ask Bambu Lab about the upgrade route, and they said it is for experienced users, which leads me to believe it's going to be a slightly fiddly process, especially when you look at the complexity of the mechanism in any depth.
Onto the main features, this is one of the first machines to print seven colours or materials natively, and it can be expanded to 24 with an AMS Splitter, in this case, the AMS hub, which does take some working out and space. Essentially, one AMS feeds the left-hand nozzle, and the other five feed the right-hand Vortek system. Of course, as each nozzle will then be facilitating more filaments, pruging and waste will once again increase, as will print times.
As with the other H-Series printers, it features an advanced automation suite that, once set up and calibrated, runs through pre-print plate scans, nozzle usage tracking, normal feed detection, live camera feeds and more. Again, this has all been inherited from the H2D and H2S.
When it comes to filament materials, there's wide support, with high-temperature materials supported through those 350 °C nozzles. With the heated chamber, you can use more specialist materials such as ABS and nylon without fear of warping. When it comes to PLA and other more standard materials, the automatic venting on the front top of the machine allows you to use them without needing to open the enclosure door, meaning that if you're working in an office, workshop or studio, everything stays neat and tidy inside.
It is, of course, also fully compatible with the Bambu Lab ecosystem, so it works with AMS 2 Pro and AMS HT models, enabling even greater material compatibility and ensuring filaments run through the system in the best possible condition.
The Vortek system is what everyone has been getting excited about, and I'll try my best to explain this in more detail. Essentially, it isn't a multi-tool head; there's only one tool head, but instead it features interchangeable nozzles that work wirelessly using inductive power and communication, and these are swapped in and out of the right side of the tool head.
In the same way that you sync your RFID filament spools to the software, you do exactly the same with nozzles. If you install a 0.2, 0.4, 0.6 or 0.8 mm nozzle (all available at launch), it is instantly recognised by the system and can then be synced in with the software so you can program it when slicing your models. The great thing about this is that there are no exposed wires, helping to cut down on complexity and, hopefully, boost reliability.
One of the other great features of the Vortek system is that it's completely modular. So, if you want to load in six 0.4 mm nozzles, then you can. Likewise, if you're looking for ultra-fast prints, why not swap them all out for 0.8 mm? Or, if you're doing tabletop gaming and need ultra-fine detail, drop down to 0.2 mm. It just gives you that extra level of creativity that no other FFF printer is currently able to offer.
Now, one of the big fears about this type of design is that the heating temperature might be reduced, because there's no wiring directly feeding current to the hot end. However, due to the induction design, it only takes eight seconds from the time the nozzle is loaded to being ready to use. While that's not quite as fast as a tool head already being in place, the filament change is still impressive.
One point I did notice during testing is that because only the nozzles are being changed, not the entire tool head, there's less margin for error. As a result, the quality of the prints seemed exceptionally good, with very little sign of layering when printing at higher resolutions.
Obviously, having all those hot ends and nozzle swapping might be slightly slower than tool heads, but in a similar fashion, there's a massive reduction in waste due to less purging. Although, unlike a multi-tool head system, and this is the big difference between tool heads and nozzles, there still needs to be a bit of purging to push that last bit of filament out and ensure the new filament is properly loaded. You're not having to clear out a previous colour or material type, but it still involves a very small amount of purging, so filament poop is still a thing, even if vastly reduced.
BambuLab H2C: Performance
Setting up the H2C takes around 20 minutes. It's a large machine, once again, being quite weighty and ideally requiring two people to manoeuvre into position. It's also worth sorting out the base before you spin the machine around, as the rubber feet on the bottom help dampen vibrations but can make it trickier to move than some other printers.
Essentially, all that really needs doing during setup, once all the internal packaging is removed, is plugging in the AMS and installing the new nozzles used on the right-hand side of the tool head.
The AMS connection is the same as any other: simply plug it in at the back with a single tube connecting to the inlet and a data cable linking the machine and AMS Pro.
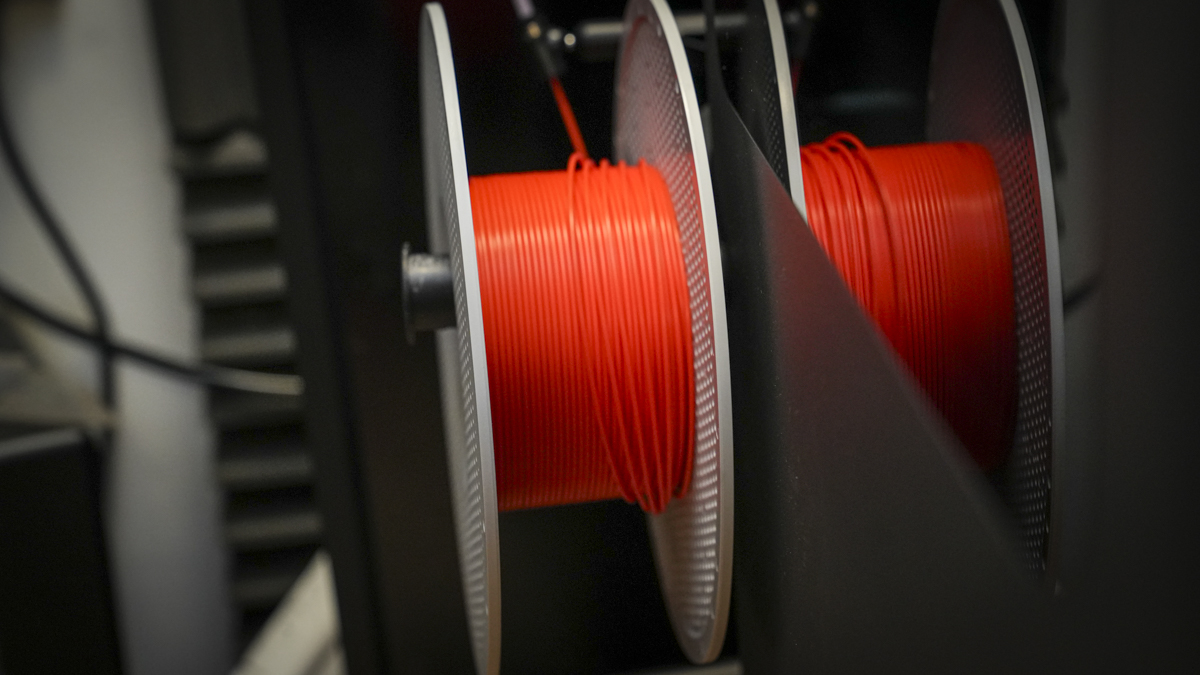
The external filament is used for the left-hand nozzle via the spool holder that clicks into place at the back of the unit and sticks out from the left. If you want to use the AMS HT external dry box, you can place it by the machine and feed the filament using a longer tube. It's all very nice and simple.
I did think the magnetic head would be more complicated to set up, but in the end, it was extremely simple. The nozzles arrive individually packed and just need to be clicked into place. There are two holes within the print head that align with two pins on each of the carriers, so each of the nozzles fits firmly onto the Vortek system.
Once that's done, it's just a case of running through the setup process. Again, Bambu has worked hard to make sure this is streamlined and intuitive. Everything is handled for the user; there's very little manual intervention, aside from loading filaments into the AMS and feeding the others through from the left-hand side to the right-hand nozzle.
Once calibration is complete, it's over to Bambu Studio. Load in your models, sync both filaments and nozzles.
If you've used a Bambu Lab printer before, you'll know about filament syncing using the RFIDs from the filament reels to automatically recognise what's loaded. Once again, the process is exactly the same. Just sync your filaments, and they all appear, so you don't have to enter them manually. If you're using third-party filament, then you can input that manually via the options.
The nozzles work in almost exactly the same way; just sync them, and they'll be automatically recognised. You're prompted to do this, then run through a quick calibration, and you're pretty much set to go.
Loading in prints is done the same way as with any other Bambu printer, or any printer using PrusaSlicer as the base. You can quickly send 3D print files to the machine remotely, with a nice live view feed coming back from the machine so you can monitor progress and make sure everything is running smoothly.
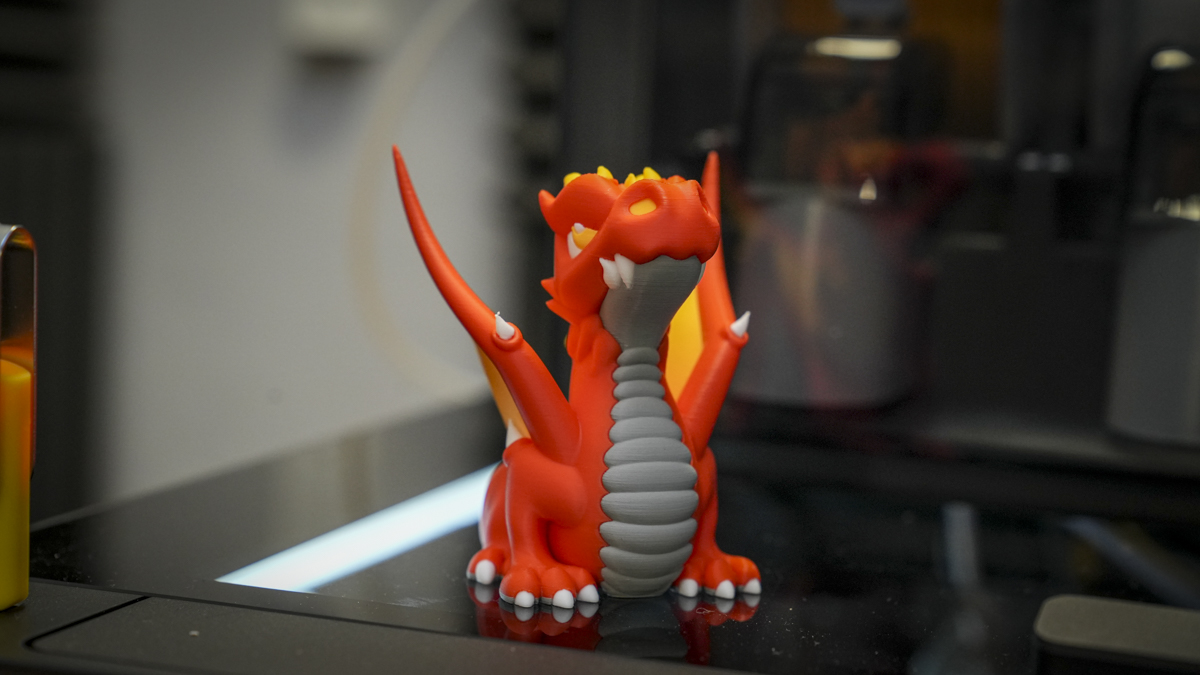
For this test, I ran an H2S, H2D and H2C side-by-side to see what the differences were in both print times and output. The differences between each were quite marked, with a full day's difference between the fastest and slowest printer. When printing out the four-colour Robo Tortoise, it took the H2S 1 day, 16 hours and 51 minutes; the H2D, 1 day, 5 hours and 6 minutes; and the H2C just 16 hours and 42 minutes, so a considerable time difference between each model.
The most interesting fact here is the amount of filament used. On the H2S (with the single head and standard AMS 2 Pro), it used 238 m of filament, the weight of which was 709.86 g, with quite a bit of filament waste out the back. The H2D improved on this greatly, using 197 m and 587 g of filament, already saving roughly 120 g. But then you step up to the H2C, using only 96 m of filament and a total weight of 238 g. That's a substantial saving over the other two machines, less than half the amount of the H2D, and almost a third compared to the H2S. So, if you're running a business, you're making a substantial saving on filament costs.
Checking over the quality of the print, once again, it's exceptionally good. What you really notice about the final chain Bambu Lab print is that the transition between one filament colour and another is pretty much seamless, and with a bit of tweaking of the settings, you start to get exceptionally high-quality results.
Overall, when it comes to performance, the H2C is a significant upgrade from the H2D. While the Vortek mechanism does add an extra layer of complexity to the printer, it ran constantly for two weeks throughout testing. Aside from a few early setup tweaks, it's just been running smoothly without fault or issue.
BambuLab H2C: Print quality
Dimensional accuracy - score of 4/ 5
Target 25 = X: 24.77mm / 0.23mm Error | Y: 24.71mm / 0.29mm Error
Target 20 = X: 19.78mm / 0.22mm Error | Y: 19.91mm / 0.09mm Error
Target 15 = X: 14.86mm / 0.14mm Error | Y: 14.89mm / 0.11mm Error
Target 10 = X: 9.99mm / 0.01mm Error | Y: 9.88mm / 0.12mm Error
Target 5 = X: 4.89mm / 0.11mm Error | Y: 4.82mm / 0.18mm Error
X Error Average = 0.142
Y Error Average = 0.158
X&Y Error Average = 0.15
Fine Flow Control - score of 5
Fine Negative Features - score of 5
Overhangs - score of 5
Bridging - score of 5
XY resonance - score of 2.5
Z-axis alignment - score of 2.5
Adding up the totals gives a final score of 29 out of 30.
BambuLab H2C: Final verdict
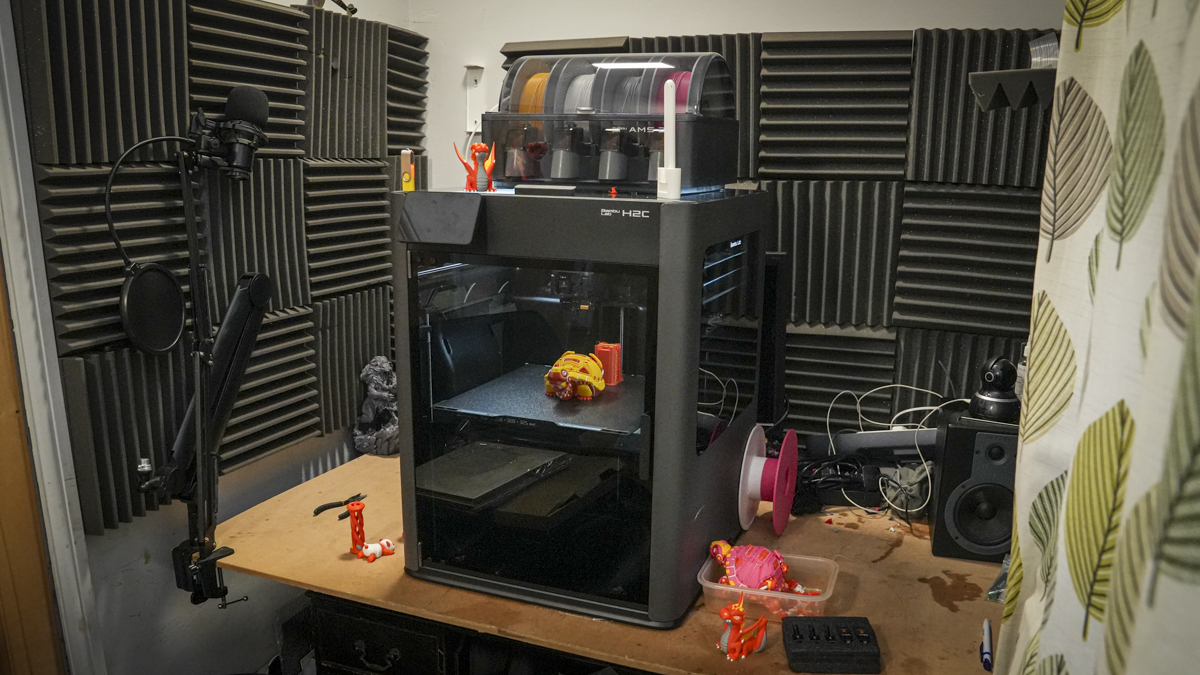
The first thing I have to say is that the Vortek hot-end system is genuinely innovative. It allows for swaps with virtually no purge waste compared with the H2D or H2S. Although it isn't quite as efficient as the Snapmaker J1 or Prusa XL, it's definitely a step in the right direction and offers yet another mechanism for efficient multicolour printing.
When it comes to whether this is a multi-tool changer, as many of us were expecting, it isn't. It's something very different. It's a multi-nozzle changer, and that difference is really important to highlight. It uses a completely different mechanism, and while it does add a little complexity, only time will tell which approach is better. For simplicity and ease of use, this Bambu Lab approach works very well in my opinion.
There are also several things I like about the design and the thinking behind it, notably that if you have an H-series printer already, there is a clear upgrade route, and that upgrade will be available at the beginning of next year. That means if you're already familiar with Bambu Lab printers and their software, this is just a natural step forward. The user interface is identical to what you'll already know.
Again, you have a wide variety of materials that you can use, so whether you're a high-end enthusiast, a small business or a print farm, it has the ability to work with standard PLA materials all the way through to nylon, carbon-fibre filled, and pretty much any other specialist material you can think of.
The chamber also heats up to 65 °C, and with a 350 °C hot end, that gives you huge flexibility when it comes to printing. Then you have the AMS system, not only enabling you to print, at present, straight out of the box with seven different filaments, but with the addition of more AMS units, you can take that up to 24, although you do need to be mindful of the additional cost.
From the many people I've spoken to about the aspirations of this machine, the major question was: Does it cut down on filament waste? And the straight answer to that is yes, not completely, but enough to make a significant difference.
When compared with rivals, particularly the Prusa XL, that machine creates little to no waste. For a similar model, it only uses 230 g of filament. Looking at the Snapmaker U1, which has a similar mechanical design to the Prusa XL, the filament use is also close to the XL, both saving around 50 g of filament over the Bambu Lab H2C, which isn't bad.
However, when you compare the print quality of the Bambu Lab H2C against the Snapmaker J1, you start to see where your extra money is going. Print quality and dimensional accuracy are just that much better, and it feels like a more solid, pro-level machine. Then you have the Prusa XL, which just works exceptionally once it's fully tuned and is another step up. However, even with the XL, you don't get the benefit of a fully enclosed machine, and you're limited to five filements, which the H2C gives you out of the box.
Having used the H2C for a few weeks now, I will say that I'm impressed overall. It is a shame that there's still a little filament waste out the back; however, the amount of waste is still far less than with the H2D or H2S, in fact, it isn't even comparable. Then there's maintenance, which does worry me slightly; the complexity of that Vortek system is just another level up from what I'm used to. But again, this is the first system of its type that I've seen, and it's only once it has run for several months that I'll be able to return to the review and properly comment on the long-term reliability.
What I can say for now is that, having run the printer for well over 240 hours, it's been going solidly. Aside from one third-party filament reel getting stuck due to a slightly bent cardboard outer in the AMS, it's otherwise been pretty plain sailing.
So, the H2C is an exceptional machine with real innovation. It takes a different approach to most manufacturers in how it utilises multiple nozzles rather than tool heads. If you're already invested in the Bambu ecosystem, this printer just makes sense. It's great for studios, engineers, prototypers, or anyone needing a high-quality multifilament machine that's capable of producing excellent prints and working with a multitude of different materials.
Should I buy the Bambu Lab H2C 3D printer?
Buy it if...
You run complex multicolour prints.
You're frustrated with purge waste or filament switching and want to speed up the print process.
You already know the H2D/H2S.
You want to build on the ecosystem you already have without re-learning a totally new platform.
Don't buy it if...
You only print with single materials.
You only prototype with single materials and rarely use more than two filaments at a time.
Budget is tight.
This is a premium model, and at present, there are plenty of cheaper printers that offer superb multifilament prints.
For more models, I've tested the best 3D printers you can get right now.
Alastair is a photographer, filmmaker and tech writer who has been working in the publishing industry since the late 1990s. For more than 25 years he has covered photography, video and technology across Future's photography, technology and gaming brands. He runs a photography and video production company and lectures in TV and film. He can usually be found testing mini PCs or prototyping and prop building with the aid of 3D printing.
You must confirm your public display name before commenting
Please logout and then login again, you will then be prompted to enter your display name.
