TechRadar Verdict
Although not the first multi-head 3D printer, it's certainly the smallest, cheapest and most accessible. Print speeds all around are exceptionally fast, and whilst there are a few quirks due to the early nature of our review sample, this does look to be one of the best 3D printers of all time.
Pros
- +
Multi-material speed
- +
Reduced waste
- +
High-speed CoreXY
Cons
- -
Add-ons required for some materials
- -
Open frame limiting material use
- -
Some early bugs with connectivity
Why you can trust TechRadar
Snapmaker is known for its multipurpose maker machines that mark a different path to other mainstream 3D print manufacturers. Their Snapmaker 2.0 and Artisan models combine 3D printing, laser cutting and CNC into one multi-tool option. Whilst these machines have made Snapmaker's name in the maker community, they have also been pushing to make a mark in the straight 3D printing arena.
The Snapmaker J1 impressed me when I looked at it back at the start of 2023. At the time, this IDEX machine with two heads enabled dual-filament printing that helped to cut down print times over many other multifilament machines. Whilst that machine was good, the likes of Bambu Lab, Creality, and of course Prusa all have machines that offer something a little bit more, at least that was until the arrival of the Snapmaker U1.
This new Snapmaker U1 machine aims to change the 3D printing market, especially the mainstream multifilament machines that exist at present. There is, of course, one other manufacturer that has already gone down this route with the Original Prusa XL, but that machine is aimed at the professional market and, when it comes to size and weight, it's beyond the reach of most individuals and small businesses. I'm also not forgetting the DIY options, but this is the first multi-head machine that is both compact and, at the moment, affordable.
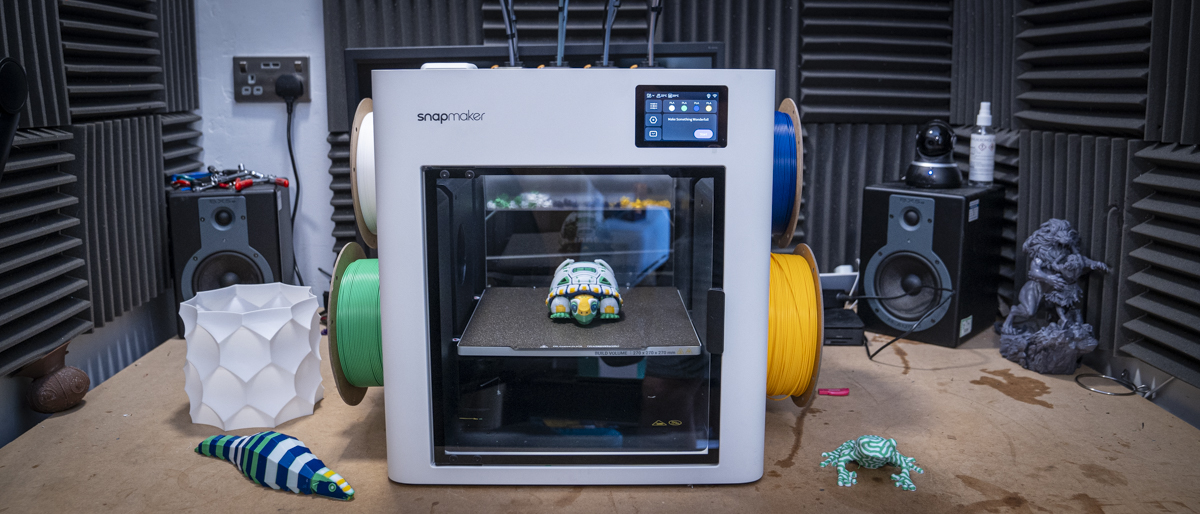
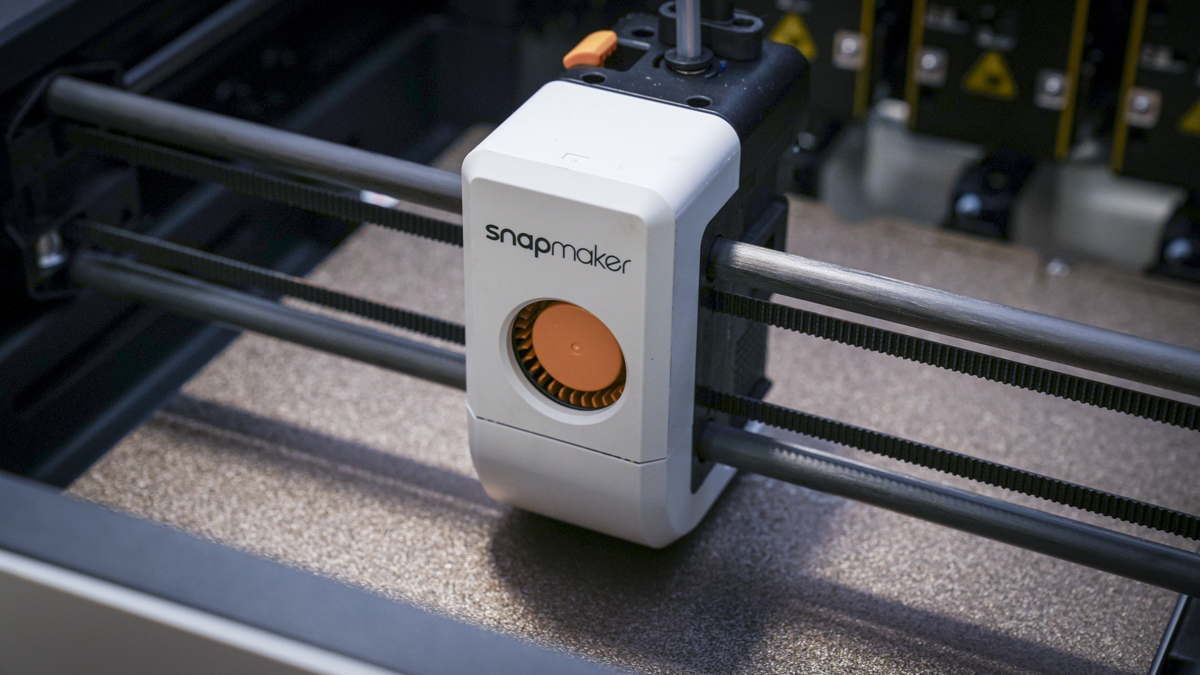
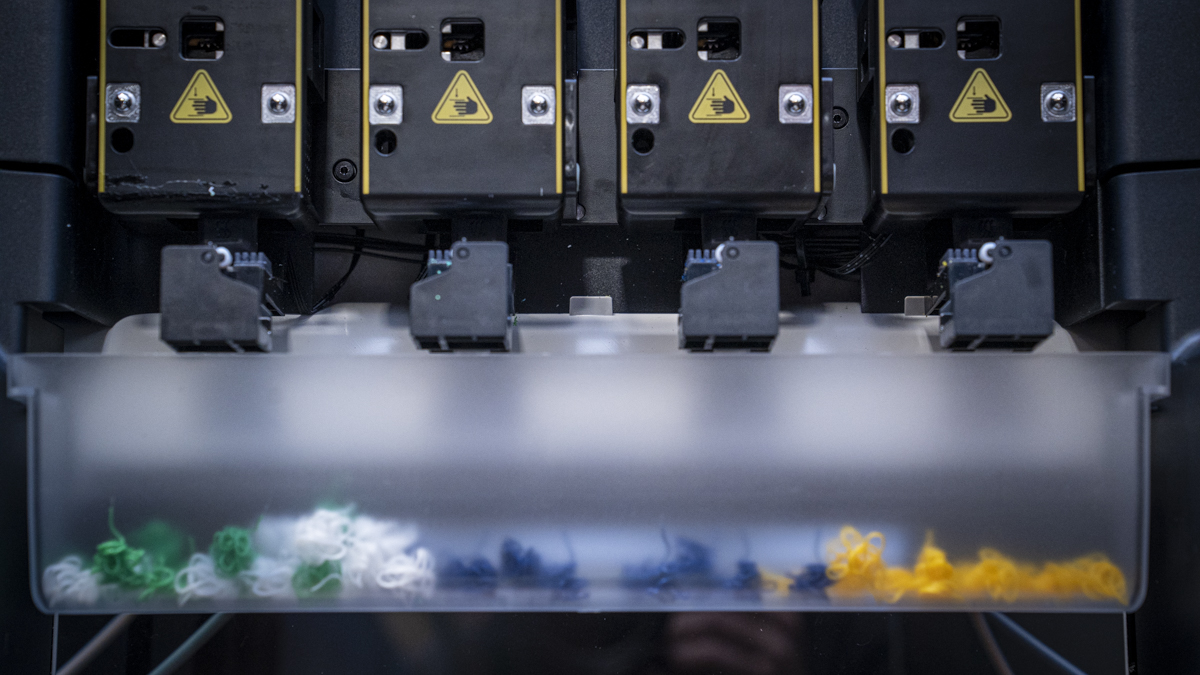
The way the U1 differs from most of the best 3D printers I've tried is that it has four 3D print tool heads, each loaded with a single filament, and a tool changer that essentially grabs the head that's required, prints, and then swaps for the next head. There's only a small retraction and purging of filament and filament between each material change, so little waste, the head is simply swapped, and printing resumes. This Snapmaker claim can cut down print times by up to five times.
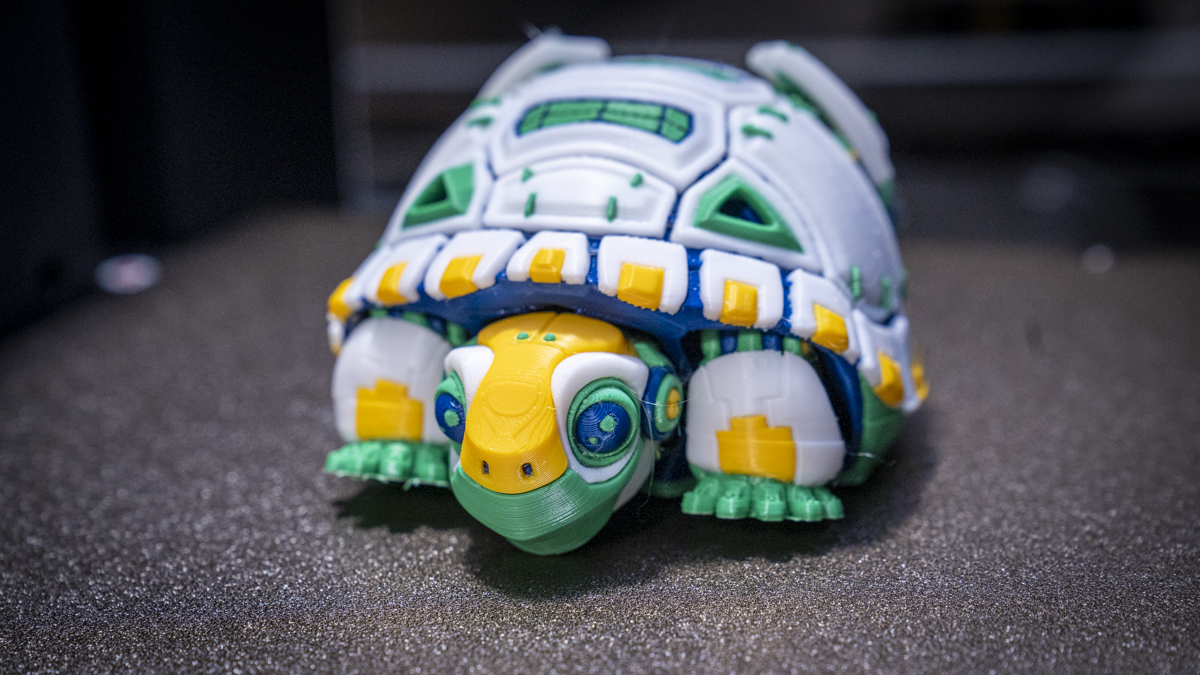
In my test, printing the four-colour robot tortoise, a print that would usually take a few days, was finished within 24 hours.
At present, there is one company that really dominates the 3D printing market, Bambu Lab, so to make a mark with a new machine that sports a new way of 3D printing is challenging. But I really do feel, having used the Snapmaker U1 for the last month, that this is a serious contender, and for many who work in the 3D print industry, it marks a turning point for the mainstream 3D print companies to produce machines that are far more efficient and fast, and at this price point it certainly looks set to disrupt the industry.
Snapmaker U1: Price and availability
The SnapMaker U1 Kickstarter campaign is live now and the machine is available for an early bird price of $679. You can check out the 3D printer and make a pledge over at the SnapMaker U1 Kickstarter page.
Sign up to the TechRadar Pro newsletter to get all the top news, opinion, features and guidance your business needs to succeed!
SnapMaker U1: Design
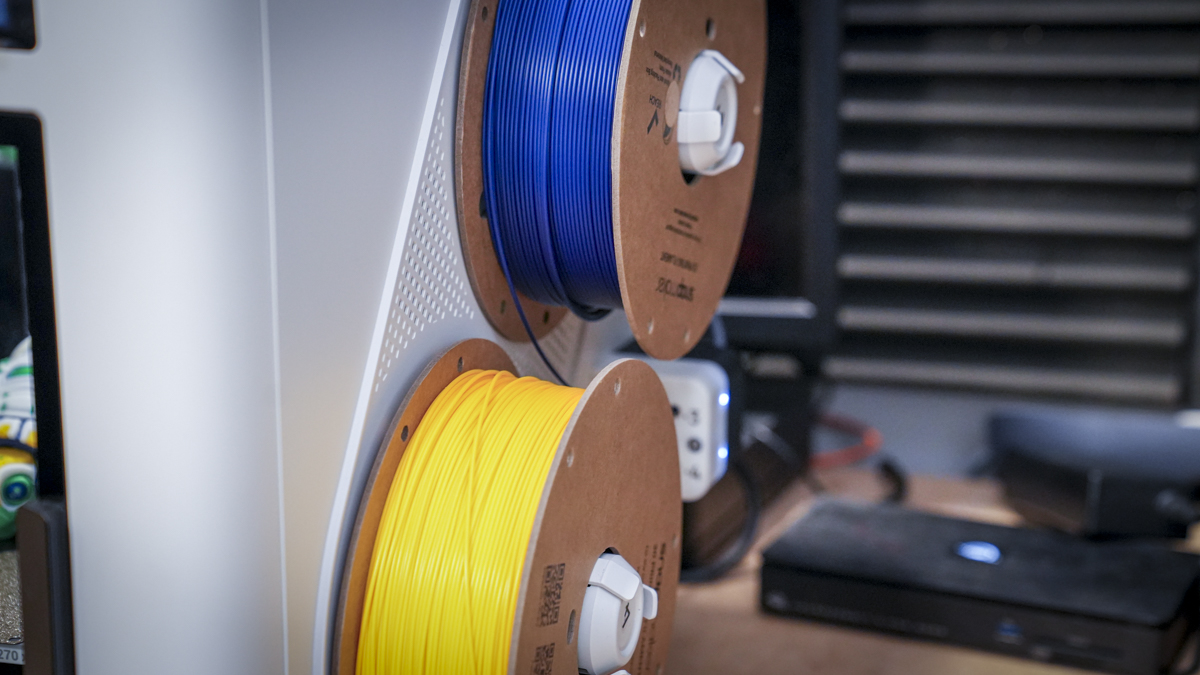
One of the things that I really liked about the Snapmaker U1 from the outset was that for a relatively small machine it has a build volume of 270 × 270 × 270, offering a decent print size, whilst the machine itself measures at 500 × 600 × 700 mm, the width of 600mm is including the filament reels that sit either side of the machine, otherwise the width is closer to 410mm.
Likewise, when it comes to weight, having used the original Prusa XL with its similar design and mechanism to the U1, I'm only too aware of just how large and heavy these machines have been in the past. Here, the U1 remains relatively lightweight and a single person can easily pick up and manoeuvre the machine around the workshop.
The design, for the most part, sticks with tradition, with a semi-enclosed layout and a closed door at the front. Due to the multi-tool design, the top is open. This open top does limit material use, but there will be an enclosure available later that will enable printing with more advanced and technical materials. There's also work going on in the background to better support TPU, although I did push some through the system, and it printed absolutely perfectly.
The mechanism behind the machine is CoreXY, ensuring fast prints, and overall print times for single filament as well as multifilament were impressively quick. There's absolutely no doubt that this new four-tool approach sees far faster changes between each material compared with more traditional single-nozzle options. Even compared to Bambu Lab's latest X1 with its dual approach, this four-head solution is again far faster.
At present, the tool heads offer a combined nozzle and extruder in one, and thankfully, those nozzles are designed to be quickly removed and changed in case of breakage or blockage. At present, there's only the 0.4 mm nozzle available, but it does look like there will be other hardened options and different diameters available shortly.
The stainless-steel nozzle that comes with the machine is a standard 0.4 mm and will support the most popular materials. In this review, I started off with Snapmaker's own PLA, which featured the RFID chip, so it's automatically recognised and configured for the system, with the nozzle temperature going up to 300°C, which does give you plenty of scope for many more advanced materials. Likewise, the flexible PEI build plate offers a maximum temperature of 100°C, providing decent adhesion to many materials and print types.
At present, out of the box, it has basic compatibility for PLA, PETG, TPU and PVA. With the optional seal cover, which should be on the way soon, it should be able to support PET, ABS and ASA. Then with the seal cover and hardened steel nozzle, you'll be able to support PC, PA, PA-CF, PA-GF and many more.
When it comes to material type, it takes the standard 1.75 mm filament. Through the test, I started off with Snapmaker's own materials before using ColorFabb and other manufacturers' filaments. The only thing to note is that the spool diameter needs to be correct to fit the outer of the machine.
One issue that I can see is that the filaments are held on the outside of the machine, so they are open and exposed. Unlike many other multifilament machines that now utilise a dry box to ensure the material stays in top condition, here on the Snapmaker U1, they're open to the elements, which will be an issue for higher humidity environments.
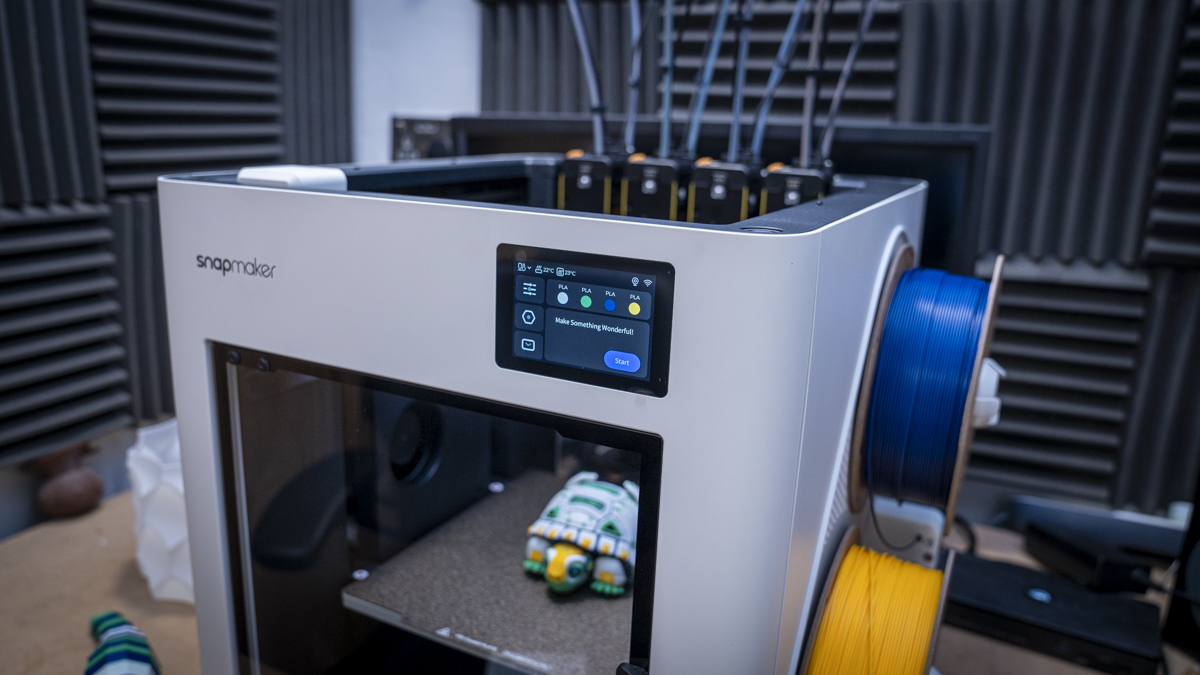
When it comes to connectivity, the machine is, of course, Wi-Fi enabled, features USB flash drive support, and, as this was an early version of the machine, there were a few issues with transferring models from the Orca software over to the machine. However, the USB flash drive option worked 100% of the time. All models and other settings can be accessed using the 3.5-inch touchscreen, and, as ever with Snapmaker, this interface is superb.
As we've come to expect from machines these days, the U1 offers full auto-calibration, bed levelling, tool head offset, vibration input shaping and pressure advance. There's also power-loss recovery, filament run-out detection, spaghetti and obstruction detection, although these do need to be switched on within the interface, and a full update to how these work won't be released until December of this year, so at present, due to a few failed prints, this feature doesn't appear to be active.
One of the other features I was pleased to see is that it does feature a built-in camera which will enable monitoring and time-lapse. At the time of this review, I couldn't get this to work through the Orca software, although a firmware update should be on the way soon to correct this.
SnapMaker U1: Features
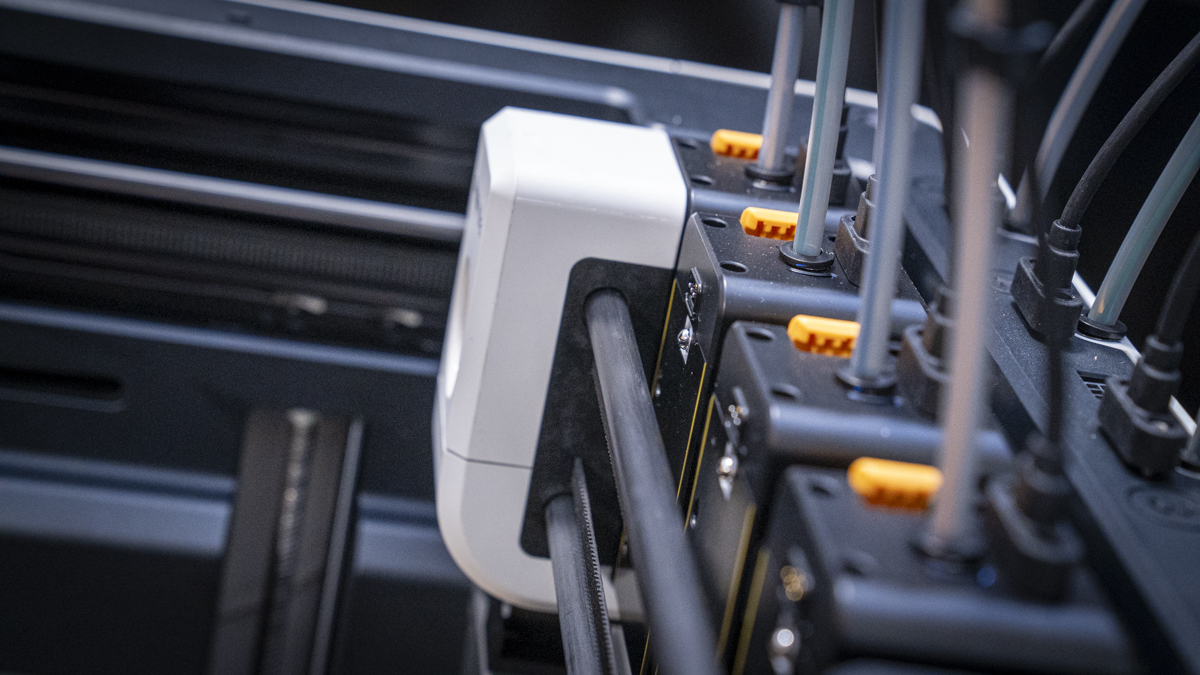
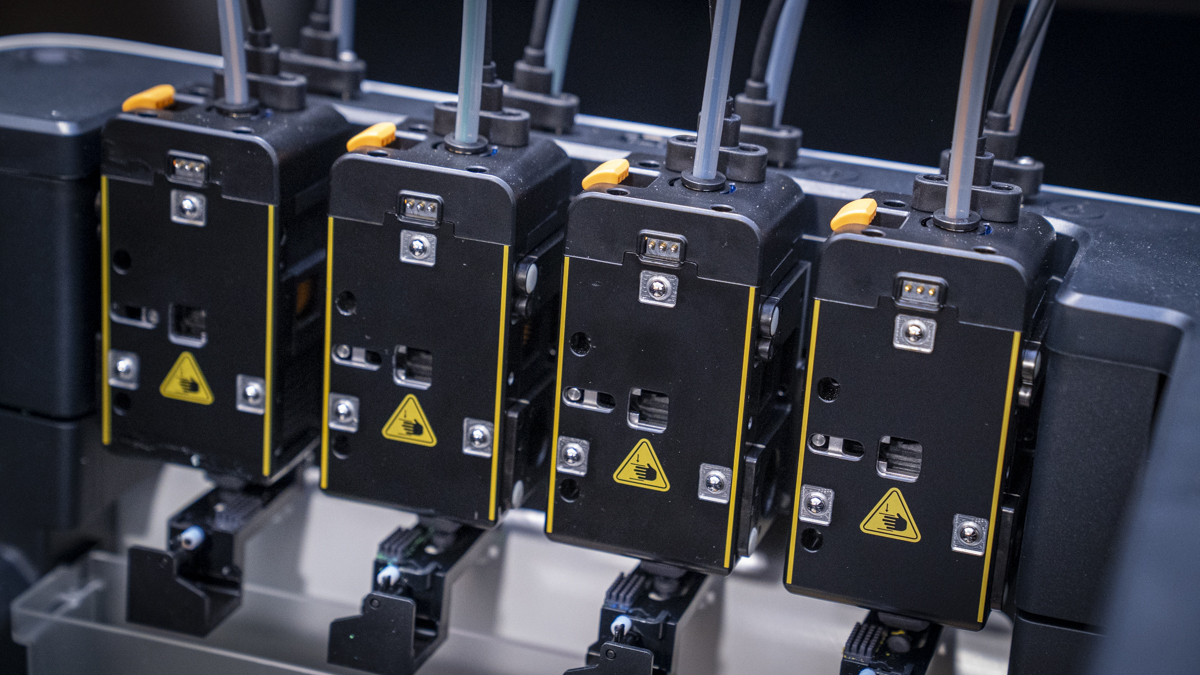
A first look at the Snapmaker U1 shows that it's a very different style of printer with the four independent tool heads each featuring a nozzle and an extruder, enabling true multi-material and multi-colour printing.
Each of the tool heads has been designed to be quickly upgraded, and maintenance appears to be extremely easy.
Of course, one of the big reasons for having independent tool heads rather than using a single or dual-head is that the tool change is much faster, taking just five seconds to swap between materials with minimal purging or waste, compared with the more conventional multifilament approach.
To ensure speed, a CoreXY design is used, with print speeds of up to 300 mm/s and 500 mm/s travel. While these are fast, they are by no means the fastest out there, but considering that time is not lost through multiple filament changes and purges, much of the speed reduction seen with some of the Bambu Lab machines is offset by this new multi-tool head system.
The print bed is well-sized at 270 × 270 × 270 mm, which, considering the compact footprint of the machine, is an extremely good-sized build area.
One of the features that really stood out to me is the fact that the nozzle can reach up to 300°C, which is good to see. Despite the advancement of using multiple tool heads, they've managed to retain this high temperature. Partnering that high-temperature tool head is the flexible PEI build plate that offers decent adhesion and a maximum temperature of 100°C.
Around the machine, there is plenty of cooling to help with the setting of the material when printing at high speed and to ensure accuracy. As ever, there is auto-calibration, including mesh bed levelling, tool head offset, vibration control and flow compensation. There's also pressure advance to help with the flow of filament extrusion, ensuring sharp corners in prints. Likewise, there's also input shaping.
At the start of this test, I was using Snapmaker filament reels, which feature RFID recognition, so when the filament is installed, it's instantly recognised by the machine. This cuts down on guesswork and avoids assigning the wrong filament type in the slicer.
Print Technology: FDM (Fused Deposition Modelling)
Build Area: 270 × 270 × 270 mm
Minimum Layer Resolution:
Maximum Layer Resolution:
Dimensions:
Weight:
Bed: Heated, Magnetic PEI Steel Plate
Print Surface: PEI, up to 100°C
Software: Snapmaker Orca, OrcaSlicer
Materials: PLA, PETG, TPU, PVA
Print Speed: Up to 500 mm/s
As with many of these latest machines, there's a built-in camera that offers remote monitoring, time-lapse recording and spaghetti detection.
When it comes to connection to the machine and interaction, it offers Wi-Fi and USB connectivity and has a large 3.5-inch touchscreen, which once again offers a really well-designed interface from Snapmaker. Alongside the machine comes slicing software in the form of OrcaSlicer.
OrcaSlicer is based on the superb PrusaSlicer and seems to be fully featured, enabling enough options at this level of machine over parameters of those four tool heads, with many profiles for Snapmaker official materials. For non-official materials, it's easy enough to build your own profiles.
Once you've done a few tests and checked the flow and quality of the prints, you can store those profiles, and, of course, these will build over time and probably be available in the community.
SnapMaker U1: Performance
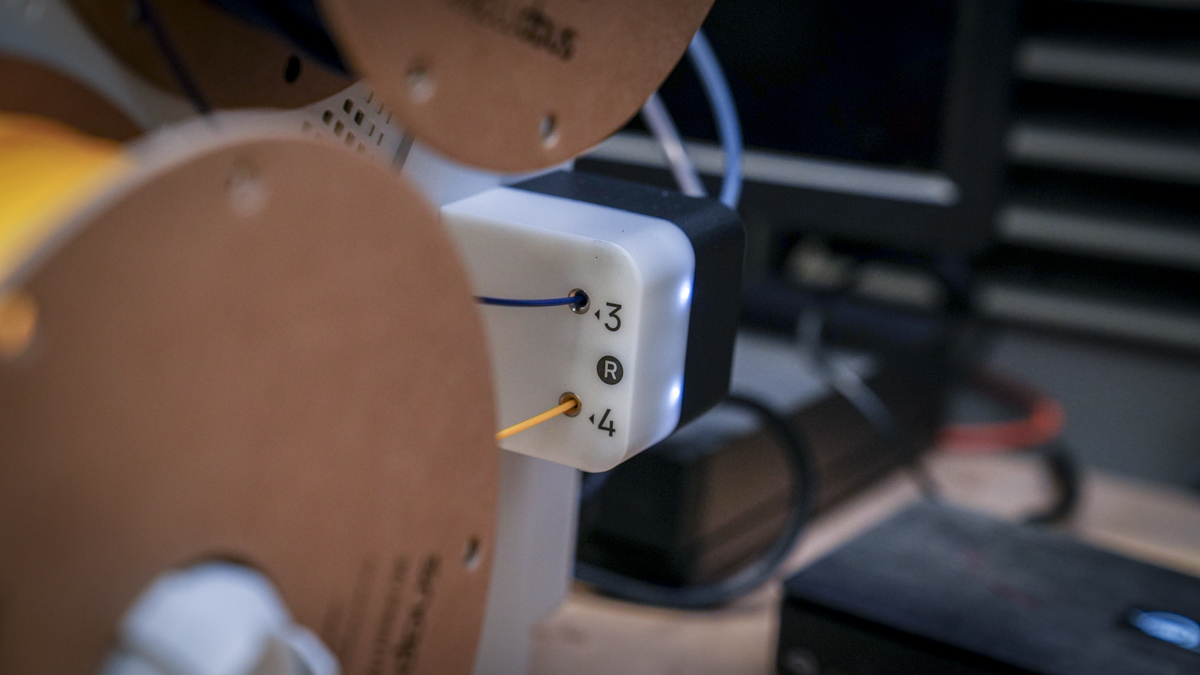
Getting started with the Snapmaker U1 was almost as easy as any standard 3D printer, with clear instructions on how to set up the machine and run through your first print. Likewise, installing and setting up OrcaSlicer was as simple as downloading, checking online to select your printer, and then sending your prints directly over to the machine.
When it comes to the setup, the machine is mostly ready to go. All you need to do is install the heads, pop in the feeder tubes, and then install the filaments onto the side of the machine. The whole process takes between 15 and 30 minutes, depending on experience.
Throughout the start of the test, I was using the official Snapmaker PLA, which was instantly recognised by the machine due to the RFID reel recognition. One note at the start was that while the filament was drawn into the system, I then needed to purge each tool head individually to ensure the filament was correctly loaded before printing.
To get started with the first prints, I ran through all of the models installed on the machine, including 3D Benchy, and was instantly impressed with the quality that came out. One thing I liked was the ability to quickly swap and change tool heads before printing, so that you can print in the material you want.
As I got more advanced, I started printing multifilament models and was again impressed not only by how easy the machine was to use but also by how quickly the multifilament prints were completed. For the most part, I was seeing at least a doubling in speed, if not tripling, for more complex options.
One thing I did note compared with some of the other multifilament machines, which often sound like Tasmanian devils in the background, is that the Snapmaker is far quieter. Although this is a fast machine, the print head seems to move at a steady pace and, because there is no purging involved between filament changes, each tool head change essentially takes a few seconds rather than up to a minute with the competition.
Taking a look at the quality of the prints, the results were exactly what you'd expect from a mid-range 3D printer, with decent overall quality, very little layer visibility, and excellent handling of overhangs and bridges.
As I went through the test, I started to experiment with a few more advanced materials, including PETG and TPU, both of which the machine should be compatible with directly out of the box. In both cases, the U1 was able to handle extrusion and cooling exceptionally well.
One of the issues I did come across from the outset was that whilst adhesion to the print bed was generally good, in some cases a skirt needed to be added to all models if each object was being printed in a different filament, however, if all were printed with the same then no skirt was required. I also found it was essential to do auto bed levelling prior to every print when using multifilament printing, whereas with single filament, it was easy to skip this function, speeding up print times further.
What I really liked about the multifilament printing was the ability in the software, as with many other slicers based on PrusaSlicer, to colour your print with those multiple colours. One model I created, which I had tried to print on other multifilament printers but usually gave up on due to the days of printing required, was handled by the Snapmaker U1 in less than a day. Likewise, the robot turtle print, which is again a lengthy print, finished within 28 hours. The fastest I'd previously seen this print complete with my preferred settings was 36 hours, so this was a considerable time saving.
When it came to the multifilament printing, I was absolutely blown away by the pure simplicity and ease of use. There are many models I don't print just because of the amount of time I'd have to leave the printer unattended, and I'm still a little dubious about leaving a machine running for a week. However, here, with those multi-tool heads enabling fast swaps between materials, print speeds are vastly increased and, moreover, print waste is massively reduced.
For the robot tortoise as an example, I'd usually expect to clear away waste filament from the machine once every few hours to avoid a jam or blockage. Here, with the Snapmaker U1, there was pretty much nothing. The small internal waste tray was all that was needed, and throughout the print, it didn't need emptying until the very end, something which completely differentiates this printer from any normal consumer-level option.
The quality of the overall print was exceptionally good, especially the multifilament printing, which is in line with, if not better than, many other multifilament 3D printers on the market at present. However, the picture wasn't all exceptional.
One of the issues I found was with cooling on bridging, where gaps that needed to be quickly cooled as the filament was extruded didn't quite hold. This was reinforced when I looked at the benchmarking results, which, on the whole, were exceptionally good.
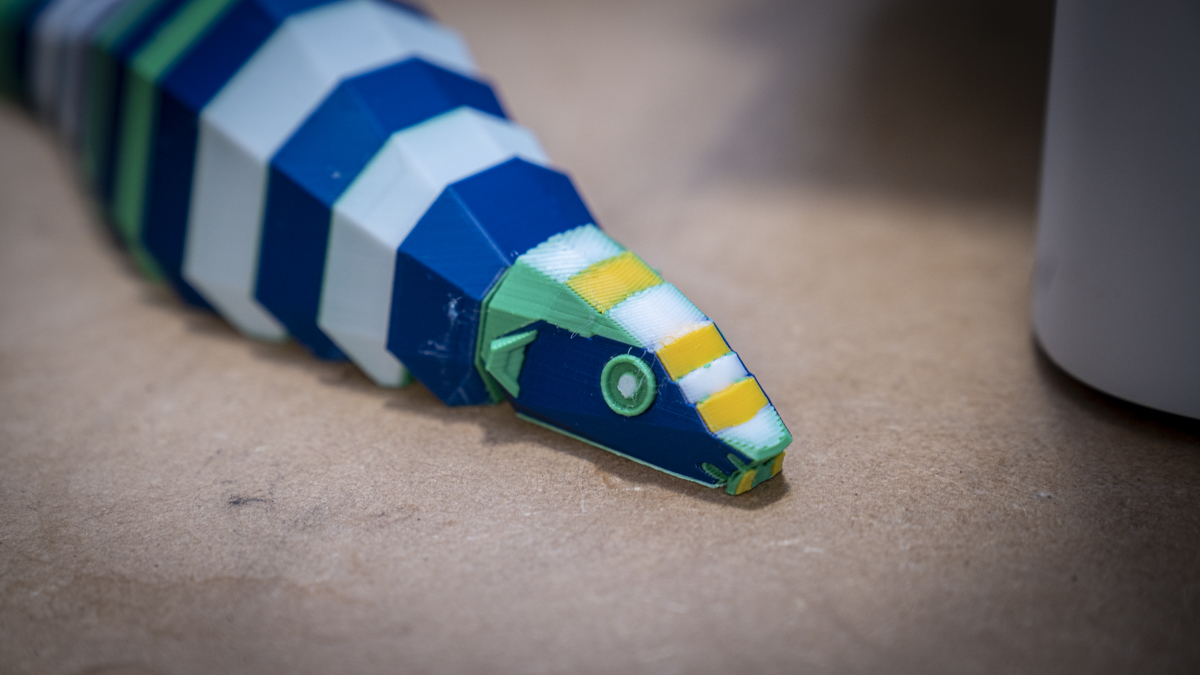
First and foremost, dimensional accuracy was superb, one of the best I've seen from any printer at any price point. Fine flow control, fine negative features and overhangs were also really well handled by the printer.
However, surprisingly, when it came to bridging, there were definite signs it wasn't quite as good as with some other printers. Looking at the purging section of the benchmark model showed some strings of filament hanging down and almost touching the bridge below.
Looking at the underside of the benchmark model and above the dimensional accuracy rings, you could see a little bit of visible stringing, and just below the fine flow control platform, there was some filament string.
But, picking out these small issues is really me being a little more picky than usual about these elements, as otherwise the print is almost perfect.
SnapMaker U1: Print quality
Dimensional accuracy – score of 5
Target 25 = X: 25.04 mm / 0.04 mm Error | Y: 24.93 mm / 0.07 mm Error
Target 20 = X: 20.06 mm / 0.06 mm Error | Y: 19.98 mm / 0.02 mm Error
Target 15 = X: 14.95 mm / 0.05 mm Error | Y: 14.93 mm / 0.07 mm Error
Target 10 = X: 9.90 mm / 0.10 mm Error | Y: 9.95 mm / 0.05 mm Error
Target 5 = X: 5.05 mm / 0.05 mm Error | Y: 4.95 mm / 0.05 mm Error
X Error Average = 0.06
Y Error Average = 0.052
X & Y Error Average = 0.056
Fine Flow Control – score of 5
Fine Negative Features – score of 5
Overhangs – score of 5
Bridging – score of 3
XY resonance – score of 2.5
Z-axis alignment – score of 2.5
Adding up the totals gives a final score of 29 out of 30.
SnapMaker U1: Final verdict
I've really enjoyed using the Snapmaker U1 as it opens up a world of possibilities for multifilament printing. What was made possible by other multifilament printers is simply sped up through the design and mechanics of this machine.
The print quality is excellent, and I really like the design, the small footprint, and the scale of the physical dimensions, which means that it easily sits on a desktop without taking up too much space.
While the Snapmaker U1 has a huge amount going for it, there are also a few issues. First and foremost is the fact that it is still an open printer and, whilst there is an enclosure on the way, this is an added expense.
Then you have the nozzles, which at present are only available in the 0.4 mm option. Although there will be further nozzles available soon, I wasn't able to check those out in this review, and it's still not apparent whether you can mix and match nozzle diameters, for example, swapping between 0.6, 0.2 and 0.4 mm within a single print.
I was generally impressed with the build quality and especially the design. When it comes to filament storage, I would have preferred some type of dry facility on the side of the machine to keep the materials in top condition.
At present, the ambient temperature is exceptionally hot for the UK at around 26°C in the workshop, far higher than normal, yet the humidity is thankfully relatively low. I'll be interested to see how well the machine copes when moisture levels change as we go into the autumn and winter, and how that will affect print speed and quality.
Through the test, I was generally impressed with the build quality and, whilst there were a few issues with prints coming away from the PEI build platform, I was impressed overall. With a few tweaks in OrcaSlicer, mainly adding a skirt to most prints, I had a good success rate on the models I put through the system, both single and multifilament.
While I love the machine and think it's going to be a real contender for one of the best 3D printers available, it is, at the same time, a little bit overkill for many users. If you're just starting off, whilst a single-nozzle machine is going to be slower and produce more waste, it's also going to be far easier to fix if something does go wrong. There are now some superb multifilament 3D printers, such as the Creality Hi, for half the price of the early-bird option for the Snapmaker U1.
At present, considering everything from build and print quality to the workflow and the move to a true multi-tool changer, this is the machine that I would go for. The Snapmaker U1 is a turning point for affordable multifilament 3D printers, offering unparalleled speed and far less waste than alternatives.

Should I buy the SnapMaker U1?
| Row 0 - Cell 0 | Row 0 - Cell 1 | Row 0 - Cell 2 |
Value: | As one of the first truly affordable multi tool 3D printers the price is extremely well balanced | 5 |
Design: | The multi tool head design is innovative, fast and cuts waste., However it's not fully enclosed | 4.5 |
Features: | In every area from the design to the mechanics and software this printer is feature packed, however, an enclosure and integrated drybox would be good. | 4.5 |
Performance: | The benchmarks show the precision of the printer, when combined with the speed it wins all round. | 4.5 |
Total: | The first affordable multi tool of it's type makes this an extremely interesting and exciting option. | 4.5 |
Buy it if...
You want a fast multifilament printer.
Featuring four tool heads and a price that makes it extremely affordable, the Snapmaker U1 offers some of the most advanced 3D printing for the best price on the market.
You design advanced prints.
If you're looking to design advanced models with different coloured and material filaments, then a multi-tool changer is by far the best option.
Don't buy it if...
You just print single or dual-material prints.
While it's nice to have those four tool heads, it does mean there's a greater chance that something could go wrong, and there are now many fine printers available with a single extruder.
You work with advanced materials.
As the top of the machine is open and, at present, there are only the standard nozzles available, if you print with advanced materials like nylon, carbon fibre or ASA, you'll need a fully enclosed option.
For more crafting tech, we've tested the best laser engravers.
Alastair is a photographer, filmmaker and tech writer who has been working in the publishing industry since the late 1990s. For more than 25 years he has covered photography, video and technology across Future's photography, technology and gaming brands. He runs a photography and video production company and lectures in TV and film. He can usually be found testing mini PCs or prototyping and prop building with the aid of 3D printing.
You must confirm your public display name before commenting
Please logout and then login again, you will then be prompted to enter your display name.
