How to use Norton Cloud Backup
Norton's tool for Windows PC owners to keep their data safe
Sign up for breaking news, reviews, opinion, top tech deals, and more.
You are now subscribed
Your newsletter sign-up was successful
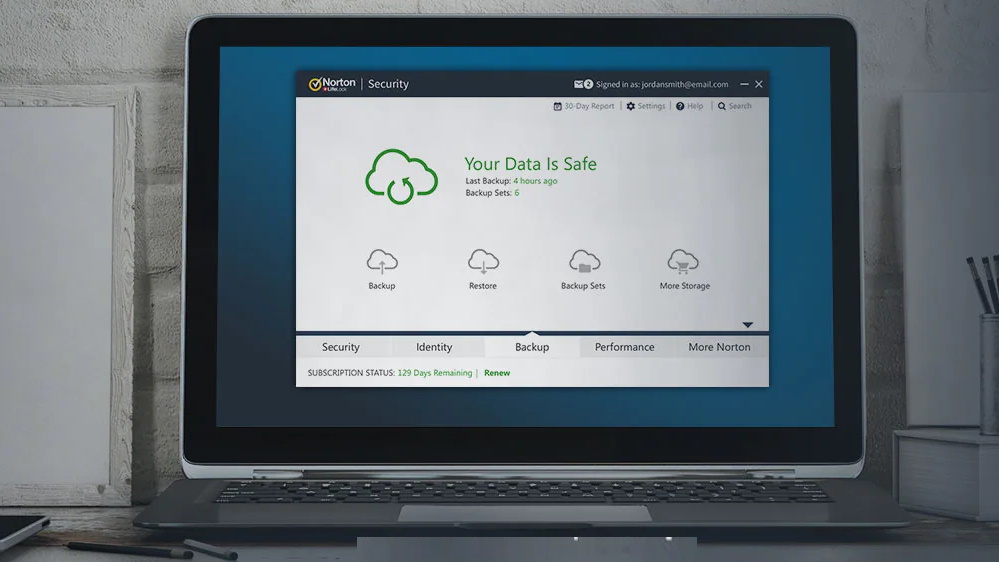
Norton Cloud Backup is a seriously handy part of Norton’s antivirus and security armory that helps ensure the safety of your files and personal data.
You won't need us to tell you that everyone should have a backup strategy, because if some kind of disaster should hit your PC – like a drive failure or ransomware attack – you’ll be very glad that your files are safely copied to another location, so you can easily restore them.
Cloud storage is a great option for backing up, as it stores your files remotely, whereas, say, a portable hard drive with backups on it might be kept in the same room as your PC, and in an unfortunate event like a fire, could perish along with your computer.
Norton Cloud Backup is one such storage service which provides fully automated backups and comes built-in with all the firm’s security subscriptions. In other words, you can’t buy Cloud Backup as a standalone product, but can only get the service by subscribing to an antivirus plan. The better the plan, the more storage you get
One important thing to note upfront is that Cloud Backup only works with Windows PCs, so bear in mind that if your computer runs an OS other than Microsoft’s, you can’t use the service. With that caveat out of the way, let’s press on with our step-by-step guide in which we’ll use Norton 360 Standard to demonstrate how to get going with Cloud Backup, and how everything works.
1. Grab a Norton plan
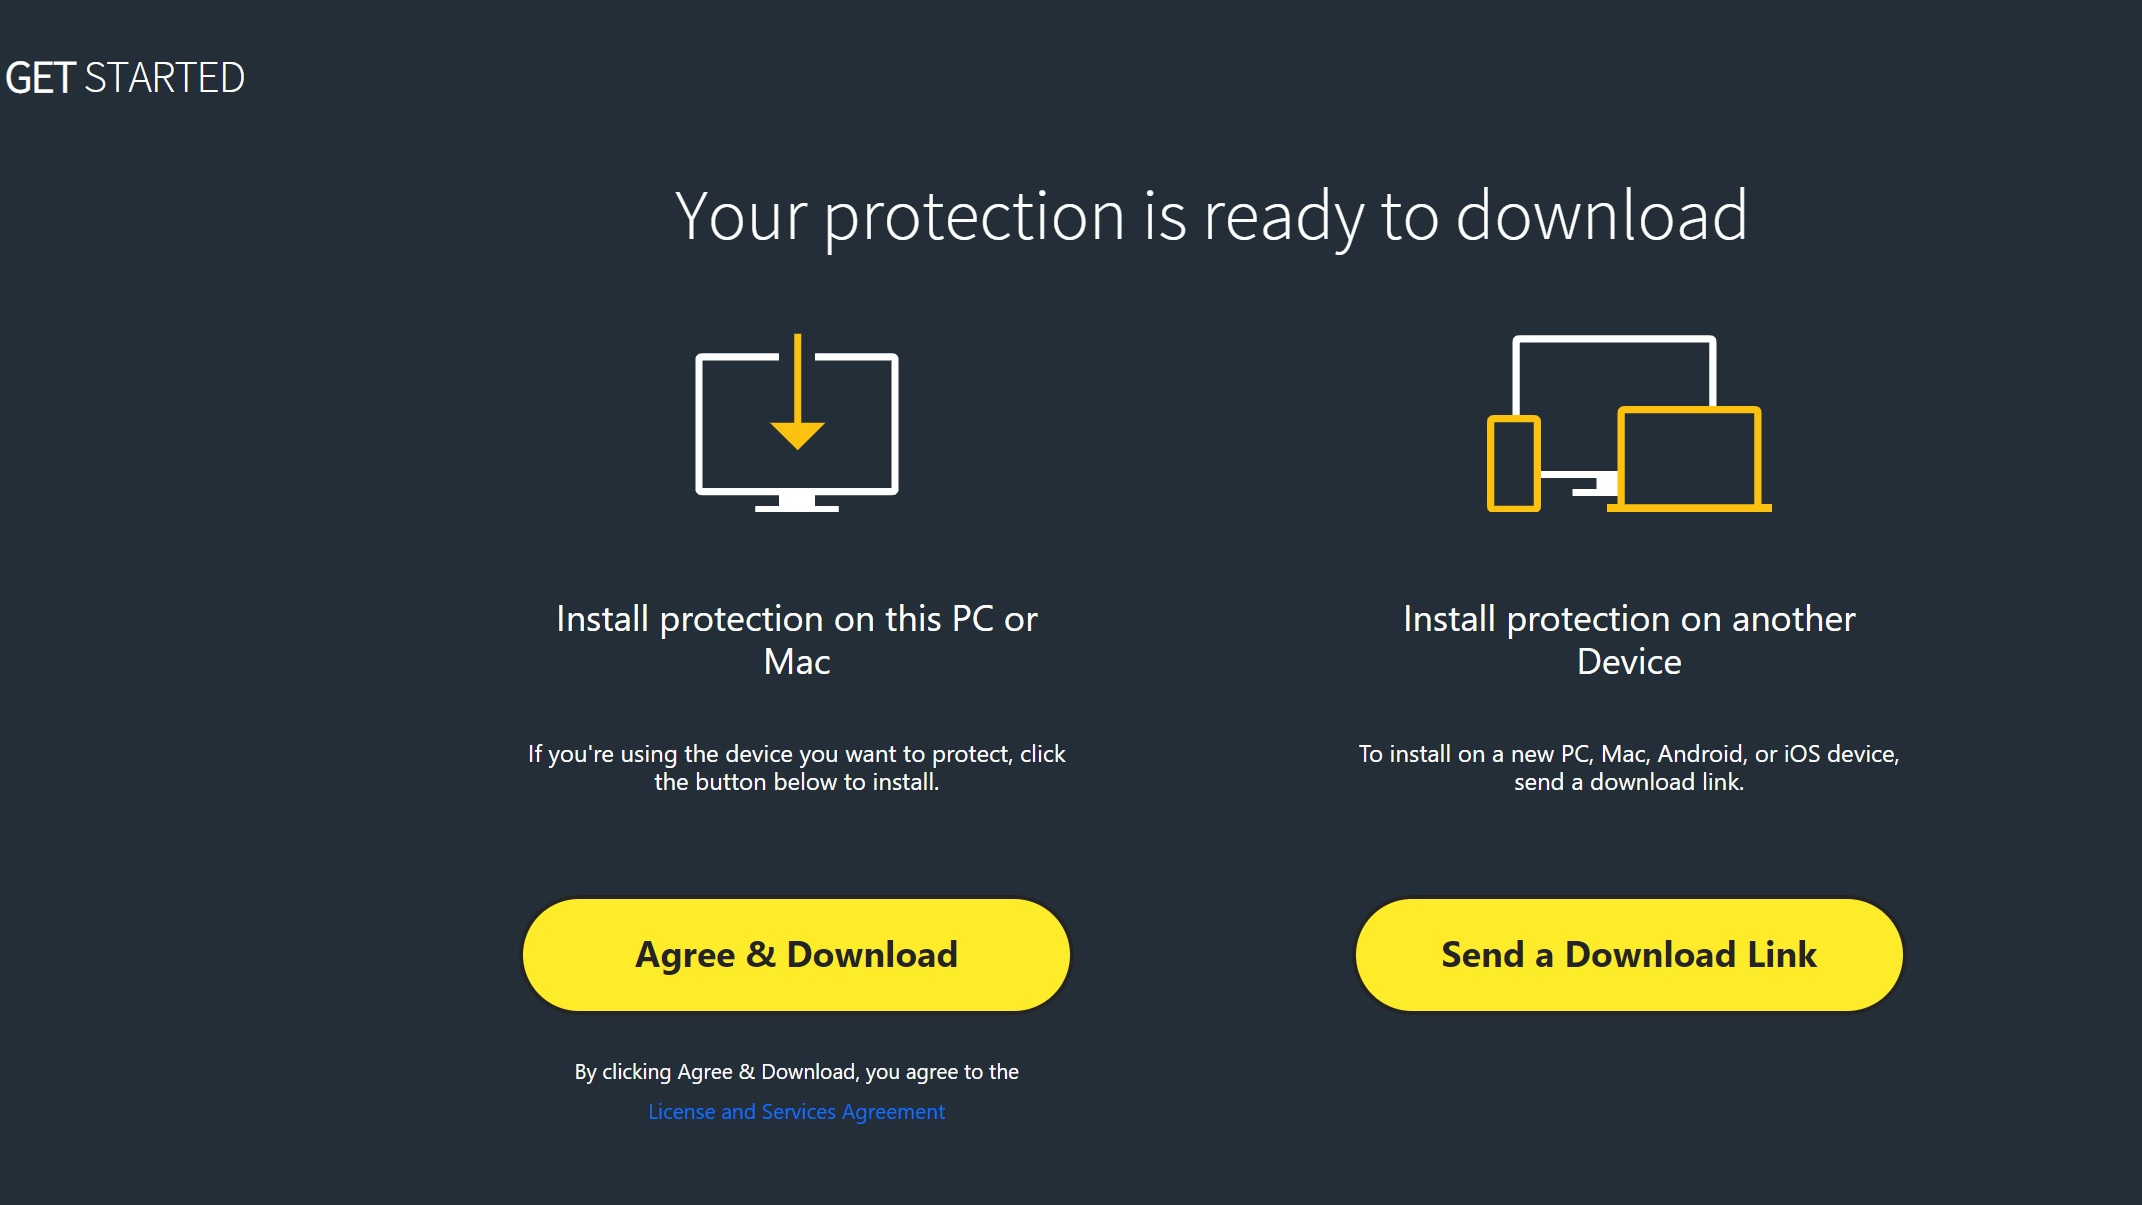
The first step is to subscribe to your chosen Norton plan, because you can’t use Cloud Backup without an active subscription. (If you are already subscribed to a Norton security product, you can skip this part, obviously – head straight to step 3).
As we mentioned above, every plan has at least some storage: you get just 2GB with the basic Norton AntiVirus Plus, which is upped to 10GB with Norton 360 Standard (the suite we’re using here), and a beefier 50GB with Norton 360 Deluxe, doubled up to 100GB with Norton 360 Premium.
Sign up to the TechRadar Pro newsletter to get all the top news, opinion, features and guidance your business needs to succeed!
Sign up for the plan that fits your storage needs best – and your other security suite requirements for that matter – and after payment, Norton will provide a ‘Get Started’ button you can click to get going with setup (you can also find this button in the welcome email you’ll receive from Norton). Follow the simple on-screen instructions for installation (but if you want a full step-by-step on this process, we’ve got a guide right here).
2. Activate Cloud Backup
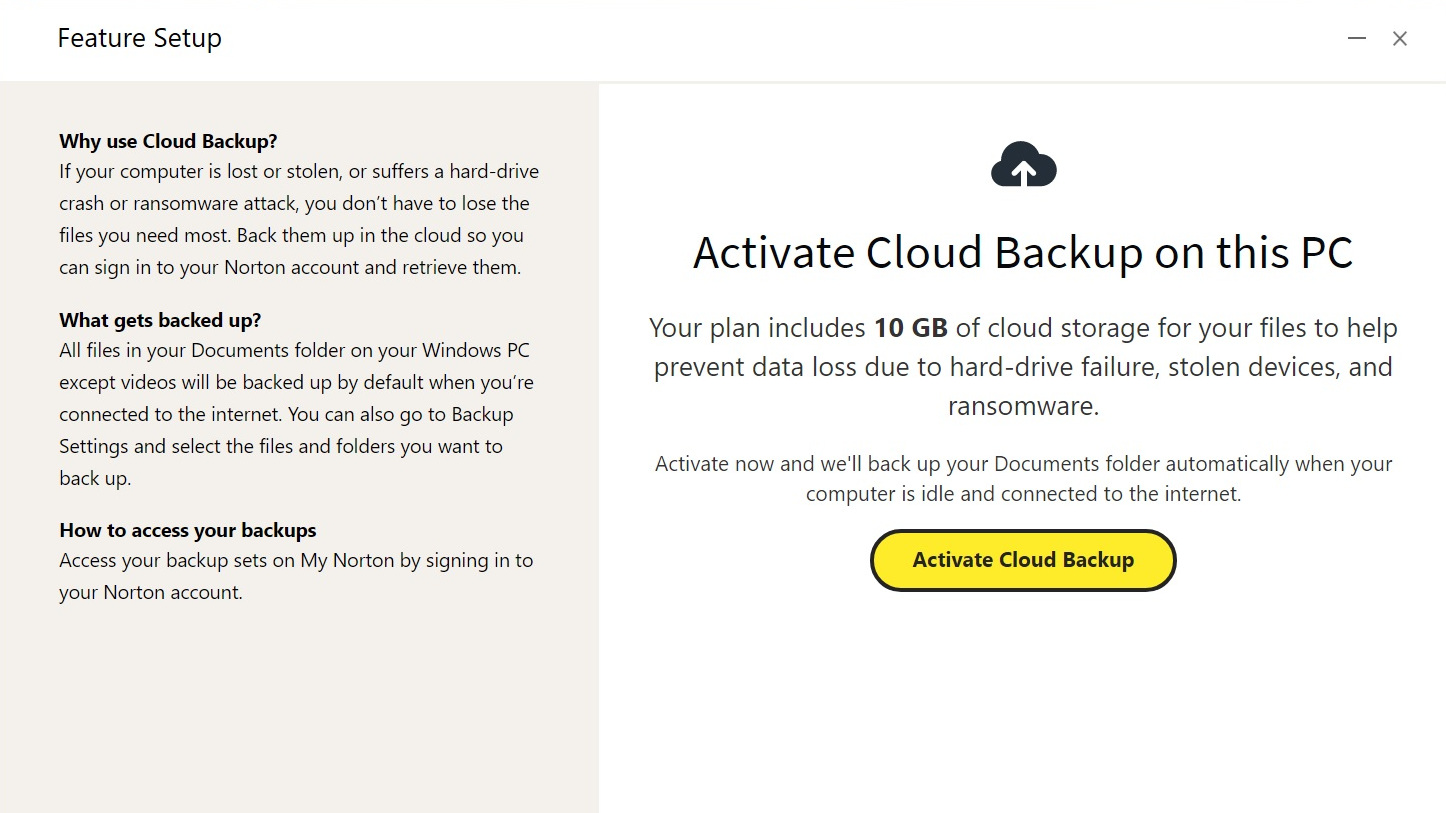
Once the installation process has finished, a message will pop up informing you that the device is now protected and, as a first-time installer, you’ll be given the chance to initially set up some of Norton’s features.
The first such feature is, in fact, Cloud Backup, so you can click on the yellow ‘Activate Cloud Backup’ button that appears right here (note that a brief explanation of Cloud Backup and what it does is provided).
You’ll see a message stating “Cloud Backup Activated” with a green tick, and a further Windows notification reminding you that a backup has not yet been run. There’s no need to click that, let’s head to the main menu to sort out the backup process – but before you reach the main menu, you’ll need to go through the other elements of Feature Setup.
3. Cloud Backup default process
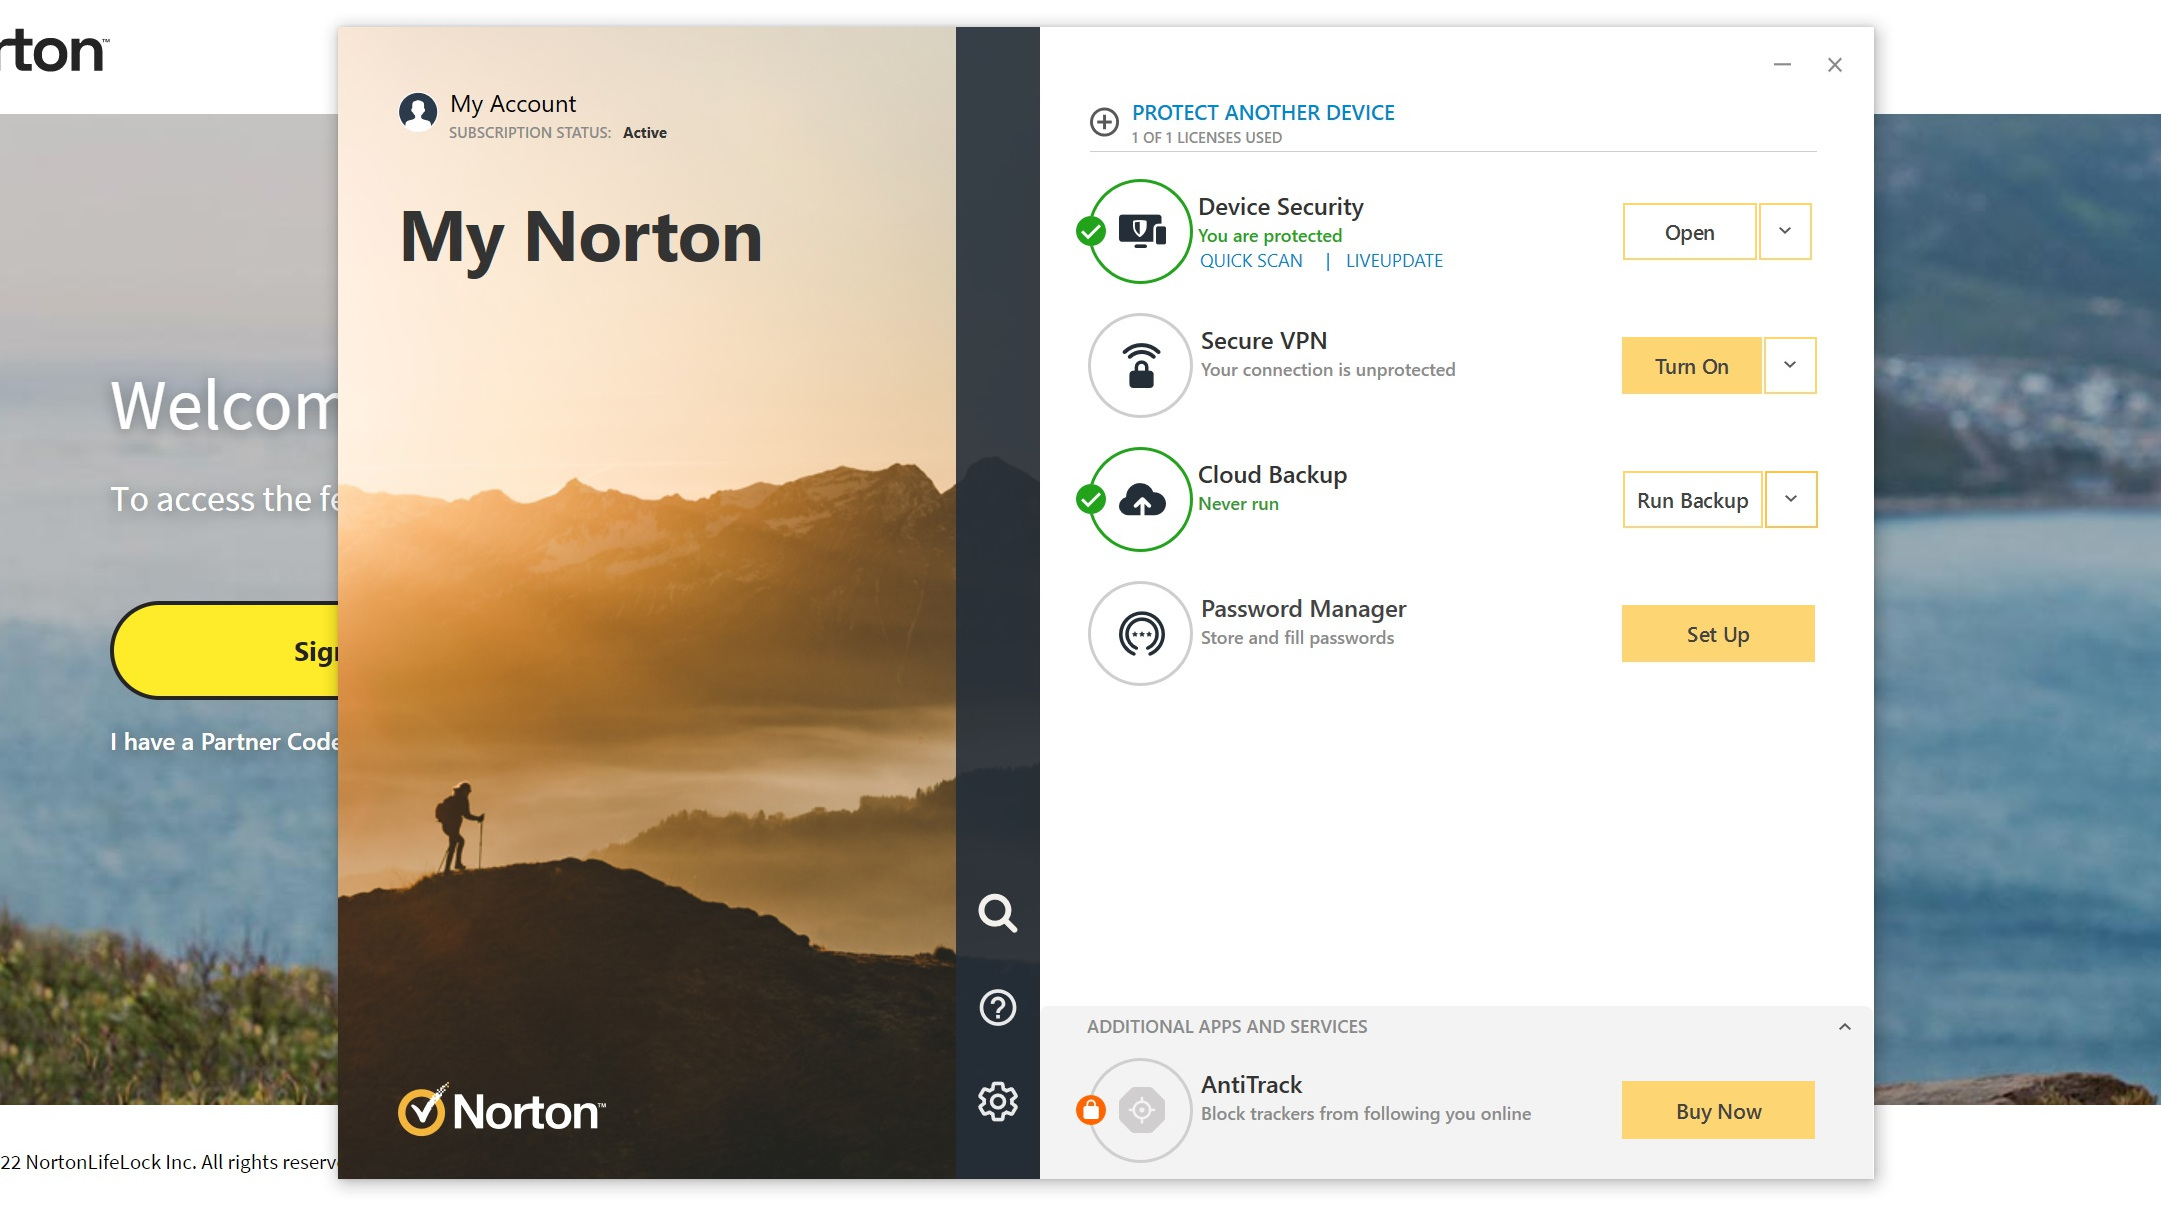
At the Norton main menu, called the My Norton window, on the right-hand panel, you’ll see the main features listed, one of them being Cloud Backup. Note that if you’re using the classic Norton 360 main menu, the function is there in the middle of the bottom panel – it’s just called Backup but works in exactly the same manner.
At this point, you can just click ‘Run Backup’ and the security suite will run a backup with its default settings, which means that it backs up the files in My Documents (except videos) to Norton’s cloud storage locker. These backups will be set to automatically run when your PC is idling, by the way, periodically in an ongoing manner, to keep everything up to date.
If you want more than that just the default My Documents contents covered, it’s easy to configure another backup process, as we’ll see next.
4. Configuring your own backup
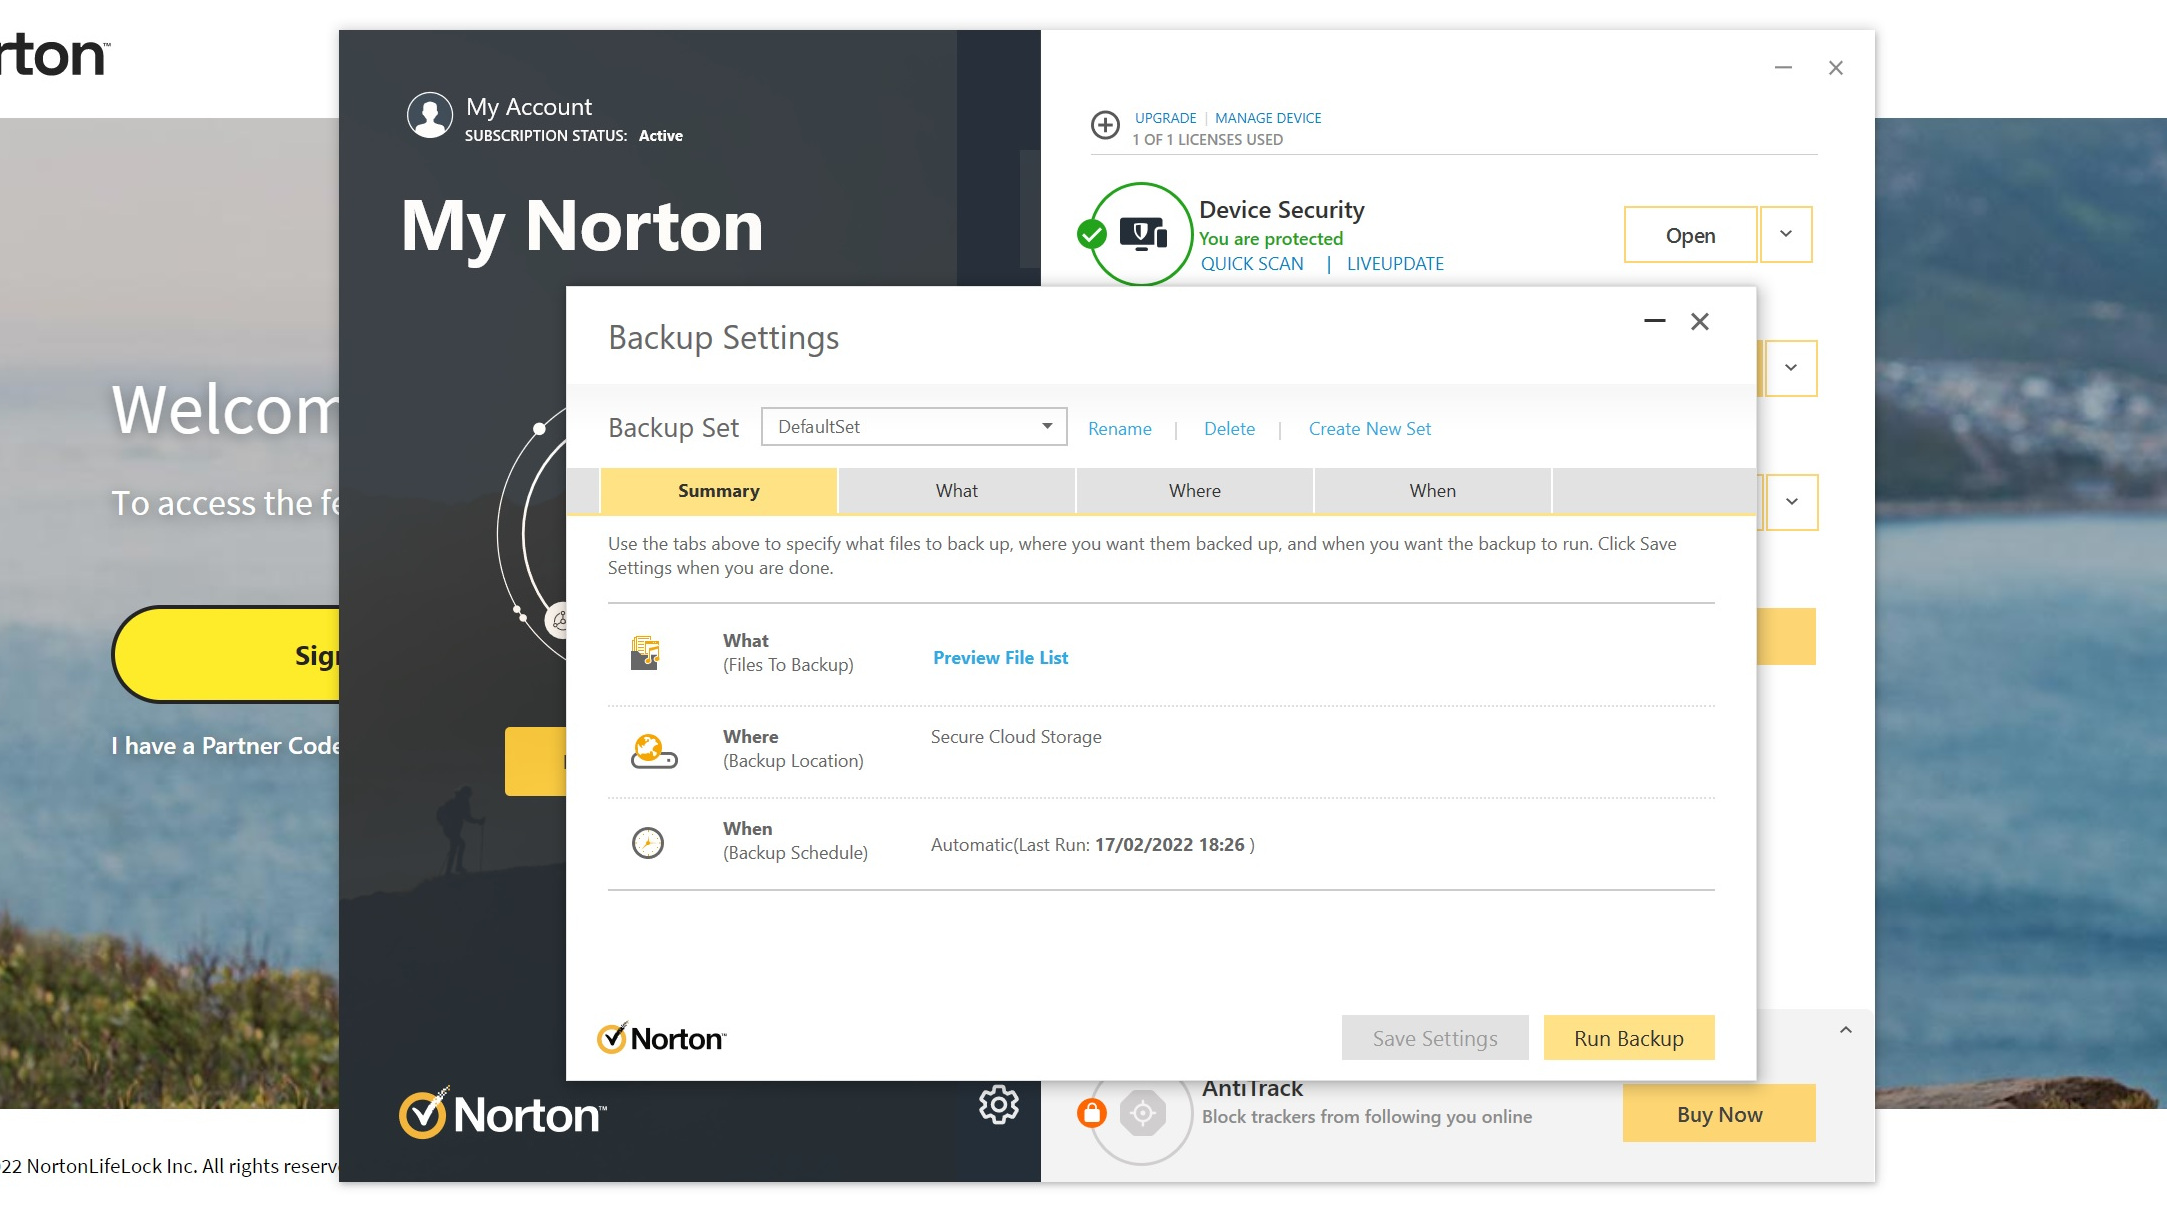
To choose the files you want to back up, click on the down-arrow next to the Run Backup button, and then click ‘Manage Backup Sets’ (this is just called ‘Backup Sets’ in the classic Norton 360 main menu). The Backup Settings menu pops up, and you can see the default settings which are applied out of the gate when you first use Cloud Backup (they’re called “DefaultSet”).
To make a new configuration for backing up on your PC, click on ‘Create New Set’ in the top menu.
5. Configuration parameters: What to back up
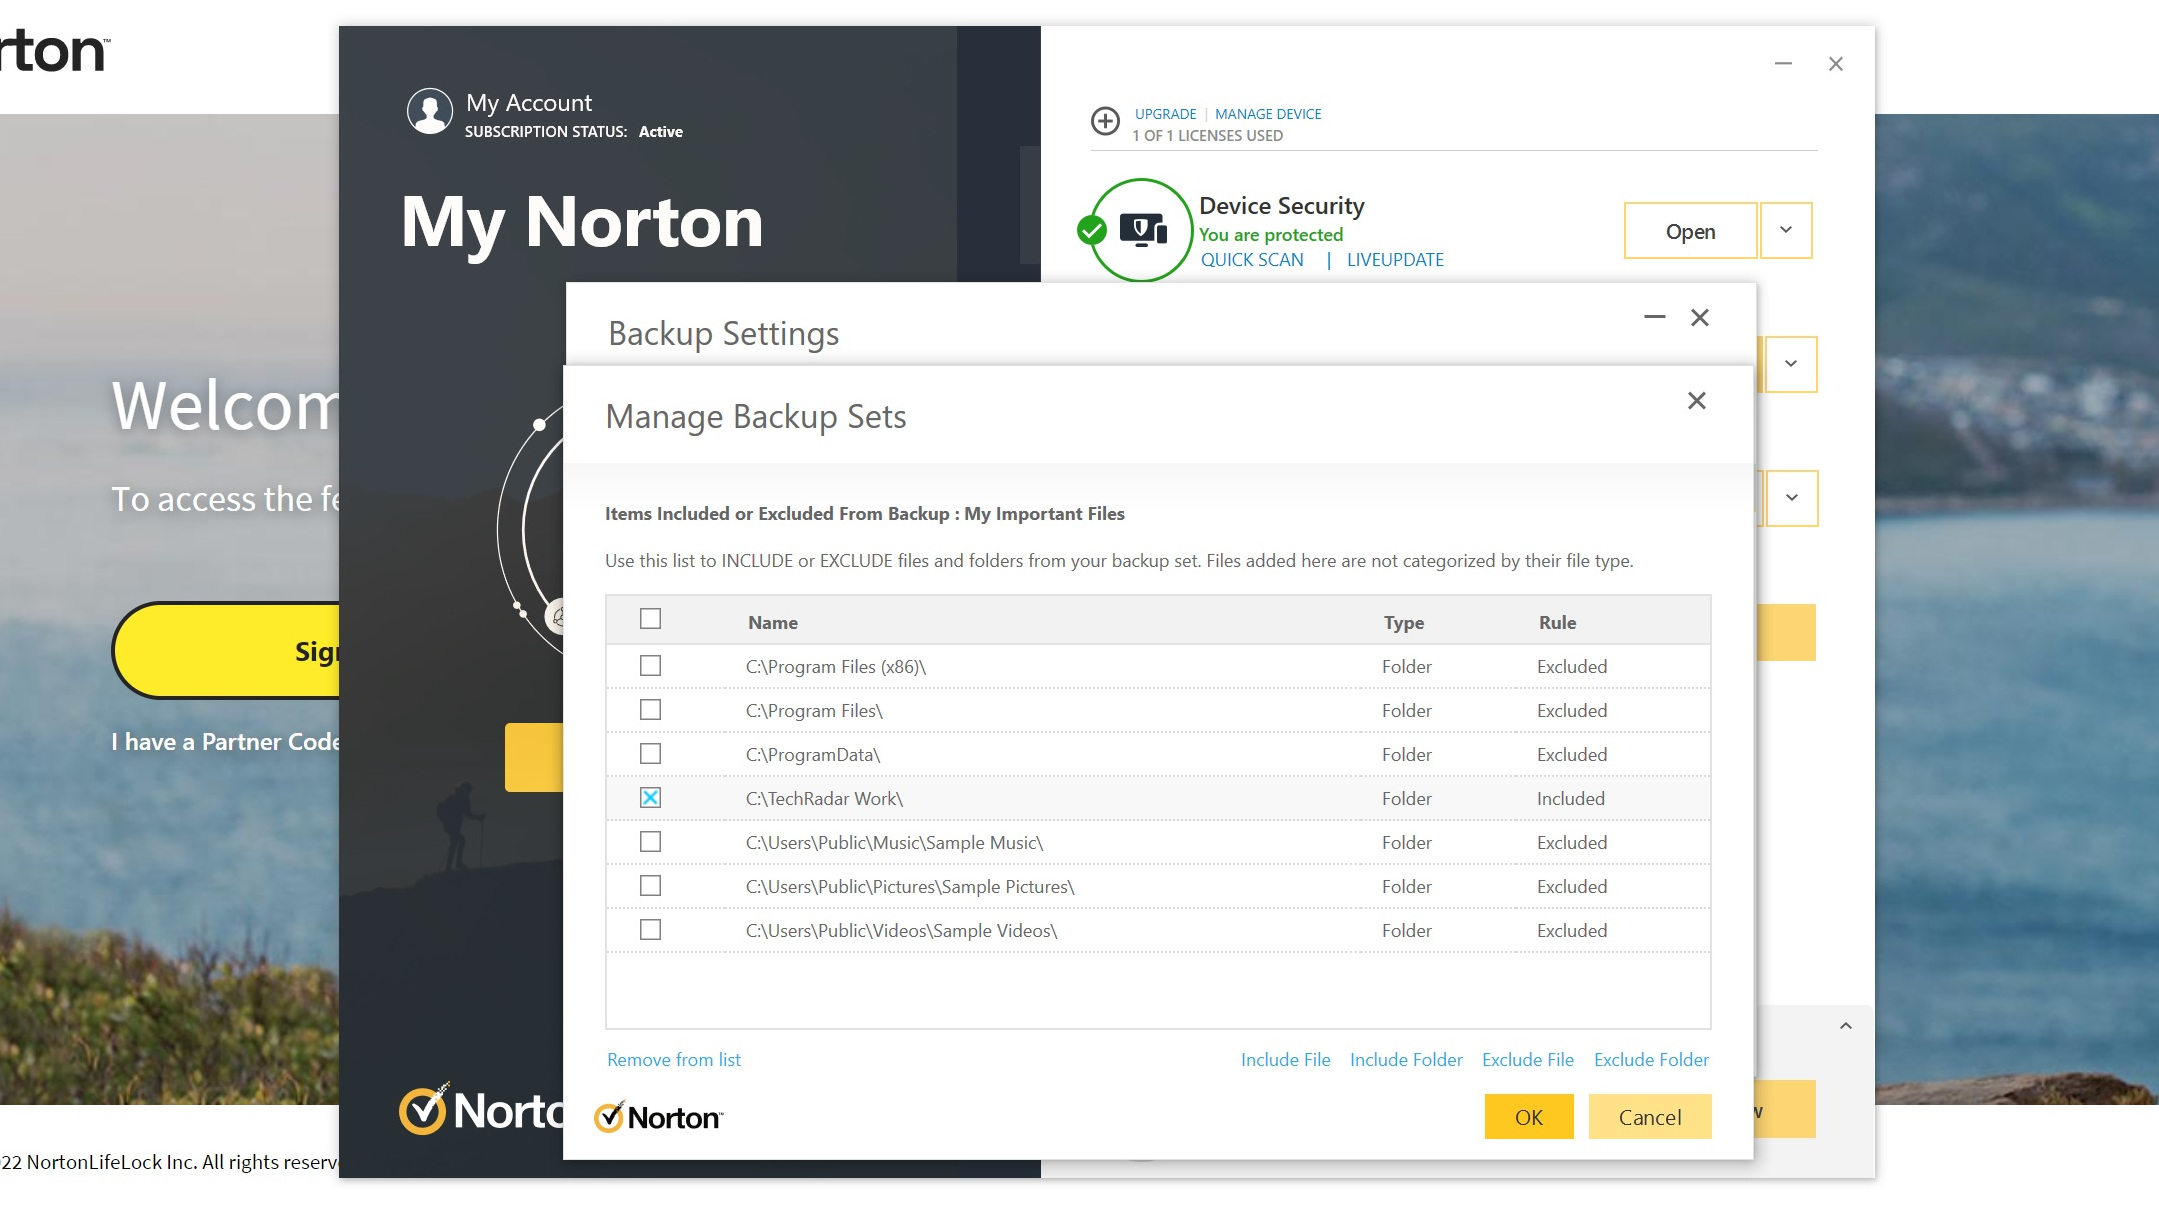
First off, you must give the backup set a name, like “My Important Files” for example. Type in what you want to call the set and click ‘OK’. You’ll notice that the Backup Set you’re now working with – highlighted in the box in the top menu – is now this set you have just named.
The first job is to configure what you’re going to back up with this set, so click on the ‘What’ tab (the first one next to Summary). Next, click on ‘Add or exclude files and folders’.
At this menu, to tag a folder to be backed up, click on ‘Include Folder’ (at the bottom) then find the folder you want in the Explorer panel that pops up, select it, and click ‘OK’. You’ll see that folder appear in the list, and it’ll be marked as Included in the rule column. Folders marked Excluded are, obviously enough, those which won’t be incorporated in the backup. If you want to remove an exclusion – or an included folder for that matter – just click the box on the left of it, and then click ‘Remove from list’ at the bottom-left of the panel.
6. Configuration parameters: What to back up part 2
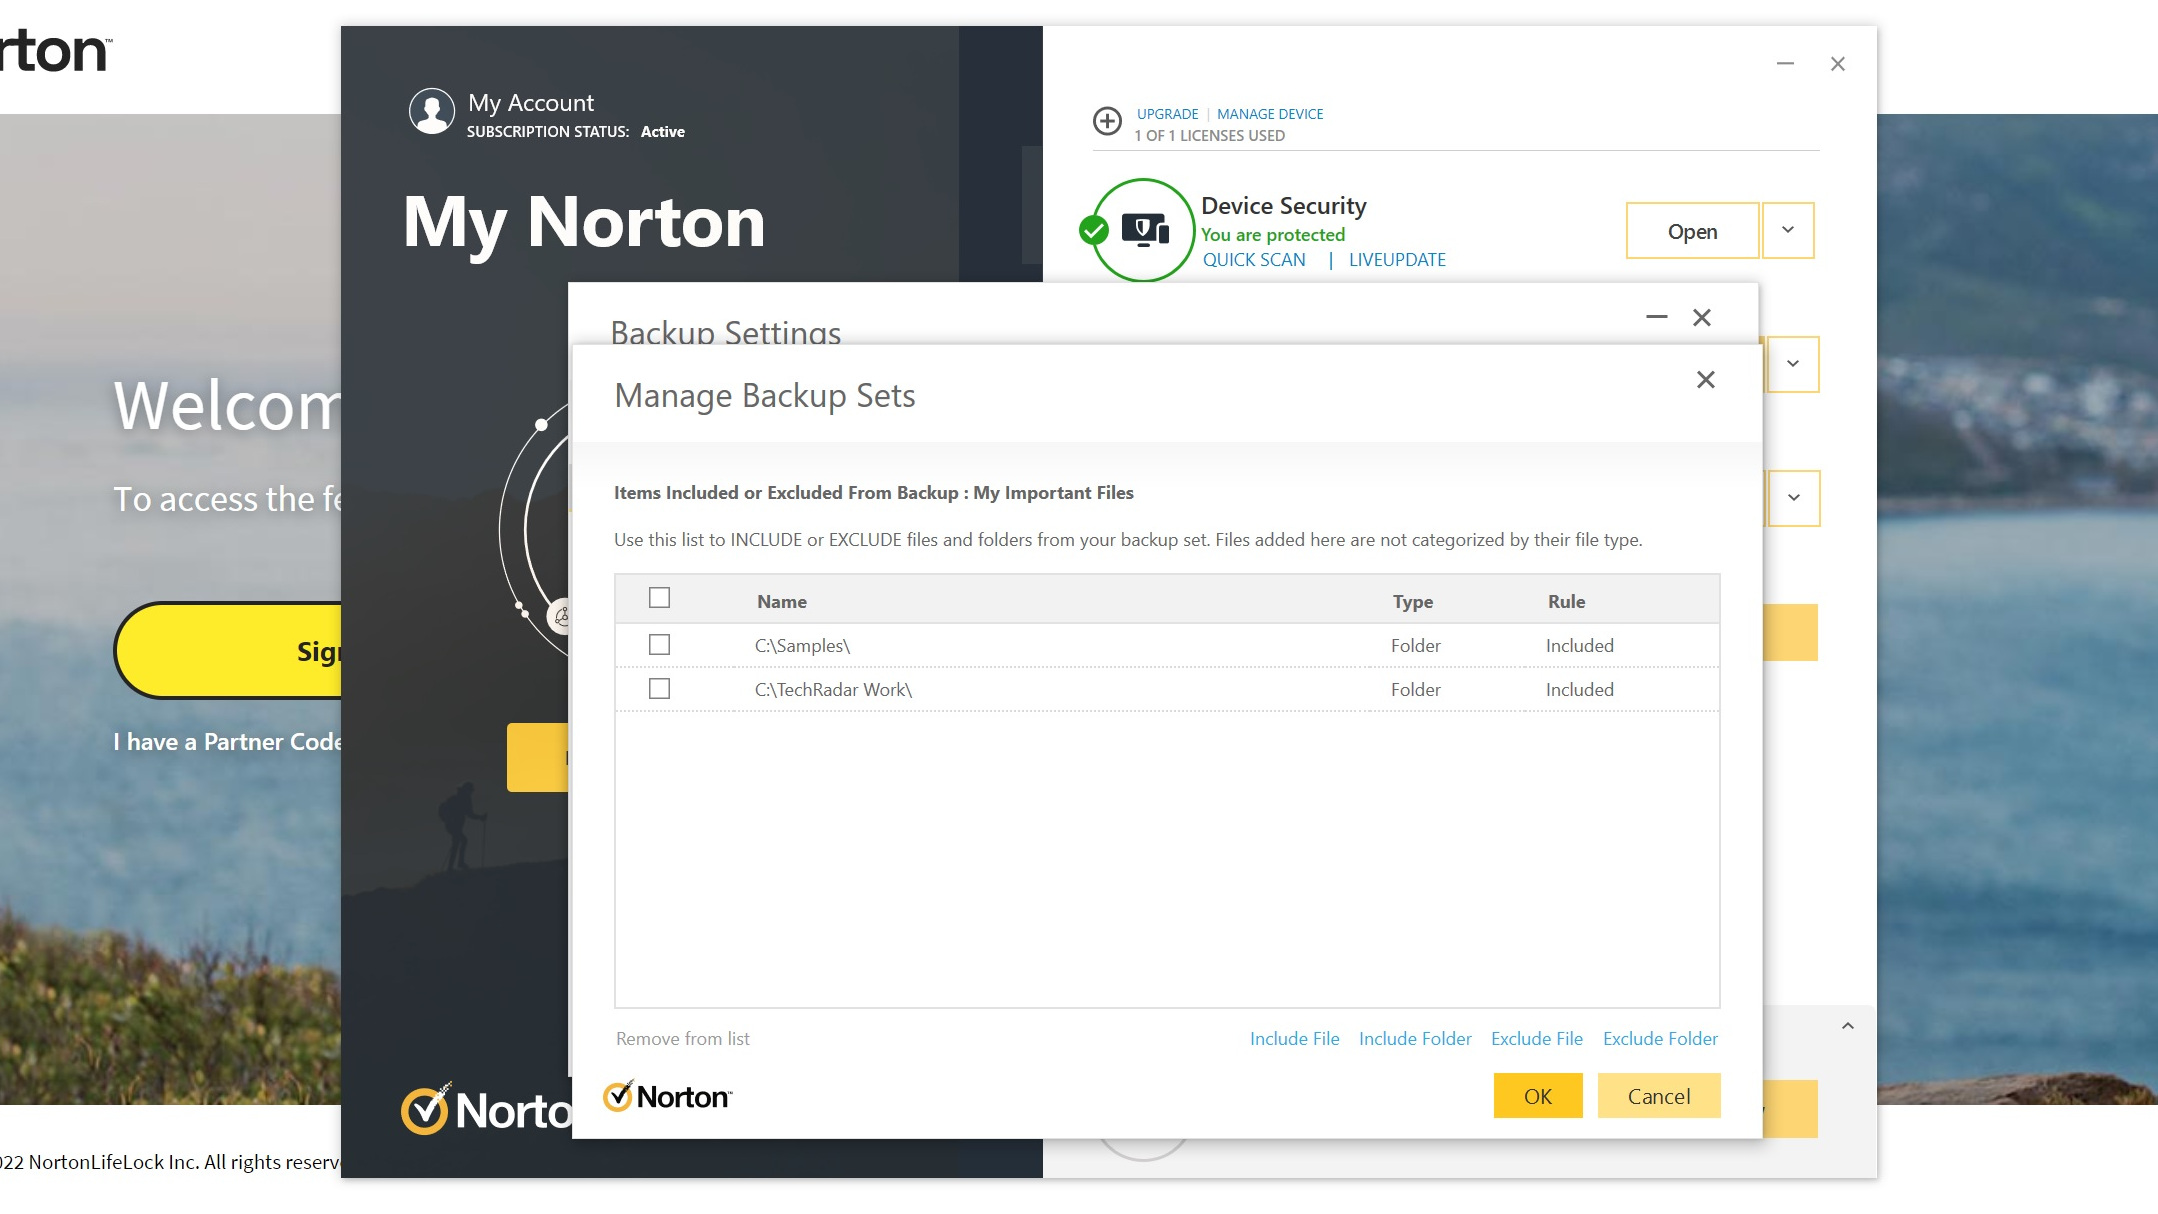
Using the ‘Include Folder’ function repeatedly, you can build up a list of folders you want backed up. If there are subfolders within a folder you’ve selected that you wish to exclude from the backup, simply use ‘Exclude Folder’ in the same way to remove them from the set.
Similarly, you can use ‘Include File’ and ‘Exclude File’ to incorporate or remove individual files from a backup set as required.
Once you’ve picked everything you need covered, click the yellow ‘OK’ button.
7. Choose file types
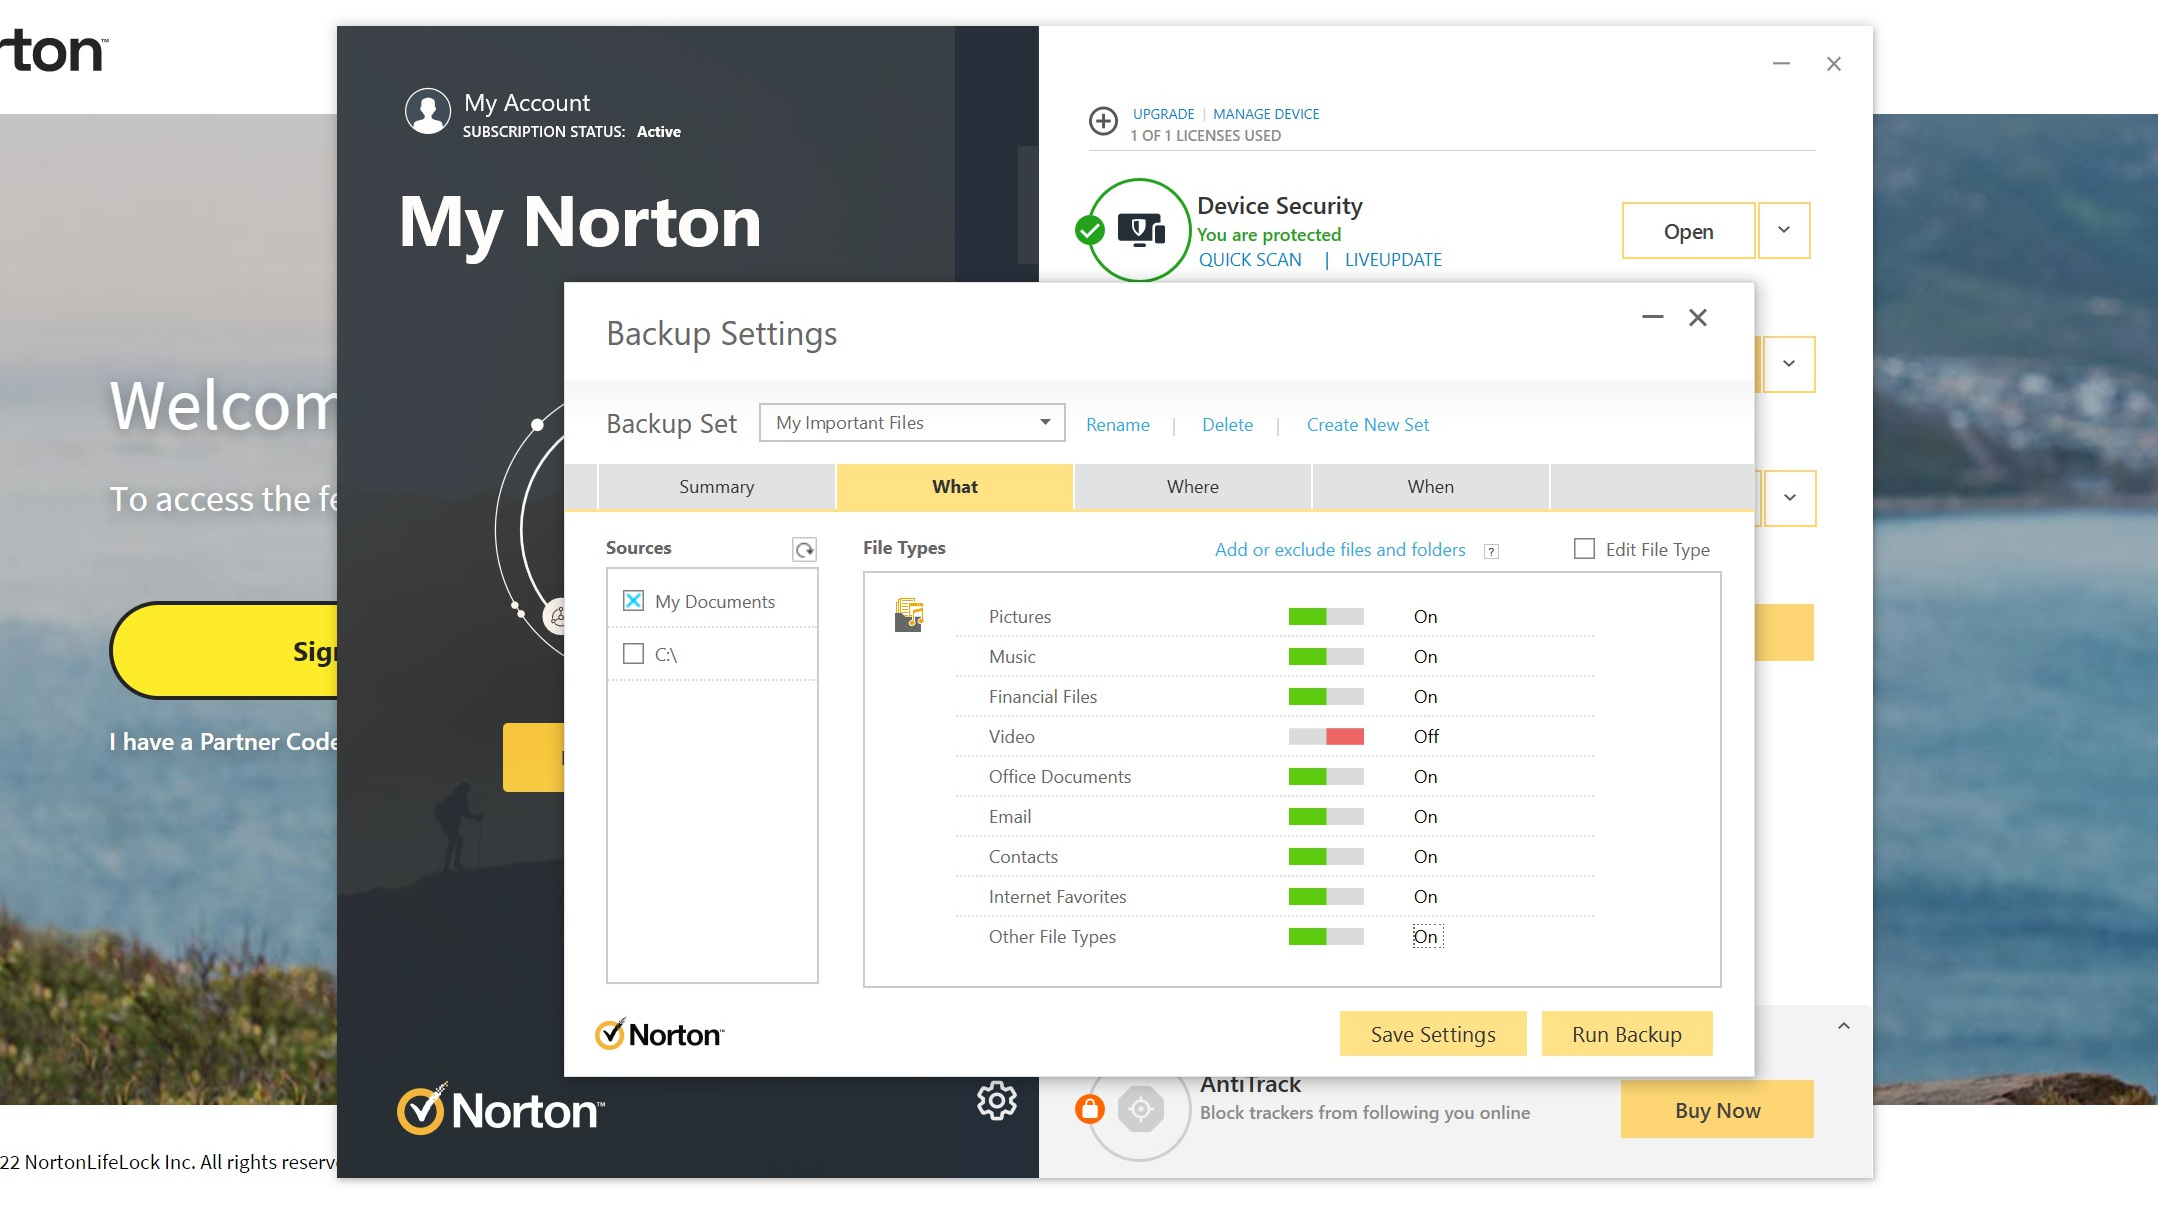
You’ll find yourself back at the Backup Settings menu, still in the What tab. Note that as well as the files you just picked out, My Documents is also selected here, by default, on the left-hand side under Sources. If you don’t want this included, uncheck it.
Now turn your attention to the File Types panel, and turn on the files you wish to be backed up. If you want everything, turn them all on (green). If you don’t want videos, say, because they’re so large, then leave that off. Note that you can also fine-tune these categories by ticking ‘Edit File Type’, which will pop up Configure buttons for each file type; just click on one and you’ll be able to choose, for example, which image file types are included in the backup (maybe you only want JPGs, and no giant RAW files, for example).
8. Select backup location
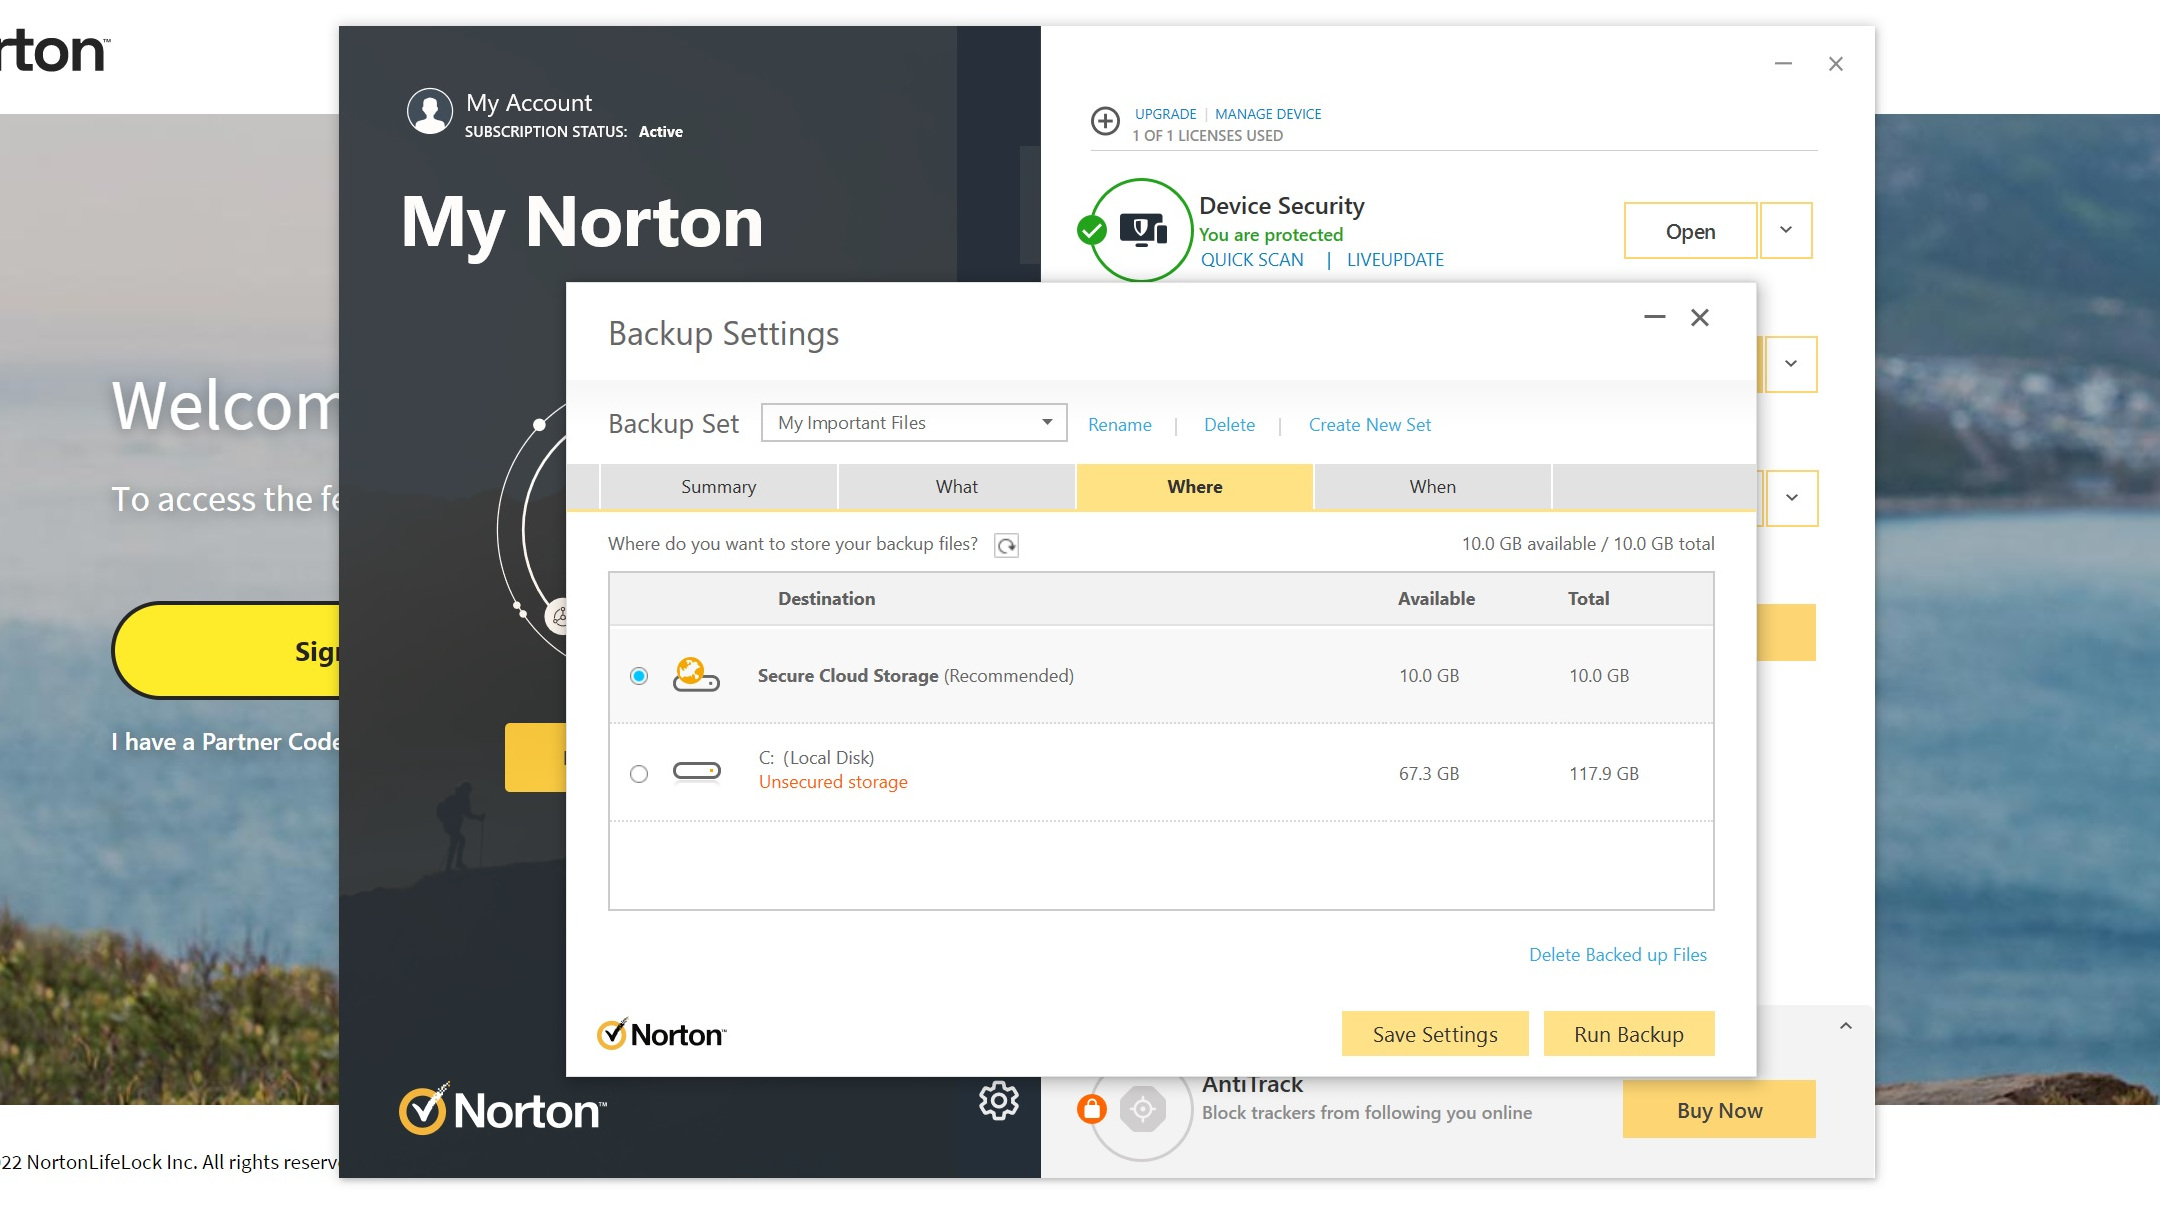
Next, click on the ‘Where’ tab. All you have to do here is make sure ‘Secure Cloud Storage’ is selected, which is Norton’s online storage locker (it should be by default).
You can also back up to an external drive here, instead, but Norton recommends its cloud facility as the most secure option. Indeed, you’ll also see your local drive here, but obviously there’s little point backing up to that, as if the drive fails, you’ll lose both the original files and their backups. Although that said, if a single rogue file goes corrupt, a backup on the same drive could still prove useful.
9. Choose backup schedule
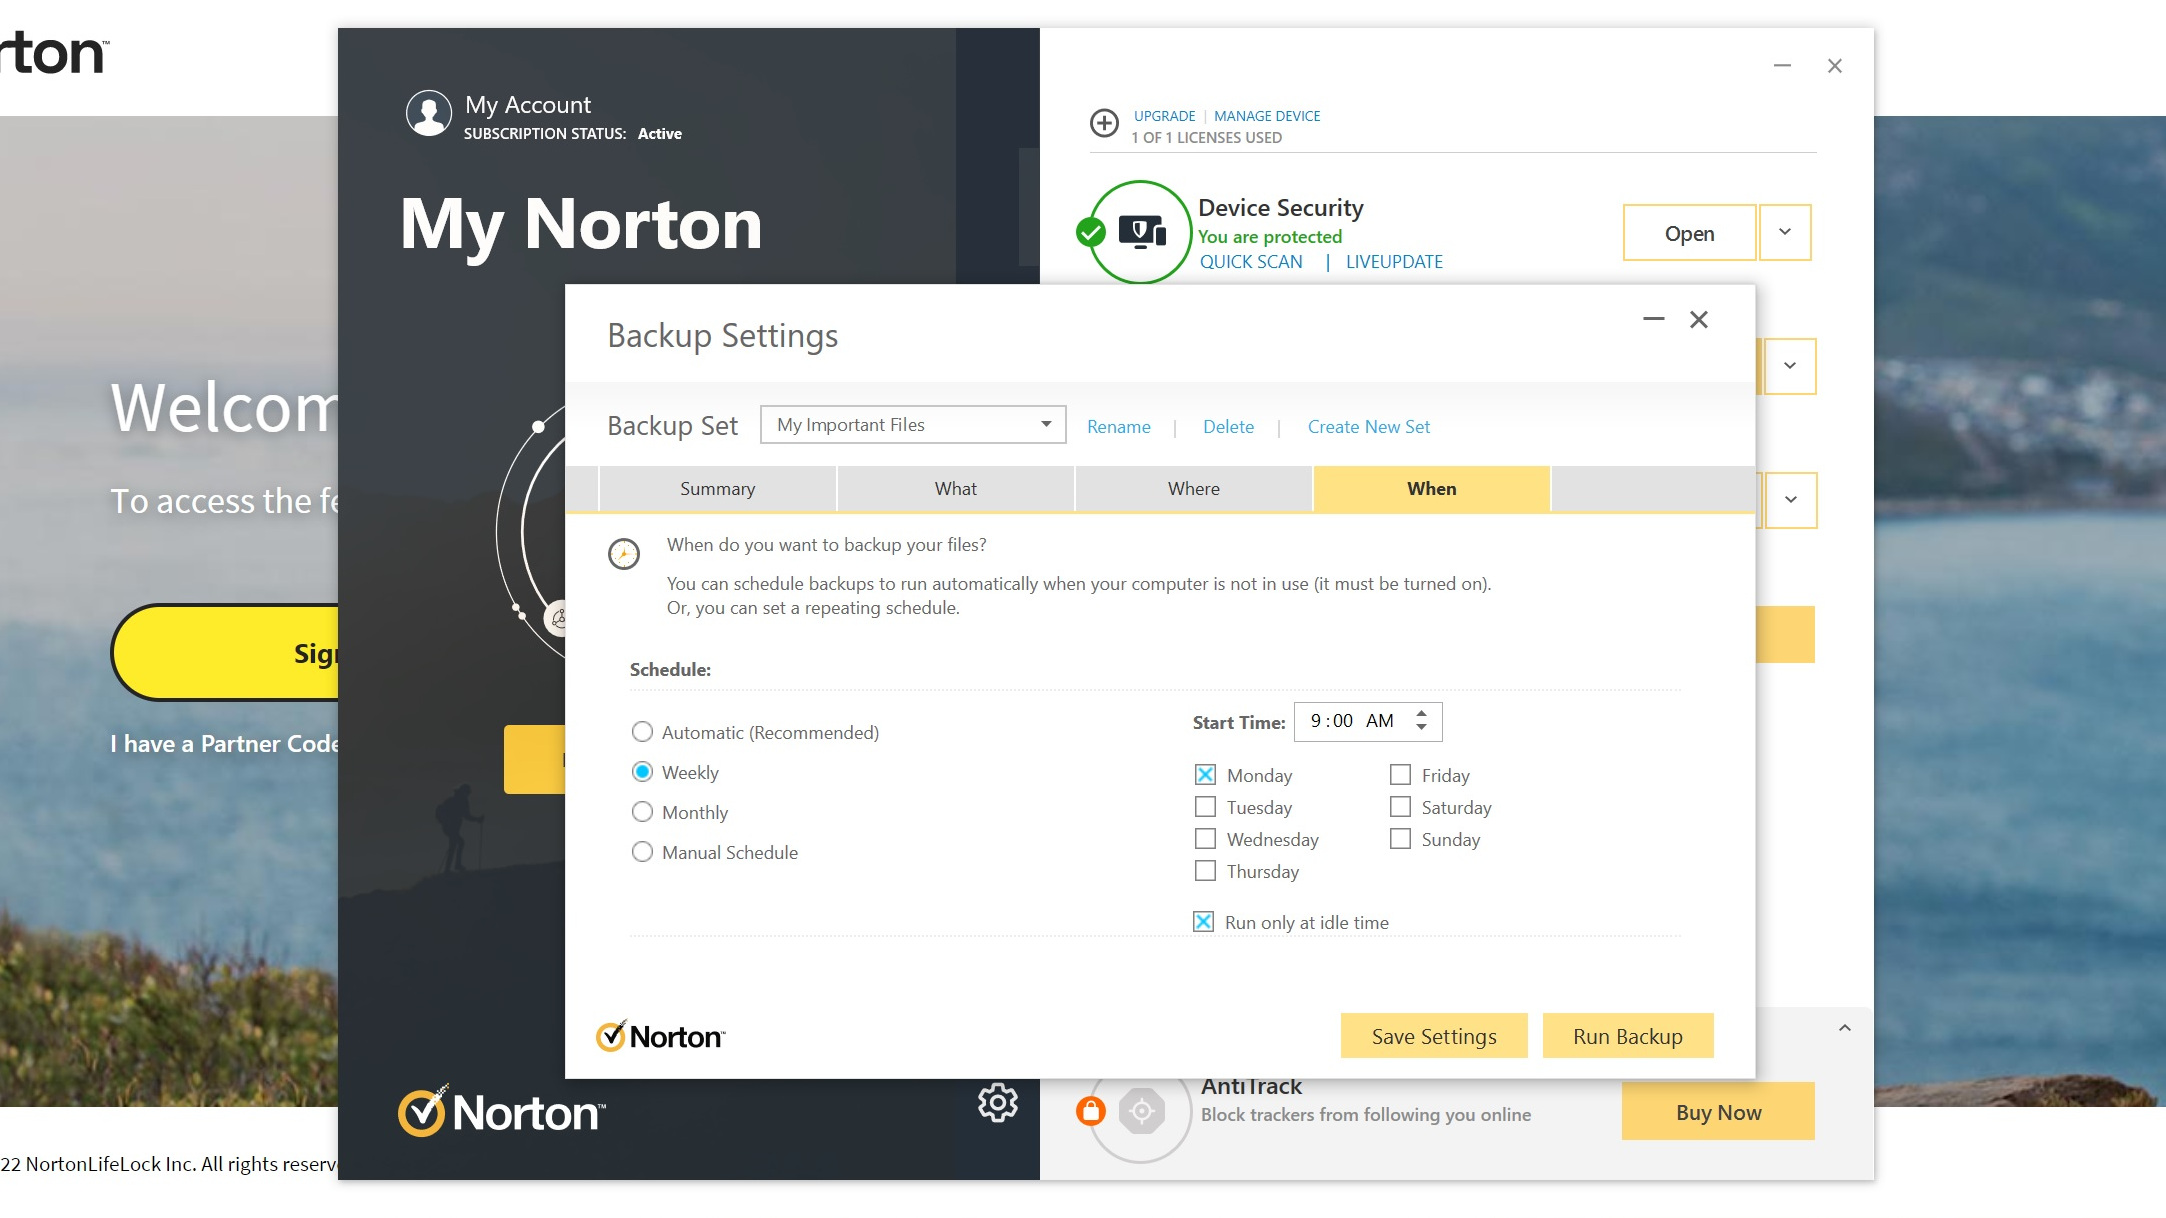
Now click on the final ‘When’ tab which pertains to backup scheduling. The default (and recommended) choice is ‘Automatic’ which means exactly what it says – Norton takes care of running backups regularly in the background, whenever your PC is not being used (but is turned on, obviously). This seems like the best bet to us, though if you prefer, you can click to have ‘Weekly’ or ‘Monthly’ backups with a specified start time or date. Or alternatively, choose ‘Manual’ if you only want backups run when you manually fire them up from Norton’s main menu (using ‘Run Backup’).
10. Save the configuration and run your backup
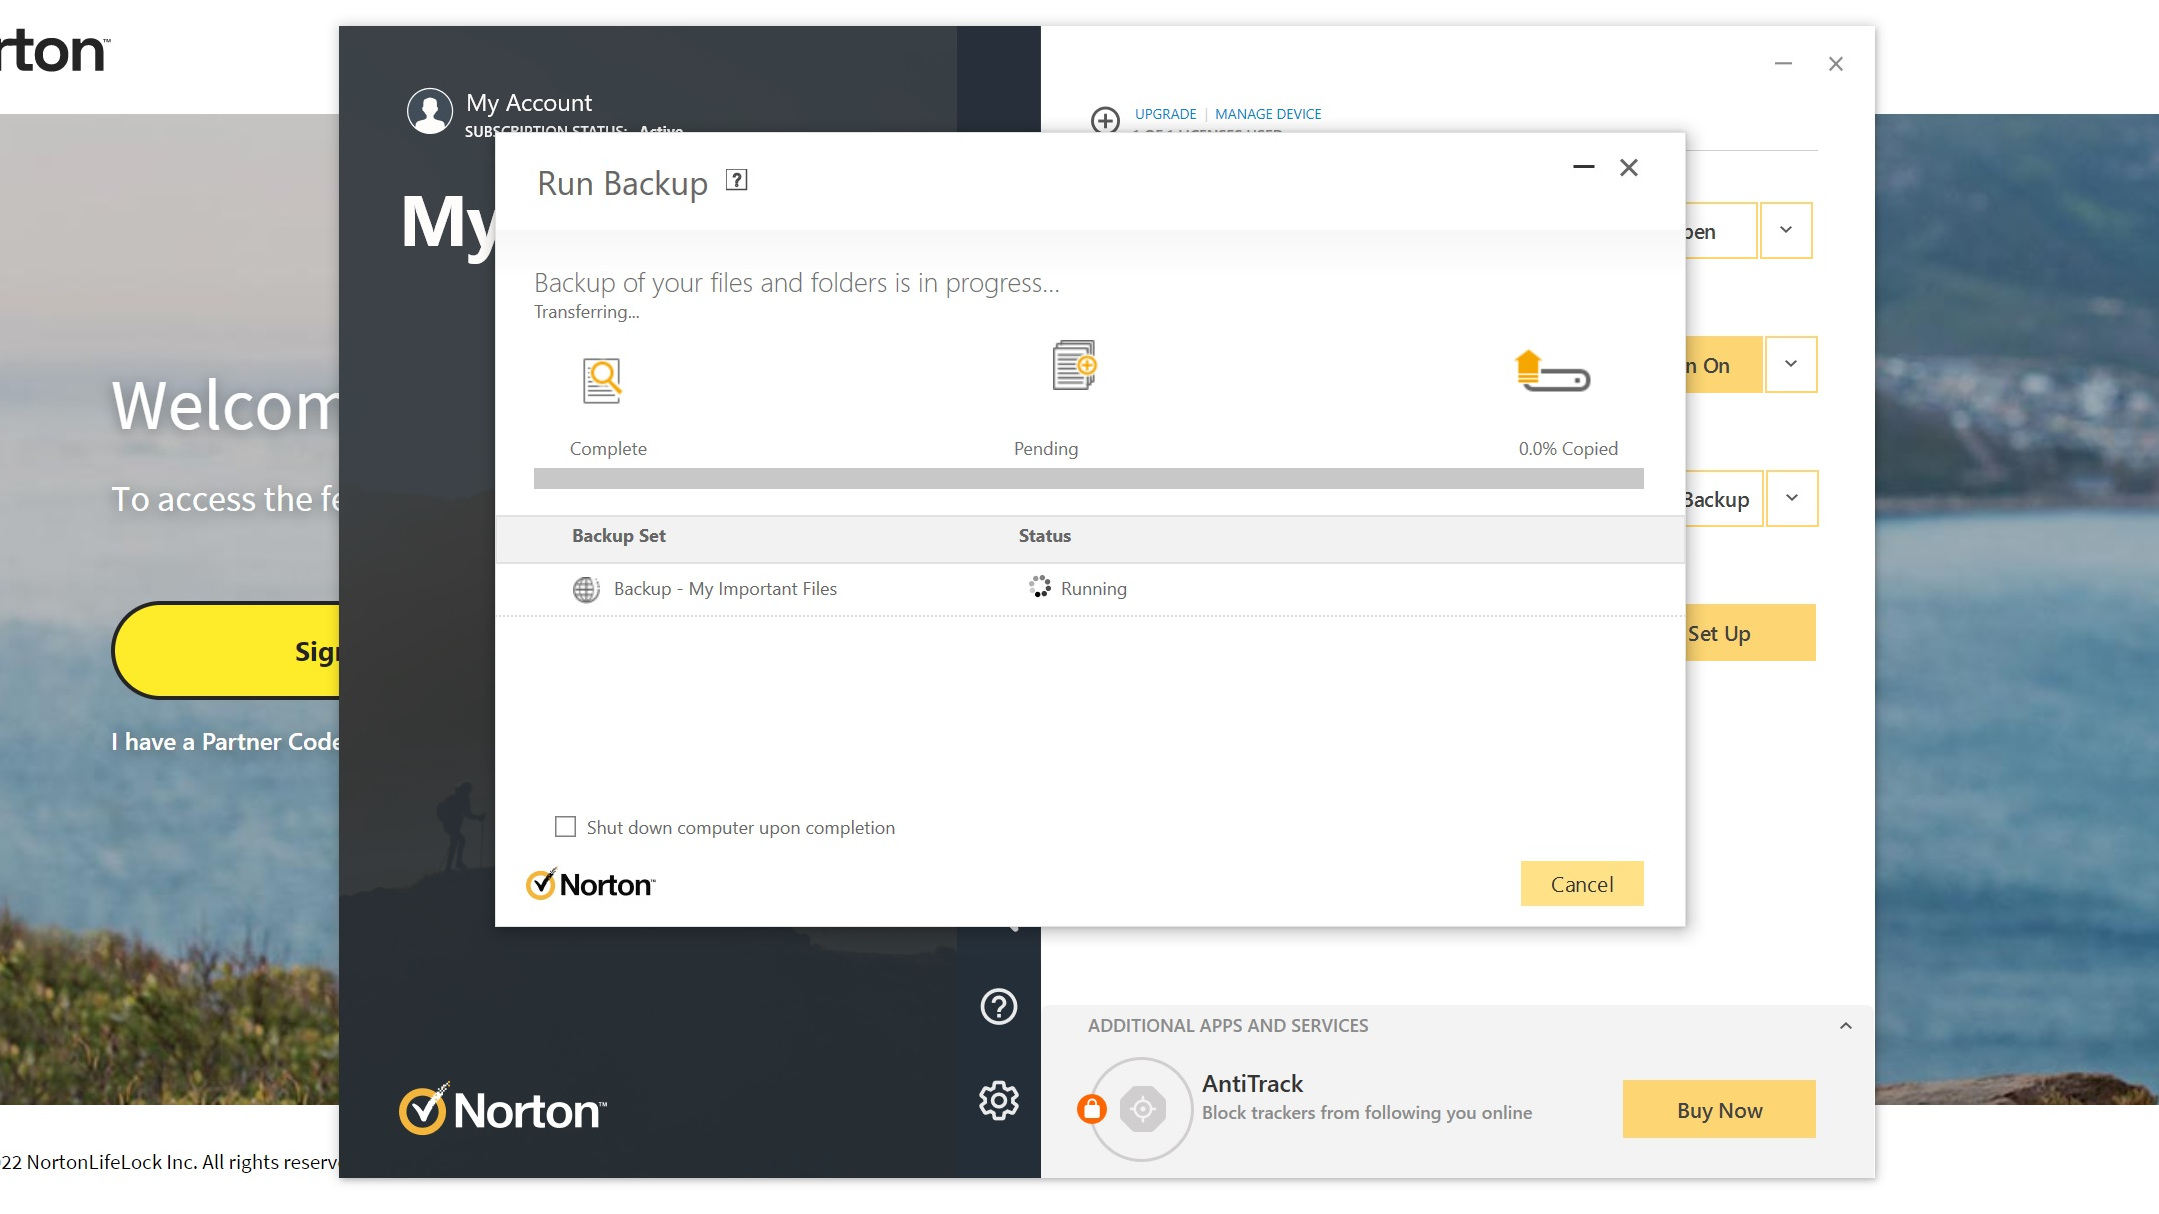
After choosing your schedule, that’s everything configured – click on the ‘Summary’ tab to go back there, and you’ll see all the settings you’ve just chosen neatly summed up. If you click on ‘Preview File List’ you’ll see a full list of all the files that will be backed up when you run the backup process. If you’re happy with everything, all that’s left to do is exactly that: first click on ‘Save Settings’ to save the configuration changes you just made, then click ‘Run Backup’.
Your backup will then be processed, and how long it takes depends on the size of the files being uploaded (and the speed of your internet connection, naturally). Once done, Norton will let you know that copying is complete, then you can click on ‘Close’ and you’ll be returned to the main menu.
11. All done!
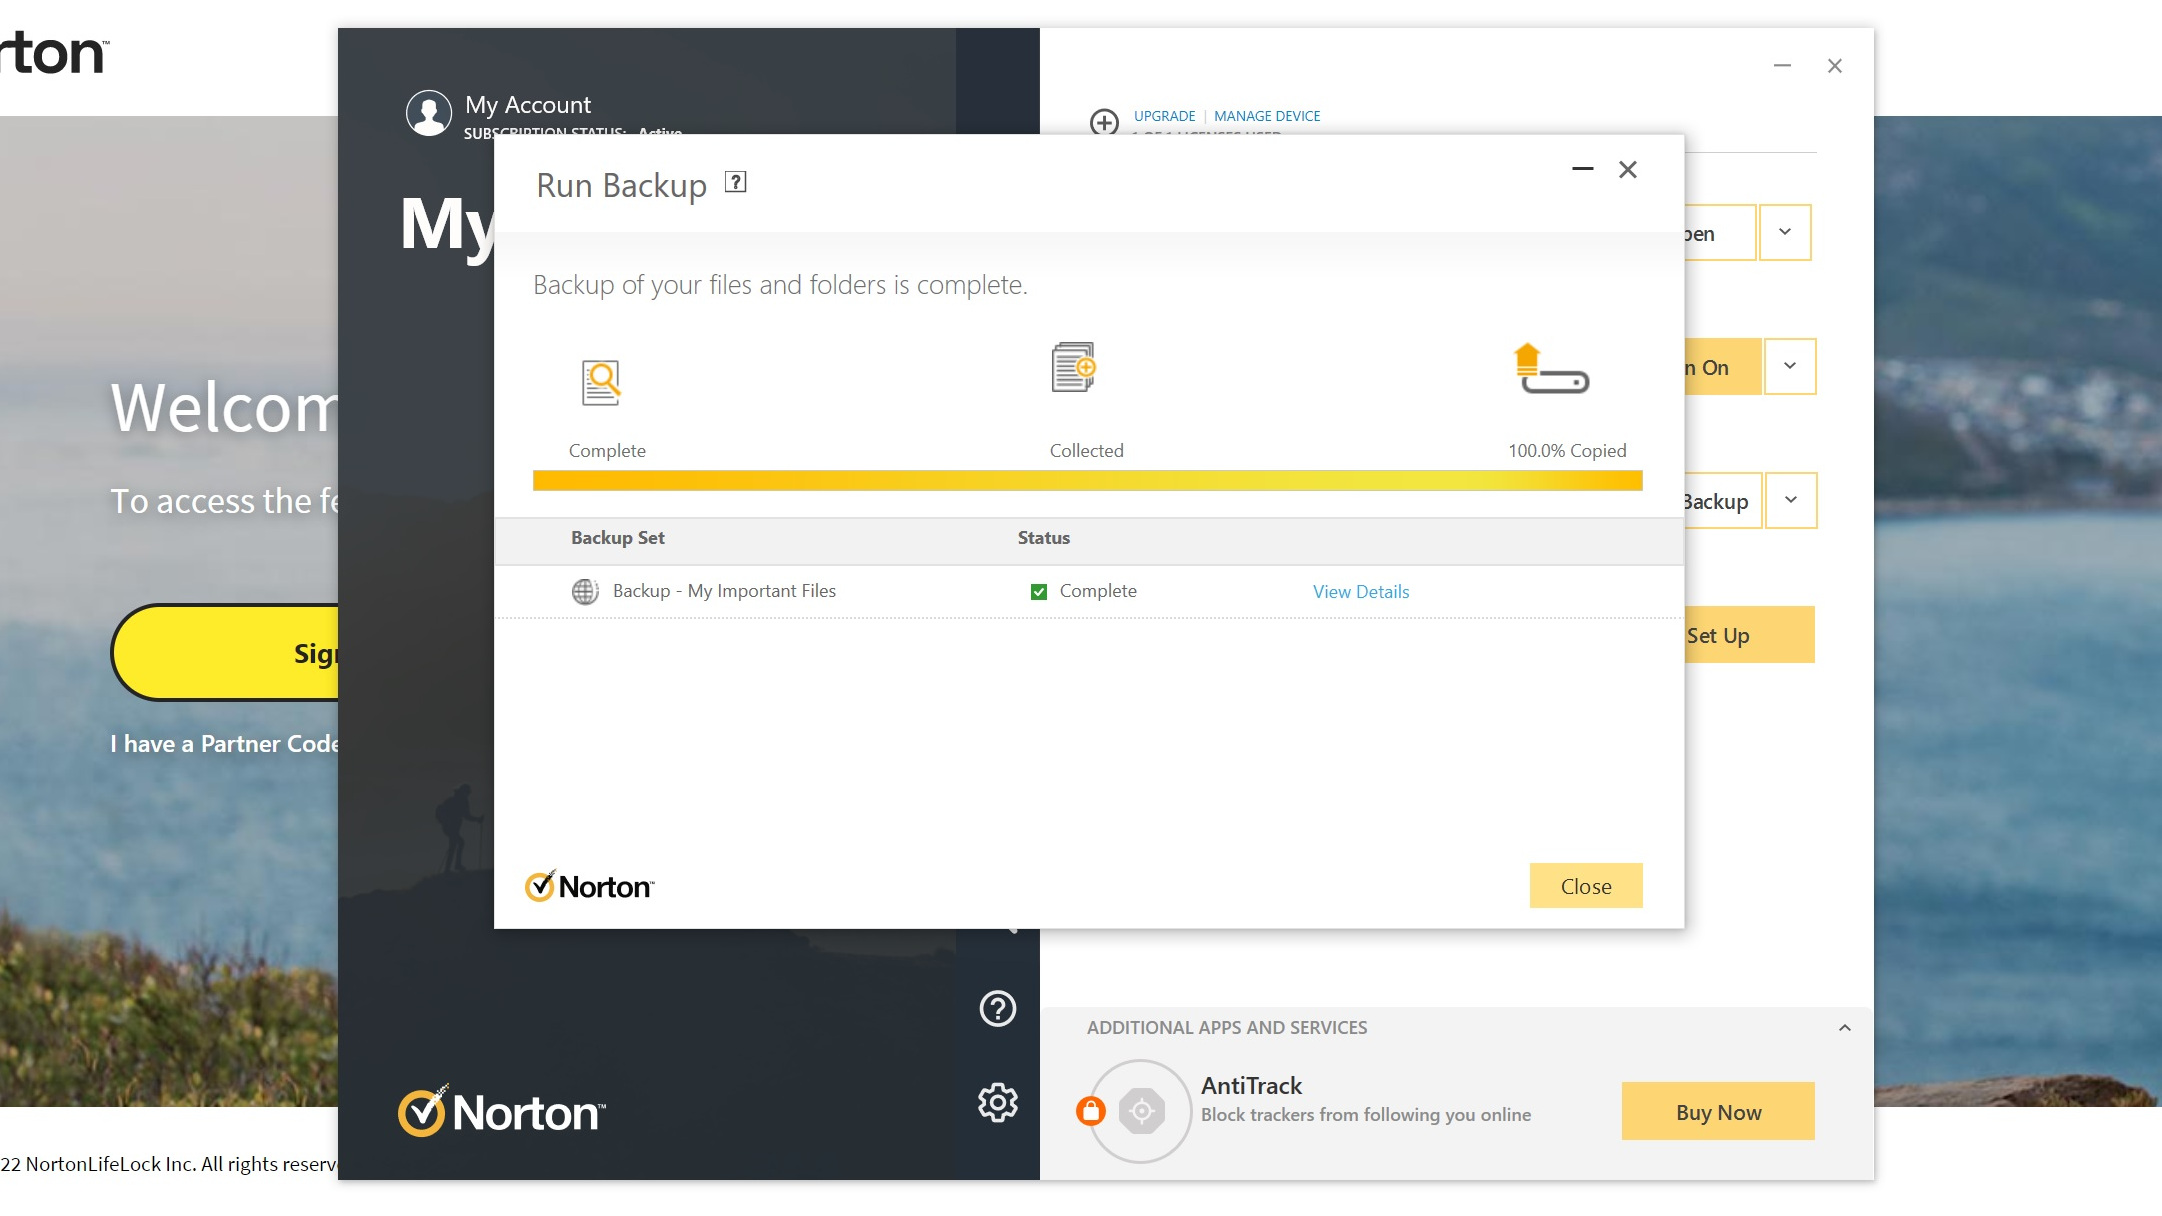
Congratulations – your precious data is now backed up. If you’ve chosen scheduled backups, they will occur automatically going forward, but should you ever wish to change anything, you can click ‘Manage Backup Sets’ from the main menu and tweak the configuration, or change between different Backup Sets.
To switch Sets, just use the dropdown menu at the top of the Backup Settings panel, and choose the name of the backup you want to run. Most folks will be fine setting up just the one backup configuration, though, and having that run indefinitely, maybe tweaking it occasionally as required.
- Read more: How to choose the best antivirus for you
- Our definitive list of today's best antivirus software
- More protection for not much more money - grab the best cheap VPN
Darren is a freelancer writing news and features for TechRadar (and occasionally T3) across a broad range of computing topics including CPUs, GPUs, various other hardware, VPNs, antivirus and more. He has written about tech for the best part of three decades, and writes books in his spare time (his debut novel - 'I Know What You Did Last Supper' - was published by Hachette UK in 2013).