How to choose a security protocol in the NordVPN Windows and Android apps
It’s not difficult to tailor your VPN experience to your needs
Sign up for breaking news, reviews, opinion, top tech deals, and more.
You are now subscribed
Your newsletter sign-up was successful
NordVPN is a Virtual Private Network (VPN) service that offers benefits such as military-grade encryption, double VPN technology (for extra security), and CyberSec, a feature that automatically blocks suspicious websites to help prevent malware or other threats infecting your device.
NordVPN recommends two different security protocols that provide strong VPN encryption between your device and the server you have connected to. These two security protocols are IKEv2/IPsec and OpenVPN. So what are these exactly?
IKEv2/IPsec
This security protocol encrypts and secures the user’s traffic by employing high-level cryptographic algorithms. IKEv2/IPsec is set as the default in the NordVPN apps for iOS and macOS.
OpenVPN
This provides online security, reliability, and a fast VPN experience, although exactly what you get depends on how you set it up, as OpenVPN can be used with two different protocols: TCP and UDP.
TCP provides better connection stability but it usually reduces speeds. It is generally used for web browsing. UDP provides better performance and is more for the likes of streaming services or downloading, but has a greater risk of instability.
The bottom line is that there’s no difference in security between the two.
OpenVPN supports a number of strong encryption algorithms and ciphers. It is currently used by default for the Windows and Android NordVPN apps. If you want to set up the OpenVPN protocol manually, you can easily do that by using the OpenVPN open source software, which you can download here.
As OpenVPN is used by default in NordVPN’s Windows and Android apps, this step-by-step guide will show you how to choose between the TCP and UDP protocols in your NordVPN Windows app, and how to enable the TCP protocol in your NordVPN Android app.
- Check out our list of the best VPN
For Windows
1. Open the app
Locate and open your NordVPN Windows app.
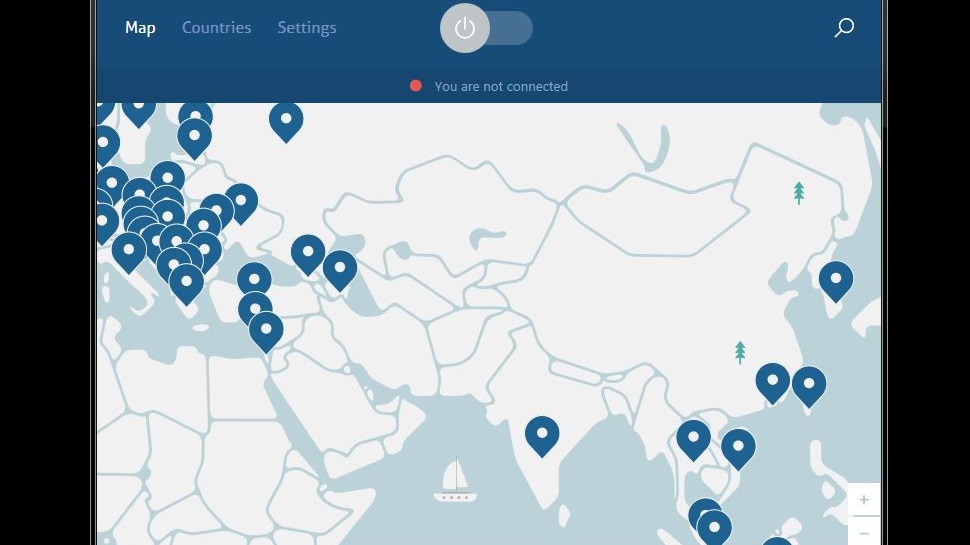
2. Select Settings
Click on the word Settings in the top menu of your NordVPN app, next to the Countries option.
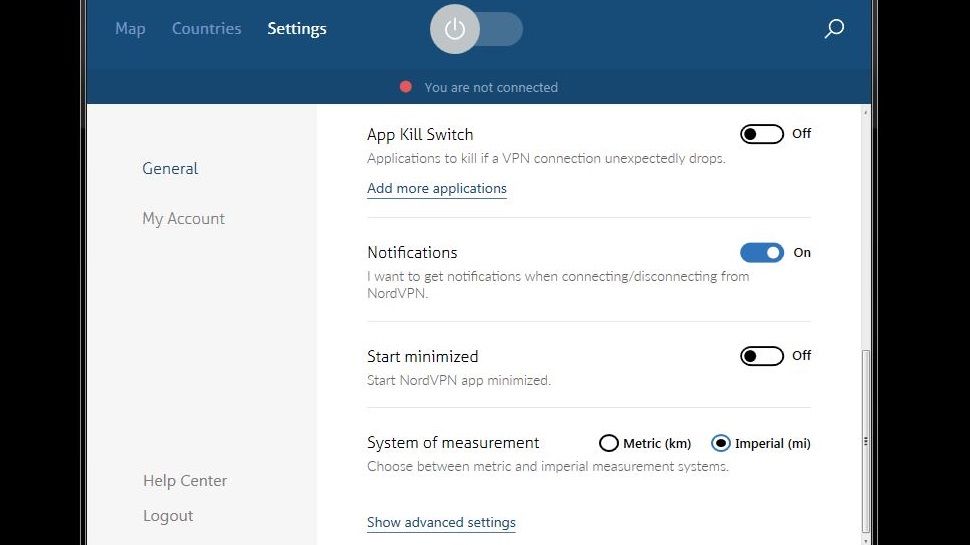
3. Access advanced settings
Click on Show advanced settings. A warning will pop up, cautioning you about the consequences of messing with the advanced settings. Click the ‘I know what I am doing’ button.
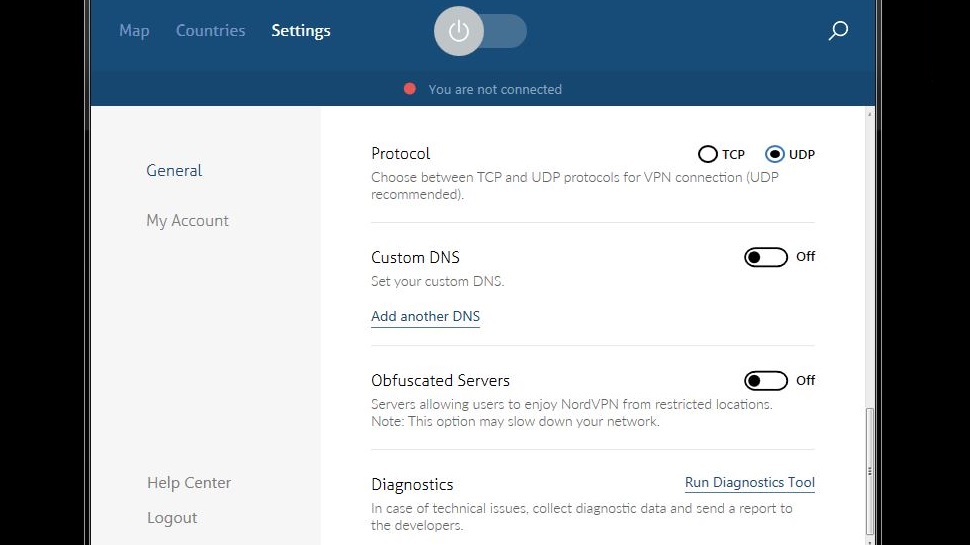
4. Select the protocol
You will see a number of additional options otherwise hidden in general Settings. The first option is choosing between the TCP and UDP protocols. Select which protocol you want based on your planned activities online (TCP for browsing, UDP for streaming or downloading).
5. Connect to a server
Connect to the server of your choice, and that’s it. You can securely continue your online activities with your NordVPN Windows app.
For Android
1. Open the app
Locate and open your NordVPN Android app.
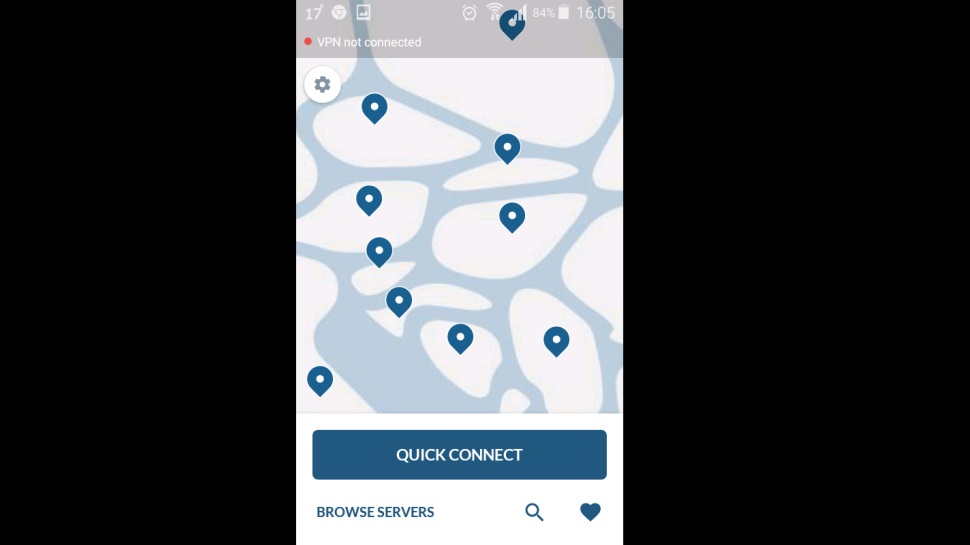
2. Go to Settings
Tap on the Settings icon in the top-left corner of your app (the gear/cog symbol).
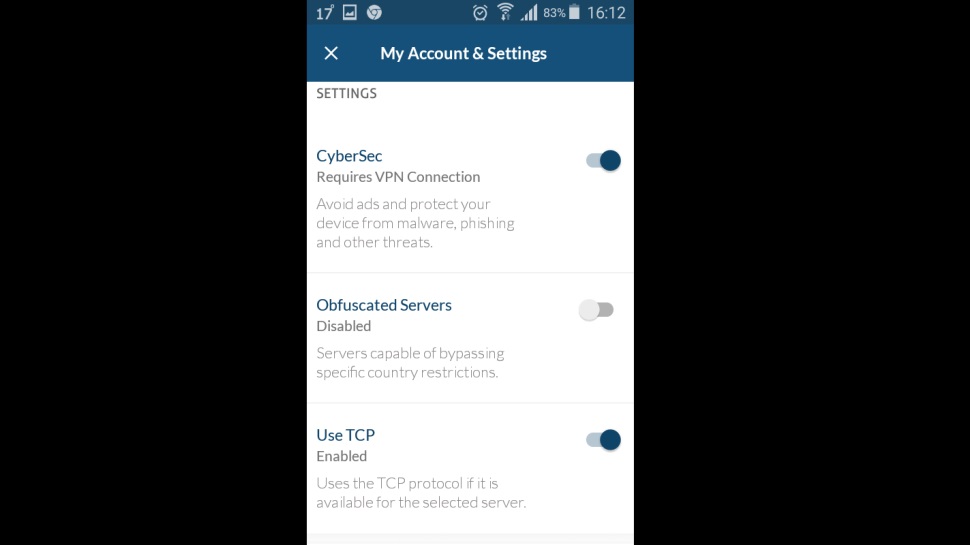
3. Turn on the TCP protocol
Tapping Settings will open a list of options, among which you’ll see Use TCP (this option is automatically disabled) and a toggle switch next to it. Turn the toggle switch on. You have now enabled the TCP protocol on your Android device.
4. Connect to a server
Now you just need to select a server or have one assigned automatically, and you’re all set. You can now continue surfing safely with your NordVPN Android app.
Sign up to the TechRadar Pro newsletter to get all the top news, opinion, features and guidance your business needs to succeed!

Désiré has been musing and writing about technology during a career spanning four decades. He dabbled in website builders and web hosting when DHTML and frames were in vogue and started narrating about the impact of technology on society just before the start of the Y2K hysteria at the turn of the last millennium.