How to configure Windows 10 to protect your privacy
Make with the 'Off' switches
Sign up for breaking news, reviews, opinion, top tech deals, and more.
You are now subscribed
Your newsletter sign-up was successful
Windows 10 is built to share data, but by default it does a seriously lousy job at privacy. If you think about it, on any of our personal Windows computers there's heaps of personal data, including our account logins, our images, and financial data that we would prefer to keep private, and away from prying eyes.
No wonder there are ongoing issues on what data Windows 10 actually collects, and with Microsoft's latest commitment to pare this down to “the basic level that is necessary to keep your Windows 10 devices secure and up to date” according to Terry Myerson, EVP of the Windows and Devices Group.
However, at the initial setup of that shiny new PC, as we eagerly tick the boxes to accept the license agreements and get on to the fun stuff, most of us don't realize the multiple elements of privacy that we're totally giving away. Of course, Windows makes it sound all routine, such as 'Don’t you want Cortana to do her best work?' However, fret not, as Windows is a quite flexible and configurable OS, and can be set up to protect your privacy in lots of ways.
Privacy dashboard
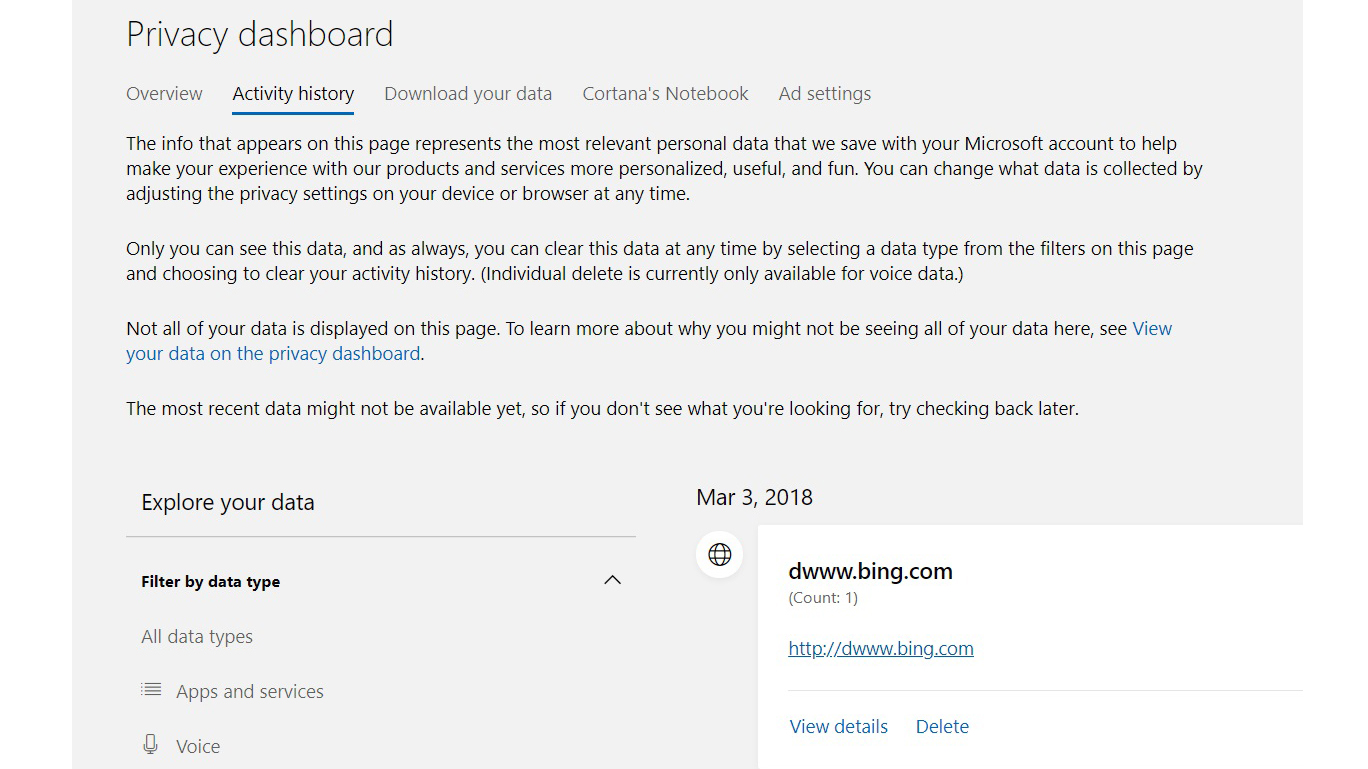
For those who are curious as to what data Microsoft is collecting, head on over to the dashboard. Here, you can see the type of data collected, such as locations, search results, and browsing. If this does look an awful lot like Microsoft’s version of ‘Big Brother,’ keep reading to see how you can limit its reach.
Reload the OS
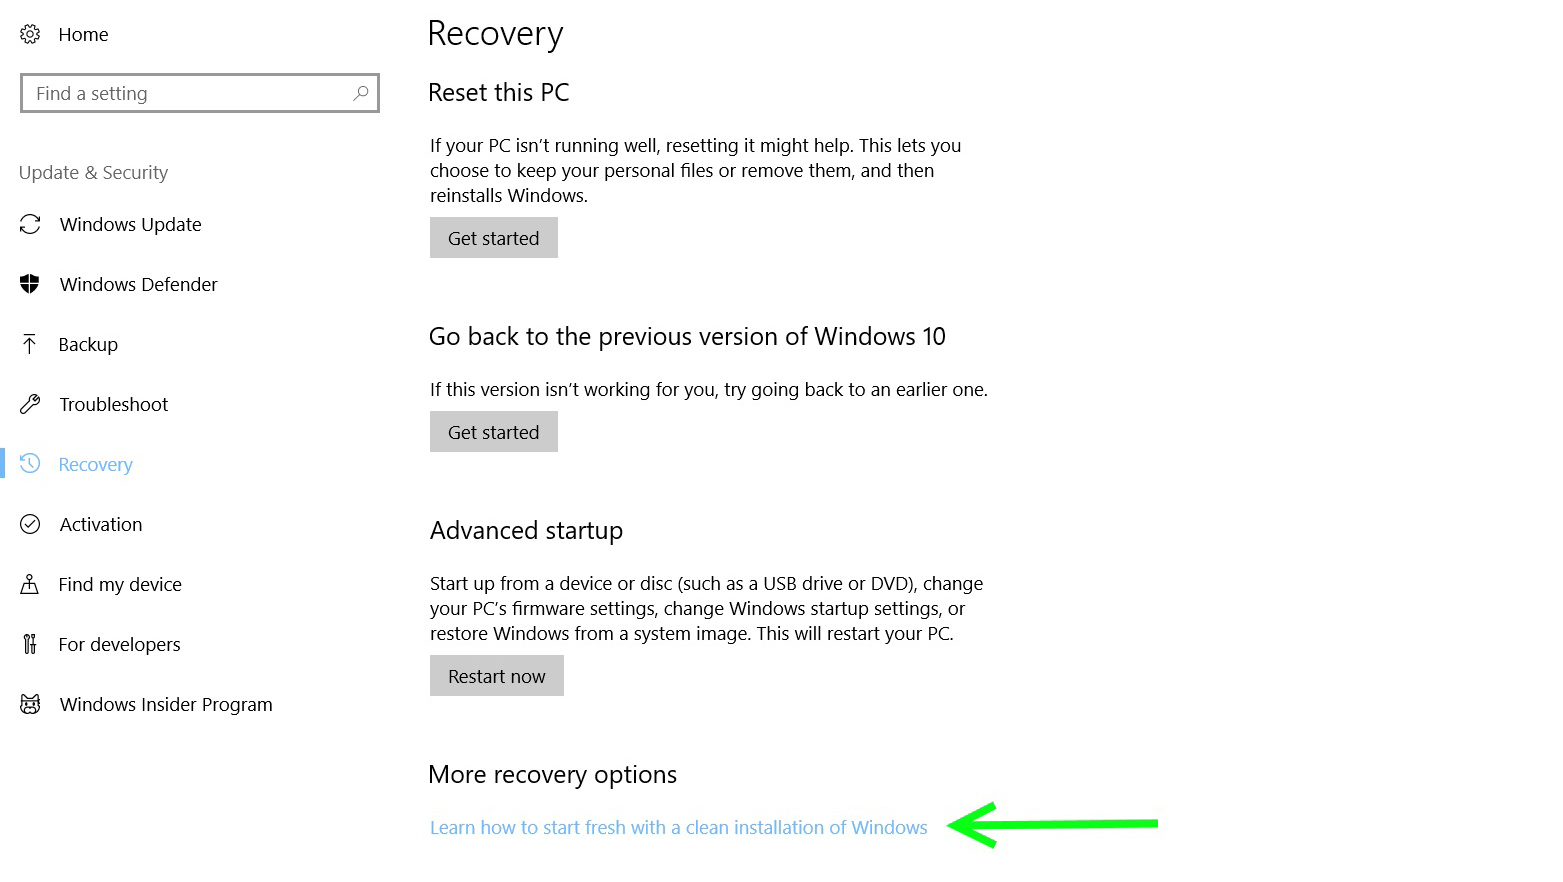
If the computer is being used, a good first step is to reload the OS. All users over time install software, and this leads to additional security vulnerabilities, whether from standalone programs, or browser plugins. Even with a brand new PC, it's good practice to start with a fresh OS, as the example of Superfish adware that came preinstalled on Lenovo PC’s shows, where hijacked browsers were used to place third-party ads based on Google searches, or the less ominous but still disturbing Dell laptop eDellRoot software vulnerability.
Therefore, whether your computer is brand spanking new, or you've been using it for a while, a good security practice is to take off the data you need, totally wipe the machine, and start with a clean reinstall. Note this should not be confused with a Windows restore, nor a rollback that goes back to an earlier version, but does not provide a totally fresh start.
Thankfully, Windows 10 makes it easier than on previous versions of Windows to do a reinstall from within the OS, so be sure to check out TechRadar’s reinstallation guide for simple directions for the process.
Sign up to the TechRadar Pro newsletter to get all the top news, opinion, features and guidance your business needs to succeed!
Cortana
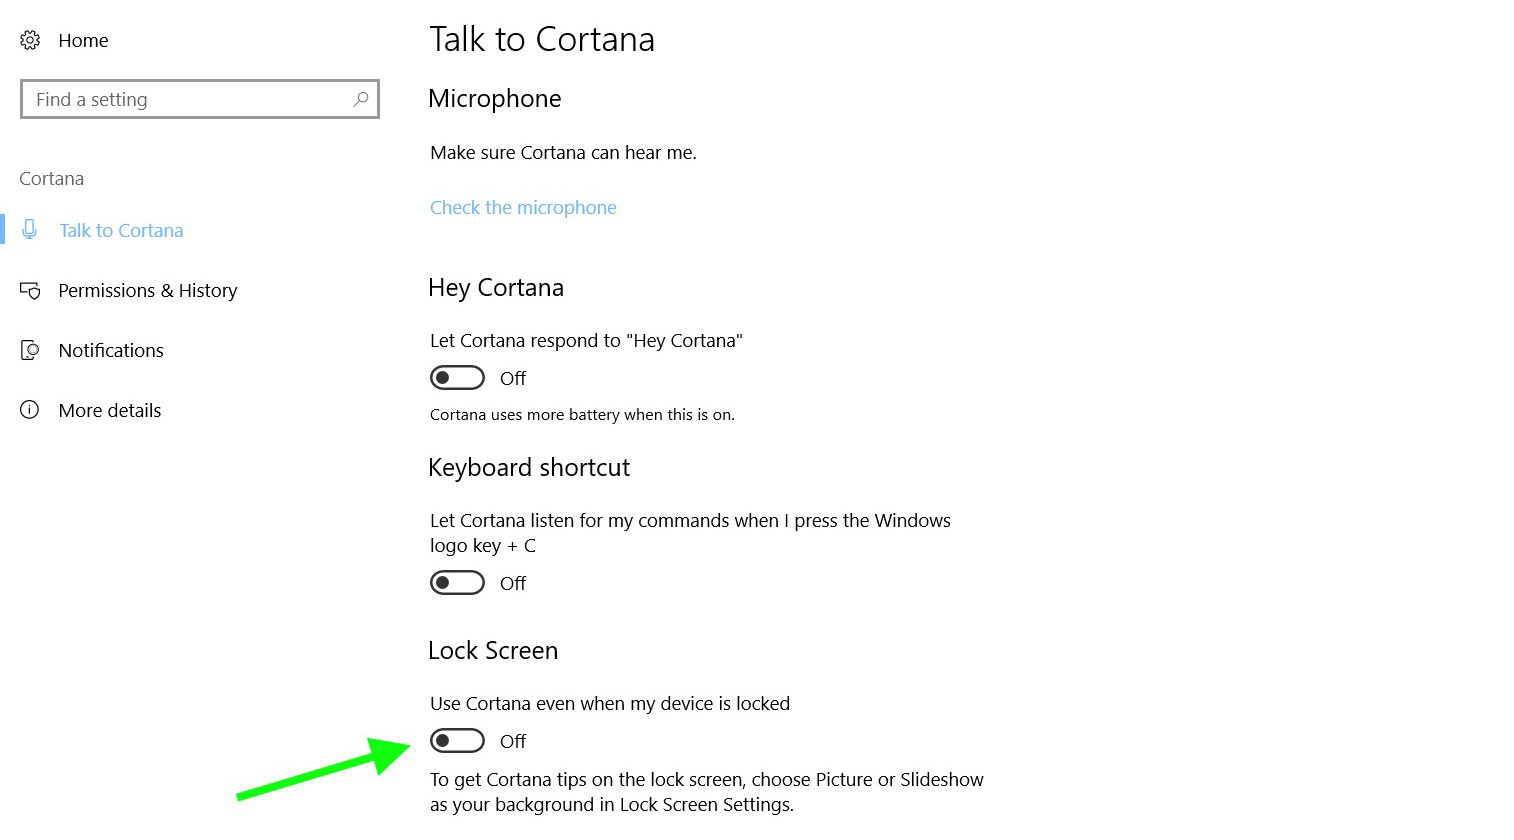
Next, turn your attention to Microsoft’s digital assistant, Cortana. While a personal assistant has certain use-case scenarios, such as when you're driving, it's less essential for users on their Windows computer with a keyboard and mouse at their fingertips. And a recent exploit demonstrated that Cortana can be used to open certain websites from the lock screen to hack the computer.
Therefore, from a privacy standpoint, it's better for Cortana to know less. Head on over to Windows settings, and the Cortana section. On the first Cortana screen, under 'Talk to Cortana' we disabled the 'Hey Cortana' feature, the keyboard shortcut, and allowing Cortana to work with the device locked, which should protect from the exploit described above.
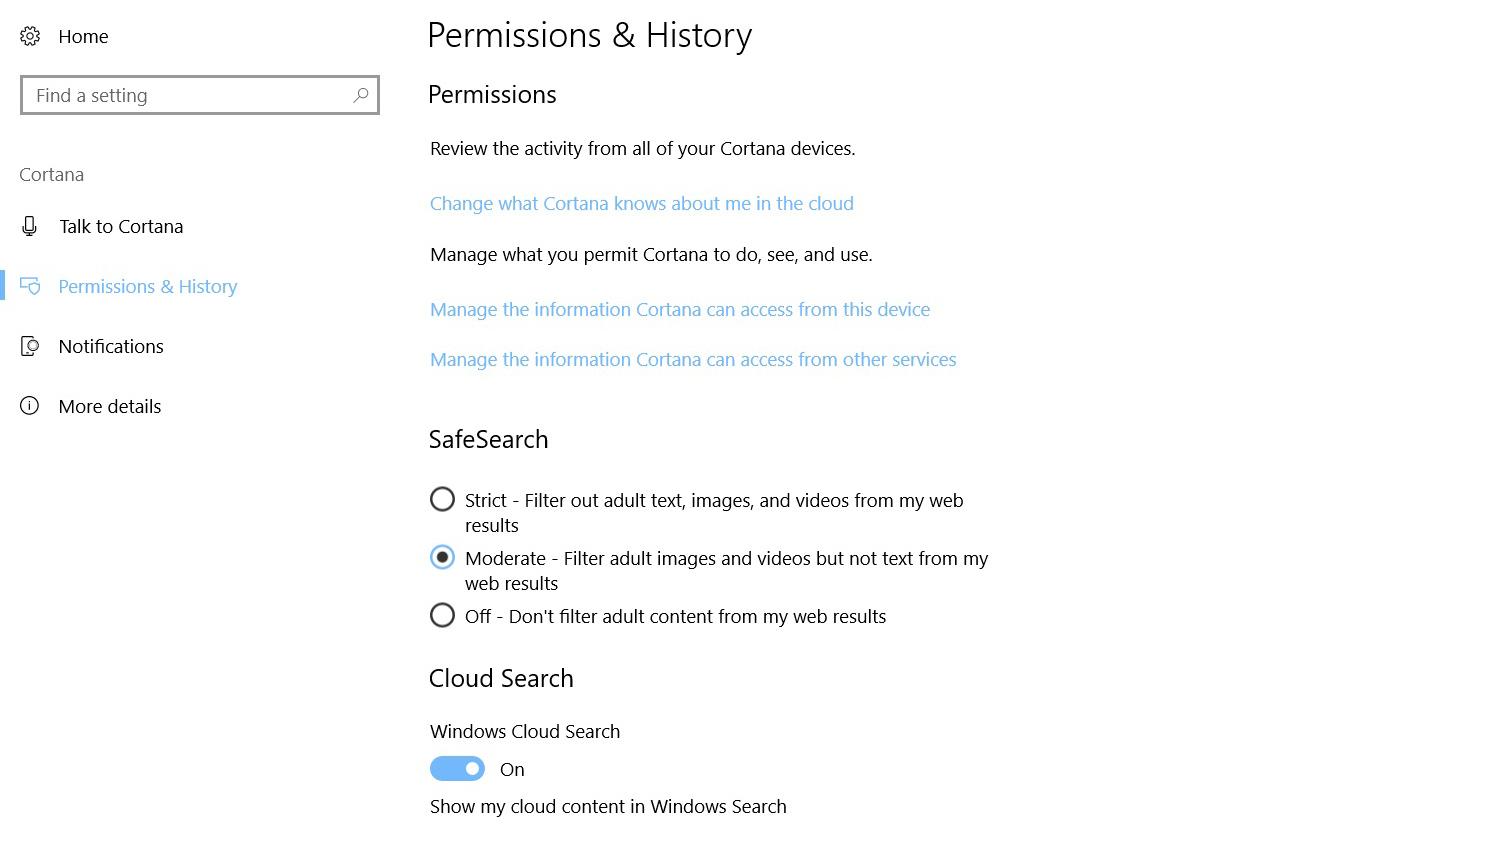
Next, still in the Cortana section, we headed over to ‘Permissions & History’. Back when we had a Windows Phone (yes, it pains us to admit that today, these permissions made more sense than now. Here you can clear what data Cortana has collected, and adjust the search results. You can also lock down access to what's in the Cloud account, the device’s history, and if you scroll all the way at the bottom of the screen (not shown in the screenshot above), you can prevent Cortana from collecting data from your personal search history.
General privacy settings
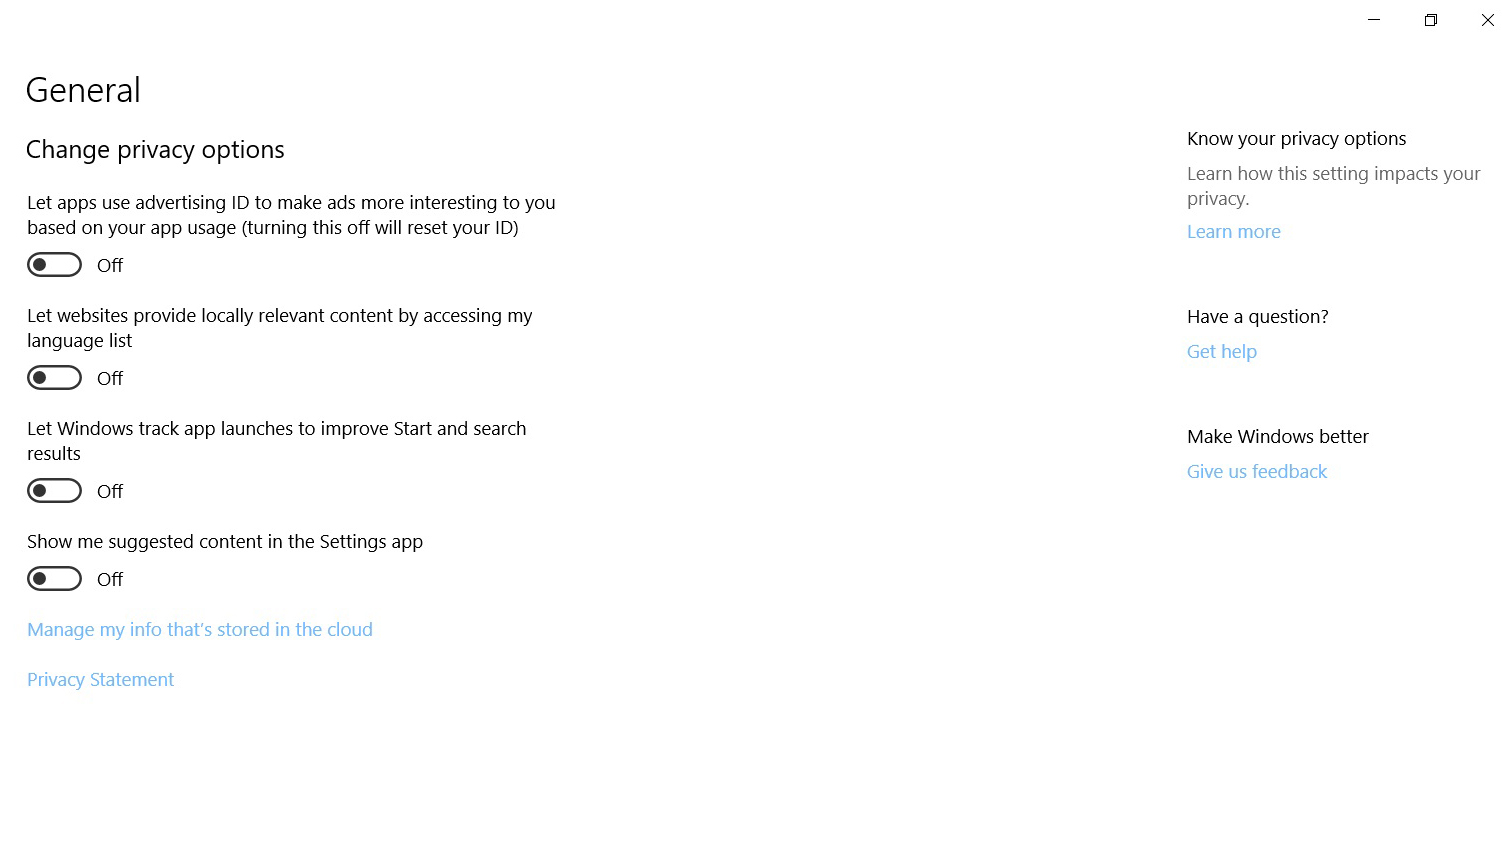
While still in the settings, we left the Cortana section and moved to Privacy. Under the ‘General’ subheading, there are several toggles. Perhaps the creepiest of these is the one at the top, that allows apps to use ‘advertising ID’ to track you, and then send you ads based on your recent activity, rather than generic ads for that site. Ever wondered why after you look at a new car site, how then you get bombarded with ads for cars – well, now you know. We set all the options here to off.
Camera and microphone
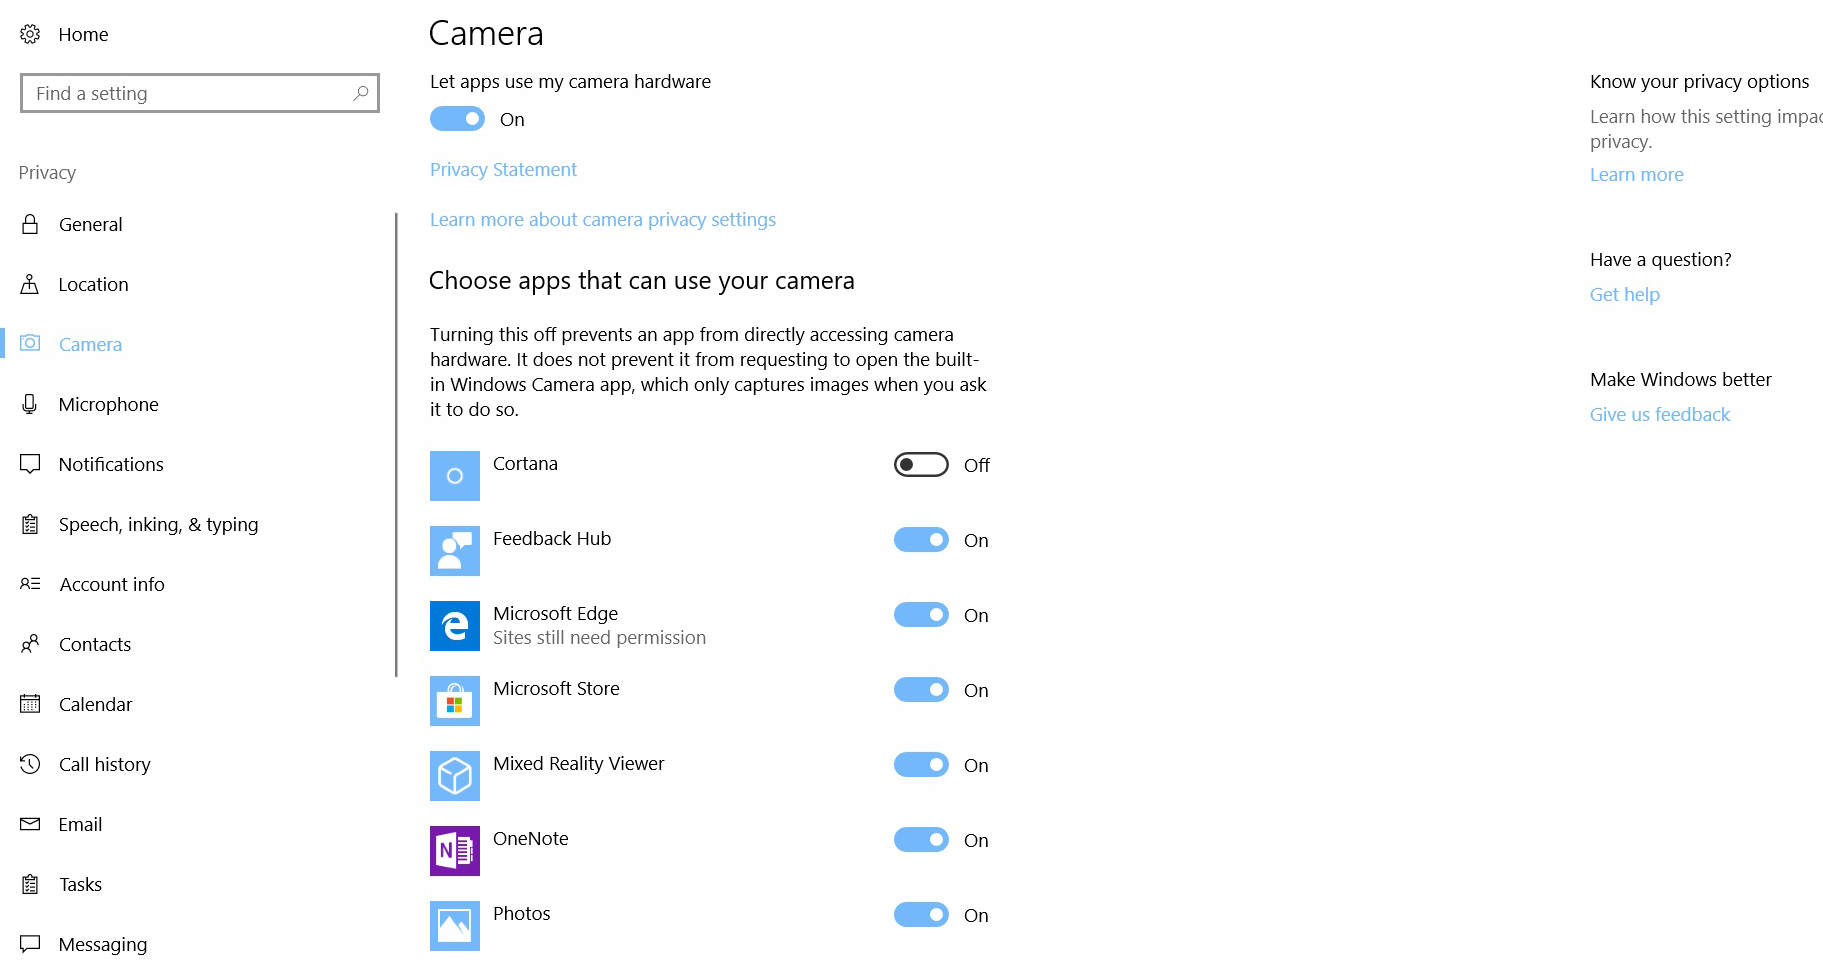
Going down the list of sub-headings we get into some of the more granular permissions levels, so tread lightly here. For the ultimate in privacy – and for the extremely paranoid – both the integrated webcam and the microphone can be totally disabled at a system level. However it makes sense for certain apps to have access to these, for example Skype, so most users will want to disable or enable the camera on an app-by-app basis. For example, in the image above, we could disable access to the camera for the Microsoft Store and OneNote, as it makes little sense for those apps to be able to use the camera. The same policy applies to the microphone, which is the next sub-section in the list.
Sign-in options
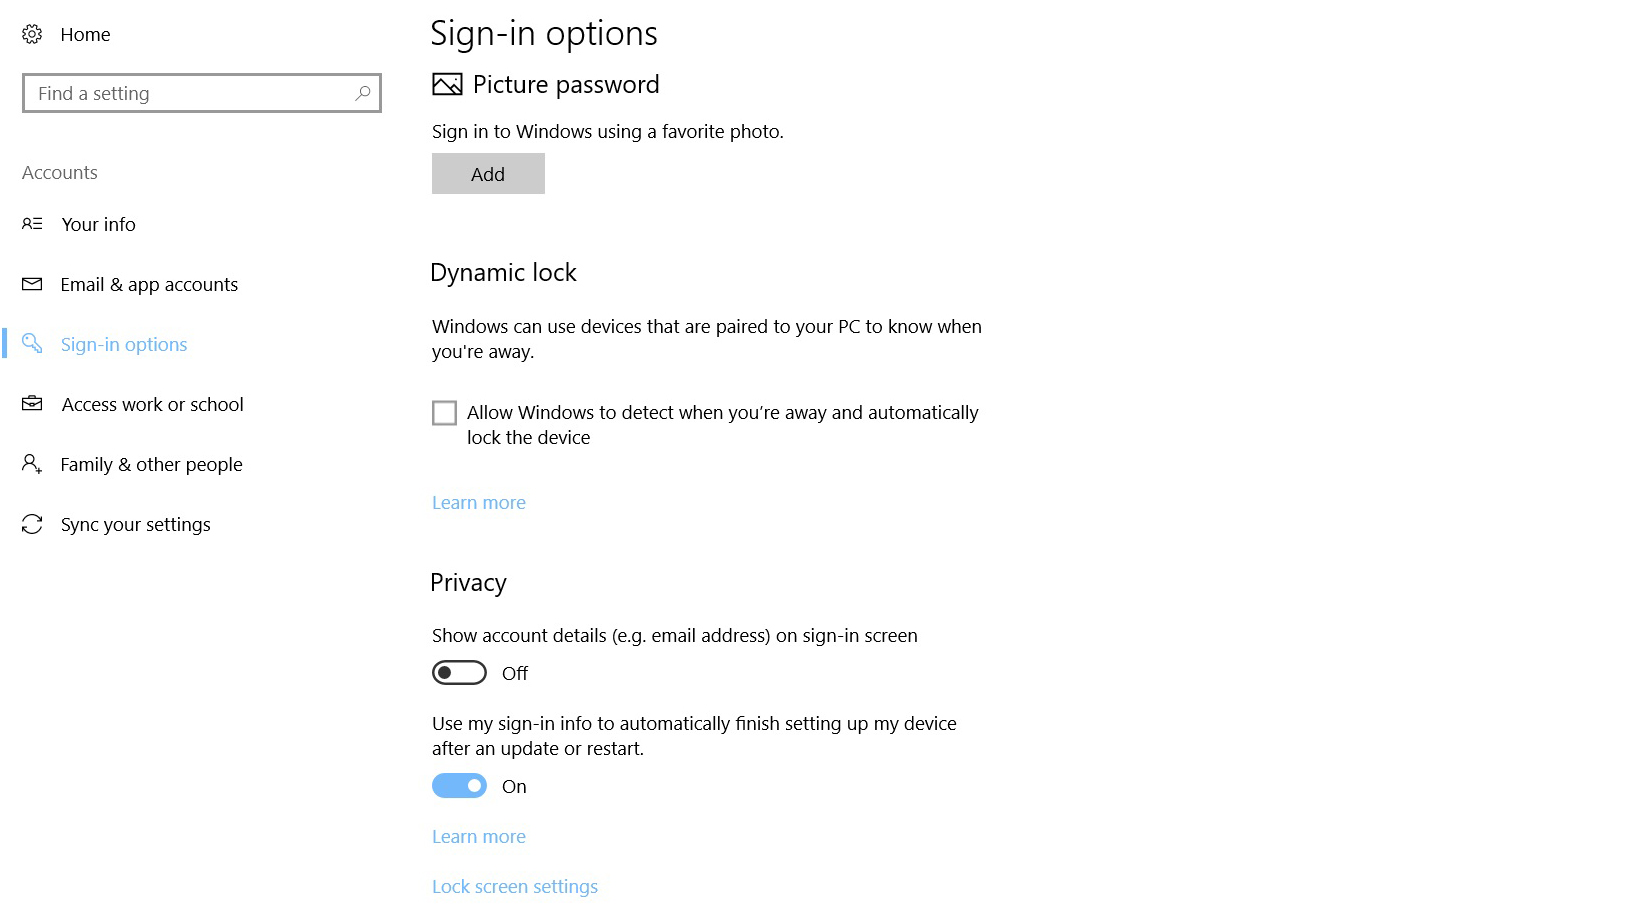
Under the Account category there's a subcategory for ‘Sign-in options’, and towards the bottom here are two settings. The first one controls whether account details such as an email address are displayed when the device is off. The second determines if the sign-in info can be used to automatically finish setting up a device after an update or restart. For maximum privacy, these both should be set to off.
Shared experiences
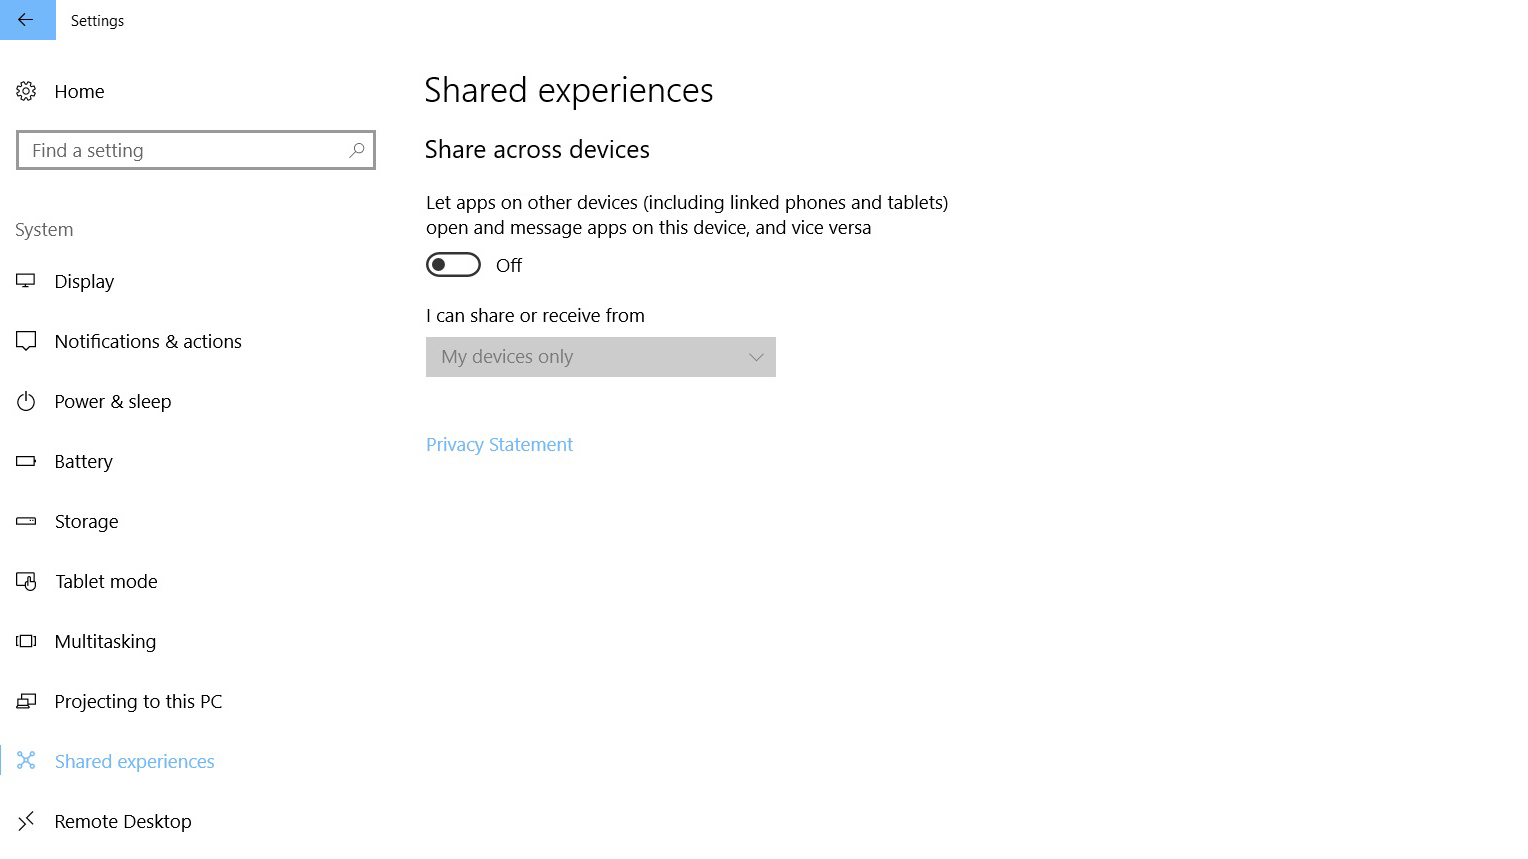
Finally, in the System category, head to the ‘Shared experiences’ sub-section. As most users use a variety of devices, this is a way for Windows on a PC to link to apps on connected phones and tablets, to open and message apps between the devices. While this was an update for the Windows Creators Update, few apps have implemented it. For the time being, from a privacy standpoint, it's better to toggle this off, as it represents a way for Microsoft to build a more comprehensive profile between different devices, with little tangible benefit to users so far.
Under the Account category, there is a subcategory for ‘Sign-in options.’ Towards the bottom are two settings. The first one toggles if account details such as an email address are displayed when the device is off. The second determines if the sign-in info can be used to automatically finish setting up a device after an update or restart. For maximum privacy, these both should be toggled to off.
Securing your digital lifestyle doesn’t have to be a tedious or expensive process. You can achieve that in the next 60 seconds by downloading a trial of CyberGhost VPN here, risk-free.
Jonas P. DeMuro is a freelance reviewer covering wireless networking hardware.