How to install and customise Raspbian on the Raspberry Pi
The brains behind the Raspberry Pi

Raspbian has been the default distribution (distro) for the Raspberry Pi since its launch in 2012. In this time we've seen the distro grow from a simple fork of Debian into a fully featured product that covers many different use cases. In this tutorial we peek under the hood and get to know the latest version.
The easiest way to install Raspbian is via NOOBS (New Out Of the Box Software). For this you will need at least an 8GB micro SD card that's formatted to use a FAT32 filesystem. Download the NOOBS ZIP archive to another computer and extract the contents of the ZIP archive to your micro SD card.
Eject the card from the computer and insert it into your Raspberry Pi. Connect your keyboard and other peripherals but leave the power until last. Boot your Raspberry Pi and you will be presented with a menu offering many different operating systems for installation.
Tick the box next to Raspbian and then click Install and wait. The installation will take around 10 minutes to complete. With the installation complete your Raspberry Pi will reboot into the Raspbian desktop environment, but first you will need to complete a few configuration changes via raspiconfig which automatically loads on first boot.

At this time the only configuration change to make is expanding Raspbian so that it uses the full capacity of your SD card. Once complete you can navigate to Finish using the cursor keys and press Enter to confirm your choice.
Every Raspberry Pi has the same default login details:
Username: pi
Sign up to the TechRadar Pro newsletter to get all the top news, opinion, features and guidance your business needs to succeed!
Password: raspberry
Once logged in we are presented with the Raspbian LXTerminal and from here we have a significant amount of power available through a few common Linux commands.
Finding your way about
When logged in we are dropped into our home directory and this is where all of our documents, music and pictures are held. To understand where we are in the filesystem we can use a command to print our location, which is known as print working directory by typing in $ pwd
This will return our location as /home/pi/ but what if we wish to navigate to another directory? If we wish to go into a directory that's in our home directory then we first need to list the directories in our home. To do this we type ls into LXTerminal, after the command prompt.
This will output all of the directories and files in our home directory. We can see one called Downloads and if we want to navigate there we need to change directory, so we use the cd command and pass it the location of the directory that we wish to move to like this: $ cd Downloads (note: the ' isn't to be typed. It's a symbol representing the command prompt and that you should be typing in LXTerminal/Bash).
If we now repeat the pwd command, it will report that we are in /home/pi/Downloads and if we wished to return to /home/pi we can type:
cd /home/pi
A quick way to return to home is to type:
cd
Let's now load the Raspbian desktop, to do this we use this command followed by Enter: $ startx. After a few seconds the Raspbian desktop will load and you will see a clean desktop with a rather large Raspberry Pi logo.
The Raspbian desktop has been refined to be a much more user-friendly interface by Simon Long, who joined the Raspberry Pi Foundation in late 2014, and has spent a great deal of time in creating a simple interface that does away with the repetition of applications seen in previous versions.

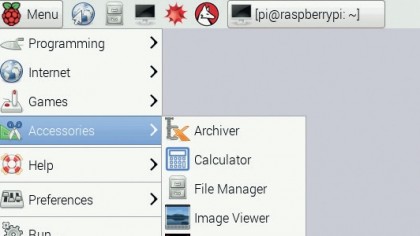
The main menu is at the top left of the screen and inside there we can see a number of sub menus. The first of the submenus is Programming and in there we have two versions of Python: versions 2.7 and 3. We also have Sonic Pi, the popular music creation application powered by the Ruby programming language.
In the next submenu, which is Internet, we'll find a web browser and quick links to the Raspberry Pi Store for apps and the official Raspberry Pi resources. In the 'Games' submenu we'll find the popular Minecraft game which can be hacked using a pre-installed Python API, which has recently been updated to work with Python 3.
Finally, in the 'Accessories' submenu we'll find a collection of handy applications, such as a PDF reader, archive managers, text editor and a file manager to graphically navigate the files and directories of our Raspberry Pi.
Moving along the top of the screen we can also see a line of icons. These are shortcuts to the web browser, file manager, terminal and other applications. Moving further along to the top right we can see a group of four icons.
The first of the four is the new Wi-Fi configuration tool which replaces the previous tool that was found in the main menu.
The new configuration tool is easy to use with most types of Wi-Fi dongles. You simply left-click on the Wi-Fi icon, wait for it to detect the routers in the area, select your router from the list and enter your password into the Pre Shared Key dialog box.
After a few moments your Raspberry Pi will be connected to the network. Moving along the screen we next see the volume control, a left-click here will bring up a volume slider, whereas a right-click is used to change the output from HDMI to 3.5mm headphone jack.
The remaining two icons are a CPU process graph showing how busy the CPU is and the final entry is a date/time application.
If we wish to update the software that's installed by default with Raspbian we can use APT (Advanced Packaging Tool) to download the applications and any dependencies. To do this we open an LXTerminal via the shortcuts at the top of the desktop.
Our first command will update the list of installed software on our Raspberry Pi with a list from the Raspbian servers, this ensures that our software is up to date: $ sudo apt-get update. We can now upgrade the software installed on our Raspberry Pi by typing $ sudo apt-get upgrade. This may generate a lot of output in LXTerminal.
Make sure that you read what's being installed if you're asked to accept changes before continuing with the upgrade.