How to export LastPass passwords to NordPass
Switch to a superior password manager and shift all your passwords too
Sign up for breaking news, reviews, opinion, top tech deals, and more.
You are now subscribed
Your newsletter sign-up was successful
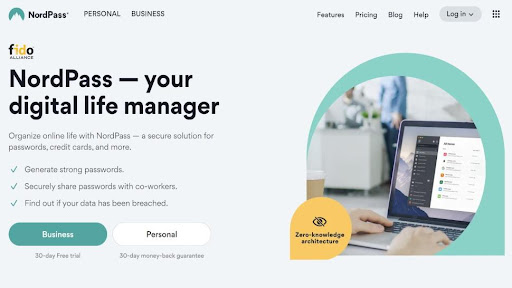
Are you ready to leave LastPass and wondering how to export your passwords to NordPass? Well, you probably wouldn’t be here if you weren't, so let’s get down to work.
Although LastPass was loved by many and treated as one of the top password managers in the industry for over a decade, its latest security breaches have left a terrible stain on its track record. So, like many, you were probably searching for a more trustworthy password manager when you stumbled upon NordPass - after all, NordPass has never been breached.
Not only is it a more secure choice than LastPass, but NordPass is also one of the most popular password managers known for its pocket-friendly yet feature-rich plans. Plus, even if we focus on freebies, NordPass’ freemium edition is less limiting than one LastPass offers. For starters, it doesn’t restrict you from using its app on multiple devices - however, you still can’t stay logged in while switching between them.
Also, like all the best password managers, NordPass utilizes multiple authentication methods, zero-knowledge architecture, and a strong encryption algorithm to keep all your sensitive information on the safe side.
So, if you’ve decided to give NordPass a shot, here’s how you can securely export your passwords and other data from LastPass and import it to your new solution.
Export your passwords from LastPass
Before beginning to export your passwords and other data via CSV file, make sure that you’re using a secure device, preferably your personal computer (PC). After all, you wouldn’t want scheming cybercriminals to get hold of your sensitive information. For additional security, if you’re using any backup software, switch it off until this process is complete. This will stop your unencrypted export file from getting backed up.
Exporting passwords from LastPass can be done via browser extensions or LastPass’ official site and the latter method is a simpler one - that’s why we’re going to use it.
Sign up to the TechRadar Pro newsletter to get all the top news, opinion, features and guidance your business needs to succeed!
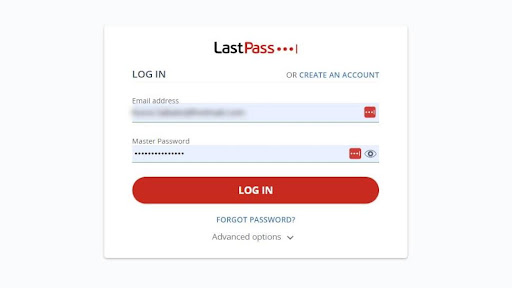
1. Log into your LastPass account
First and foremost, you’ll want to log into your LastPass account. Like many times before, you’ll be asked to surrender your email address and your master password - once you’re done, press the “Log in” button and that’s it.
However, if you want to do this via the LastPass browser extension, it’s slightly less straightforward. You’ll have to go to your browser and click on the “Extensions” button at the top right - the one that looks like a puzzle piece. After this, you’ll want to find “LastPass” on the dropdown menu and press it.
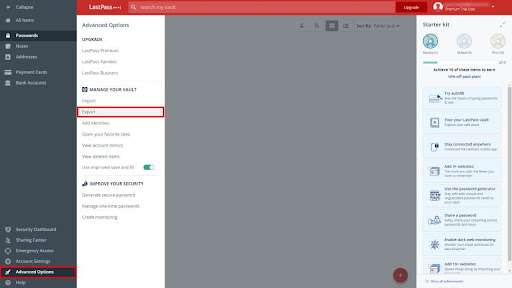
2. Tap on “Advanced Options” on the sidebar, then select “Export”
After you arrive at your LastPass dashboard, start looking for “Advanced Options” on it - it’s on the left sidebar squeezed between the “Account Setting” and “Help” buttons. The next thing you want to do is to tap on the “Export” button - it’s a bit to the right - you can’t miss it.
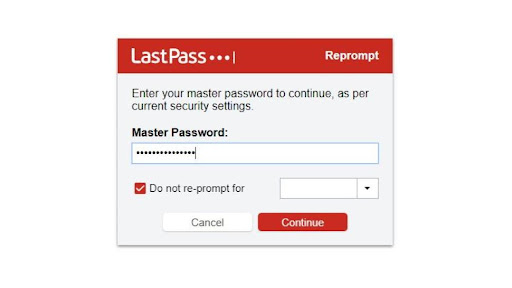
3. Enter your master password, export your vault data as a CSV file and download it to your computer
As soon as you click on the “Export” button, you’ll be transferred to the next page and asked to enter your master password. Once you do this, click on the “Continue” button.
This will trigger a CSV file titled “lastpass_export.csv” with all your vault data to be automatically saved to your computer. Once the download is complete, go and check if the file has the CSV extension - without it, you won’t be able to import it to another password manager.
We should also note that LastPass’ export does not include file attachments. So, if you have any, download them before exporting your passwords.
And that's about it, you’ve efficiently exported your passwords and other vault data from LastPass.
Import your passwords to NordPass
While importing passwords into NordPass is surprisingly simple, there are a few things we should point out first.
First off, NordPass doesn’t import time-based one-time passwords (TOTP), so make sure to store your TOTP secrets somewhere else before exporting.
Also, addresses and payment cards that contain non-numeric field data (for instance, “one four zero eight” instead of “1408”), can’t be imported, so you’ll have to update this before starting to export your data from LastPass.
All data stored in your LastPass shared folders will be imported as personal folders in NordPass. Item categories such as SSH keys, bank accounts, and custom items with LastPass will be imported as secure notes to NordPass.
Now, let’s get on with it.
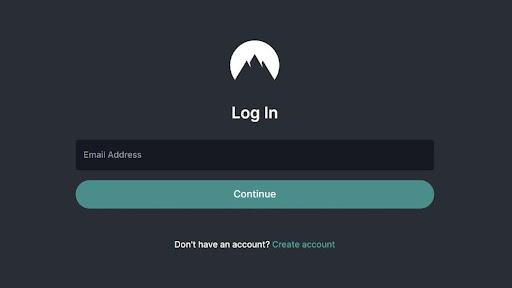
1. Sign in/log in to your NordPass account
If you have a NordPass account, log in to it right away - and if you don’t, create your new NordPass account. As per usual, you’ll be asked to provide your email address and your master password.
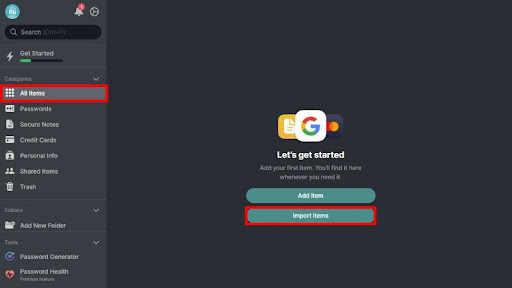
2. Select “All Items” and then click on the “Import Items” button
You’ll find the “All Items” button on the left sidebar, so go ahead and click on it. After this, you’ll get to choose between two options: to “Add items” one by one or to “Import items” via CSV file - opt for the letter one.
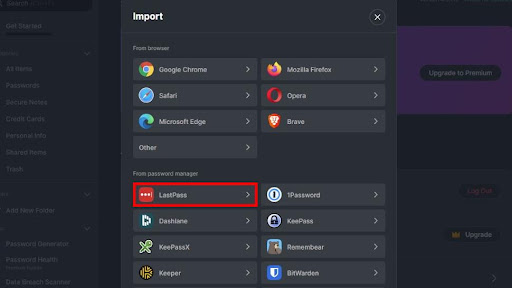
3. Pick out LastPass from the list of supported platforms
Here, you can choose between a few web browsers (Chrome, Safari, and Brave included) and a couple of other password managers (such as BitWarden, 1Password, and LastPass) - pick out LastPass from the list. If you don’t see it now, scroll down until you do.
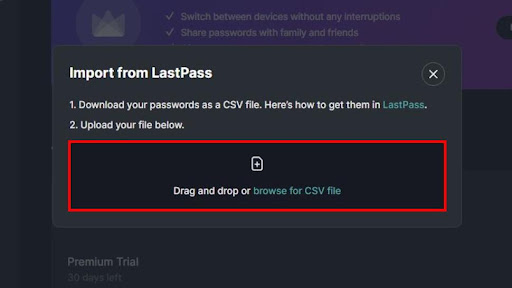
4. Drag and drop/browse the CSV file you’ve exported from LastPass and hit “Import”
Before hitting the “Import” button, take some time to check out all items you’re going to import first. Fortunately, NordPass’ easy-to-use user interface (UI) makes this effortless.
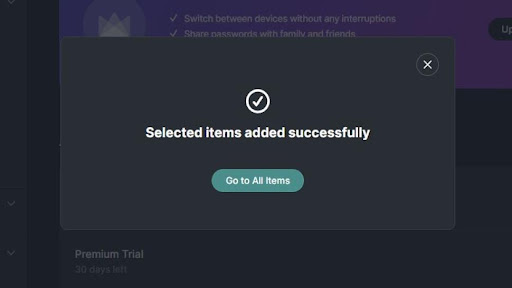
In a couple of seconds you should get the message above - congratulations, you’ve successfully exported your LastPass passwords to NordPass.
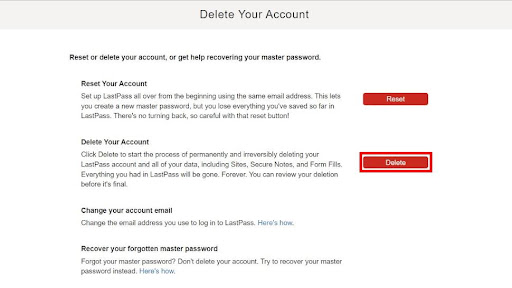
Now, let’s say goodbye to your LastPass account
Since you probably don’t plan to use LastPass anymore, it’s best to part ways with your LastPass account and remove any app or browser extension you’ve previously installed.
For this, you’ll want to go back to your LastPass dashboard, find “Account Settings” (it’s just above “Advanced Options), and press it.
When a new window pops up, select “My Account” (in the “General” section”) and then opt for the “Delete or Reset Account” option. You’ll have to confirm your choice once again by pressing yet another “Delete Account” button - and that’s it, your LastPass account has become a thing of the past.
- Check out our list for the best password managers
Sead is a seasoned freelance journalist based in Sarajevo, Bosnia and Herzegovina. He writes about IT (cloud, IoT, 5G, VPN) and cybersecurity (ransomware, data breaches, laws and regulations). In his career, spanning more than a decade, he’s written for numerous media outlets, including Al Jazeera Balkans. He’s also held several modules on content writing for Represent Communications.