How to manage document versions in iWork
Roll back
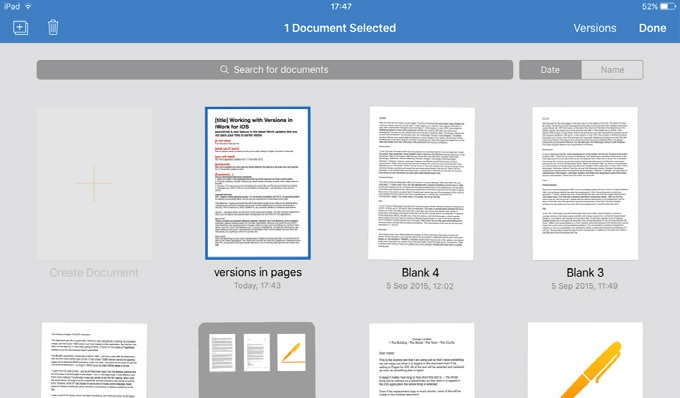
1. Select your document
Open the app you want to work with and go to its document picker. 'Tap Edit' on the toolbar, then tap the document, spreadsheet or presentation that you want to roll back.
Tap 'Versions' on iPad, or the clock face-like icon on iPhone.
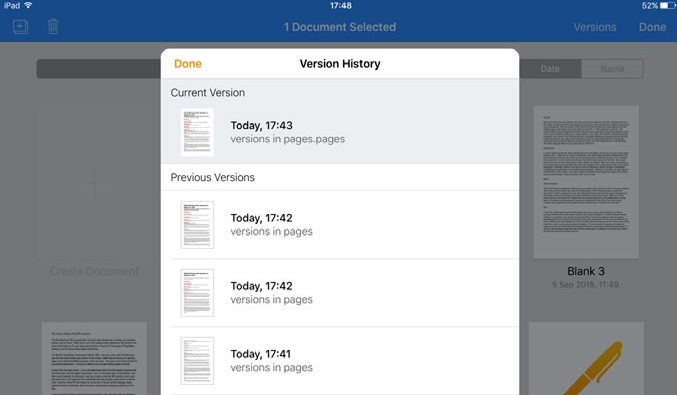
2. Browse older versions
A list of earlier versions of the document will pop up. These versions might have been edited in iOS, OS X or the browser.
If the file has only ever been edited on iOS, changes made before version 2.6 of the app aren’t shown.
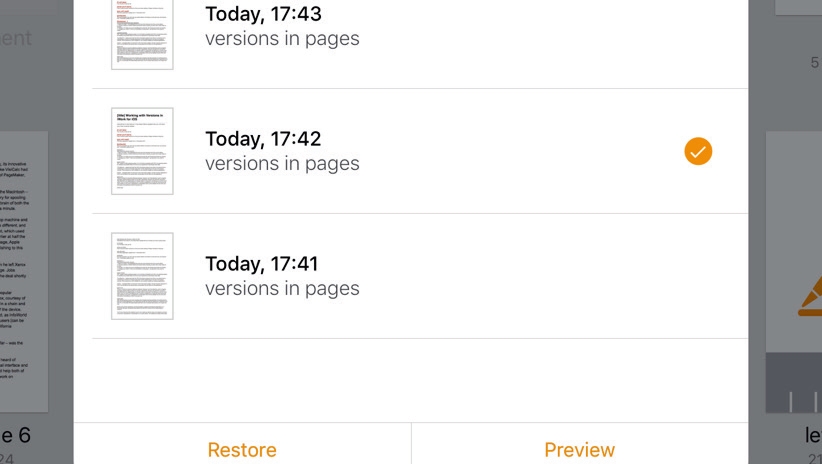
3. If you’re confident…
If you’re sure you know which version you want to roll back to, tap it in the list and then tap Restore.
That version will be reinstated as the current one immediately, and the most recent edition will be demoted to the history.
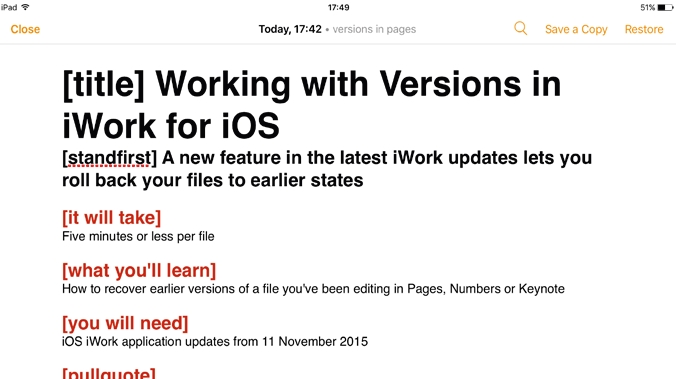
4 …and if you’re not
Tap 'Preview' to take a look at the version you’ve selected. This will let you check that you’ve identified the correct one prior to rolling back to it.
Sign up to the TechRadar Pro newsletter to get all the top news, opinion, features and guidance your business needs to succeed!
If you have, tap 'Restore' on the toolbar to complete the process.
5. Partial reinstatement
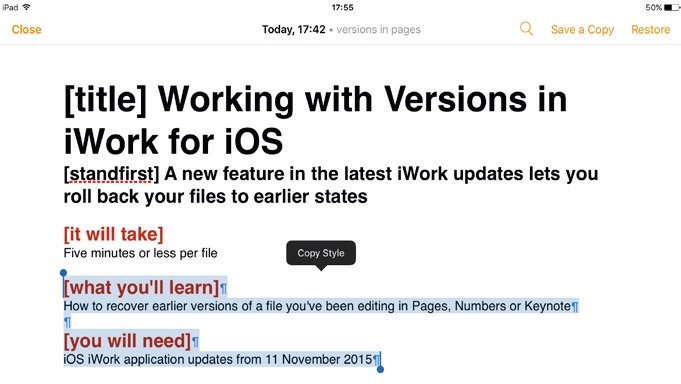
To recover part of the old version, select it as you would when editing a document, then tap 'Copy'.
Similarly, copy text‘s appearance with Style > Copy Style. In the current version, tap and pick 'Paste', or select text and pick Style > Paste Style.
6. Search for content
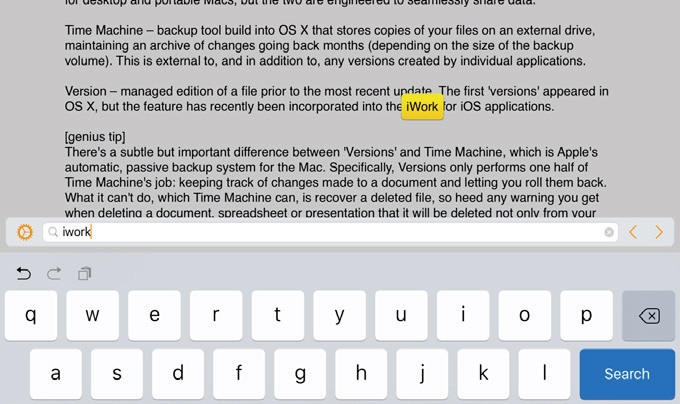
Though you can’t edit old versions without restoring them, you can swiftly search through one.
Tap the magnifying glass on the toolbar and type something. Matches are highlighted; step through them using the arrows on the search bar.
- Enjoyed this article? Expand your knowledge of Linux, get more from your code, and discover the latest open source developments inside Linux Format. Read our sampler today and take advantage of the offer inside.
- 1
- 2
Current page: How to inspect and recover old document versions
Prev Page What is document versioning?Nik is an Esperanto-speaking, pencil-bothering, manual typewriter fan who also happens to have a soft spot for tech after sufficient years in the business to know what that disk icon on the save button actually means. Never happier than when out in his campervan, coffee in one hand, ebook in the other, listening to the rain on the roof.