Why you can trust TechRadar
Noiseless CK is rather like Snapheal – it's designed to do a single job that's normally rather technical, but in a way that makes it quick and simple for anyone.
Image noise is less of a problem with today's digital cameras than it used to be, but it can still give your images a nasty, granular appearance, especially at high ISO settings.
Noise reduction is a pretty standard tool in any image-editor, but it's a tricky science to get right. The software can't easily distinguish between real image data and random noise, with the result that image noise can be smoothed out pretty effectively, but a lot of subtle textural detail in the photo gets washed out with it.
This is why you get that horrid 'watercolor' look with photos from some smartphones and point and shoot compact cameras – the camera has processed out the noise, but it's taken out much of the subtle fine detail too.
The solution is some clever image processing algorithms and choosing the right noise reduction settings for each image – and also finding the right trade-off between noise reduction and detail preservation.

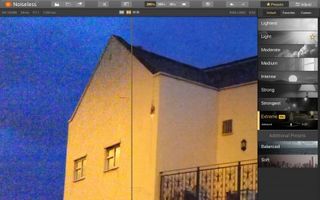
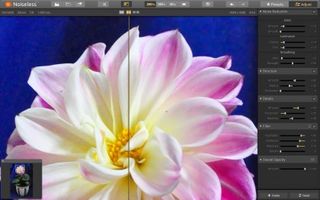
Noiseless achieves all three rather well. When you open up your noisy image, it's split down the middle with the untreated image on the left and the treated version on the right – you can drag the central divider left and right to see a before and after comparison in real time.
Over on the right there's a list of noise reduction presets with handy titles like Light, Medium and Extreme – you just click a preset and see if you like the result.
If you think you've found the right one but the effect looks just a little too strong, then you can drag back the slider under the preset's title to reduce its strength.

And if you feel you could do a better job by adjusting the noise reduction parameters manually, you can click the Adjust button top right and tweak six in-depth sliders for Noise Reduction, with further panels for Structure, Details, Filtering (Highlights, Midtones, Shadows, Details) and Overall Opacity.
A lot of noise reduction software is horribly complicated and so technical that you may never feel you've got to the bottom of it. A lot of software will also kid you that you can achieve miracles.
You can't. Heavy noise reduction inevitably starts to erode image detail, and high ISO images have other faults beyond just noise – camera shake is likely (high ISOs are used in low light where shutter speeds are also likely to be slow), and the resolution of the sensor diminishes at high ISOs, too. Too much smoothing can make it painfully obvious that the picture doesn't have much detail anyway, whereas keeping just a little noise can help disguise the fact.
Where Noiseless scores is not in achieving the hitherto impossible – noise reduction is still a destructive process you have to balance carefully – but in making it simple, fast and straightforward. You'll soon find out if your image can be rescued and you'll quickly arrive at the settings which give the best-looking results. And that is pretty much all you could ask from a noise reduction tool.

