The Windows 7 incarnation of Media Center is streets ahead of its Vista cousin. The interface has been tweaked to make navigation easier, and there's a Media Center Gadget for simpler control. But the more time you spend in Media Centre, the more you become aware that it's good, but not perfect.
However, with a little power user trickery you can make it a whole lot better. TunerSalad, removes the four-tuner limit. It does this by modifying system files, so although it's well-regarded, you should always save any work and back up your PC before you start.
If you don't have a TV tuner, Media Center won't show you much. Install TunerFree MCE for instant access to live TV. You can stream content from BBC iPlayer, ITV Player, 4 on Demand and Demand Five at 720p resolution, as well as BBC Radio and BBC HD. Media Center may provide higher image quality than you get on your TV.
Configure your Windows PC as a media server
1. Getting started
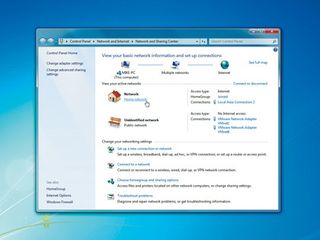
You've probably built up a sizeable collection of multimedia files, so why limit them to your PC? Apply a few tweaks and you'll be able to access them from anything connected to your network. However, this will only work if your PC currently accesses your network using the Home or Work Network type. Right-click the network icon in your system tray and select 'Open Network' and 'Sharing Center' to take a look.
2. Sharing the right way
Get daily insight, inspiration and deals in your inbox
Get the hottest deals available in your inbox plus news, reviews, opinion, analysis and more from the TechRadar team.
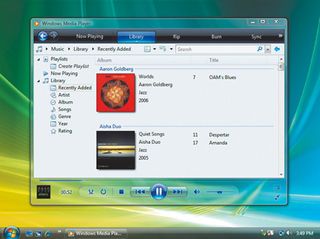
If your main network is labelled 'Public network', but it's only used to connect trusted PCs in your home, click the 'Public network' link and choose 'Home or Work network' instead. Make the same check on any other Windows 7 PCs on your network. This will provide access to shared Media Player music libraries. Open Media Player on one of the network PCs and it will discover the tracks on your main computer.
3. Tuned sharing
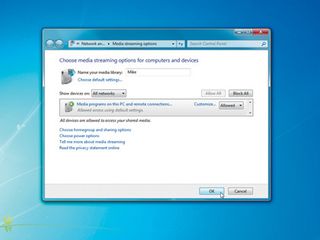
To share all your media across the network, launch Media Player and click the 'Stream' button. Then click 'Automatically allow devices to play all my media' to enable full-scale media sharing. If that's not appropriate, you can click 'Stream | More Streaming Options' and decide which devices can access your media files. Remember, this is for secure networks only – don't turn it on unless you trust every system.
4. Make it available
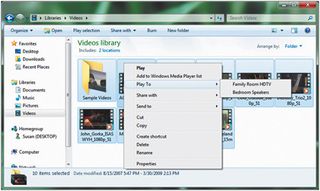
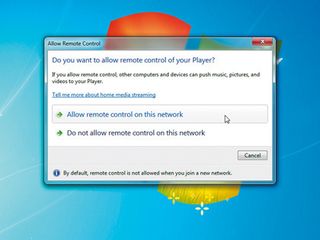
Click 'Stream | Allow remote control of my player | Allow remote control on this network'. If you have any other Windows 7 PCs in your network, repeat this and the previous step on each of them. (They must be in a HomeGroup, too.) Now right-click a song, video, picture or other media, choose 'Play To' and you'll be able to send it to another PC, a DLNA-certified device, or a media extender such as the Xbox 360.
5. Playlists
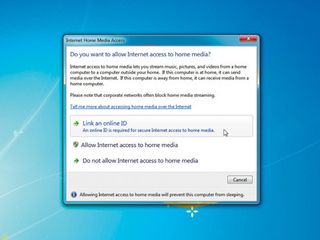
Windows Media Player will display a 'Play To' window that enables you to add other media, then push it directly to your chosen PC or device. That's good, but there's a better way to share a playlist. Windows Media Player now enables you to share your media collection online, making it accessible from almost anywhere. Click 'Stream | Allow internet access to home media' to start setting this up.
6. Remote access
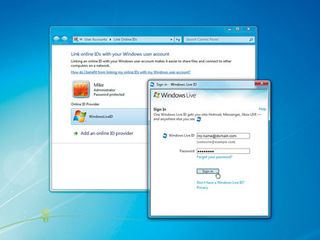
You can also access your media from a PC not on your network. To do so, click 'Link an Online ID | Link Online ID' and sign in with your Windows Live ID account. Then select 'Allow Internet Access to Home Media'. Remember, business networks may block the necessary ports, or you might have to configure your router manually. See Microsoft's guide (www. bit.ly/bpcMuP) for details on how to do this.
Handy Windows 7 shortcuts
Many of Windows 7's features appear straightforward, yet have considerable hidden depths.
The Taskbar, for instance, is far more powerful than many people realise, and mastering its secrets can make a real difference to your PC. Taskbar icons can launch more than applications. They can also represent folders, drives – anything that you can place in a shortcut.
To try this, create a text file on your desktop, rename it to example.exe, then drag and drop it onto your Taskbar and delete the original file. Right-click the shortcut, right-click its file name and select 'Properties'. Change the 'Target' and 'Start In' boxes to point at the drive or folder of your choice, and click 'Change Icon' to choose an appropriate icon. Click 'OK', and that's it – the drive or folder you've specified is now accessible with a single click.
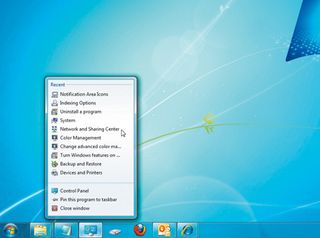
If you prefer keyboard shortcuts, hold down the [Windows] key and press 1 to launch the first Taskbar icon, 2 the second and so on, up to 0 for the 10th. Alternatively, press [Windows] + [T] to move the focus to the Taskbar, then use the left and right arrows to select an icon and press [Enter] to launch it.
Once an application is running, hold [Shift] and click or middle-click its Taskbar button to launch another instance. Holding down [Ctrl] while you click on a Taskbar button cycles through all instances of that application (an app-specific, faster version of [Alt] + [Tab]).
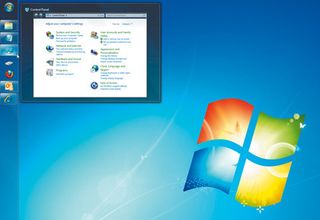
If this becomes too chaotic, you can hover your cursor over a Taskbar button, then middle-click an Aero thumbnail to close that application.
Libraries
If your hard drive is untidy, try Libraries – another underused feature. Libraries aggregate the contents of several folders and list them in a single view. This enables you to collect related documents, wherever they're stored on your hard drive. Best of all, it lets you search only those folders, so you'll always get results quickly.
To begin your exploration, Click 'Start', type Libraries and click the 'Libraries' link, then double-click the 'Documents' Library. Initially the Library says it includes 'Two locations', but click that link, then 'Add' and you can include any other folders that you like. These stay in the same disk location – the only change is that the contents will be visible in the Documents library.
To create custom locations, right-click in the Libraries folder, select 'New | Library', and add a library for your projects. Next, add folders from across your PC to bring all your work files together.
Libraries take a little getting used to, but when you understand their benefits you'll wonder how you ever lived without them.
Current page: Windows Media Center and Windows shortcuts
Prev Page Windows 7 optimisation & calibrationMost Popular
