iPhone 6S camera tested in depth
We test Apple's hyped-up iPhone 6S Plus camera in the real world – and get a few surprises
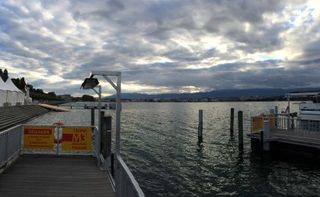
The Pano (panoramic) mode is particularly interesting. Lots of cameras now use the same 'sweep panorama' action, but on the iPhone 6S it works particularly well.
First, you shoot with the iPhone held vertically. This might seem odd at first, but this gives you a wider angle of view vertically – the horizontal angle of view is determined by how far you pan the camera.


Click here for a full size version.
The iPhone displays an arrow on a horizontal line, and as you pan the camera you need to keep the arrow on the line – or as close to it as possible. This keeps your panorama level and reduces the amount of the image lost to cropping when the iPhone cleans up the edges.
By default, you pan from the left to right but you can reverse the direction by tapping on the arrow.
Once you've worked out the composition, you start the panorama by tapping the shutter button. You then sweep across the scene smoothly, keeping the arrow on the line, and then tap the shutter button again when you want to stop.
Panorama tips
At first, it's tempting to shoot the widest panoramas possible – but these extreme letterbox shapes are difficult to view and often oddly uninteresting. It's much better to use a shorter sweeping movement to capture a narrower angle of view and a more normal aspect ratio. The trick lies in knowing when to stop and in looking for effective compositions, rather than just shooting the widest view possible.
Get daily insight, inspiration and deals in your inbox
Get the hottest deals available in your inbox plus news, reviews, opinion, analysis and more from the TechRadar team.
The other issue with extra-wide panoramas is that objects directly in front of you, such as buildings or the line of surf on a beach, can appear to 'bow' towards the camera. This isn't a fault – it's simple geometric distortion. This is another reason to keep your panning movements relatively short.


The wider view
In fact, the Pano mode is such a handy way of shooting a wider than usual view that you can find yourself using it a lot. The sweeping movement hardly takes any longer than lining up a regular photo and the stitching is so effective that you can rarely see the join.
You do have to watch out for objects and people moving in the foreground, though – they can be chopped in half or distorted in unexpected ways. It's something to check when you've used the Pano mode, just in case you need to take the shot again.
You can't apply any of the iPhone's effects filters when you shoot a Pano image, but you can apply one later using the Edit mode in the Photos app.
One potential issue with panoramas is exposure. Normally, the phone locks the exposure and focus on the first frame, and if this is shooting into the sun or dark shade it's going to upset the exposure for the rest – but you can frame up the shot with the most important area in the frame, tap and hold to lock focus and exposure and this will stay locked while you reframe and shoot your panoramic sequence.
The iPhone's camera has a focal length equivalent to 29mm, so it has a pretty wide angle of view already, but sometimes even this isn't wide enough to capture what's in front of the camera, so the Pano mode is a quick and simple way to extend your iPhone's angle of view.
DP:
You could shoot a panorama simply as a record of the surroundings, but pictorially every photo needs a focal point – shoot too wide and you risk shrinking your main subject into insignificance.
Current page: Pano mode
Prev Page Square mode, filters and the Photos app Next Page 4K video and Slo-mo mode