Watch and record live TV on your Raspberry Pi
Forget a PVR, go for Pi!
wget http://www.sundtek.de/media/sundtek_netinst.sh
chmod 777 sundtek_netinst.sh
sudo ./sundtek_netinst.sh
The final line will execute the script that's downloaded in the first line. It will then detect the system you're running and install the latest version of the drivers. It will leave the drivers running and configured to launch at boot.
For users of the DVB-T version, you will also need to execute this command:
/opt/bin/mediaclient --setdtvmode=DVBT
This will ensure the card is configured for terrestrial reception, rather than a 'cable' source, which the device is also capable of.
4. Install Tvheadend

The piece of software we're going to use to record and stream the digital television signal is called Tvheadend. There's a plugin for the just-released XBMC that will turn this awesome media player into a fully-fledged digital video recorder, with Tvheadend doing the hard work in the background from your Raspberry Pi.
Because Tvheadend is a tool that's constantly being developed, we used the development version, but you could just as easily use the OpenElec distribution instead of Raspbian if you wanted to skip this step.
Get daily insight, inspiration and deals in your inbox
Get the hottest deals available in your inbox plus news, reviews, opinion, analysis and more from the TechRadar team.
Fortunately, building it is easy. First, install the development and DVB tools:
sudo apt-get update
sudo apt-get install unzip libcurl4-openssl-dev pkg-config git build-essential dvb-apps gcc-4.7
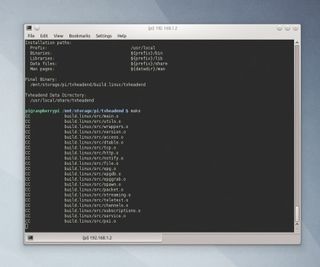
The final step is to download the latest version of Tvheadend from the developer's repository using git, and to build this using the build trinity of ./configure, make and sudo make install:
CC=gcc-4.7 ./configure; make; sudo make install
5. Configuring Tvheadend

Tvheadend's user interface is accessible through a web browser, but first you need to start it. As this is the first time, we're going to run the service in Configuration mode, and as a daemon, which means it becomes a background process. To do this, type the following:
tvheadend -C -d
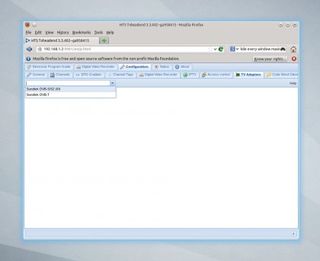
Now open a browser, preferably from another machine on the network, and enter http://ip_of_rpi:9981/extjs.html
You can discover the IP address of your Raspberry Pi by typing ifconfig and looking for the value next to the 'inet addr' field for the 'eth1' device. Your browser will load the default frontend to Tvheadend. This is where you'll eventually see all your program data and set up and view recordings.
We need to tell it how to use the TV hardware we've connected. This can be done by clicking Configuration > TV Adaptors and selecting your device from the drop-down menu on the left. As the next steps are going to depend on whether you're receiving a satellite signal or a signal through your aerial, we're going to briefly separate the next steps. For satellite receivers, carry on. For terrestrial reception, jump to step 7.
6. Satellite reception

Satellite reception is easiest to configure. With the adapter selected, the General page will show an overview of the configuration. First, click on the Enable tick box, followed by Save. We want to add some channel information, and this is done by adding the data for finding a satellite and the multiplexes it provides and then searching these multiplexes for channels that can be received.
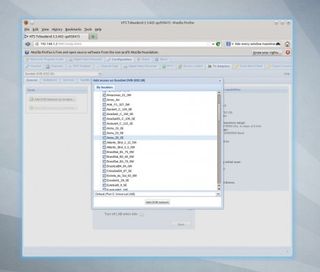
Tvheadend bundles the data for satellite location, so you just need to click on the Add DVB Network by location button on the left. This will open a window containing a global list of satellites. For the UK and Northern Europe, your best option is Astra_28_2E.
After selecting the satellite, Tvheadend will add a list of multiplexes associated with that satellite to the Multiplexes tab. These will now be scanned for channels, and you can watch the scanning progress in the Capabilities box on the right of the General page.
