How to build a website using HostGator
Build yourself a professional-looking website with ease
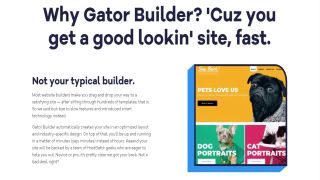
Note: The Gator website builder is now discontinued. Here are some great alternatives we recommend considering:
- Wix: A great all-in-one website builder - you can read our full Wix review here.
- Bluehost: A powerful WordPress based website builder - you can read our Bluehost website builder review here.
- Hostinger: An affordable website builder with advanced AI tools - you can read our full Hostinger website builder review here.
Alternatively, you can check out our full list of the best website builders for more expert insight and advice on finding the best website builder for you.
For a beginner, the thought of building a website can be overwhelming. The technicalities are enough to scare anyone away and instead seek professional help. A web designer can make a huge deal of difference, but will also charge an arm and a leg. Having no knowledge in coding, web design, and other technicalities should not deprive you of the opportunity to have the online presence that you need to start your journey to success.
Thanks to tutorials on YouTube and many other sites, it is now possible for any beginner to build a website from scratch. That means for every new business venture, anyone without the technical knowledge in codes and web design can get the online presence they need to get the business running, and invest in a professional website once they can.
If you need a website sooner than later, you’ll find the walkthrough below to be more helpful than you think so you can get your professional-looking website running and monetizing in no time. This is a walkthrough of how to create a website using HostGator’s Gator Website Builder, one of the easiest, most promising easy drag-and-drop website builders made with beginners in mind.
- We've put together a list of the best website builder software around
- These are the best web hosting services for your website
- Also check out our roundup of the best web design software
Who Is HostGator?
HostGator has made a name for itself in the web hosting business by powering over 8 million sites worldwide. They also gave us Gator, HostGator’s own easy to use website builder.
Gator provides a platform for any beginner to explore and create a website that can start generating income. It features the drag-and-drop editor, tons of templates and a myriad of features that can help you get started and finish your website. One of Gator’s strengths is its social media integration.
Are you a pro? Subscribe to our newsletter
Sign up to the TechRadar Pro newsletter to get all the top news, opinion, features and guidance your business needs to succeed!
Here’s how to build a website using HostGator’s website builder:

1. Go to HostGator's website
Once on the page, hover your mouse over Hosting, and choose Website Builder.
As soon as you click on Website Builder, you’ll be prompted to the recommended plans- Starter, Premium and eCommerce- along with the pricing and their features. In most cases, the Starter Package will give you all the features of a working website. Or at least what you need at the moment. If you’re wanting to build something big, you might have to reconsider this option.
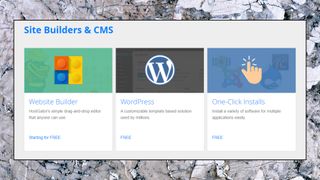
The Starter Package includes free hosting, a domain name, the drag and drop builder, customizable templates, website analytics, free SSL certificate and 24/7 support.
2. Select a package
Depending on your needs, each package will have something to offer to meet them. For beginners, the starter package usually does the trick. If you have a more advanced set of skills in design and knowledge in website building, or are needing eCommerce functionality, you may go with the second and third package options.
Once you have chosen your package, click on the “Buy now!” button just below the package features.
3. Choose your domain name
You’re starting to bring your website to life, and the first step is to give it a name. If you’ve decided on the domain name before logging on to the HostGator website, this should only take seconds. If you haven’t the slightest idea yet, there are tons of domain name generators online that can give you tons of ideas and recommended domain names you can choose from.
The importance of choosing an appropriate domain name can be viewed as similar to choosing an appropriate name for your business. However, not all of the appropriate or desired domain names are always available, so always have backup choices.
After typing in your chosen domain, click on “Get Domain!”. Doing so will check the entire web if your domain name is available. As soon as you see the congratulatory message, you’re good to go. Otherwise, you can just go ahead and type a different domain name.
This page will also ask you again which plan you’re going to choose, so if you think the choice you initially made on step 2 didn’t necessarily reflect your website needs, this is your chance to make a final choice.
4. Create an account
As with any website where you sign up, you will be asked to create a username and set a password for your HostGator account. You’ll also fill out on the same page your payment details. You can pay with a VISA, Mastercard or American Express, or via PayPal. After filling out your billing details, you will see the order summary at the bottom. If you have a discount code, this is also where you can put that in. Once your purchase is confirmed, you will be redirected to the next step.
5. Select your apps
As soon as the purchase goes through, you will be able to add selected apps for additional monthly recurring charges. You may also choose not to add apps in the meantime.
6. Create your website
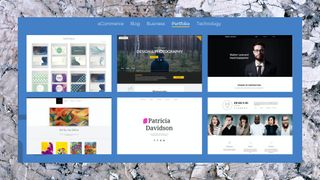
This is where the real fun starts. As soon as you make it to this page, you will be shown a wide selection of awesome templates you can choose from. Note that any text, images, videos, etc. you may find on these templates are completely customizable. You can do this as you create your website.
Tip: You can preview the template before actually choosing one
7. Start editing
You’ll find this button on the upper right hand side of your screen. As soon as you click this button, HostGator will give you a quick, 15-second tour. During the tour, you will be shown how to navigate pages, how to add pages, the mobile editor, and how to add different elements and buttons to your site.
On the left, you’ll find all the options for editing - adding elements (social, images, videos, maps, shapes, PayPal, site navigation, buttons, contact, files, HTML /page embed, etc.), adding a page, managing your pages, customizing these pages, etc. Here, you can also edit the sections of your website, as well as add and remove them. By clicking on these sections, you can make changes to the page. You can edit the text, add images/videos, and so much more.
Adding elements is as easy as dragging the element you want to add from the selection and dropping it where you want it on your site. Deleting something is also as easy as finding that delete button and it’s gone.
The mobile button on the center top will show you what your site will look like on mobile, making your website mobile-friendly in the process. With billions of mobile phone users across the globe these days, it is imperative for any website to be mobile-friendly and accessible. This will convert well for your site. From here, you can make changes as well, making sure that your website looks just as impressive on mobile as its desktop counterpart.
Clicking on an image on any page will allow you to edit its style, design, size and position, and even add animations to it. When you click on ‘Change Style’, you’ll see a menu where you can change the background, border, overlay effect, border width, roundness, and opacity. You can also change an image’s size and position, element appearance, etc. Here, you can also upload your own image or use stock images (available for use.)
With all the options for easy editing and designing, you’re almost guaranteed to not only achieve your desired website design, but also to have fun in the process. You can continue to edit your website as you please - add text, change font style and size, add videos/images, add/delete pages, making sure to create a website that will mirror your brand.
Tip: Create space on your page before adding more things in. Not doing so will result in overlapping elements, as Gator does not make the existing text/elements automatically adjust whenever you add something in. it is, however, easy to move elements around as you design your site
Once satisfied with your work, you can go ahead and publish your site. It’s as easy as clicking on the Publish button.
8. You're done
Well done! Now, clicking on the dropdown menu on the top left of your screen will allow you to manage your sites. This is especially helpful if you are wanting to claim the domain name for your site, or change it. HostGator is going to show you a couple of suggestions of domain names you can choose from. Whichever plan you chose will include this domain for free, so you can choose any domain name available.
Next, you will be prompted to select how long you want your domain subscription to last. The first year is absolutely free, and HostGator will make sure to mention that. Here is also where HostGator mentions that all your plans will automatically renew upon expiration of your free domain. Confirm your purchase and your site will be ready for publishing.
It is important to note that most, if not all of the template choices you will be given are mobile-friendly. You can choose between an eCommerce site, a blog, a business site, a site for your portfolio or a technology site. HostGator also allows you to constantly view how your site is doing with its analytics, which are easy to understand. You can keep your social media engagement easily with its social media tools, as well as integrate your productivity tools so you can easily monitor your site.
HostGator is behind over 8 million websites across the globe, and with Gator Website Builder, HostGator has made it even easier for entrepreneurs both fresh and seasoned to reach the world with its easy drag-and-drop feature and stunning templates that make website creation a breeze. Pre-built templates basically provide the framework of the website, and it’s only a matter of a few minutes of editing before the website can go live and start monetizing.
Domain transfer
If you’ve purchased a domain elsewhere and want to move forward with HostGator, transferring it is also fairly easy. It is not, however, recommended, since signing up for any of HostGator’s plans will give you the domain free for a year. In certain situations where it is inevitable, it’s definitely possible to do so, and won’t be as time-consuming as it would seem to be.
Each template HostGator offers you is professionally-designed and mobile-friendly. Most websites require mobile-friendly sales, and HostGator makes sure this is covered. Editing your mobile site will not in any way affect your site’s desktop version, so you can make your edits anytime.
Your HostGator website now has its own unique domain name (for free) and unlimited storage and bandwidth. This simply means you won’t have to worry about the size of the elements you’re wanting to add to make your website look even more professional, or about the traffic that you might drive into your website. None of these will slow it down.
This is exactly why HostGator is perfect for portfolio sites, or heavy-traffic eCommerce sites. Huge galleries of images, videos and whatnot, as well as heavy traffic are things you should be excited and not worried about.
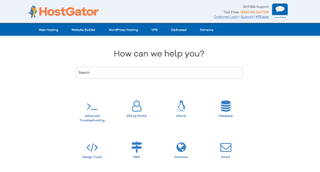
As with most hosting plans, you will also appreciate HostGator’s 24/7 phone, live chat and email support. When things go wrong inevitably, Gator has got your back to ensure your website is back up and running in no time.
- We feature the best password managers.
- We've also highlighted the best shared hosting
Anna is a freelance copywriter with extensive knowledge on the technology sector. She writes about a variety of topics for TechRadar including web hosting, website builders and cybersecurity. She also has a knack for writing deals, guides and versus articles.
