How to store and share images with Google Photos
Digital photo album
Once you've got your photos uploaded to Google Photos it's time to see what you can do with them. The most obvious thing you'll want to do is share them with friends and family.
You'll be given various chances to share them as you upload them to Google Drive; however if you miss your chance then you can always select the photo from your photo library, and investigate the sharing options.
When looking at a single photo, click or tap 'Share'. This gives you a chance to write a caption for the photo, and offers you options about who you share it with.
As you'll know if you already use Google+ that it uses various Circles to make sharing more selective. When you share a photo, Friends and Family Circles may be selected by default. You can easily add them by clicking or tapping the 'To' field. You can also add individual people here from your Google contacts list.
Security
If you care a lot about privacy then we suggest you click the downward arrow that's also at the far right-hand edge of the 'To' field. This gives you a menu with two important options – 'Disable comments', and 'Disable reshares'.
Disabling the reshares is key to making sure the photo isn't available to people you don't know. There's also a little tickbox at the bottom of the form called 'Also send email from you…', which will email people to tell them that you've shared a photo with them.
Turn this on or off , as required. If you want to share more than just one photo at a time then head to the Highlights tab in Photos. Here you'll see all your photos broken down by event or album. Next to each event or album there's a button called 'Share'. Click this and you'll get the same options you would for sharing an individual photo, but you're sharing the whole photo group.
Get daily insight, inspiration and deals in your inbox
Get the hottest deals available in your inbox plus news, reviews, opinion, analysis and more from the TechRadar team.
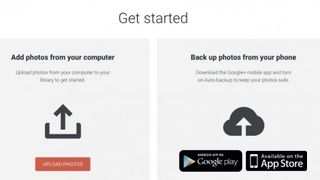
1. Getting started

To use Google Photos go to your Google Drive account page and choose 'Photos' from the menu on the left-hand side of the screen. This takes you to the Get Started screen, which gives you two options – add photos from your computer or phone.
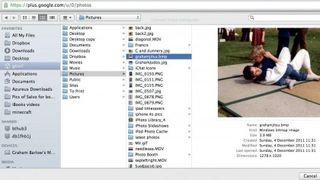
2. Adding photos

You can drag and drop photos from a computer into your browser window to add them, or using the Google Photos phone app, you can automatically back up any pictures you take on your phone.
It's available for Android and iOS.
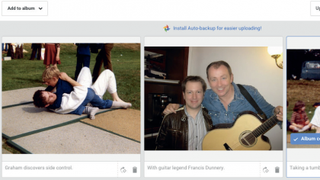
3. Adding captions

Once you click 'Open' the selected photos are uploaded. Be aware, this isn't a particularly quick process! Once they're uploaded you can add captions, and choose which will be the album cover – just hover your cursor over a picture to select this.
4. Share the album

Click 'Done' once you're ready. Google will locate faces in your photos and ask you to tag people from your Google contacts.
The album will be shared automatically with anybody you tag – skip this if you want. You can also share with others.
5. Edit the album

Now you'll see how your album looks on Google Photos. By default it's given the date as its name; to change the name click the pen icon next to it. You can also see options here to share the album, tag people, make a slideshow, download and delete photos.
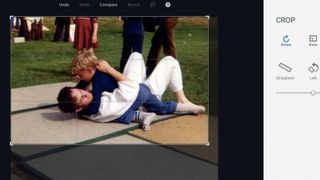
6. Edit photos

Google Photos offers some basic editing tools and filters. Click a photo, then click 'Edit', or any of the tools such as the the Crop tool, to get at the editing screen.
You can crop, straighten, rotate or apply a photo filter and always returns to the original photo, if you need to.
- Enjoyed this article? Discover how to get the most from your PC and new things to do in Windows Help & Advice. Take advantage of an exclusive offer in our sampler today.
