Why you can trust TechRadar
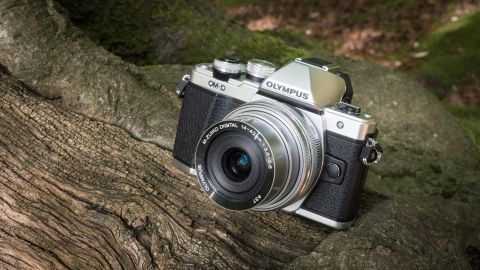
Obviously image quality plays a huge part in the success of a camera, but one of the reasons for the success of Olympus's OM-D line is the build quality and control arrangement. Like the other OM-D cameras, the E-M10 Mark II is constructed from magnesium alloy and has a solid, durable feel, though it lacks the weatherproof sealing of the OM-D E-M1, OM-D E-M5 and OM-D E-M5 Mark II.
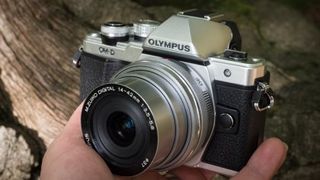
On the front there's a shallow but effective grip just like the one on the Mark I. The thumb-grip on the back however, has changed a little and I have a little less confidence in it and used the camera with a strap, swapping between the Peak design Cuff and Leash depending upon the shooting situation. In fairness, the camera never once slipped from my grasp, I just felt the need for the extra reassurance that a strap brings. The thumbrest also now houses one of the three customisable function buttons on this camera – there are two on the E-M10.
The OM-D E-M10 is the smallest and lightest camera in the OM-D series. While the dimensions that Olympus quotes for the mark II version indicate that it is very slightly larger in two dimensions (it's just 0.8mm/0.03-inches in both cases) and 8g (0.28oz) heavier, its body looks the same size as the Mark I version except for the slightly taller flash housing.
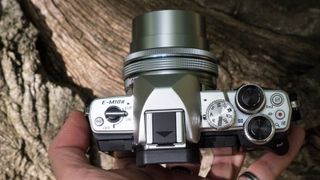
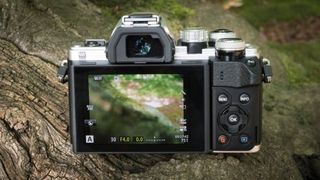
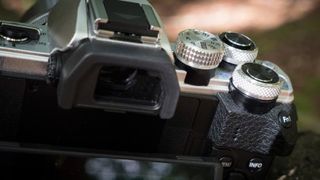
Although there are a few tweaks to the design here and there, the most noticeable difference between the new and old cameras is on their top-plates. On the left, where the Mark I has the exposure mode dial, the Mark II has a new retro-styled power switch. Pushing this beyond the power-up point pops-up the flash. Over on the right, where the E-M10 has two dials, the E-M10 Mark II has three – including the relocated mode dial. All three dials are taller than those on the Mark I and they have a new silver metal finish and knurled pattern that gives excellent purchase. As before, the shutter release is at the centre of the frontmost dial and it's within easy reach of your index finger, while the rear and mode dials are easy to operate with your thumb. The mode dial doesn't have a lock (neither do the other two – it would be odd if they did), but it isn't easily knocked out of position in normal use.
As the power switch has moved from the back of the camera to the top-plate there's a slight difference on the back of the E-M10 II in comparison with the Mark I version, with the playback button appearing in the bottom right corner.
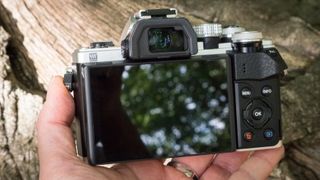
I found the viewfinder very clear, with no obvious dot pattern or texture, so it's easy to forget whether you're using an optical or electronic finder. It makes the scene look vibrant and attractive to photograph.
When shooting from the photographers' pit at Fairport's Cropredy Convention, however, I often found that the viewfinder showed the performers would be badly overexposed even though the exposure settings delivered a perfect result. This happened in manual exposure mode and shutter priority mode, and when I took control of sensitivity or let the camera set it automatically. A test shot or two was enough to confirm that the exposure settings were correct, but it was disconcerting at first. I've reported this issue to Olympus and it's being investigated. On other occasions the viewfinder correctly previewed the final image unless I was using the simulated optical finder – which is what you would expect.
Another issue I had when shooting continuously was that the when the final image appears in the viewfinder it fleetingly looks very soft before rendering to reveal the sharp image. However, I had no problem following a moving subject in the viewfinder.
To me one of the main advantages of an electronic viewfinder is that you can preview the impact of camera settings, so the ability to simulate an optical viewfinder isn't important to me. Nevertheless the E-M10 II has this capability and it does a good job.
The main screen also provides a good view in all but direct sunlight, but as there's an excellent viewfinder it makes sense to use it for composing most shots. As the screen tilts it's helpful when composing landscape format images (or video) above or below head height. A vari-angle screen would make it helpful for upright shots as well.
I had mixed success with using the screen to set AF point while looking in th viewfinder. On some occasions it worked very well, while on others I couldn't get it to respond. Because the EVF extends out behind the screen I had no trouble with my nose touching the screen and shifting the active AF point – it might be an issue for people with larger noses though.
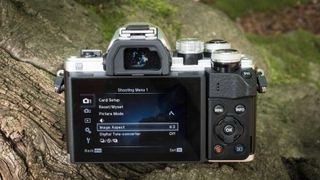
As it has an extensive feature set the E-M10 II also has a pretty long menu. On the whole this is sensibly arranged and after a period of familiarisation it doesn't take long to find the things that you want. It would be helpful if there was a customisable screen where you could access all your most commonly used features. It would also be nice if the main menu options could be selected using the touch screen. The options in the Super Control Panel, which appears when the OK button at the centre of the navigation pad on the back of the camera is pressed, can be selected with a touch on the screen, but the individual settings have to be navigated and selected via the physical controls, which seems a little odd.
It's very easy to create a time lapse movie in-camera. This feature is found within the drive mode option and there various parameters (shot number, interval time etc) are easily set – and the camera indicates how long the shoot will take as well as the length of your movie. Once you've set everything, the sequence is started by pressing the shutter release. After the last shot is taken (there's a maximum of 999), the camera creates the AVI movie automatically. Full resolution images are also saved so it's a good idea to switch off raw recording and select a smaller file size to save space on the memory card.
The OM-D E-M10 II can create 4K time lapse movies in camera, but they have a frame rate of just 5fps, which makes them quite jerky (quite apart from any subject movement between frames). The camera will also save the individual frames, though, so you can make your own time lapse movies later – our samples are resized to full HD for YouTube.
While the E-M10 II is generally very responsive, as with the E-M5 Mark II, I had the occasional unexpected problem. I've already mentioned the issue with the viewfinder and there were a few occasions when pressing the info button didn't toggle through all the options, skipping the histogram and level views. There was no logical explanation and turning the camera on and off again seemed to resolve it.
