How to make sure you install Windows 10 perfectly on your PC
Be prepared!

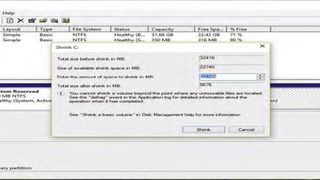
Launch the Disk Management tool by opening the run dialog with [Windows]+[R] then typing diskmgmt.msc. The interface shows the partitions that exist on your machine – you'll probably have at least two, a small recovery
partition and a much larger main partition, and it's the latter we're interested in. Check in the volumes list at the top of the window that your chosen partition has enough free space (at least 16GB for 32-bit Windows 10 and 20GB for 64-bit, though we'd obviously recommend allocating a fair amount more). If you're short on space, you'll need to clear some files before continuing.
Right click your target drive in the Disk Management tool and select 'Shrink Volume', then input the amount of space you're looking to claw back. Be aware that the tool is looking for this in MB rather than GB, so add three zeroes to the end of your intended space in GB. Click 'OK' and the tool will go to work, and you'll be left with an area on your drive labelled 'unallocated space'. We now need to turn this into a partition. Right click it, select 'new simple volume', and click 'Next'. You can give this new partition any letter you like. Keep clicking 'Next' until you see the formatting options. Make sure you choose 'NTFS' as the file system, and label your drive ('Windows 10' perhaps?) before formatting the space. If you ever want to revert the changes and get the space back, you can use Disk Management's Delete Volume and Extend Volume tools to expand your primary partition once more.
Are you a pro? Subscribe to our newsletter
Sign up to the TechRadar Pro newsletter to get all the top news, opinion, features and guidance your business needs to succeed!
