How to set up your projector for the perfect picture
Get the best viewing experience from your beamer
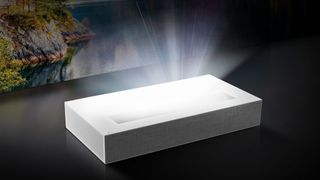
When it comes to creating a home cinema system, the picture quality is paramount. That means if you have one of the best projectors you'll need to spend some time making sure the picture is the best it can be – though you'll be glad to hear that it doesn't actually need to take up too much of your time.
Calibrating contrast, brightness, colour and sharpness is not most people's idea of a good night in – or a good night out, if you've opted for one of the best outdoor projectors. Just visit any picture menu during a movie and you're bound to get a barrage of groans – but if you've got a home cinema projector, getting the right settings to suit your home, and your personal tastes, is hugely rewarding.
Wondering how you can do that? Here's how to quickly set up a projector for the ultimate picture performance – whether you're streaming over Disney Plus or watching on your Ultra HD Blu-ray player.
The 10-minute calibration
The goal here is simple: natural-looking images in ten minutes.
It's important to change the picture parameters for each source of video (a film will need a different look to broadcast TV, or hi-def sports). If you're lucky, your projector will have some calibration test patterns built-in, or perhaps a set-up wizard.
What it definitely will have is some preset pictures modes such as 'movie', 'cinema', 'sports', 'game', 'vivid' and 'user'. While it's the latter you'll be tuning-up and saving to, the others can be used as a base.
You might also find THX or ISF (Imaging Science Foundation) presets on your projector, too. These industry standards are focused on giving you 'what the director intended', and though they don't account for your personal preferences or your viewing scenario, they serve as a useful comparison.
Get daily insight, inspiration and deals in your inbox
Get the hottest deals available in your inbox plus news, reviews, opinion, analysis and more from the TechRadar team.
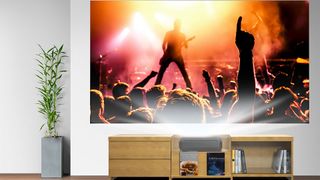
Brightness, blackness & contrast
This is a balancing act since black on a projector is merely a lack of light, and brightness the opposite.
You should study and tweak the image in whatever ambient light is likely to be most normal; if you intend to use your projector during the day, leave the curtains open.
However, if you can close curtains or blinds – even just a bit – to rid the room of as much ambient light as possible, do so. This will massively improve both black levels and brightness (if your projector screen is reflecting ambient light, there's not too much any projector can do about it).
If you are calibrating for a film, set the projector to the 'cinema' or 'movie' mode, then find a sequence with plenty of black in it (such as the space backdrop of Gravity, or a film with suits such as Men In Black). Push the brightness dial in the picture settings menu up and down until the overall image is bright enough, and the black areas of the image are convincing.
You're looking for black that looks black, but with enough detail within, like bright stars in space or creases and texture on a suit. If the black looks like a uniform block, you've pulled the brightness down too far.
Next, move onto the contrast slider and do the same for white areas of an image. You're looking for bright, pure white while retaining as much detail as possible. You'll probably have undone your good work with brightness, so go back and repeat these tweaks until you're in balance.
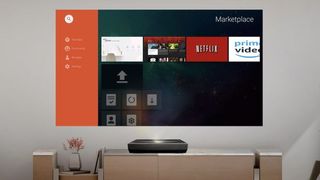
Colour, tint, colour temperature & sharpness
Tweaking for colour and tint is best done by prioritising skin tones; it shouldn't be hard to find a sequence that features close-ups of several regular-looking humans (avoid alien life-forms or over-baked celebrities).
Simply push the colour slider until they look completely normal. This is subjective, but don't be tempted to over-saturate; there will be a perfectly natural point somewhere between pale and ill-looking, and downright orange. Warm, rosy colours have an instant appeal, but this can grate after a while, so go slightly paler than your eyes initially prefer.
It's all pretty intuitive, but it's wise to be slightly conservative.
Adjusting sharpness is another balancing act between ultimate Full HD (or perhaps even Ultra HD 4K) detail and the integrity of edges. Push sharpness too high and you'll see 'jaggies', poorly defined lines that appear stepped. Easily seen in skyscrapers and other buildings with clean lines, this is often a consequence of upscaling (or lack of). Push the sharpness down a few notches and jaggies will become less obvious.
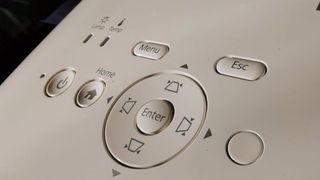
Picture processing
In order to overcome some of the limitations of projection technology, engineers have come up with various algorithms and workarounds.
Most of them have obvious, hyped-up names, such as Dynamic Black, Super Resolution or Brilliant Colour. However, the most common – and the most controversial – on reasonably high-end projectors is frame interpolation, which seeks to rid video of judder and motion blur.
You'll notice judder most obviously when the camera pans slowly from left to right, especially in Blu-ray discs. Frame interpolation tech works by intelligently inserting calculated frames of video into the onscreen action to make films appear more fluid, and easier to watch. It lends a video-like smoothness to Blu-ray discs – essentially creating a higher frame rate – that's initially very appealing, although it can introduce some nasty artefacts.
If frame interpolation is used on its highest setting, you may see flicker and 'rips' around any element of the picture that moves quickly (such as around actors' heads or limbs), so it's usually best experimented with on a mid-strength setting. Having said that, some people absolutely detest even cleanly performed frame interpolation.
Ins and outs
It goes without saying that it's always best to stick to HDMI connections wherever possible.
Don't make the mistake of spending big on short-length HDMI cables, since HDMI cables either work or they don't – think of them like a USB cable.
However, you may require an extra-long HDMI cable to reach from your source to the projector, which will be expensive, and less reliable the longer it is.
Just be sure to avoid using legacy connections like Scart and composite video, neither of which can handle high-definition or any kind of upscaled video. When blown up to the size of a projector screen, the results will look soft, noisy and all-round unpleasant.
Screen or white wall?
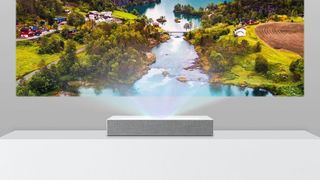
If you want ultimate detail, exacting colours, decent contrast and the ability to use your projector during the day, a projector screen is essential. However, it's best to be honest about this one.
Aficionados will always have a screen – and TechRadar would never review a projector without one – but it is possible to use a white wall.
As well as not having to invest in a projector screen, not having a specific screen to aim and fire at means you can create as big an image as the projector – and the size of your living space – allows. The whiter and flatter the wall, the better (any blemishes on the wall will both be lit-up, and cast shadows, which can look awful), though do expect to lose significant detail, as well as some brightness.
Which screen should you go for? The choice is largely about money, with a fixed screen the cheapest option, and a retractable screen perhaps the most aesthetic.
It's possible to get a motorised cantilever projector screen that rises or lowers from a housing placed on the floor or attached to the ceiling, although a manual pull-down or pull-up screen works just as well. Always go for a tensioned screen, which will give the image a completely flat canvas.
And, no, a white sheet really won't work as well.
Projector screens always have a black edge all around, which helps give your brain the illusion of better contrast. Embrace this – it works – and is another reason why projecting onto a wall is underwhelming. However, most important is how much light the screen reflects, which is called gain – and every single projector screen ever made beats a white wall on this measurement.
With a screen in place and your projector calibrated to your carefully considered preferences – whatever they are – your home cinema will truly give you the bigger picture.
- Best portable projectors: top mini projectors for work and play
- Best business projectors: top projectors for home and travel
Jamie is a freelance tech, travel and space journalist based in the UK. He’s been writing regularly for Techradar since it was launched in 2008 and also writes regularly for Forbes, The Telegraph, the South China Morning Post, Sky & Telescope and the Sky At Night magazine as well as other Future titles T3, Digital Camera World, All About Space and Space.com. He also edits two of his own websites, TravGear.com and WhenIsTheNextEclipse.com that reflect his obsession with travel gear and solar eclipse travel. He is the author of A Stargazing Program For Beginners (Springer, 2015),

