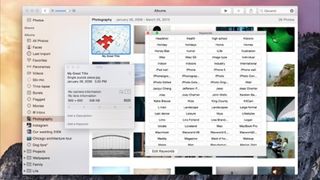
By default, and just like iOS, Photos for Mac punctuates your photos and videos using basic metadata of time and location (when available). Combine this with the new built-in sidebar categories, and many people will be happy with this level of automated organization.
For the more adventurous, you can create albums to organize media for just about any purpose or topic you want. If that isn't enough, you can also use Smart Albums, a longtime staple of iPhoto, Aperture, and OS X itself, to automatically filter your library by criteria such as date, text in titles you add, and even the camera used.
Of course, the fabric tying all Apple products together is iCloud, and it is a first-class citizen here with a custom feature name: iCloud Photo Library. If you enable this, your entire library will automatically sync between all devices as long as they're on Wi-Fi. Yes, even edits you make to photos will sync, as will your ability to revert a photo to its original form.
If I have a complaint with the organizational features of Photos, it's that not all of them sync with iOS. You can create Smart Albums and organize Faces on Mac, but as of this writing, Apple's latest iOS doesn't see them. Our ever-expanding photo libraries sync to all devices now, but the smart tools we need sift through them do not. Also, out-of-the-box, Photos is woefully short on filters. I hope Apple allows third-party apps to add filter tools on Mac like they can on iOS.
Step-by-step: get organized

1. Import Your Photos: Of course, you need to get your photos into Photos for Mac to do anything with them. If, like most people, you shoot everything with your iPhone, be sure to enable iCloud Photo library on all your devices for effortless sync. To manually import from a traditional camera, simply plug it in via USB to trigger the Photos for Mac import tool.

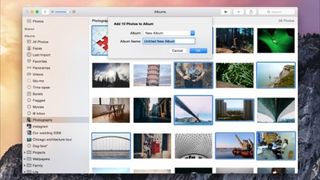
2. Create an Album: Use File > New Album to create a blank album in your sidebar, give it a name, and start dragging photos into it. Alternatively, if you hold Command or Shift to select multiple photos, then click File > New Album, all selected items will be automatically organized into that new album.

3. Get Smart: If you really want to start organizing, use File > New Smart Album to create a live, dynamic filter of your library. For example, you could combine criteria like "date" and "Face" to find all photos of yourself from that one time in your life and delete them to leave no evidence… or simply reminisce.
Are you a pro? Subscribe to our newsletter
Sign up to the TechRadar Pro newsletter to get all the top news, opinion, features and guidance your business needs to succeed!

4. New Shared Album: A great feature of Apple's new photo ecosystem is the option to share and even collaborate on an album with friends and family. Use File > Share > iCloud Photo Sharing to share media with people you invite (Apple devices required). You can even let others upload, making these handy for collaboration.

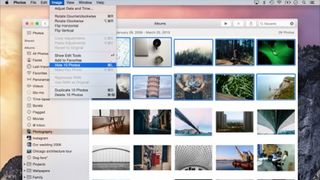
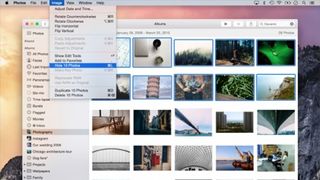
6. Hide Photos: If you save images like Internet memes or screenshots on your iPhone, but don't want them cluttering your actual photography, Photos for Mac (and iOS) can hide them (Image > Hide Photo). If you put them in albums first, the photo will display in that album, but not in All Photos.

