Essential ideas, tips and techniques to transform your portrait photography
Improve your portrait photography with our expert guide
4. Retouching
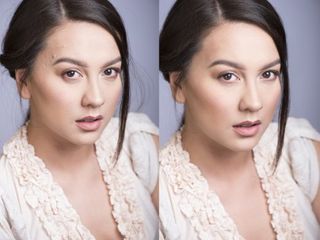
Love it or hate it, Photoshop has changed the way portraits are created – and it's also changed the way we perceive portraiture as truthful or not. With a few skills, anyone can transform a portrait into whatever they please. But when you can get rid of every wrinkle, drop three dress sizes and remove every imperfection, the real skill is in knowing when to stop.
The art to good retouching is making subtle, almost imperceptible alterations. The three tricks explained here will help. First we'll use two tools cherished by retouchers – Heal and Clone – to tidy up marks and spots. Then there's a skin softening technique that works wonders, softening and smoothing out skin while still retaining the delicate skin texture that so many inferior methods obliterate. And finally is a useful trick for reducing eye bags that lets you lift dark tones without losing detail.
Professional retouchers might spend hours working up a single image, but thankfully, these tricks take much less time to achieve…
Tip 1: Heal and clone
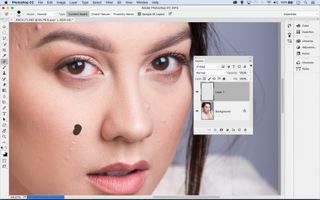
Photoshop's Spot Healing Brush lets you remove spots, blemishes and stray hairs by painting over them. Switch to the Clone Tool when you need to blend untidy patches or rough skin. Set the tool to 20% and Alt-click to sample a clean area nearby, then gradually clone over the problem area. Both tools can be set to 'Sample All Layers', so it's best to use them on a new empty layer to preserve your original image. That way, you can change your mind later…
Tip 2: Reduce bags
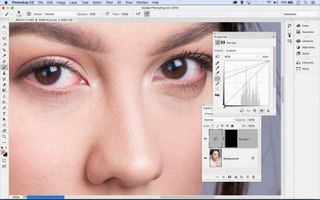
Add a Curves Adjustment Layer, then click on the Curves layer thumbnail to deselect the mask. Double-click the black point eyedropper in the Curves settings, then sample a clean skin tone. Click OK, then click over the dark eye bag. The shadow tones will change colour to match the first sampled tone. Now you simply mask it to cover just the bags. Highlight the mask thumbnail and press Ctrl/Cmd+I to invert, then paint with white over the eye bags.
Tip 3: Soften skin
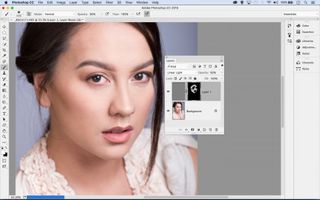
Duplicate the background layer then invert it with Ctrl/Cmd+I. Set the layer opacity to 50%, and change the Blend Mode from Normal to Linear Light: your image should now be grey. Go to Filter > Other > High Pass and set the Radius to around 9px. Go to Filter > Blur > Gaussian Blur and set it to around 3px. Finally, Alt-click the Add Mask icon for a full black mask, then paint white over the skin to reveal the softening effect.
Tip 4: Dodge and burn
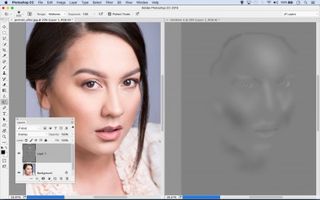
Dodging and burning might seem more suited to landscape photography than portraits, but a little selective lighting and darkening can have a huge impact. Here's one way to do it: Alt-click the new layer icon, set the Blend Mode to Overlay and tick the Fill With box, then paint white or black over the image.
Get daily insight, inspiration and deals in your inbox
Get the hottest deals available in your inbox plus news, reviews, opinion, analysis and more from the TechRadar team.
More important than the method is where you dodge and burn. With a few subtle strokes, you can emphasise the contours in the face in much the same way as a make-up artist. In general, aim to lighten the centre of the forehead, the area below the eyes and the chin; then darken the hairline, below the cheekbones and underneath the chin.
