How to run Windows 11 in macOS Monterey
Run two operating systems on your Mac
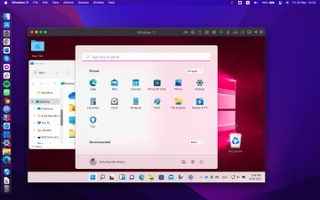
While we should never forget that Linux exists, for the vast majority of people the choice of operating system comes down to Windows or macOS.
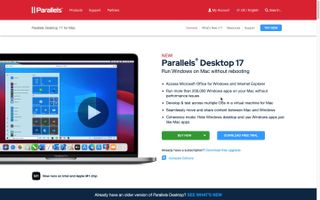
But if you need to use both Apple's and Microsoft's OS, there is no need to splash out on two computers or laptops as you can just use the virtualization software Parallels Desktop.
Using this powerful application, you can successfully run Windows 11 within macOS Monterey, effectively giving you the best of both worlds.
This is a great option for anyone who like Apple hardware, but it's a particularly good idea for students who need to use Windows and macOS as it means you only need to find space (and money) for a single device – and there's a great student discount available (see step 10)! So read on to find how to run Windows 11 in macOS Monterey.
- How to download and install Windows 11 right now
- Here's why macOS 13 could be a Mammoth upgrade
- There's an all-new, super secure look for Safari 15 on macOS

1. Giving it a try
For the purposes of this guide, we'll assume that you already have Parallels desktop installed on your Mac, but if you don’t yet have a copy, you can download a free trial from the Parallels website.
The trial lets you try out the software for a period of 14 days before you have to pay for a license, and the fact that it is a completely restricted trial version means that you can try out all of the features before you have to part with any money.
2. Download Windows 11
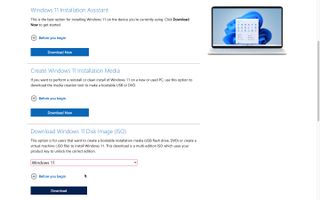
The first thing you will need to do is to download Windows 11 ready for installation. Microsoft has a Windows 11 disk image that you can download, and this ISO can be used to create an installation USB or DVD, or to create a virtual machine in Parallels.
Get daily insight, inspiration and deals in your inbox
Get the hottest deals available in your inbox plus news, reviews, opinion, analysis and more from the TechRadar team.
Pay a visit to the Download Window 11 page, scroll down to the Download Windows 11 Disk Image (ISO) section, select Windows 11 from the drop-down menu and click Download. Select your desired language from the second drop-down menu and click Confirm followed by the 64-bit Download button.
We also have a guide on how to download the Windows 11 ISO for more guidance.
3. Installing Windows 11 in Parallels
The disk image is a shade over 5GB in size so, depending on the speed of your internet connection, you may find that it takes a while to download.
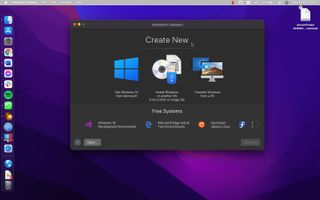
When the download is complete, you are ready to start the process of installing Windows 11 to a virtual machine, so fire up Parallels and click File > New. In the Installation Assistant window that appears, select the central option labelled 'Install Windows or another OS from a DVD or image file' and click 'Continue'.
4. Select the ISO
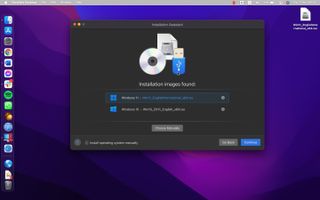
Parallels will scour your hard drive for a suitable installation image, and it should automatically find the one you have just downloaded.
If the Windows 11 ISO is not automatically detected, or if you have other ISOs on your hard drive so Parallels does not know which to use, click the 'Choose Manually' button and then either drag the newly downloaded ISO onto the app window, or click select a file before navigating to the ISO, selecting it and then clicking 'Continue'.
5. Install Windows 11 as a virtual machine
Installing Windows 11 in a virtual machine is not especially different to installing it on a PC – but of course you will have the installer for Microsoft's operating system running in macOS on your Apple hardware!
You can enter your Windows license code now to save time later, and specify which version of Windows 11 to install.
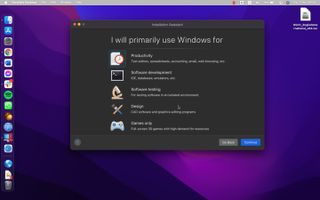
The Parallels Installation Assistant will ask you what you intend to use the virtual machine for, and this will determine how many system resources are dedicated to it. Select the 'Customize settings before installation' option and click 'Continue'.
6. Configure the installation
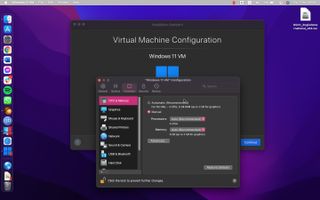
To get the most out of your experience of running Windows 11 within macOS, it is worth spending a little time configuring a few preferences and settings. In the 'General' section you can name and configure your virtual machine, while in 'Options' you can decide on things like startup and shutdown options.
Move to 'Hardware' and you can customize how much memory is dedicated to Windows 11, choose whether your webcam should be shared with Windows ands more.
Close the configuration and click 'Continue'; you can then simply follow the on-screen instructions from Microsoft, and it won't be long before you have been guided through the installation and you can create user accounts and configure Windows 11's basic settings to your liking.
7. More options
You can use the Parallels Control Center to access and launch the virtual machines you create, and this is where you can launch Windows 11.
For the most part, once Windows 11 is installed in Parallels, using it within macOS is not really any different to using it on a PC – but there are some things that are worth knowing, particularly sharing and moving content between the macOS and Windows 11.
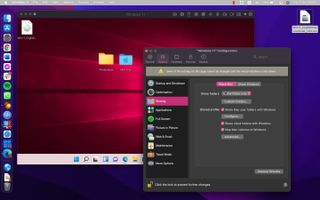
Click the Parallels icons in the menu bar and select 'Configure' before moving to Options. In the Sharing section click 'Share Mac' and check 'Share Mac user folders with Windows'. This will enable you to access Mac files in Windows 11 and serves as a handy way to copy files between the operating systems.
8. Customize shortcuts
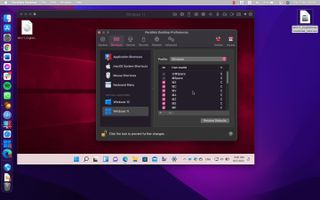
Whether you are a Mac user who is not overly familiar with Windows, or vice versa, you will be aware – or will quickly learn – that there re differences in keyboard shortcuts between the two operating systems.
To make your life a little easier, you can customize the shortcuts uses in virtual machines by clicking the Parallels Desktop menu and selecting 'Preferences'. In the 'Shortcuts' section you can customize the shortcuts used to control Parallels itself, as well as changing common shortcuts so when you use a known macOS shortcut, it is linked to an action in Windows – so Command + P can be mapped to Ctrl + P to easily access the print dialog in Windows apps, for example.
9. Integrating Windows 11 in macOS Monterey
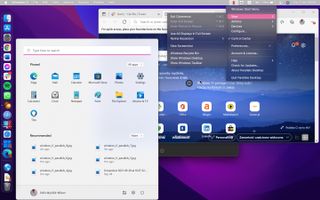
There are a few different ways for you to experience Windows 11 in macOS, the first and most obvious of which is to simply run it in a Parallels window.
This makes it very easy to switch between Windows and macOS, but if you would like to be more immersed in Windows 11, you can simply maximize Parallels. A third option is to enter 'Coherence' mode.
This essentially does away with the Windows 11 desktop so your Windows applications run within macOS and can be more easily accessed without the need to switch to Parallels. This is a great option if you use Windows apps alongside Mac software on a regular basis and can be accessed via the 'View' sub-menu under the Parallels icon in the macOS menu bar.
10. Get a discount
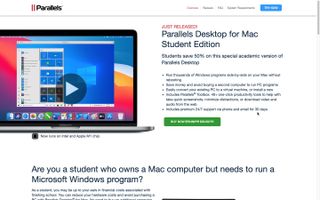
If you are a student in United States, Canada, Australia, Germany, Korea, Japan or the UK, you can find out more about a discounted version of Parallels Desktop for Mac.
The student edition of the software is available for 50 percent off the usual price of the Standard Edition (bringing the price down from $79.99 to $39.99), and more information about this discounted version here.
You will need to provide proof of your eligibility here. It's worth noting that there is a free trial version available, which you can download here.

Sofia is a tech journalist who's been writing about software, hardware and the web for nearly 25 years – but still looks as youthful as ever! After years writing for magazines, her life moved online and remains fueled by technology, music and nature.
Having written for websites and magazines since 2000, producing a wide range of reviews, guides, tutorials, brochures, newsletters and more, she continues to write for diverse audiences, from computing newbies to advanced users and business clients. Always willing to try something new, she loves sharing new discoveries with others.
Sofia lives and breathes Windows, Android, iOS, macOS and just about anything with a power button, but her particular areas of interest include security, tweaking and privacy. Her other loves include walking, music, her two Malamutes and, of course, her wife and daughter.
