Apex Legends landing spots: here's where your Jumpmaster should touch down
Jumpmaster flash
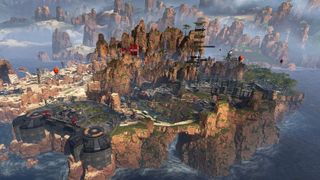
Dropping in hot. Apex Legends’ Kings Canyon map is bustling with locations to land. From the murky Swamps to the abandoned Skull Town, each sector is different from one another with specific advantages setup to give players the best chance of becoming champion.
The role of Jumpmaster is crucial. There’s nothing wrong with opting out of the role and handing it over to a more experienced teammate, however if you do decide to take on this mantle you better know your geography.
Here’s where we come in. By outlining the best locations in Kings Canyon, next time you’re given the responsibility of Jumpmaster you can confidently descend without any worry of seeing an early fatality.
Supply Ship

Arguably one of the most sought-after spots on the map, the Supply Ship is a gold mine for high-quality weapons, armor and remedies. The interesting thing about the stacked vehicle is every squad will either head for the ship - resulting in a bloodbath within the first moments of the match - or the vehicle will end-up completely desolate, due to fear of encountering an enemy so early on.
The best tactic is to view other trios during the initial fall by circling the camera round. Then if the coast is clear, head on out.
Bunker
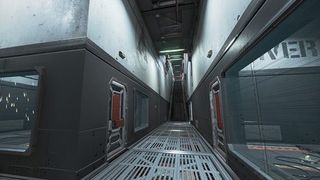
Another risky endeavor but one that can dictate the full proceedings of the game. The Bunker is very popular with players due to the fact it's littered with high-tier loot, while putting whoever presides in the area in prime position for taking down any rival squads.
As the most central spot on this list, it also lends itself for the long haul. Featuring numerous supply bins at each entrance, if you can grab some gear and batten down the hatches all in quick succession, you’ll be sitting pretty.
Get daily insight, inspiration and deals in your inbox
Get the hottest deals available in your inbox plus news, reviews, opinion, analysis and more from the TechRadar team.
Water Treatment
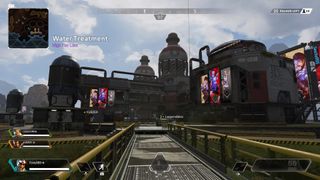
The Water Treatment may seem dense, though it’s hard to argue its wide range of tactical possibilities.
Apart from supply bins as far the eye can see, the area includes: a nearby Respawn Beacon, Jump Tower allowing for a quick getaway, strong viewpoints and the chance that the Supply Ship will land next door. This all forming a near-perfect landing zone.
Watch Tower (North)
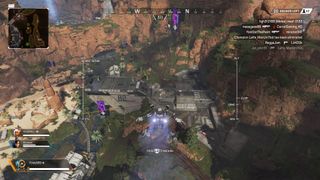
Flexibility for each scenario is exactly what a landing spot needs to provide and there’s few that offer all of this, plus more.
South-east of Artillery, Hydro Dam gives players lots of freedom whether they prefer to snipe or take on opponents in-close proximity. Although loot is not as prominent as it is in other regions, all of it is high-tier and neighboring zones are barely a two-minute jog away.
Thunderdome
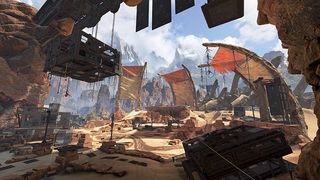
Filled with outstanding vantage points, while a Respawn Beacon lies directly in the centre, Thunderdome is always worth considering.
Containing multi-level cages high in the sky besides three adjacent structures, including Skull Town, the rocky terrain is a popular choice but for good reason.
Opposite side of the map

Realistically speaking, wherever you drop there’s a good probability that another band of misfits will be thinking along the same lines. Be strategic and consider where the Drop Ship is moving in from. Patience is key with umpteen crews simply wanting to get the match underway.
Heading in from the west? Hold on for the Watch Tower. Is the North your starting position? Maybe look at the Water Treatment. As Bear Grylls states: Improvise. Adapt. Overcome.
Matt is a full-time freelance journalist who specializes in arts, culture and tech – be that movies, TV, video games, or otherwise. He's also turned his hand to everything from mattresses to motorbikes as a journalist. Prior to this, Matt headed up the games and entertainment section at T3.com, alongside being published across TechRadar, IGN, Tom's Guide, Fandom, NME, and more. In his spare time, Matt is an avid cinema-goer, keen runner and average golfer (at best). You can follow him @MattPoskitt64.

