52 photography projects: a great technique to try every week of the year
Our pick of the perfect weekend photography projects
Outdoor photography projects
24. Brenizer effect portraits
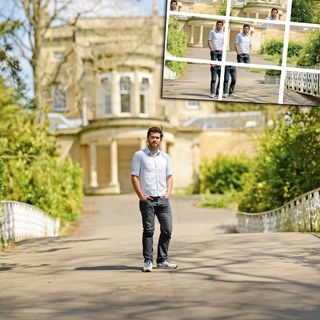
The Brenizer method, also known as portrait panorama or bokeh-rama, provides a great basis for a portrait photography project. Invented by New York wedding photographer Ryan Brenizer, the technique helps you create photos that appear to have been shot on a lens with a much wider maximum aperture. The idea is that you shoot lots of telephoto photos of different parts of a scene at the lens's widest aperture, and then join this mosaic together using Photoshop's Photomerge option or in specialist stitching software.
Make sure you shoot each frame using manual settings - from White Balance through to focusing - so that you can batch process all the shots. Try shooting anywhere from 30-80 frames, and make sure each tile and row overlaps the last by around a third.

25. Free-lensing
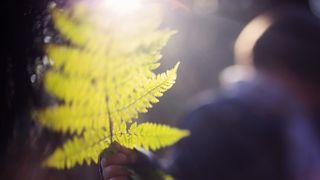
Camera manufacturers go to great lengths to build robust, dust-proof bodies – so the idea of shooting with your lens unattached might seem the opposite of good photographic practice. If you’re careful, though, free-lensing can deliver captivating focus effects.
In simple terms, free-lensing means shooting with the lens disconnected from the camera body. It allows you to achieve striking selective focus by manually positioning the lens. And while the technique requires trial and error, it can also be a really rewarding way to interact with your camera.
Free-lensing is easiest to execute with a prime lens. Before you start, set ISO and shutter speed, open the focus to infinity and set the aperture at its widest for maximum effect. Then simply detach your lens and, handling both components carefully, start experimenting.
Live View is your friend here, giving instant feedback on the impact of different lens positions. Tilting changes the focus target, while holding the lens further from the body achieves a hazy glow. As you get more confident holding the parts apart, you’ll be able to free-lens in different settings – but be sure to keep the lens as close as possible to the body to minimize the risk of dust.

26. Go big with a panoramic photo

Panoramas are simple to capture with a smartphone, but for more immersive landscapes and cityscapes, try stitching one from several high-resolution photos.
Get daily insight, inspiration and deals in your inbox
Get the hottest deals available in your inbox plus news, reviews, opinion, analysis and more from the TechRadar team.
Switch your camera to manual mode and take a test shot to determine the optimum aperture, shutter speed and ISO settings. Together with focal distance, these should remain constant across every frame for even results.
Use a tripod to pivot around a fixed point and maintain a consistent perspective – a big help when compositing. If your tripod allows you to shoot in portrait orientation, this will give you more freedom to crop later. Pan across the scene, overlapping each frame by 25%.
Once you’ve got your individual images, you’ll need to stitch them together. Doing this manually is painstaking. Luckily, there are a range of accessible software options: Adobe Lightroom features a panorama setting in its Photo Merge menu, while free solutions include Hugin and Image Composite Editor.

27. Minimalist mono landscapes
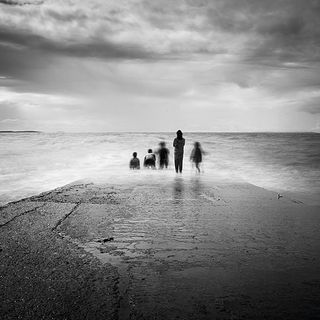
Instead of cramming an entire view into a single frame, shoot a series of minimalist long exposure landscapes instead. A symmetrical composition can help to reinforce the simplicity of the framing, as can a square crop. You'll also need a strong Neutral Density (ND) filter to give you the flexibility to create long exposures at any time of the day. Use a tripod to keep the camera still throughout the exposure and fire the shutter with a remote release.

28. Starlight landscapes
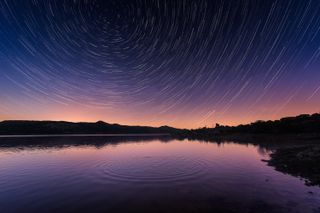
To capture the best starscapes you'll need a completely clear sky. It's best if the moon isn't visible: it can make it difficult to keep detail in the whole sky in a single exposure. To keep the exposures short enough to prevent the moving stars blurring, use Manual mode and set a high ISO such as 1,600 or 3,200 and a shutter speed of two seconds. Even then, you'll need a wide aperture: f/4 or even f/2.8. This means it's almost impossible to keep both the stars and any foreground subject in focus in a single shot. Shoot two exposures, one focused on the stars and one on the foreground, then combine them in Photoshop.

29. Zoom burst effect
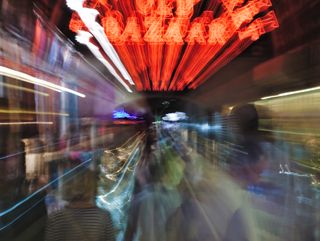
Forget fixing your focal length before you shoot: zooming rapidly while the shutter is open can enhance motion, add dynamism and make even the most mundane shots exciting. Achieving a striking zoom burst is really straightforward: simply pick a focal point, set a relatively slow shutter speed – usually below 1/60 – and, while the shutter is open, twist the barrel. Starting in and zooming out will produce a different effect to doing the opposite, as will the speed at which you zoom. Using a tripod should ensure the blurred lines are straight, while going handheld can introduce even funkier distortion.

30. Car park abstracts
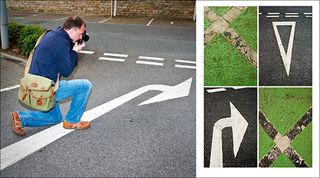
You don't have to travel far or commit a lot of time to an outdoor photography project. There are photo opportunities just about everywhere - even in a car park. A DSLR with a standard zoom is all you need for this project. Keep your technique simple and look for patterns, textures, colours and shapes.

31. Selective color
Rather than shoot in black and white and using pop colour techniques to make an object stand out, this selective colour challenge requires you to nominate a colour and find examples of it in the wider world. You don't have to fill the frame: use clever composition techniques to draw attention to it within the photo.

32. Focus stacking
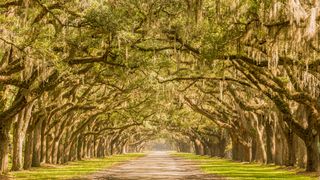
You might be familiar with the HDR technique: taking several shots of the same scene, each at different exposures. Combining the results produces a single image in which every aspect is perfectly exposed.
Focus stacking uses the same idea, but instead of changing exposure between shots, you adjust the focus point. Do this for the entire scene’s depth of field, then merge the shots and you’ll end up with an image that’s pin-sharp across the entire frame. The technique tends to be most striking for landscapes, especially if there’s perspective at play, or detail in both background and foreground.
To achieve the effect, you’ll need to mount your camera on a tripod. Frame up the scene and, between exposures, move the focus point across the sensor, using your camera’s D-pad or touchscreen. Once you’ve covered the entire frame, it’s simply a case of aligning and blending the layers, which most editing software can do automatically.
Got a lot of time on your hands? Try HDR and focus-stacking at the same time, for truly surreal results.

33. Optical illusions
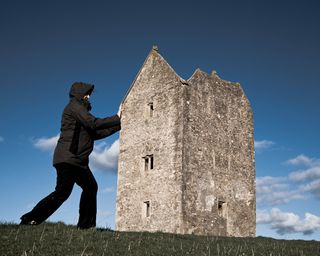
This project uses forced perspective to play tricks on a viewer's perception of the relationship between differently sized objects in a photo. The best way to approach this is to shoot a recognisable subject and get them to pretend that they are interacting with a much larger object or subject, which is actually in the background. Choose a small aperture to provide a large depth of field that will enhance the effect.

34. Small world
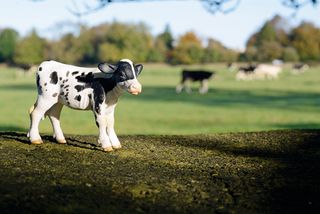
Photographing miniature toys and models in real-world environments is a popular photo project and one that you can easily fit around your day job. Try taking a small prop with you and photographing it in a range of situations - everywhere from the daily commute to a weekend stroll. To blend the model in with the rest of the scene you'll need to get close to the subject and balance the light. If your subject is cast in shadow, use your flash to add fill-in lighting.

- Best camera accessories: essential bits of kit for your camera
- 10 must-have accessories for every Canon DSLR owner
- 10 must-have accessories for every Nikon DSLR owner
- Best travel tripod: 5 carbon fiber stands for your camera
- Best camera bag: 10 options to protect your camera kit
- Best flashgun: dedicated strobes for Canon and Nikon DSLRs
- Best ND filters: 6 top models tested
- Best ND grad filters: 6 top models tested
Current page: Outdoor photography projects
Prev Page Home photography projects Next Page More outdoor photography projectsFormerly News Editor at Stuff, Chris has rarely been able to resist the bite of the travel bug – so he now writes about tech from the road, in whichever Wi-Fi-equipped café he can find. Fond of coffee kit, classic cars and sustainable gear, if there’s one thing Chris loves more than scribbling, shooting and sharing his way around the world, it’s alliterative triplets.

