This article originally appeared in our sister publication Maximum PC. For nearly 20 years, Maximum PC is considered by enthusiasts to be the absolute source for the latest in guides, reviews, in-depth analysis on cutting edge PC hardware. Subscribe to Maximum PC
Welcome to our guide on how to speed your laptop for free. It's not always possible to buy a brand-new laptop, but you can save a huge amount of money and hassle by following these steps to speed up a laptop and get it running like new – all for free.
The steps we go through here can breathe new life into your existing laptop. They could even help you if you buy a second-hand laptop (or get given one from a friend or relative).
For most people, your laptop will likely be running Windows 10, so we'll be focusing on tips and tricks for speeding up your Windows 10 laptop. We also have guides on how to speed up MacBooks.
General laptop speed up tips
1. Keep Windows 10 up to date
Ah, the Windows Update. Truly the modern-day raven, rap-tap-tapping on Edgar Allen Poe’s operating system with menacing intent.
Taking control of your updates is objective number one for anyone trying to optimize their laptop, so jump into “Update Settings” and remember to smash that “Check For Updates” button.
You can turn on auto-updates, too, under “Advanced options,” but if you have a metered connection, we advise against this, and instead recommend manual updates. You can also pause all updates for up to two weeks; useful if you want to try something in a specific version of Windows 10.
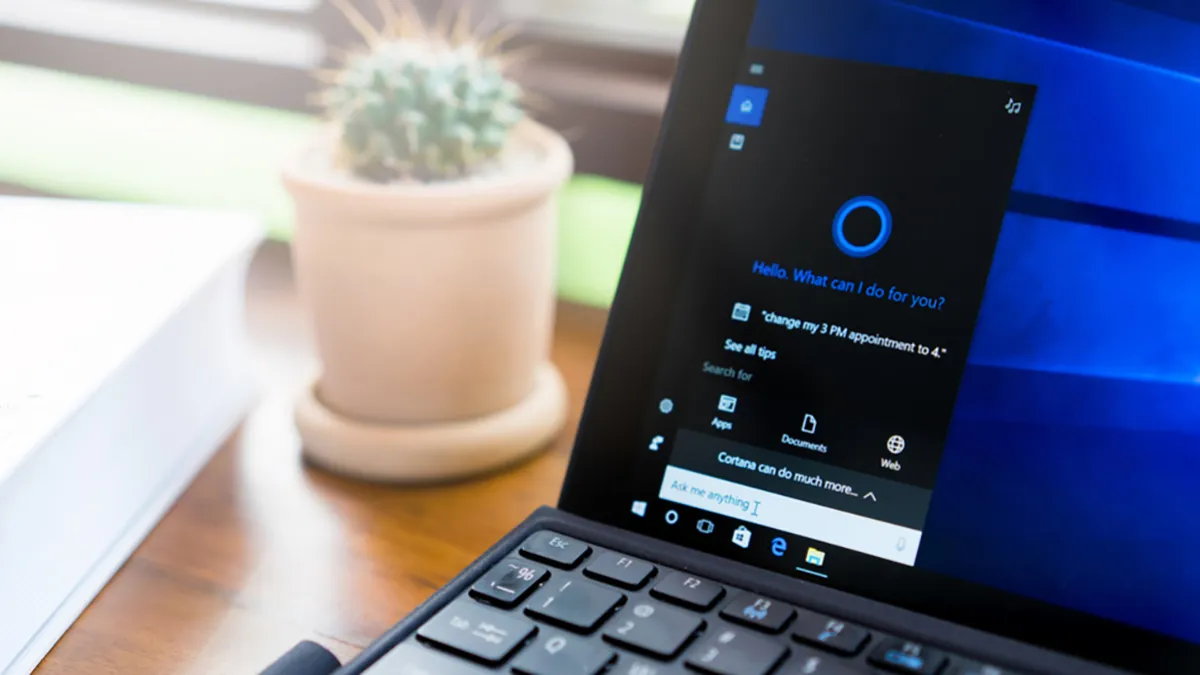
2. Shut Cortana up
For the vast majority of users, Cortana is little more than a frustration baked into the core of Windows 10. Annoying pop-ups, constant data-gathering, and forced Bing search (come on, Microsoft…) make Cortana the least helpful voice assistant in the biz, but fortunately, shutting her down is reasonably straightforward.
Find the Cortana page under “Settings,” then toggle all the sliders off. To complete the process, head back out to the main “Settings” menu. Under “Privacy Settings,” you’ll fi nd “Speech” and “Inking and typing personalization.”
Turn both of these off to cut down the amount of data Cortana gathers from your typical PC usage. You can also block all apps from accessing your camera and microphone on the “Privacy” page.
3. Disable startup apps
We’ve all been there, booting up our laptop to get a quick task completed, only to be waylaid by Spotify, Steam, Uplay, and Discord introducing themselves like the worst barbershop quartet of all time.
Windows has you covered, though—the “Startup” page under “App Settings” lets you view which apps are set to start up immediately (albeit in the background) when you log into Windows, and also which ones have a higher impact on your boot times.
Toggle off any of these that you want to open manually, such as Spotify or OneDrive, and your system should start up faster.

The tips on this page will show you how to speed up your laptop for free – but watch out for false advice. Here's some 'tips' that often make the rounds, that sadly won't make a difference.
Don't defrag an SSD
Defragmentation software can be helpful, but only for older drives. If you have a SATA SSD or M.2 NVMe drive, you don’t want to try defragging it; there are no significant performance benefits (because SSDs have no moving parts, there’s no risk of mechanical latency building up over time), and the lengthy defragmentation processes can actually wear out the memory cells and ruin the drive’s lifespan if you do it too many times. Just don’t bother.
RAM Disks aren't that useful
Also known as RAM drives, these nifty data storage solutions use thirdparty software to partition a given amount of your memory to be used as data storage instead of random-access memory.
The advantages jump out immediately; RAM is a lot faster, netting you vastly improved data transfer speeds for your virtual drive. If you’re moving files around a lot and only have an HDD or SATA SSD, it seems like a no-brainer.
However, RAM disks are volatile memory; if your PC loses power, that data is wiped. It’s necessary to have regular automatic backups to your physical drive, and to reload the RAM disk image back into your memory every time you boot up your system, which takes time. Unless you have a staggering amount of memory to spare, it just isn’t worth it.
Don't tweak power plans on a desktop
While many of these tips will also apply to desktop PCs as well as laptops, there's no point messing around with a desktop's power plan.
If your PC is connected to mains power, set the power plan to high performance and call it a day. Some people will claim that there are benefits to using the other plans; we’re not saying those people are wrong, but we are saying that any benefits will be practically unnoticeable.
Don't reinstall Windows
A complete fresh install of Windows should only ever be a last resort, when other attempts to salvage your system have failed.
System restore points are a more useful resource, and it’s generally a good idea to have both cloud-based and physical backups of your data.
Reinstalling Windows is often like bringing a broadsword to a knife fight; effective, but far too much effort and potentially messy.
4. Disable background apps
This one comes down to preference, and isn’t so necessary on more powerful systems with plenty of memory and high-speed storage.
Under “Privacy Settings,” you can individually select which apps you want to run in the background, and disable the rest.
There’s a ton of tools included with Windows 10 that you might use sometimes, but don’t ever want running in the background. Windows News? Disabled. Voice Recorder? Deactivated. Xbox Console Companion? Begone!
5. Uninstall unwanted applications
Speaking of stuff included with Windows 10, there’s plenty of bloatware you can just get rid of which will help speed up your laptop.
The most obvious contender is of course Candy Crush, but if you take a trip into “App Settings” and scroll through the “Apps & features” list, you may find a surprising amount of software you never use, and never intend to use.
Click on a program to view options, and uninstall it from there. If you’re unsure what a piece of software does, always look it up online before removing it.
6. Update device drivers
Updating your drivers is often a handy fi x for something not working with a PC, but it’s a good idea to keep your device drivers up to date whenever possible. To check for updates, right-click the “Home” button and select “Device Manager,” then right-click the device you want to update the drivers on. You can also scan for new hardware here; if you change something about your physical setup, you might need to relocate it within the Device Manager in order to update the drivers and ensure everything is working properly.
7. Log in faster
The Windows 10 lock screen is a pointless innovation. Having to swipe up or hit the spacebar before logging in slows things down a bit, and using a conventional password is slower, too.
First up, assign a PIN rather than a password for logging in; four digits and no need to hit Enter, either. If your system supports it, Windows Hello is pretty speedy, too.
You can even remove the lock screen altogether, going straight to the login screen upon boot. Annoyingly, how you do this is different for Windows 10 Home and Windows 10 Pro. For Windows 10 Home edition, you need to run regedit from the “Run” prompt, make your way to “HKEY_ LOCAL_MACHINE > SOFTWARE > Policies > Microsoft” and right-click “Windows,” select “New > Key” and call it “Personalization.”
Once created, right-click this key and add a new “DWORD (32-bit) Value,” with a name of “NoLockScreen.” Double click this and set the “Value” to 1. For Win 10 Pro, hit Win-R, type “gpedit” and hit Enter.
Double-click “Administrative Templates,” double-click “Control Panel,” click “Personalization,” then double-click “Do not display the lock screen,” and click “Enabled.” Click “Apply,” and then “OK.” Job done.

8. Check your power plan
It’s worth taking a peek at your power plans in the Control Panel on a laptop, found under “Hardware and Sound.”
If it’s a powerhouse laptop that you’re essentially using plugged-in as a desktop replacement, slap that high performance plan on and call it a day; otherwise, you’ll want to take a trip into the advanced power plan settings.
The default balanced plan is usually a good call, but even then you might want to make some adjustments; like disabling certain ports while the monitor is asleep, for example.
9. Disable tips
Windows 10 wants to be helpful, but like a bumbling manservant, sometimes that help is actually less than helpful.
By default, Windows 10 scans your system periodically to give you (usually unwanted) advice, and this can have a small impact on mobile processor performance, particularly in cheaper laptops.
You can turn it off in System Settings, under “Notifications and action.” Just toggle off the slider marked “Get tips, tricks, and suggestions as you use Windows.”
10. Manage your temperatures better
It’s a good idea to use third-party software, such as HWMonitor, to keep an eye on your system temperatures.
This is even more critical with laptops, where keeping your CPU cool is an even more difficult endeavor.
If you’re regularly using demanding software on your laptop—3D rendering tools, for example—then heat spikes are inevitable, but there are a few things you can do to alleviate the temperature load on your poor laptop.
The general optimization tips elsewhere in this article are a good start, but making sure you’re positioning your laptop right is important, too. Don’t actually put it on your lap, for starters.
Ensure that all the air vents are clear, and only use it on hard, fl at surfaces. If you have problems with temperature, consider using something to prop your laptop up, creating more empty space beneath it for better airflow.
11. Create a Restore Point and restore your system
In the Control Panel, go through “Security and System > System > System Protection,” and you’ll open up the window for system restore options.
You can hit the big “System Restore” button to revert your version of Windows to a saved restore point; your PC should regularly create these by default, but it saves over the previous one when it does so.
Hit “Configure” and you can tweak your restore settings, or create new restore points. This isn’t something you need to do too often, but it’s worth having restore points for each of your drives, just in case a new software or OS update causes problems.
- Check out our complete guide to using System Restore

12. Track CPU usage
There’s a handy function Task Manager has hidden in its box of tricks. When the Task Manager window is open, you should see a tiny square icon with a grid pattern in the bottom-right corner of your screen, in the notification area.
It may be hidden in the expanded menu; just click the arrow and drag it on to the taskbar if needed. That icon is a microcosm of your CPU usage, showing a tiny graph that indicates how much of your CPU is currently being utilized, and placing your mouse over it shows exact percentages.
To keep it present when Task Manager isn’t open, select “Hide when minimized” from the Task Manager’s “Options” drop-down menu, then minimize the window
13. Check for malware
Of course, ideally you won’t have a single bit of malware on your PC, but if you suspect something is amiss (or you watched in slow motion from across the room as your child clicked an extremely dubious link), Windows 10 can scan your system for viruses.
Find the “Windows Security” tab under “Update & Security Settings,” and select “Virus & threat protection.” From this menu, you can run quick security scans on your system, or set up full scans that take longer.
Windows Defender automatically scans your system for malware periodically; you can tweak that in this menu, too, check for security updates, and manually input exemptions from Defender’s scans.
That last point can be particularly helpful for users who deal with a lot of unlicensed software or shareware, but always err on the side of caution when it comes to downloading new programs.
- Check out our pick of the best antivirus software
14. Use Task Manager better
Making the best use of Task Manager is key to mastering control over Windows 10. First up, access it faster by right-clicking the “Home” button and selecting it; no need to Ctrl-Alt-Del here.
You’re also going to want to get rid of the simplified view by hitting “More details” to expand to the full Task Manager experience. Here, you can monitor component usage, view the full suite of active and background processes, and a whole lot more that you won’t need to fiddle with.
What is useful here is the ability to check exactly how much pressure each program is putting on your CPU, GPU, memory, and drives. If one background app is chewing up CPU power, or you want to compare the RAM impact of two different browsers, this is the place to do it.
You can end any task manually by right-clicking it, but be careful—there are lots of background processes that are vital to your system’s operation, so don’t shut off anything you don’t recognize.
15. Stop apps resuming on startup
Another matter of preference, here we’ll explain how to disable apps and browser tabs resuming upon booting up.
If you use your system a lot and have numerous Chrome tabs you want to preserve, skip this step, but otherwise, take a trip into “Accounts Settings.” Under “Sign-in options,” at the bottom of the page, there’s a slider for reopening your apps “after an update or restart.”
It tries to resume the active programs you had running when you last shut down your PC, potentially including non-essential background processes, and that slows down your PC’s boot time. Toggle it off.
16. Free up drive space
The less stuff on your drive, the better it runs. This is more true of older hardware, but can also affect SATA SSDs to a significant degree. Clearing up your drive on a semi-regular basis is a good idea, as it can also improve the drive’s effective lifespan.
There’s a few ways to do this, which work best when done in conjunction: First off, empty the recycle bin. It’s easy to forget about that little white trash can on your desktop, but emptying it regularly is a good idea.
Windows 10 also has a built-in disk cleanup tool, found under “Windows Administrative Tools” in the “Start” menu. If you’ve recently upgraded to Windows 10, this is worth doing; it can safely erase old system files. If you can, move files to a cloud storage solution, such as Google Drive or OneDrive—that can help, too!

17. Check your system health with Performance Monitor
Another handy tool in Windows 10’s repertoire is the Performance Monitor. Activate it by typing “perfmon /report” into the search bar (without the quotes) and give it a few minutes to gather system data.
It then spits out a highly detailed interactive report; any major issues with system files or processor loads should be highlighted immediately, and you can also check through a series of system checks and a resource overview, which can identify if one part of your system is working overtime when it shouldn’t be.
18. Disable syncing
Windows 10 has a bit of a digital hard-on for synching everything; whether that’s banal things such as appearance themes, or important stuff, such as passwords, search history, and cloud data.
If you use Windows on numerous devices, this can be helpful; otherwise, it just puts extra strain on your system, and potentially poses a cybersecurity risk.
You can shut off a number of these under “Sync your settings” in “Accounts Settings,” but you might also want to disable OneDrive synching, too. To do this, you have to open up OneDrive and head into the settings, then select “Unlink this PC” under the “Account” tab.
19. Disable visual effects
Look, Windows 10 is great, but it’s undeniable that some areas are overdesigned. This step does come down to personal preference regarding aesthetics, but it can also be useful if you’re running a system with integrated graphics that needs to keep things as simple as possible.
Under the “System Properties” menu, there’s a tab entitled “Advanced.” Hit the “Performance settings” button on this page to open up full customization of all the visual effects baked into Windows 10.
Hit “Custom” and you can tweak to your heart’s content; you probably won’t want to disable everything, but there are some animations here that can safely be turned off.
Speed up older laptops
20. Use ReadyBoost
ReadyBoost is a handy feature for laptops with older or limited hardware, and uses removable storage (typically a USB flash drive or SD card with at least 12GB of storage) to temporarily cache data and speed up your system.
You can activate it by plugging in an empty flash drive, right-clicking the drive in File Explorer, and selecting the “ReadyBoost” tab under “Properties.” Select “Dedicate this drive to ReadyBoost” and reserve all available space for caching.
We advise against using flash drives with data stored on them for this; while it shouldn’t be a problem, it reduces the available storage space for ReadyBoost to use, and constantly caching files can reduce the drive’s lifespan.
21. Run Defrag on hard drives
If you’re still rocking an HDD in your laptop or PC in 2020 (hey, we don’t judge), it’s important to remember to defrag that drive now and then, lest long-term fragmentation ruins your data.
Fortunately, Windows 10 has a defrag tool built-in, although it’s been shuffl ed around a few times between version updates. Punch “defrag” into the search bar, open “Defragment and Optimize Drives,” select your hard drive, and hit “Optimize.”
Depending on the size of the drive and the degree of existing fragmentation, it could take a while, so leave this until last if you’re taking some time to clean up your laptop.
22. Disable search indexing
Windows 10’s search function is great, but the indexing process can be fairly resource-intensive on older (or super-budget) systems.
Access the indexing menu by searching for “indexing options” in the Control Panel, hit “Modify,” then hit “Show all locations.” If you want to fully disable indexing, select everything here, and click “OK.”
This stops Windows Search from indexing your results, freeing up system resources to speed up your PC.
Speed up gaming laptops
23. Disable hardware acceleration on mouse
If you’re a serious gamer, you’ve probably done this already. Hardware acceleration for computer mice smooths out the overall pointer experience by making your cursor move further if you move the physical mouse faster, but this can be ruinous in first-person shooters, where snap movements to aim at a target can overshoot their mark.
Hop into the Control Panel and select “Hardware and Sound,” then fi nd your mouse settings. Under “Pointer Options,” you can deselect “Enhance pointer precision”—this is what Windows 10 calls in-OS hardware acceleration. You can tweak baseline mouse sensitivity here, too, although we recommend doing that via the physical DPI controls on a gaming mouse.
- These are the best gaming laptops
24. Block auto-updates in game launchers
This is a must-have, particularly if you’re on a metered Internet connection. Steam is easy enough; select “Downloads” under “Steam Settings,” and toggle the settings to your heart’s content. In particular, we advise unchecking “
Allow downloads during gameplay” if you play online games. Origin and Epic don’t have quite the same array of choices, but do still allow for blocking auto-updates; Epic even allows you to tweak update choices on a per-game basis.
- Check out the best Steam games
25. Revert game version
This is a somewhat niche tip, but it can be a lifesaver if an update tanks one of your games. Steam has a beta feature—not available in every game, but it’s easy to check—that allows you to roll back your game version to a previous update.
Right-click the game in your library, select “Properties,” and navigate to the “Betas” tab. From here, you can opt in to older versions of the game in the drop-down menu, let the game update, and boom—you’re running a previous update.
It doesn’t work for most online multiplayer games, of course; you need to be running the same version as everyone else.
26. Disable focus assist
This is the big one: Get rid of Focus Assist. Have you ever been midway through a high-stakes online match, only to be yanked out of it as Windows tabs you back to the desktop to inform you that you’ve received an email from your co-worker?
Yeah, that’s got to stop. Find the “Focus Assist” tab under “System Settings,” and slap it to “Alarms only”—there’s no option to turn it off completely, but you can also disable it during gameplay or screen sharing. Lastly, you can deactivate the option to show you “what you missed” when you return to the desktop; an unnecessary irritant, for our money.
27. Keep your GPU drivers up to date
Another potentially obvious tip for gamers is to keep your GPU drivers up to date. No, that doesn’t mean installing GeForce Experience—the clutter-free way to do this is simply to head to the manufacturer’s website and locate the most recent drivers for your GPU.
Both AMD and Nvidia have handy search functions to help you find your exact GPU, and what drivers it needs. Remember to select the “Game Ready” drivers if you’re using a newer Nvidia card, rather than the “Studio” version.

28. Enable Game Mode
A simple change to make, although it isn’t likely to improve game performance by much on most systems.
Under “Gaming Settings,” find “Game Mode.” Make sure this is toggled on and your PC will manage temperature and available memory better to (theoretically) improve frame rates in games.
While we’re not sure it really boosts frame rates, it does also block Windows Update from doing anything while you’re in-game. It’s possible that some games see more stable frame rates—perhaps Microsoft’s own stuff, as Game Mode is officially listed as an Xbox-branded tool.
29. Install DirectX 12
You might already have DX12 installed, but there’s an easy way to check if you do have the latest version of the widely used Microsoft API tool.
Hit the Windows key and R to open the Run function, then type “dxdiag” (again, no quotes), and hit Enter.
This should bring up the DirectX Diagnostic Tool; on the bottom of the page, it shows you which version of DX you have installed. If DX12 isn’t installed, go check your Windows Updates!
- These are the best laptops of 2020