Why you can trust TechRadar
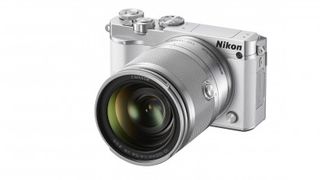
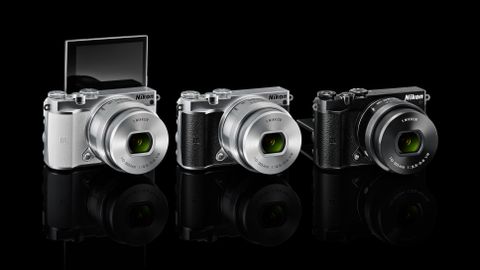
Nikon has opted for an attractive two-tone design for the J5 and it looks much smarter and more retro than the J4 it replaces. It looks much more like a Nikon camera than previous J-series Nikon 1 models.
The J5's body is plastic but it looks like metal and feels nicely put together. The faux leather covering is also quite stylish and it gives the grips a little extra purchase.
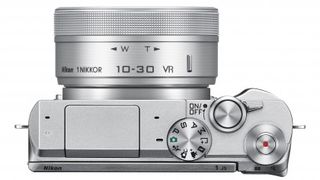
Like the J4 and V3, there's a mode dial on the top-plate of the J5. Unlike on the J4 however, this gives a direct route to the enthusiasts' favourite exposure modes: shutter priority, aperture priority and manual, as well as the collection of scene modes and fully automatic options.

There is a smattering of direct control buttons, just like the J4, but there are also dual dials which make it easy to adjust key settings. The first dial, on top of the camera is used for altering shutter speed (in shutter priority and manual) as well as having some functionality when in playback. The second dial, a scrolling dial on the back of the camera is used for altering aperture (in aperture priority and manual).
For those who may be disappointed not to find a direct access button to ISO sensitivity, you can customise the new front Fn button to one of seven different functions – including sensitivity. Pressing the up directional key on the rear of the screen brings up a number of key settings for quick access and thus saving you from delving into the main menu. Unfortunately, this menu is not customisable, but it has just a few options so you shouldn't be doing too much unnecessary scrolling.
Touch-screen control
You can use the touch screen to set a number of key settings, and it is nicely responsive. You can choose to set the autofocus point with the screen, simply by tapping the area you need on screen, or, if you prefer, have the camera focus and fire off the shutter release when you touch the screen. This can be especially useful if you're using a tripod or shooting from an awkward angle and don't want to have to use the shutter release button itself.
The touchscreen can also be used to make settings changes when using the function menu, or to scroll through pictures. The good thing here is that you don't have to use the screen if you prefer the feel of real buttons. We've often found it to be beneficial to use a touch sensitive screen in tandem with physical buttons for the best experience.
Like other Nikon 1 models, the Nikon J5 uses Micro SD cards, which is a little annoying for those who have collected a number of full-size SD cards but, on the plus side, it helps to keep the overall size of the camera down.
Focus features
You have a few different focus options to choose from. These are auto-area, single point and subject tracking focus. There are 171 focus points, with the centre being 105 phase detection points. There's no way to choose for yourself whether contrast or phase detection focusing is deployed, since the camera will choose for itself depending on the lighting conditions.
Using manual focus with the J5 is not quite as nice an experience as with some other cameras currently on the market. Once you've selected Manual Focus from the function menu, you press the OK button to see a magnified view of the scene. You then use the scrolling dial on the back of the camera to adjust focus. If you're using the kit lens, there's no focusing ring on the lens itself, so this is the only way to achieve focus. It's also worth noting that the J5 doesn't offer focus peaking to emphasis object outlines when they're sharp.

Connecting to a smartphone via Wi-Fi is pretty easy. There's a dedicated button on the back of the camera which you can press either in shooting or playback modes. You'll then be prompted to connect to the camera's Wi-Fi from your phone or tablet. Once connected, you need to launch the Nikon Wireless Utility app. This app is used with a wide range of Wi-Fi enabled Nikon cameras, but it remains disappointingly limited. You can only fire off the shutter release – and while that is useful for group shots and perhaps selfies, the more serious photographer would probably appreciate being able to change other key settings.
If you have an NFC enabled device, you simply hold the two together to form a connection and automatically load the WMU app (once it's already installed).
Amy has been writing about cameras, photography and associated tech since 2009. Amy was once part of the photography testing team for Future Publishing working across TechRadar, Digital Camera, PhotoPlus, N Photo and Photography Week. For her photography, she has won awards and has been exhibited. She often partakes in unusual projects - including one intense year where she used a different camera every single day. Amy is currently the Features Editor at Amateur Photographer magazine, and in her increasingly little spare time works across a number of high-profile publications including Wired, Stuff, Digital Camera World, Expert Reviews, and just a little off-tangent, PetsRadar.


