Power retro gaming with a Raspberry Pi
Use the Raspberry Pi to take a trip down memory lane
Our attention was drawn to an old friend, the Sega Mega Drive; a discrete, sleek-looking unit, even by today's standard, that like the Spectrum would make an ideal retro case for our RPi.
First, though, we need to prepare the RPi for its new life inside one of the best consoles ever made; and we want it to be able to play not only Sega Mega Drive games, but a plethora of other games from the hardware of the era.
To do this, we installed the excellent RetroPie project from petRockBlog; all you need to do is follow the instructions as they are given here.
In this instance, we decided to compile the most recent sources of programs, scripts and cores by selecting the second option from the main menu, the Source-based (custom) installation method. As is mentioned on the site, though, it takes several hours to compile everything, and the RPi is pretty much maxed out for the entire time, so don't expect it to do any work during the three hours of the installation; but bear with it, it's certainly worth the wait.
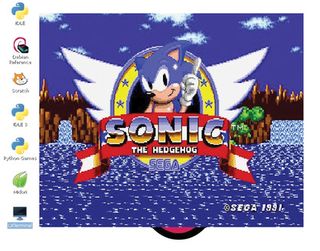
Once the installation had finished, the RPi got a well-deserved break in the form of a reboot. After that, it was a simple case of locating a game (we're assuming you're following the copyright guideline, as mentioned in this article) and running it, via a terminal, in this format: retroarch -L /home/pi/RetroPie/emulatorcores/Genesis-Plus- GX/libreto.so /home/pi/RetroPie/roms/megadrive/Sonic.md
In the example above, we had a Sonic the Hedgehog rom, which was located in the roms folder under 'megadrive'. Obviously, you will have to alter the command to represent your machine emulation, and the game you want to launch.
Picking up a dead Mega Drive was easy enough, and it cost less than a few quid to get it to the doorstep; but rather than rip out the insides straightaway, we had another cunning plan: would it be possible to house the Raspberry Pi inside the cartridge of a Sega Mega Drive game?
Get daily insight, inspiration and deals in your inbox
Get the hottest deals available in your inbox plus news, reviews, opinion, analysis and more from the TechRadar team.

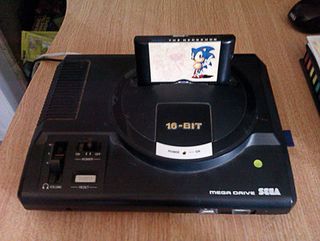
The Mega Drive we received was a little worse for wear; since its birth in 1992 it has seen its fair share of action, so although it was rough we thought this just added to its retro charm somewhat. Obviously, the game would have to be Sonic, and once we got an old Sonic the Hedgehog cartridge it looked as though it may be possible to squeeze the RPi into its innards.
Indeed, the RPi does fit in to a Mega Drive games cartridge, but it leaves very little room for cable management, even with sections of the cartridge plastic snipped away to accommodate the SD card. So, rather than having a savagely hashed cartridge atop the Mega Drive, with a tangle of cables, we decided to install the RPi within the body of the Mega Drive, and use what items we had lying around to try to keep some functionality from the original console.

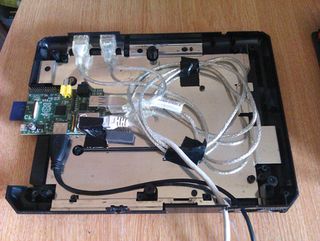
We planted the RPi onto the Mega Drive base, with the SD card within easy reach through the side expansion port, which can be sealed with the plastic cover, and ran two USB extension cables from the RPi, and fitted them into the front gamepad controller ports.
The HDMI and Ethernet cables were pushed through the power and TV ports at the rear of the unit, and the power came via the side expansion. After making sure everything was battened down, and that the Raspberry Pi wasn't in any danger of sliding out of the side of the case, we started to feed the necessary cables through the correct holes. We carefully attached the lid of the Mega Drive, making sure the screws didn't catch any of the cables or the RPi itself, slid it into its new home under the TV and fed the now reconditioned MegaPi some power.

Obviously, the power and volume controls at the front of the console didn't work, but they added to the retro appeal of having a 90s console, with a modern spin. Our MegaPi functioned perfectly and we settled in for an evening of Mega Drive classics, via the Genesis emulator in RetroPie.
WinPi

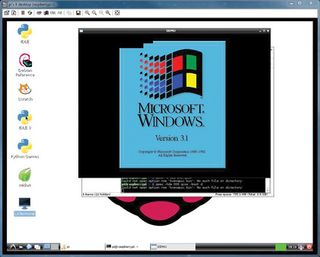
Our next software project bordered on the perverse, from the point of view of a Linux magazine. We managed to get DOS 6.22 and Windows 3.1 running under QEMU on the RPi.
Rather than building the image directly from within QEMU, we used a pre-built VirtualBox image, which we converted to a raw IMG file by issuing the following command: vboxmanage clonehd "image.vdi" "image.img" --format RAW
Replace image.vdi and image.img with the name of your images, then convert the raw image to a QEMU qcow image by typing in: qemu-img convert -f raw image.img -O qcow2 image.qcow
The result was extraordinary, and oddly satisfying to see Windows 3.1 start up and hear those 'ta-da' chimes. Needless to say, it ran like a pig in treacle, but the RPi hasn't got a whole lot of RAM, and after several minutes of running Microsoft's retro OS the screen froze and QEMU refused to boot the image until we deleted and re-converted it. Perhaps Ebon team coded in some kind of Microsoft failsafe kill switch?
