Malware removal on Android: how to clean up your smartphone
See how to deal with malware on your mobile

Is your Android smartphone playing up? Maybe it’s running sluggishly all of a sudden, perhaps popping up ads here and there, or just being randomly a bit weird. It may be because you have a problem with malware, or a Potentially Unwanted Program (PUP).
So what's the best way to check for any malware on your device?
It’s simple: grab yourself an anti-malware tool and it won’t take long to install the app, get it going and run a scan. In this guide, we will take you through the process of cleaning house and getting rid of any potential malware on your Android device, with clear and concise explanations in step-by-step fashion.
1. Get yourself a good anti-malware app
First things first, you’ll need a specialist piece of software to root out and destroy any malware which might have infected your smartphone - malware detection and removal is not something that can be done manually.
If you already have an anti-malware app installed, then all well and good, of course you can use that. However, if not, then you obviously want to use one of the top tools available.
<a href="https://www.tkqlhce.com/click-6361382-14452255?sid=hawk-custom-tracking" data-link-merchant="tkqlhce.com"" target="_blank" rel="nofollow">Malwarebytes Premium is today's best anti-malware tool
Save 25% on your security Sometimes free software just isn't enough. Malwarebytes Premium is reasonably priced and uses heuristic analysis to identify new strains of malware, cleans up existing infections, helps protect you from phishing scams, and helps stop you downloading further malicious software.
<a href="https://www.tkqlhce.com/click-6361382-14452255?sid=hawk-custom-tracking" data-link-merchant="tkqlhce.com"" data-link-merchant="tkqlhce.com"" target="_blank" rel="nofollow">Save 25%| $39.99 $29.99
Note that before you install your new tool and embark on a seek and destroy mission for malware, you may wish to back up your phone if you haven’t done so recently. This is something you should do on a regular basis anyway.
Editor's note: The rest of this article assumes you're using Malwarebytes, but most malware removal apps will work in a very similar fashion.
Get daily insight, inspiration and deals in your inbox
Get the hottest deals available in your inbox plus news, reviews, opinion, analysis and more from the TechRadar team.

2. Malwarebytes setup
Upon first running the app, you’ll need to tap the ‘Get Started’ button, then give Malwarebytes the necessary permissions it needs to be able to scan your phone’s storage and system.
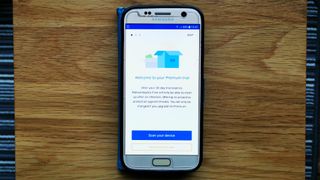
Press ‘Give Permission’ to do so, then tap ‘Allow,’ and following that you’ll see a screen which explains that you’re on a Premium trial for 30-days. After that period elapses, you will revert to the basic free app (which has much less functionality: all you get with the freebie is on-demand scanning for malware, that’s it). If you wish, you can upgrade to a paid membership here by tapping ‘Buy Premium now.’

3. Scan for malware
You can now press the blue ‘Scan your device’ button, although if you hit ‘Skip’ on the trial screen, or opted to subscribe to Premium from it, then you can initiate a scan from the main menu of the app – just tap the big green button labeled ‘Scan Now’ in the middle of the screen.

4. Scan in progress
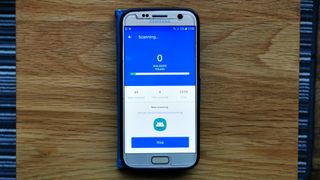
The malware scan will run and may take some time. It’ll flash up the various different applications and files being checked at the bottom of the screen, with a progress bar above which shows how far through the process is.
Note that while an initial scan may take five to ten minutes, future scans will typically take less than a minute.

5. Scan results
When the scan is finished, Malwarebytes will display the results in full, including anything suspicious which the app has detected.
At this point, the application may have found nothing, and in that case your smartphone has a clean bill of health – you don’t need to do anything else.
If something dodgy-looking has been picked up by Malwarebytes, however, then you’ll need to deal with it...

6. Threat found
If there is something nasty – or at least possibly malicious or undesirable – on your smartphone, it’ll be marked as either a Potentially Unwanted Program (PUP) or an outright piece of malware.
If it’s the latter, then you can choose to remove it immediately, which you’ll doubtless want to do – unless you know that the file is legitimate, in which case, you can choose to ignore the app’s warning. Occasionally, genuine files can be mistakenly identified as malware, which is known as a ‘false positive’, but choose ‘Ignore Always’ and that tells the app to leave the file alone and never flag it again in scans.
With a PUP, which could be something moderately unpleasant like adware, you have the same choice to remove or ignore it – or ‘Ignore Once’ which will let it slide this time, but it’ll get highlighted again in your next malware scan. The latter option is there to give you a bit of time to look up the Potentially Unwanted Program and see if it really does seem dangerous, or whether it’s something you can safely leave alone.
Remember, these are only ‘potentially’ unwanted entities, so there’s more chance that something in this category is relatively harmless (compared to malware which is surely going to be damaging, unless it’s a false positive as mentioned). That said, if you’re not sure about something, being overly cautious is generally the best policy, so err on the side of getting rid.

7. All done – but watch out for ‘critical issues’ too
When you head to the main menu / dashboard after your scan is complete, and you’ve taken any necessary actions with any threats that have been found, the app will also warn you here if, infections aside, there are any other critical issues (or non-critical ones for that matter) with your device.
In our case, there was one, namely that the ‘draw over other apps’ permission was not switched on, and we had to enable it in order to show remediation instructions with the app’s anti-ransomware protection. You can fix any individual issues by pressing the blue buttons which appear with the explanations of these problems, or you can solve them all in one go by tapping on the red ‘Fix now’ button (there’s a box to ‘Ignore all non-critical issues’ to leave these out of the equation if you tick it, as well).
Now you’re good to go, and can keep on performing regular malware scans in the future, even with the free version of Malwarebytes, which allows on-demand scans (but nothing else). Note that in the top-left menu of the dashboard, if you go to Settings > Scanning, there’s an option for ‘Scheduled scans’ to automate them on a daily basis, or certain days of the week.
- Discover more in our independent Malwarebytes reviews
- Get backed up safely with secure cloud storage solutions
- The big question...Is free antivirus safe?
Darren is a freelancer writing news and features for TechRadar (and occasionally T3) across a broad range of computing topics including CPUs, GPUs, various other hardware, VPNs, antivirus and more. He has written about tech for the best part of three decades, and writes books in his spare time (his debut novel - 'I Know What You Did Last Supper' - was published by Hachette UK in 2013).

