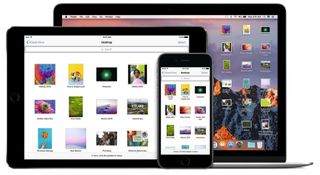
Rather than create what Tim Cook once memorably called 'toaster fridges', Apple offers distinct devices that communicate effectively as a single, coherent ecosystem.
Its Continuity features enable you to make and receive phone calls on your Mac, or start an email on one device and continue it on another.
With the release of iOS 10 and macOS Sierra, Universal Clipboard is added to Continuity's capabilities. With all your devices signed in to the same Apple ID, you can copy text or an image, photo or video on your iPad, for example, then switch to your Mac or iPhone and paste it in a there.
What you copy is sent over a peer-to-peer connection, so nothing's uploaded to iCloud.
Using Sierra's Auto Unlock

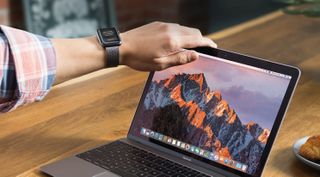
You can unlock a Mac when your Apple Watch running watchOS 3 is nearby. Assuming your Watch has a passcode set and two-factor authentication is enabled for your Apple ID, you can turn on Auto Unlock in System Preferences' Security & Privacy pane.
Try to unlock your Mac; it'll say it's doing so with your Watch. If the Watch is absent, you'll get the standard password screen. Sadly, there's no automatic locking based on proximity, but MacID can do that.
iCloud Drive
For a long while, Apple pushed back against traditional file systems. On iOS, documents only lived 'inside' apps. With iCloud, cross-device syncing worked well when using the same app on iPad, iPhone and Mac. However, when using multiple apps, you had to copy documents between them; this often resulted in many part-finished files strewn across devices.
Get daily insight, inspiration and deals in your inbox
Get the hottest deals available in your inbox plus news, reviews, opinion, analysis and more from the TechRadar team.
With iCloud Drive's introduction, Apple added a more typical file system to the core iOS experience, and made it accessible on Macs and iOS devices.

You can delve into app-specific folders, but also add folders of your own, just like in Finder on a Mac. Now, with the release of macOS Sierra, Apple is making a particularly audacious move regarding iCloud Drive, enabling you to keep your Mac's Desktop and Documents folders on iCloud Drive.
The option to do this is provided when you first set up macOS Sierra, but you can turn it on later in System Preferences' iCloud pane: click on Options next to iCloud Drive, and in the Documents tab put a check mark next to 'Desktop & Documents Folders'.
When this feature is active, Desktop and Documents appear in the iCloud section of Finder's sidebar (you can move them back to Favorites if you want), and the documents stored in those places will be available everywhere.
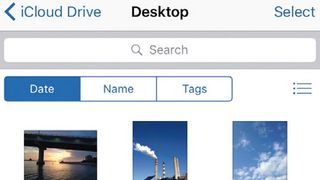
And we mean everywhere. On an iOS device, you can open iCloud Drive Picker, or going to Settings > iCloud > iCloud Drive and switching on 'Show on Home Screen'). Among Macs using the same Apple ID and with the same settings, your documents will sync in the background.
On a Mac running an older operating system, you'll find your files in the Desktop and Documents folders within iCloud Drive. When using a non-Apple device, access them in the iCloud Drive web app at iCloud.com.
Will it fit you well?
Regarding the specific folders that sync, Apple reasons they're the most common places for saving files; also, images and other media are already catered for by existing iCloud services.
There are, however, some snags to be mindful of before jumping in. First, there's no granularity whatsoever at this time. The feature is either on or off. If you like the idea of syncing your Desktop but not Documents, tough.
Secondly, if you regularly work with massive media files (such as Photoshop documents, audio recordings or video), be wary of slowing down your internet connection to a crawl as your devices try to sync huge documents with iCloud Drive.
Finally, whatever you store in iCloud Drive eats into your iCloud storage plan. By default, Apple gives you just 5GB for free, which disappears rapidly with a couple of iOS device backups, let alone when syncing all manner of documents from your Mac. That said, the convenience of more easily accessing files will for many be worth a few quid (or dollars) each month.
Access your Mac anywhere
There are other ways of getting at a Mac's desktop from another Mac, by making use of OS X's File Sharing and Screen Sharing features. These can be enabled in the Sharing pane in System Preferences.
Macs that are configured to use them appear in Finder's sidebar, under the Shared heading. Select one there and click Connect As to access the Mac's files and folders. Click Share Screen and then enter login credentials for the remote Mac to view its desktop in a window.

Drag files in Finder to copy them between the two computers. These options require the Macs to be on the same network, but you can also access a Mac over the internet.
In System Preferences, choose which users should have access to Screen Sharing, then turn on Back to My Mac in the iCloud pane. In Finder's Sidebar preferences, ensure Back to My Mac is checked. You should then be able to see the remote Mac in the sidebar and share its screen.
Current page: Universal Clipboard and iCloud Drive
Prev Page Introduction to macOS Sierra Next Page Photos