


-

7 smart home tips to help you save energy and reduce waste
Smart home devices don’t just make life easier, they can also help you save energy and minimize waste.
-
-
 Sustainability Week 2024
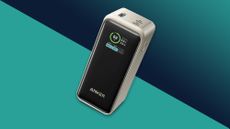
This swirly power bank might be the most sustainable battery pack on the planet
Gomi makes power banks from recycled e-bike batteries and plastic bags, with excellent repairs, for peak sustainability.
-
 Sustainability Week 2024
Acer shows Apple how environmentalism is done with pledge to collect equivalent of 2.5 million plastic bottles with Plastic Bank partnership
Acer is one of the best companies for living up to its green pledges – and it’s now taking on plastic waste.
-

This company just bioengineered a plant-bacteria combo to clean air better than an air purifier
Neoplants Neo PX is both a plant and an air-cleaning system
-

Brighter, low-energy OLEDs are going into production this year – but they won’t be coming to TVs just yet
New OLED displays could be twice as bright, twice as efficient and last three times longer but the best TVs won't be the first to see this new tech.
-


-
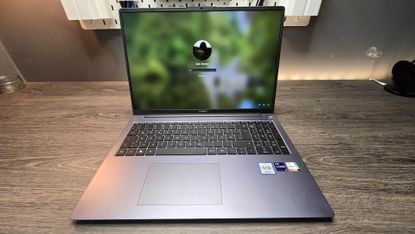
Huawei MateBook D 16 review: an all-round solid laptop for those after a cheaper Dell XPS
It's no Dell XPS or MacBook Air, but the MateBook D 16 is a decent laptop with a sensible entry price.
-
-

BenQ Zowie EC2-CW review: no-nonsense esports performance
Thanks to its superior comfort, the Zowie EC2-CW is an excellent choice for competitive FPS games.
-

Moto G34 review
The Moto G34 is one of the cheapest 5G phones around, and it manages to exceed expectations in some key areas.
-
 Updated
Deezer review
Deezer has a huge library, minimal design and good recommendations – but there’s little to set it apart from its rivals.
-

Lomography Lomomatic 110 review: Brand-new 50-year-old technology
The Lomography Lomoatic 110 is a 110-film camera that's simple to load and use.
-

Asus ROG Strix Scope II RX review: a keyboard for the sophisticated gamer
A top-notch keyboard with great performance and a rich feature set, the only thing that lets the Asus ROG Strix Scope II RX down is its lackluster software suite.
-

Nikon Z 40mm f/2 review: this cheap, modern 'nifty forty' has been my everyday lens for over a year and it hasn't let me down
Nikon's cheapest prime is a cost-effective entry-point into the Z mount ecosystem and a great take on the 'Nifty Fifties' of old.
-


How TechRadar tests

Product testing for the real world
You need to know that the device or service you’re about to spend money on works as advertised - and that it works in the real world.
- We test properly: objective and subjective testing
- We use experienced experts for our reviews
- We always offer 100 per cent unbiased, independent opinions
reviews
hours' testing
buying guides
-

Moto G34 review
The Moto G34 is one of the cheapest 5G phones around, and it manages to exceed expectations in some key areas.
-
-

Samsung may have delayed the next Galaxy S24 Ultra camera upgrades
Hang tight if you're waiting for fixes to problems or quality upgrades for your Galaxy S24 Ultra phone.
-

HMD steps out of Nokia's shadow and launches its own mid-range smartphone line
The Pulse phones share hardware similarities but have much different camera setups.
-
Sustainability Week 2024
This swirly power bank might be the most sustainable battery pack on the planet
Gomi makes power banks from recycled e-bike batteries and plastic bags, with excellent repairs, for peak sustainability.
-
 Updated
The best power banks 2024
Here are the best power banks, whether you're after a slim portable charger for phones or a large bank to juice up your tablet.
-

This Game Boy-styled MagSafe stand just tickled my retro-gaming synapse – now all I need is a matching controller for Nintendo emulators
This retro Nintendo MagSafe stand has me rushing for Amazon – just take my money.
-

Does closing apps on your iPhone save battery life? The surprising answer is no – here's why
Closing background apps has a negligible impact on your iPhone's battery life and performance – and Apple's confirmed it.
-


-

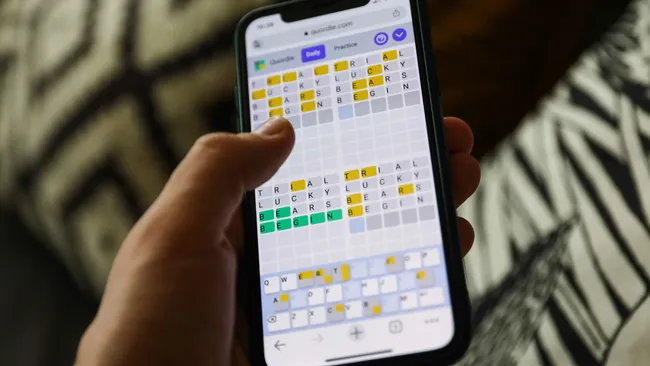
Quordle today – hints and answers for Friday, April 26 (game #823)
Looking for Quordle clues? We can help. Plus get the answers to Quordle today and past solutions.
-
-

NYT Strands today — hints, answers and spangram for Friday, April 26 (game #54)
Looking for NYT Strands answers and hints? Here's all you need to know to solve today's game, including the Spangram.
-

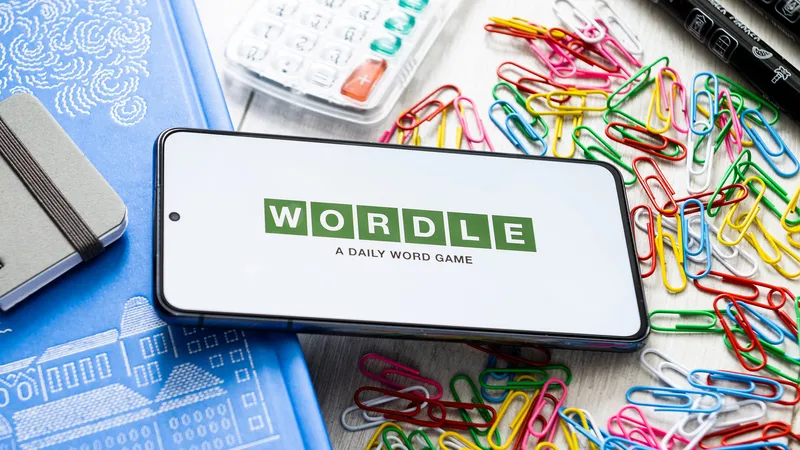
NYT Wordle today — answer and hints for game #1,042, Friday, April 26
Looking for Wordle hints? We can help. Plus get the answers to Wordle today and yesterday.
-

Huawei MateBook D 16 review: an all-round solid laptop for those after a cheaper Dell XPS
It's no Dell XPS or MacBook Air, but the MateBook D 16 is a decent laptop with a sensible entry price.
-

Qualcomm claims its Snapdragon X Plus is an M3 beater, but is it really?
Qualcomm claims Snapdragon X Plus is an M3 beater - that should scare Intel and Apple if it turns out to be true.
-
BenQ Zowie EC2-CW review: no-nonsense esports performance
Thanks to its superior comfort, the Zowie EC2-CW is an excellent choice for competitive FPS games.
-

The price of one of the fastest gaming SSD cards keeps on free falling - now it's under $155
One of the fastest gaming PCIe 5.0 SSDs, the Crucial T705, is now on sale for its lowest price ever - dipping below $155.
-


-

iOS 18 could be loaded with AI, as Apple reveals 8 new artificial intelligence models that run on-device
Apple announces multiple new open-source AI models. But what does this mean for iOS and Mac users?
-
-

Finished Fallout on Amazon? Then Silo is your next must-watch show
If you want more post-apocalypse Vault-like action after Fallout, then Silo on Apple TV Plus is for you.
-

Apple’s most useful AI tricks could be keeping your Mac more secure – here’s how
Apple might be using artificial intelligence to fight back against malware and keep your Mac safe from harm.
-

Apple might start developing its own AI chips - here’s what that means for Mac lovers
Leaker claims Apple is stepping up its AI game - but don’t expect it to make a difference for the M4 chip.
-
 Updated
The best cheap tablets 2024
Looking for the best cheap tablet that's actually worth buying? Whether you're after an Amazon, Android, or iPad tab, you'll find our favorite budget options here.
-


-

Disney Plus and Hulu are getting two new shows about creative legends in puppets and fashion: here's when you can stream them
Two very different shows are coming to Disney Plus and Hulu that highlight two iconic creative legends.
-
-
 Updated
New Netflix movies: the biggest films to stream in April 2024
These are the biggest new Netflix movies that have debuted on the world's best streaming platform recently.
-

One of Fallout season 1's most heart-breaking finale scenes was reshot because 'it didn't feel right', star says
Ella Purnell has revealed that a key season 1 finale scene involving her character Lucy MacLean was retooled late in development.
-

Prime Video movie of the day: Thirteen Lives is true-life survival thriller with 94% Rotten Tomatoes audience score
This is an under-seen movie from the director of Apollo 13, starring Colin Farrell and Viggo Mortensen.
-

Paramount Plus just got safer and better for kids – here’s what’s changed
Paramount Plus' kids profiles now offer more age controls and a nicer interface too.
-


-
-

Best Buy is slashing prices on our best-rated OLED TVs - save over $1,000 while you can
Best Buy is having a huge sale on our best-rated OLED TVs, and I'm rounding up the best deals with over $1,000 from Samsung and LG.
-
 Updated
The best indoor TV antennas for 2024
These are the best indoor TV antennas for watching free TV channels at home.
-

How to buy a good secondhand TV, or make your old TV last longer
Buying a secondhand TV is a great way to save money and help prevent waste, but navigating it can be a bit of a minefield - we're here to help with that.
-
Brighter, low-energy OLEDs are going into production this year – but they won’t be coming to TVs just yet
New OLED displays could be twice as bright, twice as efficient and last three times longer but the best TVs won't be the first to see this new tech.
-

JMGO’s new 4K projector has a built-in gimbal so you can place it anywhere in your home
The new JMGO N1 Ultra promises to be the perfect projector for pretty much any space.
-

New Google TV 4K streaming stick tipped to land soon – and it could come with a new remote
Nearly four years after the Chromecast with Google TV 4K launched, there are rumors that a new one could launch soon.
-
 Hot deals
The cheapest OLED TV deals and sales for April 2024
Your guide to the best OLED TV deals with incredible sales from brands like Sony, LG, and more.
-


-
-

Bang & Olufsen's limited-run vertical 6-disc CD player makes physical music fun again
Money no object: B&O's sustainably minded Beosystem 9000c 5-disc CD player and speakers harks back to 1996, in the best way.
-

Spotify just launched a quiz to reveal your K-Pop persona – which band member are you?
Spotify is stopping at nothing to make music streaming interactive and social, with a new fan-specific K-Pop feature in its latest addition.
-

Samsung Galaxy Buds 3 Pro – everything we know so far and what we want to see
We've been waiting a while for the successors to the Galaxy Buds 2 Pro, but the wait might almost be over.
-
Samsung Galaxy Buds 3 Pro leak gives us a clue about battery capacity – don't expect any surprises
Based on a new leak, the Galaxy Buds 3 Pro charging case battery is going to match its predecessor.
-

The next HomePod could be more like a soundbar according to this Apple patent – and it hints at fixing the HomePod 2’s biggest issue
The next Apple HomePod might be getting an unexpected design and an exciting new addition.
-
Updated
Deezer review
Deezer has a huge library, minimal design and good recommendations – but there’s little to set it apart from its rivals.
-

'In the beginning I didn't want to – my son persuaded me': why Audiovector's Trapeze Reimagined speaker is a 45-year family affair
Audiovector is a Danish outift that's serious about sound, but it's also the father-and-son heartwarming hi-fi tale you need.
-


-
-
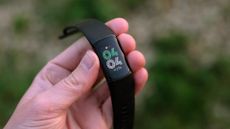
Fitbit users hate the recent Sleep page update, but a change could be coming
People hate the Fitbit Sleep page update, and it looks like Fitbit is taking notice; so is a change on the way?
-
 Updated
The best bone conduction headphones 2024
Looking for the best bone conduction headphones to keep you aware of the outside world? Here are our top picks.
-

Wear OS 5: what we want to see, and all the leaks so far
Wear OS 5 could land this year. Here's what we've heard about it and what we want from it.
-


-
-

Fujifilm's next budget camera may house surprisingly powerful hardware
Fujifilm's rumored X-T50 will reportedly support in-body image stabilization and have a 40MP image sensor inside.
-

DJI Mini 4K release date confirmed: here's what to expect from DJI's cheapest-ever 4K drone
DJI is refreshing its entry-level Mini 2 SE drone with the Mini 4K, which will likely feature the same 1/1.3-inch 12MP sensor as pricier models.
-
 Buying Guide
The best mirrorless camera for 2024
Our best mirrorless camera guide will help you find the perfect pick for you, whatever your budget or shooting style.
-
Updated
The best camera for photography 2024
Our guide to the best camera for photography will help you find the right digital camera for you, whatever your budget.
-


-
-

I made my own nut milk for a month – here’s what I learned
I ditched store-bought dairy-free milk and made my own using the Milky Plant – and I’m never going back
-
 Updated
The best vacuum cleaner 2024
These are the fastest, quietest, smartest, most powerful vacuum cleaners for every kind of home.
-

New Google Nest Audio and Nest Hub Max devices could be in the works
Google could be working on new Nest Audio and Nest Hub Max devices, and there's potential for generative AI to be front and center.
-
This company just bioengineered a plant-bacteria combo to clean air better than an air purifier
Neoplants Neo PX is both a plant and an air-cleaning system
-


-
 Buying Guide
The best mirrorless camera for 2024
Our best mirrorless camera guide will help you find the perfect pick for you, whatever your budget or shooting style.
-
-
 Updated
The best gaming PC 2024
Finding the best gaming PC for you can be tricky, with confusing spec sheets and numerous configurations - but we're here to help.
-
Updated
The best cheap tablets 2024
Looking for the best cheap tablet that's actually worth buying? Whether you're after an Amazon, Android, or iPad tab, you'll find our favorite budget options here.
-
Updated
The best power banks 2024
Here are the best power banks, whether you're after a slim portable charger for phones or a large bank to juice up your tablet.
-
 Updated
The best iPad 2024
Whether you want the best iPad Pro or the best cheaper iPad, a small iPad mini or a thin-yet-powerful iPad Air, you'll find the top options here.
-
Updated
The best vacuum cleaner 2024
These are the fastest, quietest, smartest, most powerful vacuum cleaners for every kind of home.
-
Updated
The best camera for photography 2024
Our guide to the best camera for photography will help you find the right digital camera for you, whatever your budget.
-


Why we're experts

We care passionately about tech
The TechRadar team has a life-long passion for the latest innovations – over 300 years of experience between us, in fact – and we’ve made it our mission to share that combined knowledge and expertise with you.
We’re here to provide an independent voice that cuts through all the noise to inspire, inform and entertain you; ensuring you get maximum enjoyment from your tech at all times. Technology is our passion, so let us be your expert guide.
years' experience
how-tos written
Apple events covered
-
-
The price of one of the fastest gaming SSD cards keeps on free falling - now it's under $155
One of the fastest gaming PCIe 5.0 SSDs, the Crucial T705, is now on sale for its lowest price ever - dipping below $155.
-

Missed Dell's latest flash sale? I recommend these 4 laptop deals that are just as good
Dell's most recent flash sale is now over but the manufacturer still has some great laptop deals available - here are 4 of the best ones I recommend.
-
 Deals
DealsMother's Day sales 2024: deals from Walmart, Target, Amazon and more
Your 2024 Mother's Day sales guide with all the best deals from Walmart, Target, and Amazon on gifts, jewelry, flowers, and more.
-

AMD's flagship graphics card, the RX 7900 XTX, is under $850 for the first time ever
The AMD Radeon RX 7900 XTX, AMD's flagship graphics card, has dipped below the $850 price threshold for the first time ever.
-

Apple sale at Best Buy - I've picked the 8 best deals on iPads, AirPods and MacBooks
Over a dozen Apple deals are now live at Best Buy so I've searched through the sale and picked out 8 of the best ones on iPads, AirPods, MacBooks and iPhones.
-
 TechRadar Deals
Best Apple Memorial Day sales 2024: date and deals to expect
Your guide to this year's Memorial Day Apple sales event, with key information such as the date and deals to expect.
-


-
-

OnePlus Coupons for April 2024
Use these OnePlus coupons to get a better price on mobiles & accessories from the leading Android smartphone retailer.
-

Keeper Security Promo Codes for April 2024
Look through our Keeper Security promo codes to save on subscriptions to the online password manager and protect your details online for less.
-

Casper Coupons for April 2024
These Casper coupons can help you save big on your next bedding purchase from sheets, pillows, mattresses, and more.
-

Paramount Plus Coupon Codes for April 2024
Our Paramount Plus coupon codes can be added to your subscription to help you save on monthly streaming fees.
-


TechRadar's story

Our mission is unchanged
TechRadar was launched in January 2008 with the goal of helping regular people navigate the world of technology. It quickly grew to become the UK's biggest consumer technology site.
Expansions into the US and Australia followed in 2012 and we are now one of the biggest tech sites in the world.
- We've been covering tech since 2008
- 17 international editions from Mexico to New Zealand
- We're a globally respected brand worldwide
-
-

iOS 18 could be loaded with AI, as Apple reveals 8 new artificial intelligence models that run on-device
Apple announces multiple new open-source AI models. But what does this mean for iOS and Mac users?
-

These are the Meta Quest alternatives we could get soon with Horizon OS, according to Mark Zuckerberg
Mark Zuckerberg has teased five Meta Quest alternatives that would run on Horizon OS in a recent investor call.
-
Apple might start developing its own AI chips - here’s what that means for Mac lovers
Leaker claims Apple is stepping up its AI game - but don’t expect it to make a difference for the M4 chip.
-

Logitech has built an AI sidekick tool that it hopes will help you work smarter, not harder, with ChatGPT
Logitech introduces AI Prompt Builder, looking to enhance users’ ChatGPT interaction. It promises to smooth out prompts, improve workflow, and pave the way for seamless conversation.
-


-
-
 Sponsored
NVIDIA’s AI takes gaming to new heights with DLSS 3.5 and Ray Reconstruction
Powerful AI can enhance graphics and performance Advertorial Disclosure: Advertiser Content From NVIDIA
-

No Rest for the Wicked director defends early access release - 'It's one way to allow developers to truly perfect a product over time'
No Rest for the Wicked creative director has defended the idea of launching a game in early access.
-

PlayStation Portal restock tracker - the latest tips on where to check for stock
We're still tracking the PlayStation Portal restock situation for you, trying to give you the best advice on where to buy the PlayStation Portal remote play device.
-

Metal Gear Solid 3 remake - everything we know
A remake of Metal Gear Solid 3 is in the works, and with little information available, we've got a lot of questions about it.
-


Between them, the TechRadar team have 300 years' experience in tech journalism. Here's why you should trust them.


-
-

Developing countries are being used by hackers to try out new ransomware strains
Malware first makes it to Latin America, before moving to North America, researchers claim.
-

Samsung unveils smaller and faster 10.7Gbps LPDDR5X RAM for use in on-device AI applications
Samsung has unveiled smaller and faster 10.7Gbps LPDDR5X RAM for use in on-device AI applications.
-

Phone tracking app with millions of users has a major security flaw that can expose precise locations
iSharing was leaking sensitive data on millions of people, experts warn.
-

Top network performance tool Flowmon has a serious security flaw, so patch now
Maximum-severity Flowmon flaw allows hackers to take over vulnerable devices.
-


