
WordPress has fast eclipsed the likes of Blogger as the most popular blogging platform. It's relatively easy to use, yet very configurable, which has led to it being used not only for blog based sites but also as a simple content management system.
In fact many sites that appear to be CMS based actually use WordPress as their backbones. There are lots of handy ways to customise it, and a wealth of useful plug-ins that extend its capabilities.
We've selected some of the most useful tweaks and extensions to help make the most of your WordPress site.
- Check out our hit list of the best WordPress hosting providers
1. Custom homepage
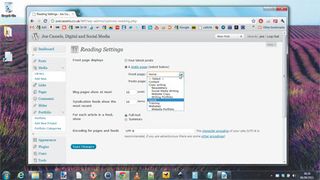
If you plan to use WordPress to manage content, you may want to define a custom homepage rather than using your most recent posts. Create a new page if you haven't already and lay it out as you'd like your front page to appear.
Once published, you can set WordPress to display it as your site's homepage by going to the Dashboard and choosing 'Settings | Reading'. Change the default setting to 'A static page' and select the page you want to use from the list. You can also define a page to use as your posts page if you want to include blog posts in your site.
2. Categories
Categories let you group blog posts together. Set one up by going to the Dashboard and choosing 'Posts | Categories'. Enter the category name and the slug, which is a URL-friendly version of the name, and provide a brief description. Click 'Add new category'.
Get daily insight, inspiration and deals in your inbox
Get the hottest deals available in your inbox plus news, reviews, opinion, analysis and more from the TechRadar team.
Once you've assigned posts to a category, you can link to a page containing only those posts by finding the category number. Go to 'Posts | Categories' and click 'Edit' under the category you want to use. Check the URL.
Just after 'category&tag_ID=' will be the category number. To show a page of posts from that category, use your site's domain, followed by ?cat=9, where '9' is the category number – for example: 'www. yourwordpresssite.com/?cat+9'.
3. Images in feeds
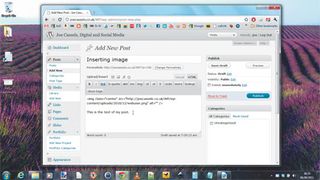
However carefully you style your site and format your posts, if a reader comes across them via an RSS reader you have little control over how they appear, since your site CSS is ignored. Images in posts often appear in-line with text, which looks messy.
You can overcome this limitation by treating your images as separate paragraphs of text. Move to the HTML tab of the post editor and separately reference the image above or below the relevant text. Feed readers treat it separately and you don't end up with an ugly in-line mess:
Here's your text
4. Highlight comments
If you have a lot of comments on your blog, it can be helpful to draw attention to those that you make in reply to others by highlighting them in a different colour. You can do this quite simply by installing the Author Highlight plugin, available from here.
Download the Zip file and then go to 'Plugins' on your Dashboard. Choose 'Add new | Upload' and then browse to the downloaded file. Choose 'Install' to upload it and then activate the plugin. You can edit the style applied to your comments by choosing 'Edit' on the Plugins page.
5. Keep a backup
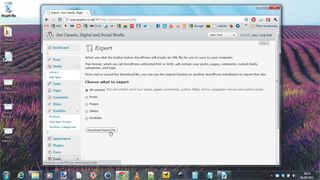
Saving your whole blog to your PC at regular intervals will help protect you in the event of a catastrophic failure of your web server. Log into the dashboard and choose 'Tools | Export'. Select all content and then click 'Download export file'. Save it in a safe place. You'll need to back up images separately.
6. Import a backup
If you need to resurrect your site, first install WordPress to your web server. From the Dashboard choose 'Tools | Import'. Choose 'Wordpress' and follow the prompts to install the Wordpress Importer plugin. You can now point it at your backup file to restore the site. Restore your images and any other media files to their original locations.
7. Press This
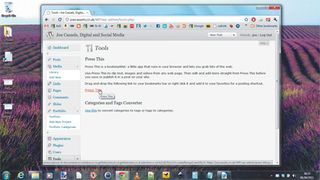
Running short of ideas for posts? It's perfectly acceptable to link to something interesting you've found online with a brief comment if it fits in with the theme of your site. As long as you don't make a regular habit of it, this will draw readers' attention to something new and help provide fresh content for your blog.
Use the Press This bookmarklet to quickly start a new post with a link to the current page. Choose 'Settings | Writing' and then drag the bookmarklet onto your bookmarks bar.
8. WP Touch
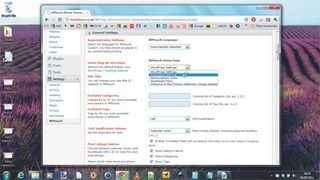
Make your blog smartphone-friendly by installing the WP Touch plugin. This detects the device being used to access the site and switches to a mobile friendly theme if the visitor is using an iPhone, iPod touch or BlackBerry. You can get the plugin from here.
Once installed, go to its Edit page to style up your mobile site. You can set which devices trigger it, what menus are available and which icons are used for categories.
9. Other mobile sites
You can set up a more generic mobile version of your site using MoFuse, a service dedicated to producing mobile websites. Go to http://app.mofuse.com and sign up.
You can set up a basic mobile version of your site for free, but you'll need to subscribe for premium features. Enter your details and you'll get a separate URL, which you can give out to anyone wanting to access it using a phone.
10. Random post
If your favourite link in Wikipedia is 'Random article,' this plugin could be for you. It's called Random Redirect and once it's installed, if you point someone to the URL www.yoursite.com/?random, it will direct them to a random post. Create a button or menu item with this URL and you have much the same feature as 'Random article'.
11. Breadcrumbs
You can add breadcrumbs to posts by installing the Breadcrumb NavXT plugin from here. Breadcrumbs show users where they are in your site according to categories and subcategories.
Once the plugin is enabled, you need to place a piece of code in your theme's 'header.php' file where you'd like the breadcrumbs to appear. Select 'Appearance', open the Editor for your theme and select 'header.php'. Type the following where you want to display the breadcrumbs:
12. Custom login
The back end of Wordpress can seem staid, especially if you have multiple authors who you'd like to impress. Install the plugin BM Custom Login and you can customise the login page to include your logo and the colour scheme of your choice. Get it from here.
Once the plugin is installed and activated, create your own background image in your graphics program and upload it to the following directory within your Wordpress installation: 'wp-content/plugins/ bm-custom-login/images'.
13. Sticky posts
Some posts perform better than others and it makes sense to put popular content ahead of other items, especially if you update frequently and good posts can become lost in the mass of others. The WP Sticky plugin enables you to make posts sticky so they appear at the start of a day or a week's postings. Get the plugin at here and install it.
Once activated, go to the Edit page of a post that you want to make sticky. Under 'Post sticky status' select 'Sticky'. If you have more than one post tagged in this way, you can also use the 'Announcement' option to ensure that the most important one appears before other sticky posts.
14. Comments in pages
If you get a lot of comments, it may help to arrange them in pages. The Paginated Comments plugin lets you do this, and optimises the pages for search engines. Once installed, you can set the size of pages by file size or number of comments.
-----------------------------------------------------------------------------------------------------
First published in PC Plus Issue 311. Read PC Plus on PC, Mac and iPad
Liked this? Then check out How to secure your WordPress blog
Sign up for the free weekly TechRadar newsletter
Get tech news delivered straight to your inbox. Register for the free TechRadar newsletter and stay on top of the week's biggest stories and product releases. Sign up at http://www.techradar.com/register
