PC case modding: a beginner's guide
Getting started on your first mod - painting, cutting and more
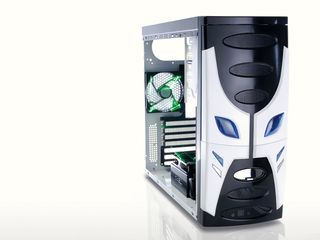
You asked for it and now you've got it: A beginner's guide to tricking out your rig. Follow our directions and we'll guide you through your first steps into adding a mod of two, we promise it won't hurt a bit.
First, we'll teach you how to strip your PC chassis and give it a semi-professional internal paintjob, and one that won't break the piggy bank.
In fact, good results can be achieved for less than the 40 quid powder coating will usually set you back and even less than the £30 for a litre of 2K top coat. Yep, we'll show how to do it for £20! But bear in mind that's before adding in the cost of primer and other consumables.
We'll then move on to adding extra ventilation to your chassis in preparation for your mad overclocking shenanigans with a guide to adding an ol' blow hole. The process may appear quite daunting, but it's fairly easy and straightforward to do even with basic tools.
We'll also show you how to add a 120mm radiator mounting point. Again, this is easier to do than you think, there are now plenty of websites that offer templates (for this guide we'll be using www.mnpctech.com) that will help you add rads up to 480mm.
This wouldn't be a mod guide of worth if it didn't include ways to bling-up up your system with a less than judicious amount of lights. Pimping up your PC case with lights is a pretty contentious issue among PC users.
Modding though is about showing off, whether that's showing off technical ability or the fact you've got no taste, and without some bling most punters won't get close enough to notice all the other cool tweaks you've made.
Get daily insight, inspiration and deals in your inbox
Get the hottest deals available in your inbox plus news, reviews, opinion, analysis and more from the TechRadar team.
But now – It's time to mod.
Paint the dull steel interior at a reasonable cost and with the minimum of hassle
We're aiming for semi-pro Halfords paint job for this first attempt and this will cost you a mere £20. Not bad when, as we've already mentioned, powder coating will set you back between £40 to £60, while loading up a spray gun costs £30 for litre and that's before spending a further £10 in primer, £20 in lacquer and consumables.
Before transforming our £18 PC chassis from China there are a few things to take into consideration.
First, what type of paint should we use? There are a wide variety of compound bases, examples include Acrylic, Cellulose, Two Pack (or 2K) and water-based paint. For this job we've chosen an Acrylic-based gloss white paint for the topcoat (which we happened to get from Halfords).
After fighting our way through three-inch bolt-on exhaust pipes and 10,000W speakers we managed to grab the primer for the job as well. The colour of the primer should generally be matched according to the top coat.
For example, a white top coat requires a white primer. If you were to use a dark primer, such as a 'grey' this would discolour the gloss-white finish. Going against the 'general rule' if you painted it red, for instance, using a white primer would give the red a bright finish. If you used a grey, black, or red oxide primer you could expect to have a darker red finish, handy to know if you ever want a 'two-tone' paint scheme or just fancy experimenting with different colour shades.
Lacquer plays a very important part in finishing the paintwork correctly as it helps to seal the top coat and provide a shiny finish to the paintwork.
You'll need plenty of Wet 'n' Dry sandpaper, this comes in various grades from rough to fine, the number stamped on the back of the sandpaper designates its grade. The lower this value, the coarser the grade and thus the rougher the finish. Higher values represent finer grades, and therefore smoother finishes.
For this job I have a selection of sand paper ranging from 400 grit up to 1,200 grit. Anything under 400 grit papers for the work we have lined up will just be too harsh and we could end up creating more work than necessary by having to apply several coats of primer to cover the imperfections.
Consumables are often overlooked when buying the right kit, but while you're buying the sexier materials for you chassis you should also grab the following: masking tape, paint thinner and a Stanley knife. Also try and get some masking paper, as it tends to save a slap around the back of the head after you've painted half the garden path.
Check the weather report
Safety is more important than all of the above when undertaking any sort of painting. Always paint in a well-ventilated area or outside if you can, and always wear a face mask.
Weather conditions will also make a huge difference to results: Adverse humidity or heat ruins paintwork. Painting with cellulose in damp conditions and you'll create a 'blooming effect', where a milky white colour will start to appear across the panel. Spray-paint on a hot day and the paint can dry before it reaches the panel!
Check the wind conditions too, it should be very light or as still as possible, anymore than a gentle breeze and you'll lose spray paint into the atmosphere.
1. Deconstructing de chassis now
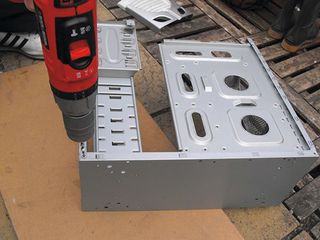
Disassembly of the chassis or PC case is a fairly straightforward process. Personally, I like to take several photographs to enable swift reassembly. Most cases are riveted together using aluminium rivets. These tend to be soft and very easy to remove using a cordless drill and a 3mm drill bit.
2. Rubba-dub-dub, time for a wash and scrub down
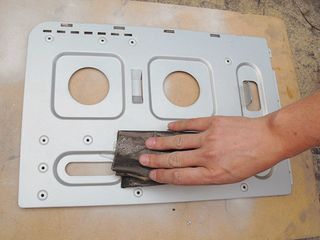
We're now looking at a pile of pressed steel panels and it's time to rub them down using a warm water mix with a dash of washing up liquid. This will help de-grease the steel panels while rubbing or flattening them down using 400 grit Wet n Dry sand paper. I've lightly rubbed down both sides of each panel and washed them off.
3. Shake-shake-shake Señora, shake your primer time
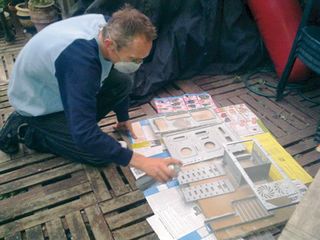
After you have made sure that the chassis panels are 100 per cent dry and make sure you inspect these for any dirt you may have missed. Shake the primer well for at least three to five minutes. Lay each panel down and from approximately six to eight inches away apply a 'dust' or very light coat of primer.
4. Jump in de line, coat your primer in time
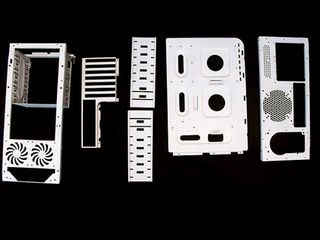
Gently build up the coats of primer allowing 10 to 20 minutes before applying the next coat. This is the secret of getting a good result when spray painting: lots of light coats built up over a period of time. Hitting the panel hard with the spray paint from the first coat will cause a reaction, run or worse.
5. Prep-prep-prep da primer and sand it down
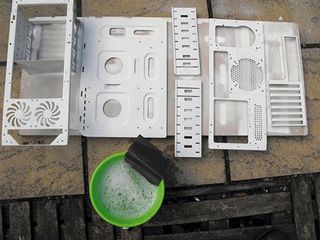
Once the primer coat has been completed and given at least 24 hours of drying time, you'll need to flattening off the primer coat to reduce any imperfections. This is a must in my book as preparation is key to obtaining a good or well finished panel. I've used 800 grit Wet 'n' Dry sand paper for this stage.
6. Left and right is da tempo (and up and down)
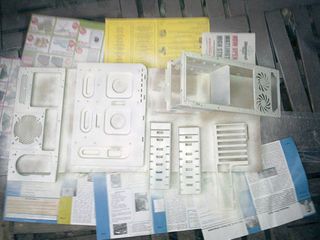
Again, make sure the panels are 100 per cent dry. Shake the spray tin well for three to five minutes we can apply the first layer of the chosen top coat. Using an up-down, side-to-side movement with the spray can lightly cover each panel inside and out waiting that all important 10 to 20 minutes before further coats.
7. Topping the top coat with more top coat
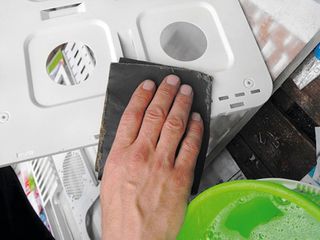
Now check the top coat is satisfactory after 24 hours of drying. For example, look for anything that may have fallen onto the panel, such as bugs and flies or dust in the air. At this point you still have the option to flatten the panel back again for a further top coat or carry on if everything looks fine 'n' dandy.
8. Don't be a slacker, apply some of dat lacquer
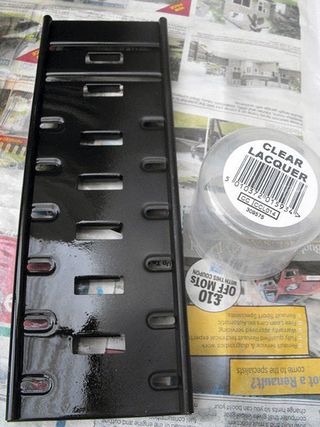
Some may regard lacquering as unnecessary but unless I've chosen a matt or satin finish paint, I always lacquer. Apply the lacquer in a few fine dust coats, leaving it five to 10 minutes before continuing. (N.B Lacquering doesn't actually turn your panel black, but black does show off the effect better than white).
9. Lacquer needs more lacquer – okay, I believe you!
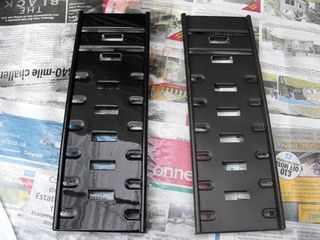
I like the deep shiny finish to gloss paint. It's like looking through a piece of glass before seeing the paint underneath, so with this in mind the option to apply a thicker coat of lacquer presents itself. Another couple of fine dust coats then and I've applied quite a heavy coat, which gives the panel an almost wet look.
10. Wait-wait-wait Señora wait until it's dry
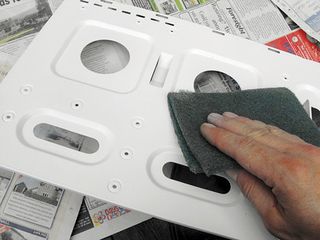
Give the lacquer a good 24 to 48 hours drying time before touching it, a good way of testing whether the paint has gone off properly is to press your finger nail into an unseen area. If an indentation is present, leave it alone and dry for longer, if all is okay then polishing the panel is next on the agenda.
11. I tell you my friends adore her with her deep shine
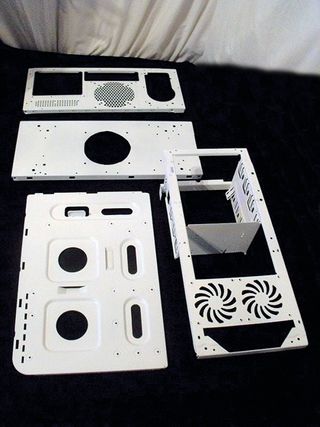
Please note: polishing is only worth considering if you have 'dry' areas of 'runs' in the paintwork. If I were painting the side panel this process would be carried out to obtain the deep shiny look. Thankfully my spray painting skills have paid off on the chassis panels and only minor polishing is required.
12. Rivet-rivet-rivet! Build your rig all da time
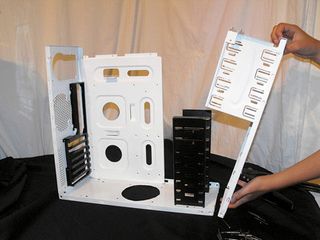
The reassembly of the chassis or PC case is a little harder as you don't want to scratch the panels in any way possible. The case has been re-riveted using black coloured rivets to match of tie in with the paint colour scheme. Once the chassis is back on its feet, our entry level case looks a whole lot better than when it arrived.
Most Popular

