TechRadar Verdict
The Ultimaker 2 is easy to set up, and it offers quality prints, ABS and PLA support as well as standalone and quiet operation. All of these factors make this a 3D printer that can ultimately be used easily by anyone.
Pros
- +
Ready to use straight from the box
- +
SD card model loading
- +
Fantastic Cura software
Cons
- -
Only designed to print PLA and ABS
- -
Care needs to be taken that filament doesn't catch at the back
- -
Not designed for tethered printing
Why you can trust TechRadar
The first Ultimaker was a sensation for tech geeks – a reasonably priced kit that enabled you to build your own 3D printer without having to follow open source plans. The kit would take a few hours to put together and calibrate, but once done you had a fully working and very competent machine, as well as the self-satisfaction that you had built it yourself. This DIY approach reflected the open source RepRap origins of 3D printing, so owners could feel part of the bigger 3D print community.
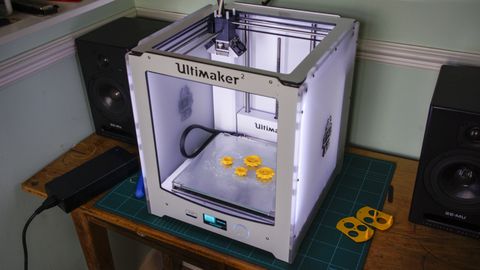
The Ultimaker 2 is based on open source hardware and software, but is very much a finished product, and is only available in its assembled form, although there are three versions: Ultimaker 2 Go, Ultimaker 2 and Ultimaker 2 Extended. Gone are the laser-cut wooden sides and control panel that gave the Ultimaker its distinctive built-in-a-shed look, and instead the new materials used for the casing are more refined and heavyweight.
The Ultimaker 2 – whch is priced at £1,749 (it costs $2,499 in the US, which is around AU$3,100) – is an evolution of the original design and although it reflects a similar look to its predecessor, every aspect is a level up in terms of quality.
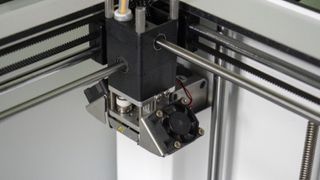
Whereas the original was for those who wanted a challenge, the Ultimaker 2 is for those who want to print, and will suit home, business and education equally well. However, if you want a go at building your own the Ultimaker Original is still out there.
Build quality
Print area is an important factor, and the Ultimaker 2 offers an impressive 23 x 22.5 x 20.5cm from its heated build plate. Around the 20 x 20cm size is becoming pretty standard, but the design of the Ultimaker means that it's able to fit this bed into a comparatively small footprint of just 35.7 x 34.2 x 38.8cm. While this might still seem quite large, compare that to the XYZprinting Da Vinci that also features a 20 x 20cm build plate, but has a colossal 46.8 x 51 x 55.8cm footprint.
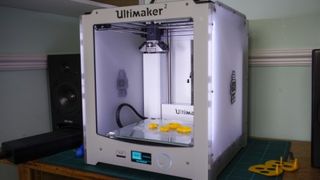
The top and front of the printer are open which does mean that you need to be a little careful with fingers during the print process, so if used in an educational environment this does need to be taken into consideration.
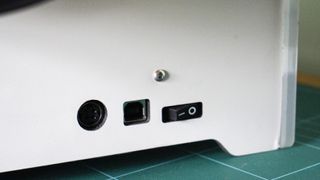
3D models can be loaded by means of a supplied SD card through a slot in the front, and the model to print is selected using the LCD and dial on the front of the machine. The models themselves are loaded onto the card along with quality settings via the Ultimaker Cura software. On the back is the filament holder, power switch and a USB port that's used for updating firmware rather than tethered printing.
Getting started
Lifting the Ultimaker out of the box reveals that aside from attaching the filament holder on the back and removing supporting card, the printer is pretty much set to go. The holder simply clicks into place, and then using the control panel on the front the material is selected and filament is fed into the feeder at the back – as this happens instructions on the LCD tell you exactly what to do and after a couple of minutes the filament is loaded and ready to go.
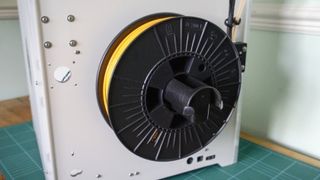
Then it's just a case of preparing the build plate with stick glue, slotting in the SD card, clicking print, selecting one of the pre-loaded models, and the print process starts. Our test sample didn't require any adjustment and initial prints turned out well and at an exceptionally high quality.
If adjustment is needed access to fine-tuning settings are found within the LCD interface and these walk you through the calibration process. This involves adjusting the head height with the control dial on the front and with screws under the build plate, then checking head-to-base distance with a piece of paper. We un-calibrated the build plate to check just how easy it was to adjust – it did take a couple of attempts to get the hang of the adjustment but this process worked well enough.
Once the print finishes the build plate lowers and the LCD shows the cooling process, and once ready the LCD lets you know that it is safe to remove the model.
