Why you can trust TechRadar

The modest pixel count combined with the back-illuminated CMOS technology and Expeed C2 image-processing engine pays dividends when looking at the quality produced at high ISO sensitivities.
Images taken at ISO sensitivities up to ISO 400 are clear, and fine details are rendered well, with no signs of softening due to noise reduction. Increasing the sensitivity to ISO 800 results in a slight amount of softening, but colours are still vibrant and the loss of fine details is only noticeable on close inspection.
Increasing the sensitivity further results in an increased level of softening due to noise reduction and less vivid colours, but the quality still holds up well, especially when compared to many other compact and bridge-style cameras. Pictures taken at ISO 3200 should still be able to produce respectable 9 x 6-inch prints so long as exposures are accurate.
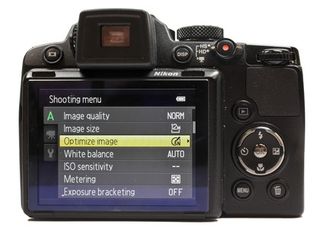
A comprehensive range of metering options are available through the menu. A choice of Matrix, Centre-weighted, Spot, and Spot metering from the focus area used are available.
The P500's Matrix metering mode performs well in even lighting conditions, but is often fooled by high-contrast scenes, such as backlit subjects and scenes with bright but overcast skies. Exposure compensation of plus or minus two stops may be a bit limiting for some situations.
Many scene modes are available via the menu when the exposure mode dial is set to the scene position. If choosing a scene mode each time is too troublesome, than Nikon's Auto Scene Selector will attempt to do the hard work for you.
In practice, the Auto Scene Selector mode works well much of the time, but occasionally it is fooled in dark lighting conditions, which may result in the camera taking a longer exposure than you may have hoped for.

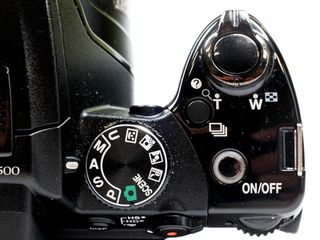
Quick access to the Night Landscape, Night Portrait, Backlighting and Smart Portrait scene programs is available via the exposure mode dial. Smart Portrait mode enables face detection, smile detection and blink detection for foolproof portrait snapping.
A combination of sensor-shift and electronic image stabilisation technologies have been employed to help tame camera movement and increase the chance of achieving sharp images. These features are especially appreciated when using the telephoto end of the zoom, although quite a bit of light is still required, even with all this technological help.
The auto white balance system on the P500 performs well in a wide range of lighting conditions, indoors and outside. It leaves just enough of a colour cast to retain the original atmosphere of the scene. For those who require more accurate colour the usual range of white balance presets are available through the menu, as well an option to take a custom white balance reading from a neutral surface.
Colours are generally accurately rendered, and if you require a little more or less saturation or contrast, this can be altered easily in the Optimise Image menu.
For a zoom lens covering such a wide range of focal lengths, distortion is remarkably well controlled, especially at the wide-angle end of the zoom range. A little pincushion distortion is visible at the telephoto end, but this should rarely be an issue.
Auto focus is fast, and accurate at shorter focal lengths, but as the lens is zoomed towards telephoto, the more it struggles to lock onto subjects accurately. Occasionally at maximum zoom the lens will refuse to focus at all, even in good light and on subjects with good contrast, which can be quite frustrating. When the lens is focused at maximum zoom, images lack the contrast and sharpness of images taken at shorter focal lengths.
The macro mode enables the camera to be focused as close as one centimetre from the front of the lens at the widest angle of the zoom. A convenient arrow is placed in the zoom display on-screen when in the macro mode. Setting the zoom to this point will result in the maximum magnification, which is a very handy feature to have available.
Current page: Performance
Prev Page Build quality and handling Next Page Image quality and resolution
