Beginner's guide to Windows 7
How to get the most from your PC
We all use Windows 7, but some of us just scratch the surface of what the operating system can do, by only using our computers to send and receive the odd email and surf the internet. In fact, there are so many great things that Windows 7 can do to make your life easier that it can all seem quite overwhelming at first.
There's now a tool for almost anything in Windows, and just knowing exactly where they are and how to use them can revolutionise your experience with your computer. There's no need to feel intimidated by the wealth of options that Windows 7 provides, because over the next few pages, we've got a crash course that teaches you all you need to get the most out of Windows and your PC.
Everything you need to know is explored and explained to you, and by the end you'll be amazed at what you can achieve with Windows 7. By taking this crash course, you'll open up whole new areas of Windows 7 to explore confidently - and it'll prove to be the beginning of you realising your PC's full potential.
Get started
Using Windows is easy - here's how to find where everything is
Although there are lots of tools in Windows, you can simplify things by thinking of your computer as being made up of three large areas: your files and folders, your programs, and system tools.
The first area - your files and folders - covers all the personal files that you create. Including photos, Office Word documents and your MP3 collection, these files are unique to you, and when you add or create them, they are saved in folders and are collected by Windows 7 in Libraries. These make it incredibly easy for you to find your files.
Get daily insight, inspiration and deals in your inbox
Get the hottest deals available in your inbox plus news, reviews, opinion, analysis and more from the TechRadar team.
There are four Libraries, and each is pretty self-explanatory: Documents, Music, Pictures and Videos. Any documents that you create in programs such as Office should be saved in the Documents Library to keep your computer organised.
In Windows XP, the locations have the same names, but with 'My' in front of them - for example, My Music. Keeping your files organised means that you spend a lot less time searching for them because you know exactly where they are kept.
The second area - your programs - covers all the software installed on your PC. While this can be installed in different locations, it can all be accessed quickly and easily through the Start menu. Click Start ➜ All Programs to see your programs and launch them.
If you have a program you use regularly, you can access it even faster by creating a desktop shortcut (right-click on the program's icon and select Send to ➜ Desktop (create shortcut)) or by pinning it to the taskbar (right-click on the icon and select Pin to Taskbar), which enables you to load the program instantly.
If you have a lot of programs installed, the Start menu can get cluttered. In Windows Vista and Windows 7, you can quickly find what you're looking for by typing the program's name into the Start search box.
The final area - system tools - covers all the tools and programs that you can use to tweak and improve Windows. Some of these are quite complicated, and best left to those who are more confident, but through the years Microsoft has worked hard to make these powerful tools more user friendly.
The vast majority of these tools are kept in the Control Panel. To access this, just click Start ➜ Control Panel. What was once a bewildering array of icons has been cleaned up and carefully arranged in Windows 7.
Every tool has been placed in a category for easy reference. Looking for a tool to help set up your home network? Look under Network and Internet. Want to set up parental controls? Head to User Accounts and Family Safety. Programs and tools that help you tweak and troubleshoot your computer can also be found under Start ➜ Computer and Start ➜ All Programs ➜ Accessories.
Dividing up where Windows keeps everything into three sections in your mind can help you memorise where everything goes, so it is easier to locate in the future.
Managing your Windows
When using programs, they are displayed in boxes known as windows - which give the Windows operating system its name. The more programs you have open at one time, the more windows appear on your screen.
Having too many windows open at once can get confusing, but Windows 7 enables you to organise your desktop so you can find the right window in a flash. Clicking the top of a window and dragging it to the left or right side of your screen instantly resizes the window to take up half of the screen.
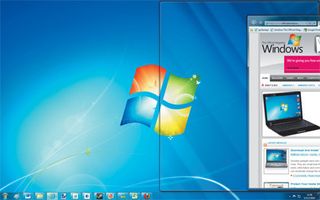
If you want to minimise all the windows except one, click the top of the window you want to keep on your desktop and shake it quickly from side to side. All the windows behind your selected window then minimise. Shake the window again to bring the others back.
Another quick way to organise your windows while they are open is to right-click the taskbar and select Show windows stacked, to display each window horizontally across your screen. Right-click the taskbar and select Show windows side by side to display them vertically. If you want to scroll through your open windows to find the one you want, hold down the Windows key on your keyboard and press the Tab key until you find the right one.
Searching Windows 7
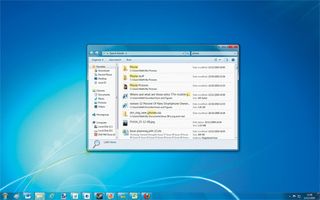
Using Windows 7 to search for files and folders can save you a huge amount of time. The way Windows searches your PC to find what you want was completely overhauled with Windows Vista - and it has been refined in Windows 7. All you need to do is click the Start button and type the name of the file or folder you are searching for into the Start Search box.
Even as you begin typing, Windows 7 starts returning results. The more you type, the more accurate results you get. To make it even easier, your search results are divided into categories - Programs, Folders and Files. If you can see what you're searching for, just click on it.
If you want to narrow down your search, click See more results. Your results are then listed in the Search Results window, with the phrase you searched for highlighted in yellow to help you quickly figure out how relevant the result is.
Windows 7 not only searches file names for your match, but also searches inside files. So if you can't remember the name of a document, but you can remember a sentence or phrase that was written inside it, you can search for that.
If you get too many results, you can filter them. For example, if you are searching for an email, you can prevent Windows 7 from returning documents and programs with similar names by clicking the search box in the top right of the Search Results window. Under Add a search filter select Email - or the type of document you are searching for - and only matches of that type are returned. You can further narrow your results by adding file type, file size and the date the file was last edited.
Set up your browser
Your internet browser is your gateway to the most important technological invention in recent history: the internet. Setting up your internet browser can help you navigate the vast amounts of information available online, so you can find what you are looking for in an instant.
Internet Explorer is the most popular browser in the world, which means that almost all websites are compatible with it. Because it is created by Microsoft, it is integrated seamlessly into Windows 7 - and the new Internet Explorer 9 brings even more integration, with jump lists and taskbar pinning of individual websites.
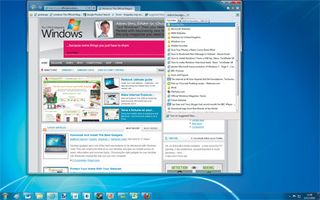
If Internet Explorer isn't to your liking, there are a number of great alternatives, such as Firefox and Google Chrome.
The first website you are presented with when you open your web browser is known as the home page. You can set your home page to be any website on the internet, so it's a great idea to set it to your favourite site.
If you have an internet email account, you could set your home page to be your inbox so that you get your emails straight away, or maybe your favourite news site to get the latest headlines.
To set a website as your home page, just go to the site in question then click the Settings icon in the top right-hand corner of Internet Explorer and select Internet options. Under Home page click Use current.
If there are other websites that you regularly visit, adding them to your Favorites (also known as bookmarking) can save you loads of time. Instead of typing in the address every time, by adding the website to your Favorites (when on the webpage click the Favorites star icon ➜ Add to favorites…) all you need to do in the future is open the Favorites list by clicking the Favorites star icon and clicking the name of the website.
You can speed things up even more by adding your favourite websites to Internet Explorer's Favorites Bar. Click the Star icon with the green arrow on the left-hand side of the screen and the site appears at the top of the window, enabling you to instantly navigate to your chosen website.

Matt is TechRadar's Managing Editor for Core Tech, looking after computing and mobile technology. Having written for a number of publications such as PC Plus, PC Format, T3 and Linux Format, there's no aspect of technology that Matt isn't passionate about, especially computing and PC gaming. Ever since he got an Amiga A500+ for Christmas in 1991, he's loved using (and playing on) computers, and will talk endlessly about how The Secret of Monkey Island is the best game ever made.
Most Popular


