Data privacy: how safe is your data in the cloud?
If you want to retain total control over your data, we've got you covered
There are a few options, such as Buddy Press which started life as a WordPress mod and grew into a complete social media platform, but we are going to look at Elgg.
Looking at the list of well-known organisations and educational establishments that choose this particular platform gives you an idea of its popularity and suitability.
A familiar procedure

The installation process is similar to many other web applications. Download the ZIP file, unpack it into your web server's document directory, preferably making a symlink to a more useful name than elgg-1.8.15, and set up the database.
Elgg uses MySQL so the standard instructions given elsewhere apply for creating a database and user. You also need to create a data directory for Elgg, this should not be in your web server's DocumentRoot, the area from which it serves pages, as you do not want the contents to be directly accessible from a browser.The directory should be owned and writable by the user running the web server, usually www-data or apache.
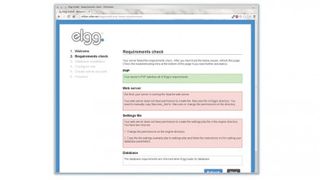
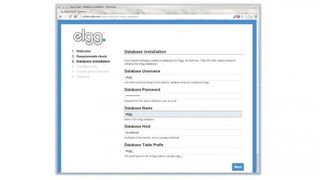
That's the command line bit done, although you could do most of that with phpMyAdmin and an SSH-aware file manager, now load http://yourserver/elgg into your web browser. This guides you through the set up, making sure you have all the modules you may need, setting the database credentials and testing access and configuring the location of the data directory.
If it picks up a problem at any point, it tries to give a helpful hint as to the solution. Hit refresh after fixing the problem to run the checks again.
The final step is to create an administrator account. When you log in with your administrator account, you can greatly change the appearance of the site as well as enabling various plugins and other options.
Get daily insight, inspiration and deals in your inbox
Get the hottest deals available in your inbox plus news, reviews, opinion, analysis and more from the TechRadar team.
Making Elgg your own

Elgg is well documented, but those documents are well hidden, with no link from the home page of the Elgg website. Prior to installation, go to http://docs.elgg.org. Once Elgg is installed there are Manual and FAQ links at the bottom of the Administration page. The method of controlling plugins should be familiar by now.
Installed plugins are accessed through a link on the administration page. New plugins are downloaded as ZIP files to be unpacked into the mod directory, after which they appear in the aforesaid list.
Themes are also plugins, to be installed and configured in the same way. Links to the theme and plugin repositories are on the front page of the administration manual. Bear in mind that as themes are treated like plugins, it is possible to select more than one at once, with sometimes strange results.
A useful feature of the plugins page is that you can move them up and down the priority-sorted list, changing the order in which they are loaded.
What is LAMP?
Web services run on what is known as a LAMP system, where the first three letters stand for Linux, Apache and MySQL while the P could be PHP, Perl or Python, depending on your preferences.
Apache is the de facto standard web server for Linux, although there are alternatives, such as Lighttpd and Cherokee, that are often lighter and work with these services. However, Apache is the most popular and everything comes set up to work with it, whereas using a different web server may involve some more work, details of which can often be found on the projects' websites.
Installing Apache is easiest from your package manager (you have already taken care of the L in LAMP, right?), Python and Perl are often installed by default so that leaves PHP and MySQL, both installed through the package manager too.
Most Popular

